19/11
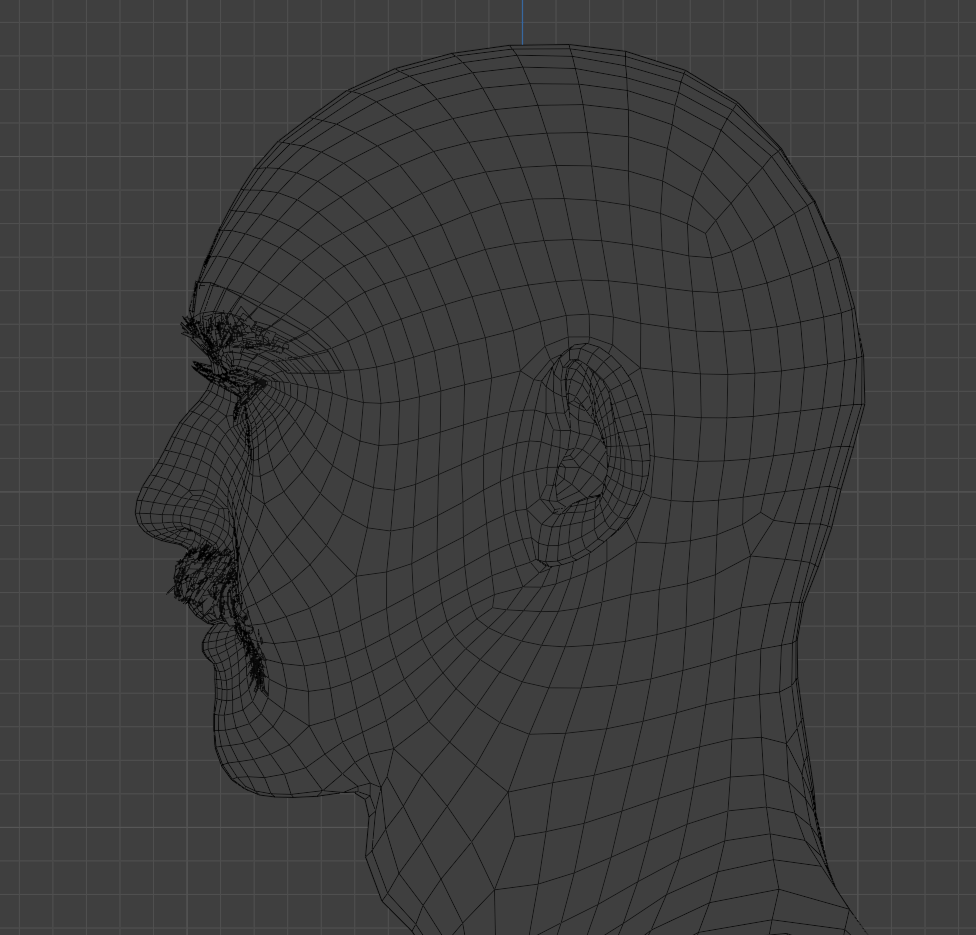
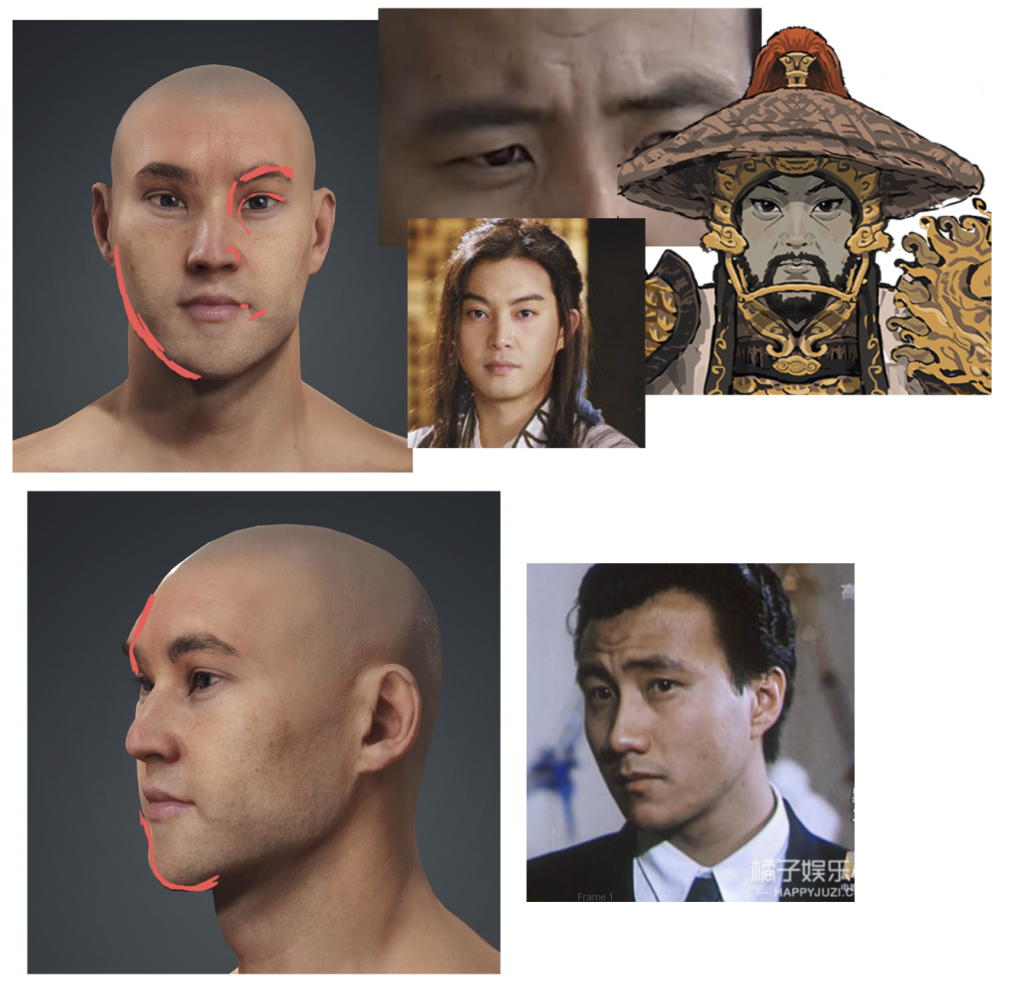
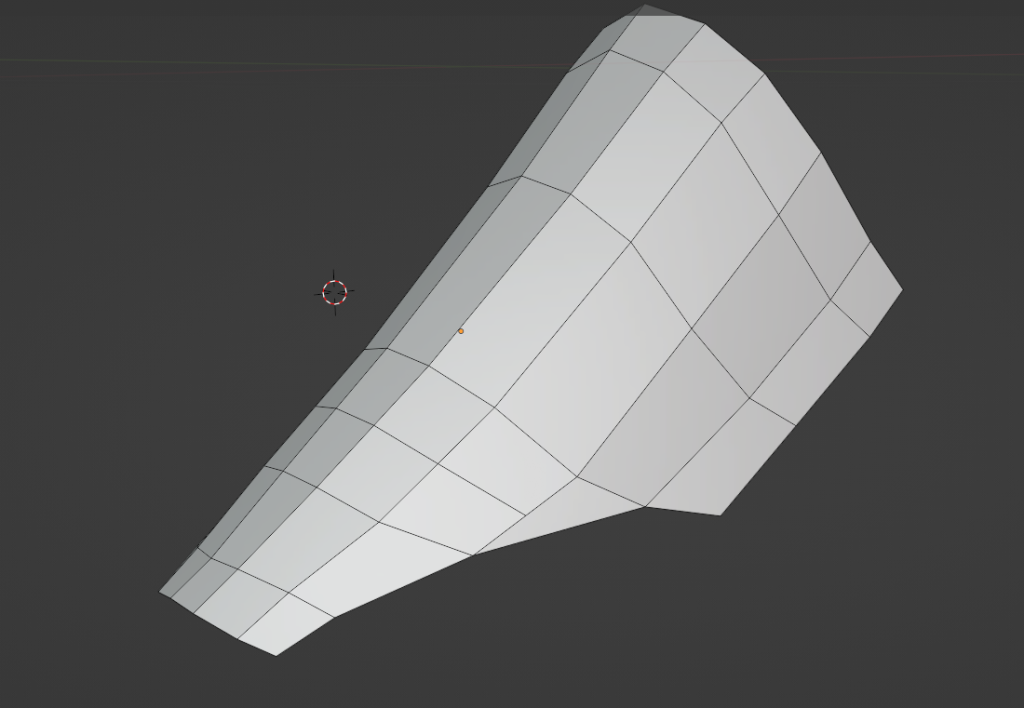
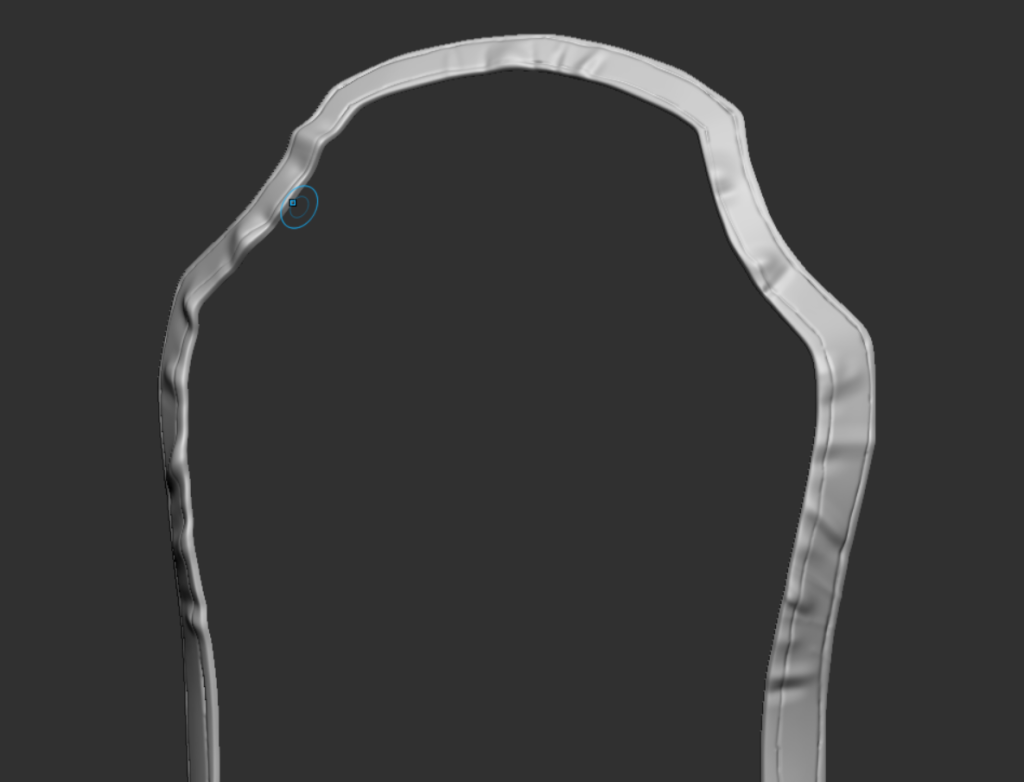
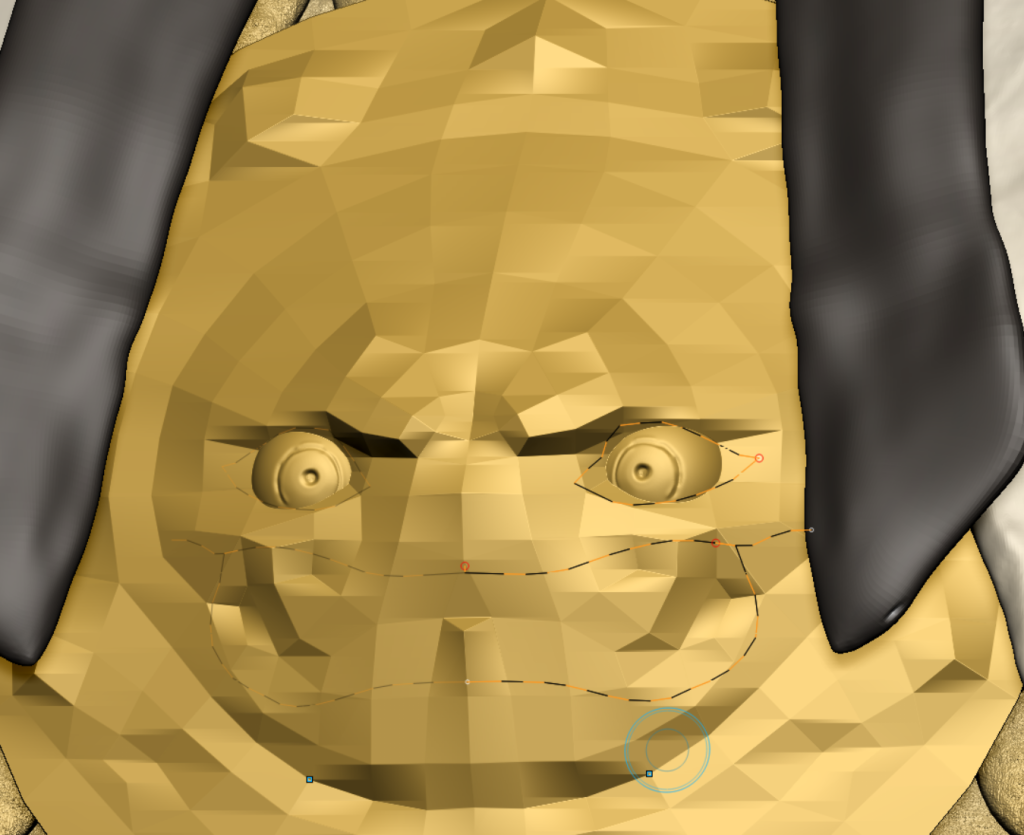
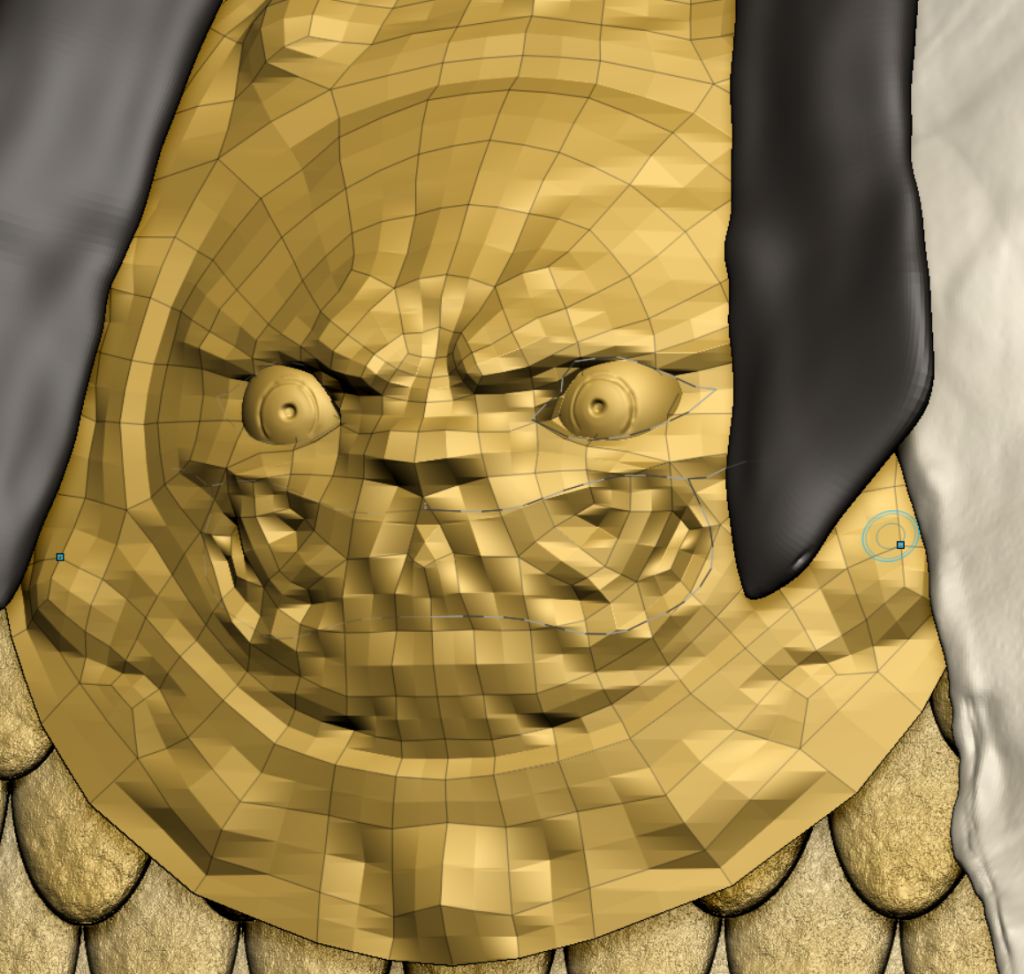
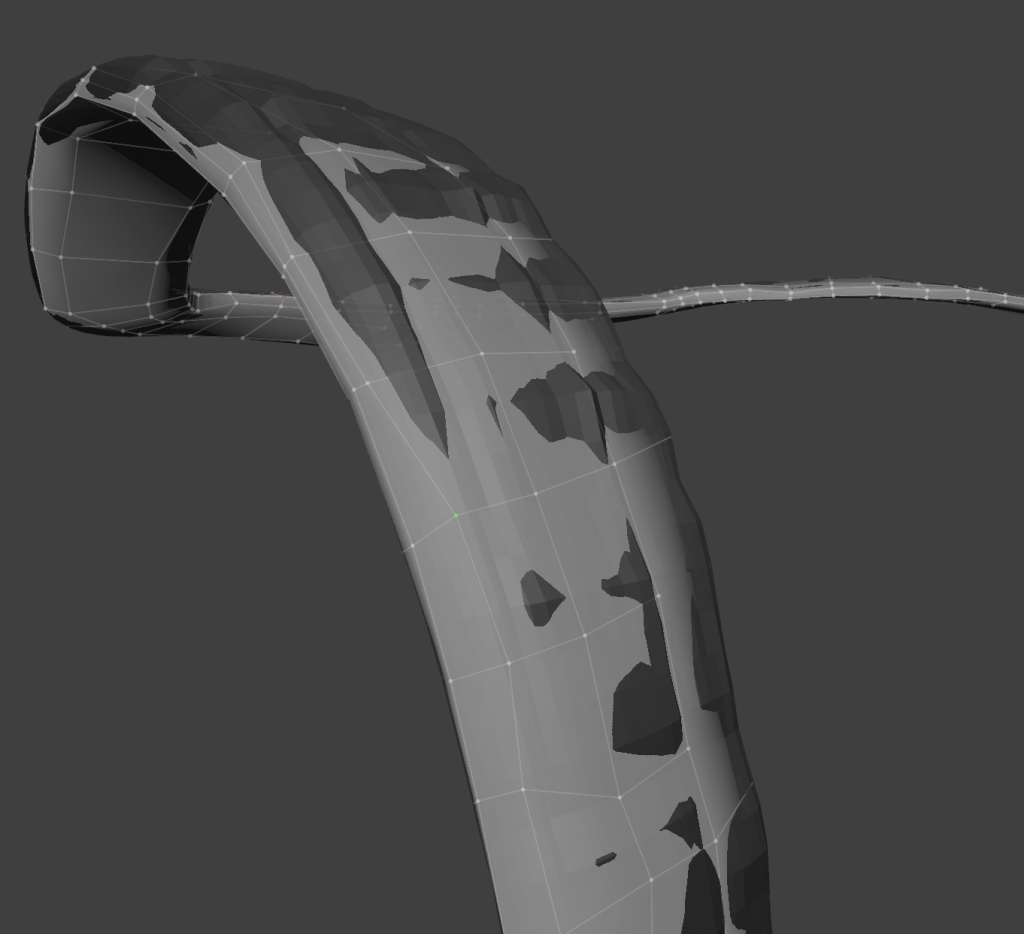
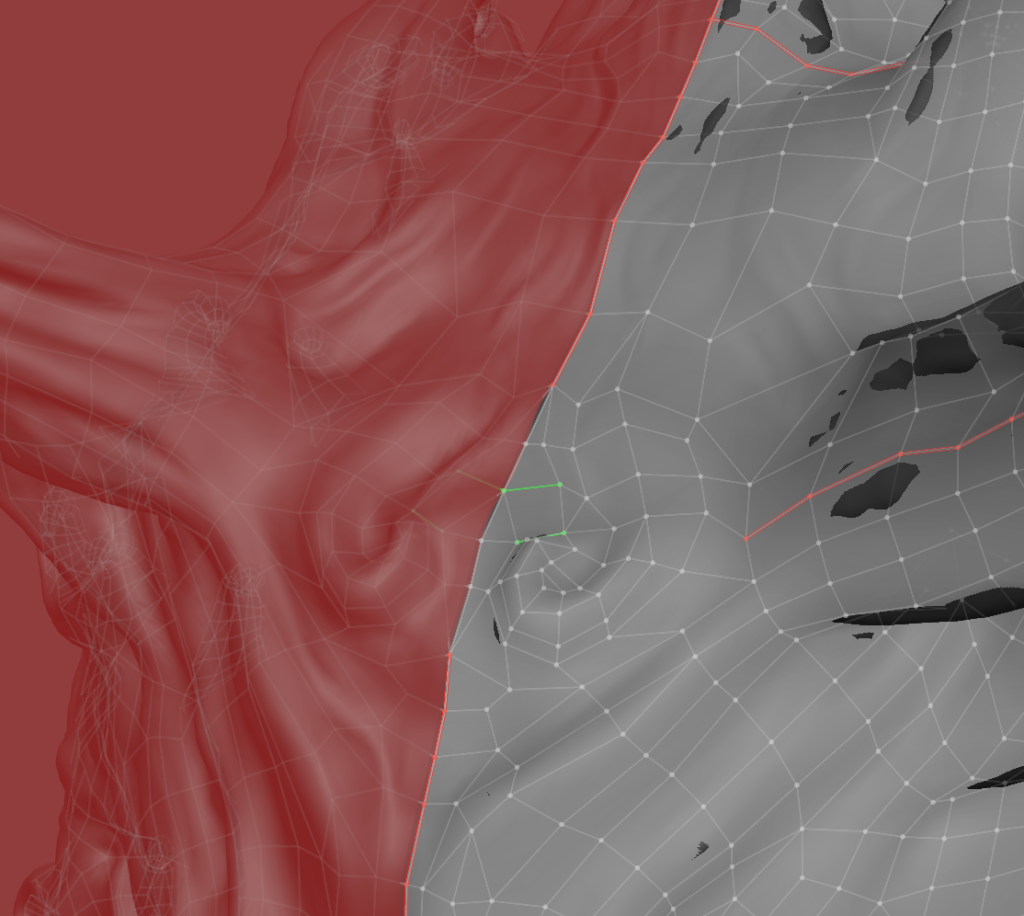
Adjustment of the jawline according to the grid distribution.
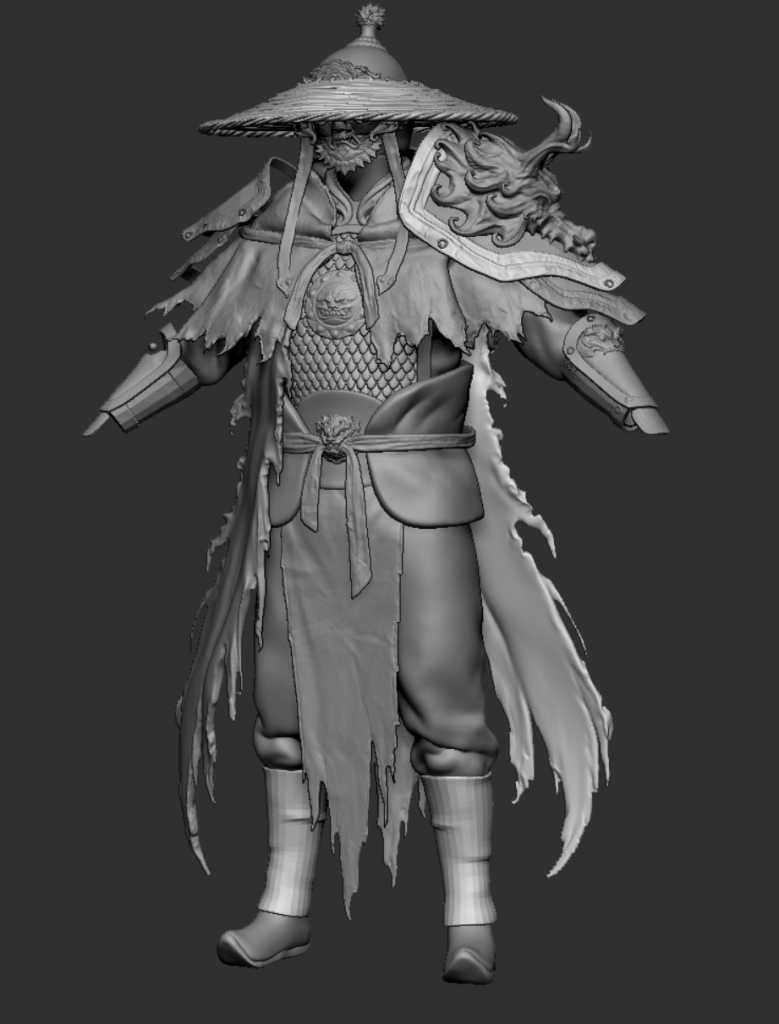
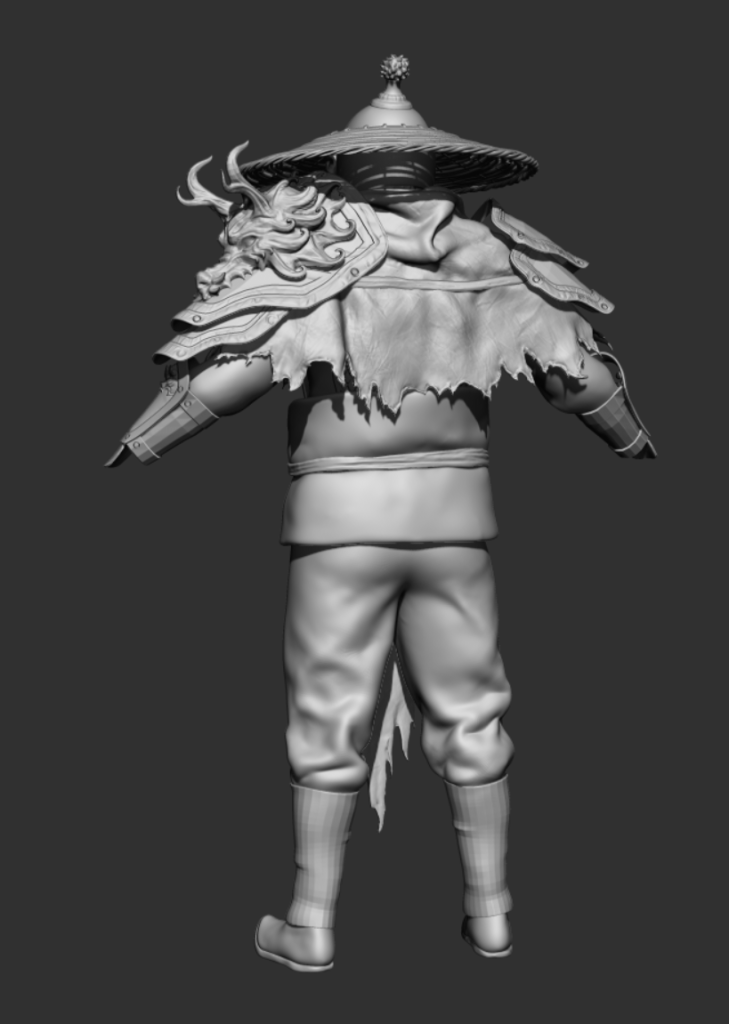
After blender updated to 4.0, the CC4 export plugin compatibility was suddenly problematic… So I installed back to 3.6
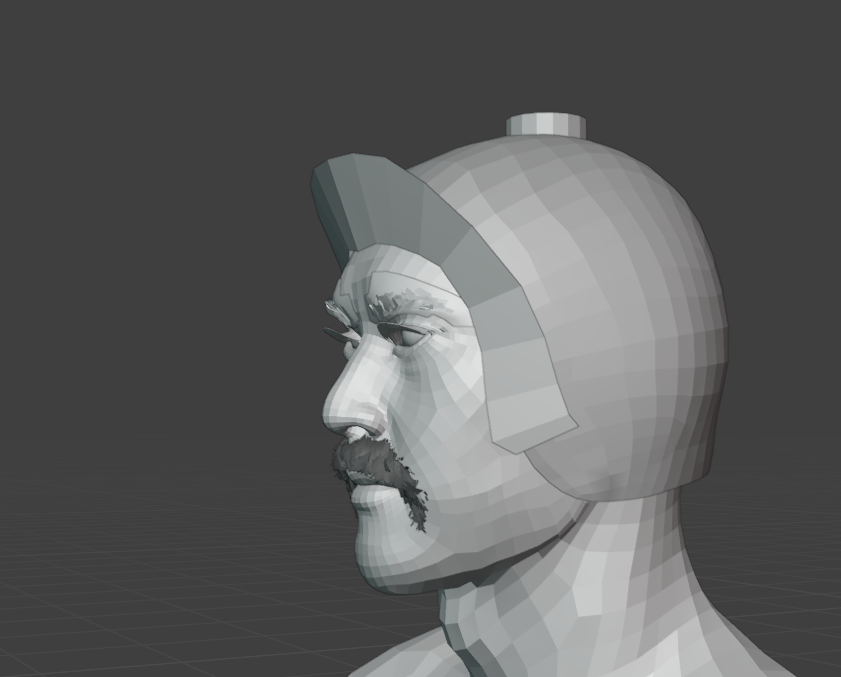
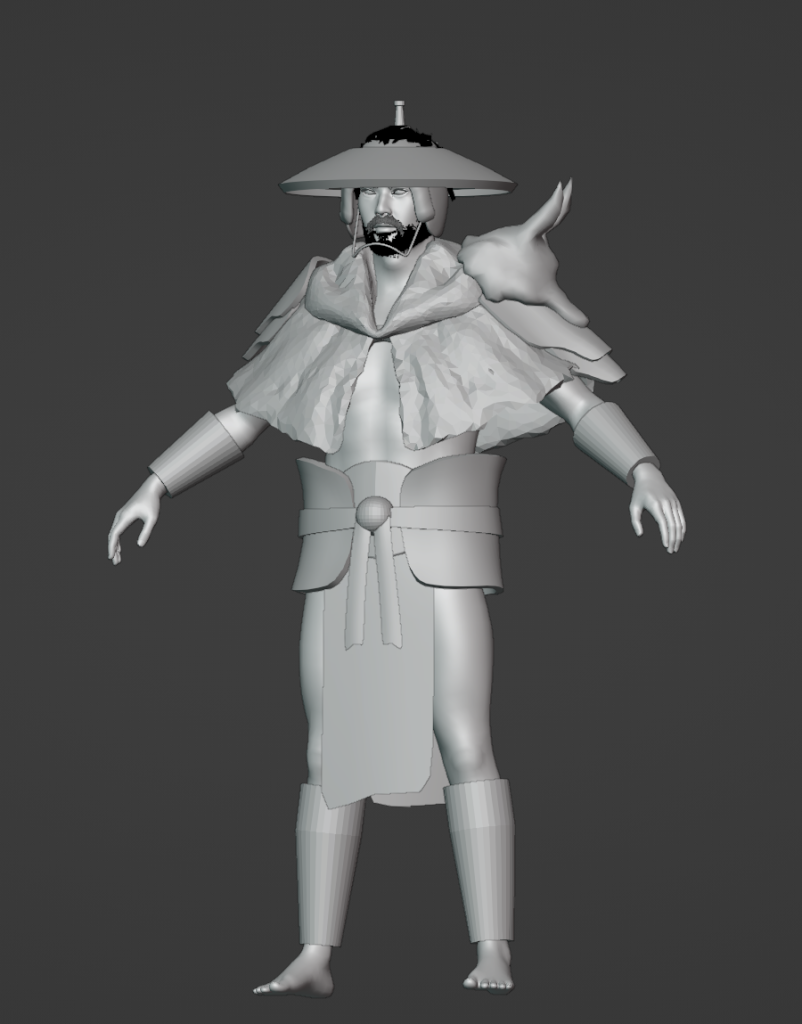
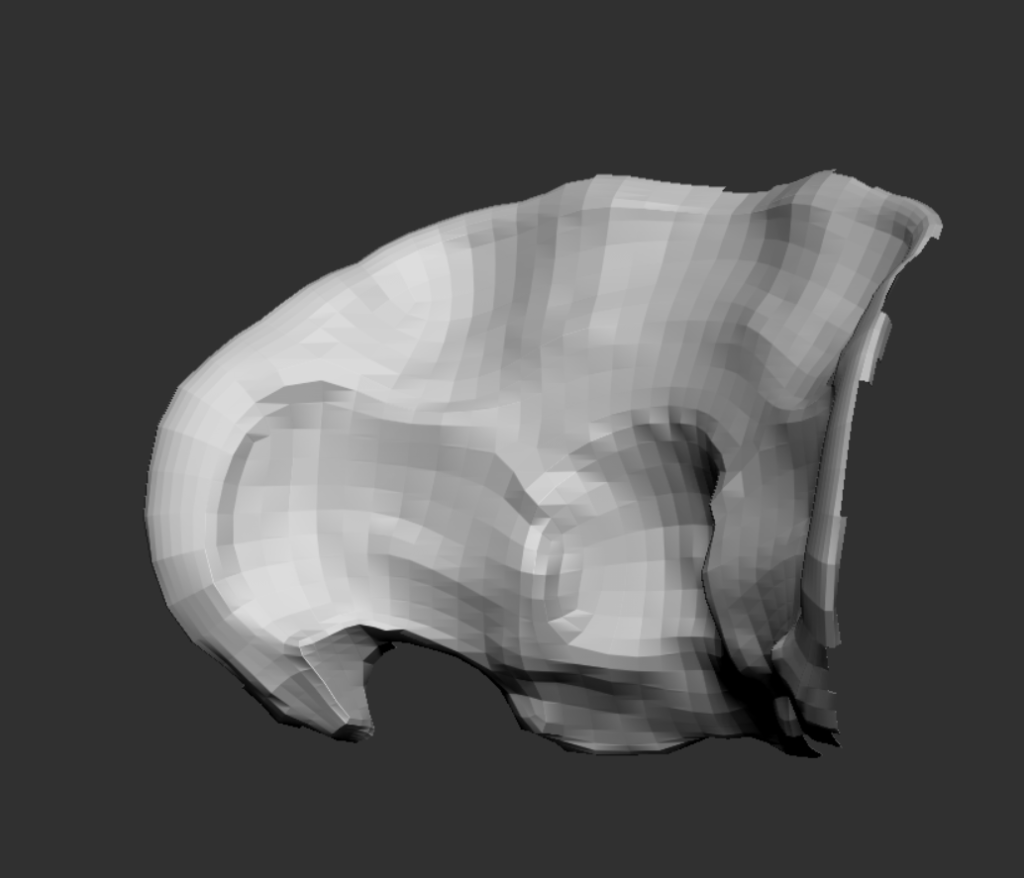
And I did a preliminary block out

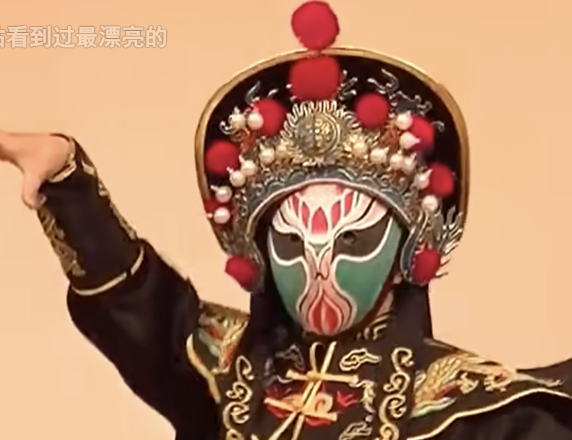
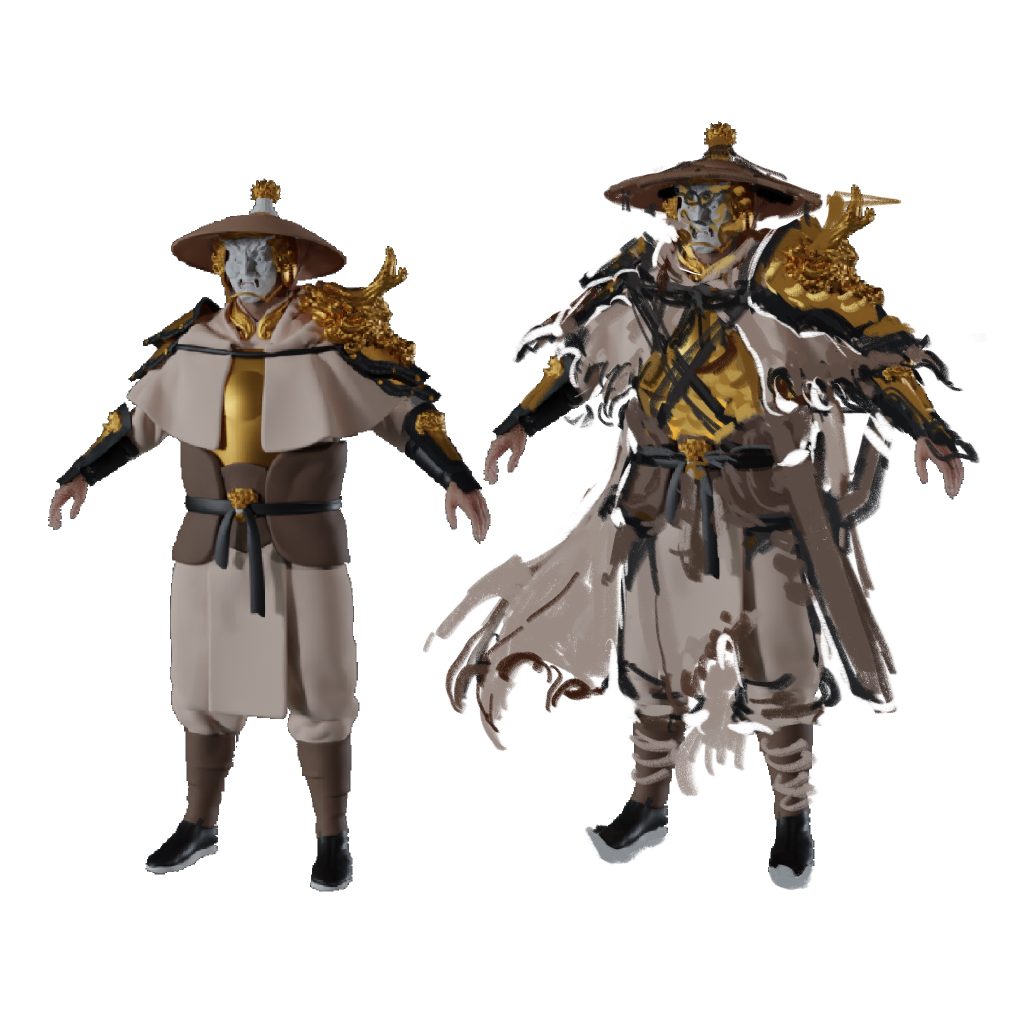
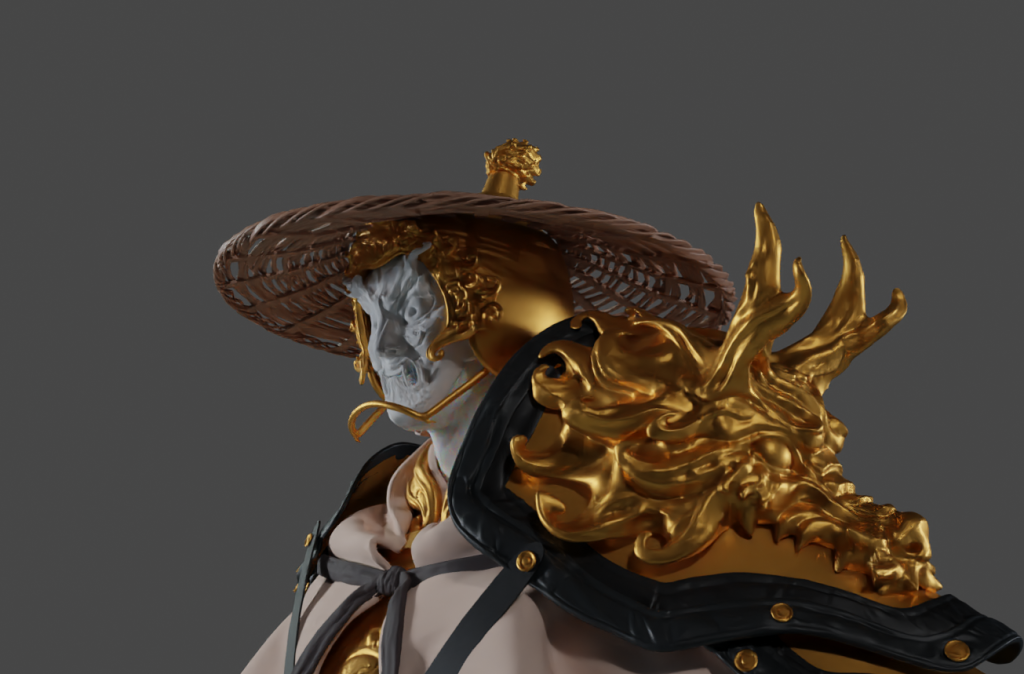
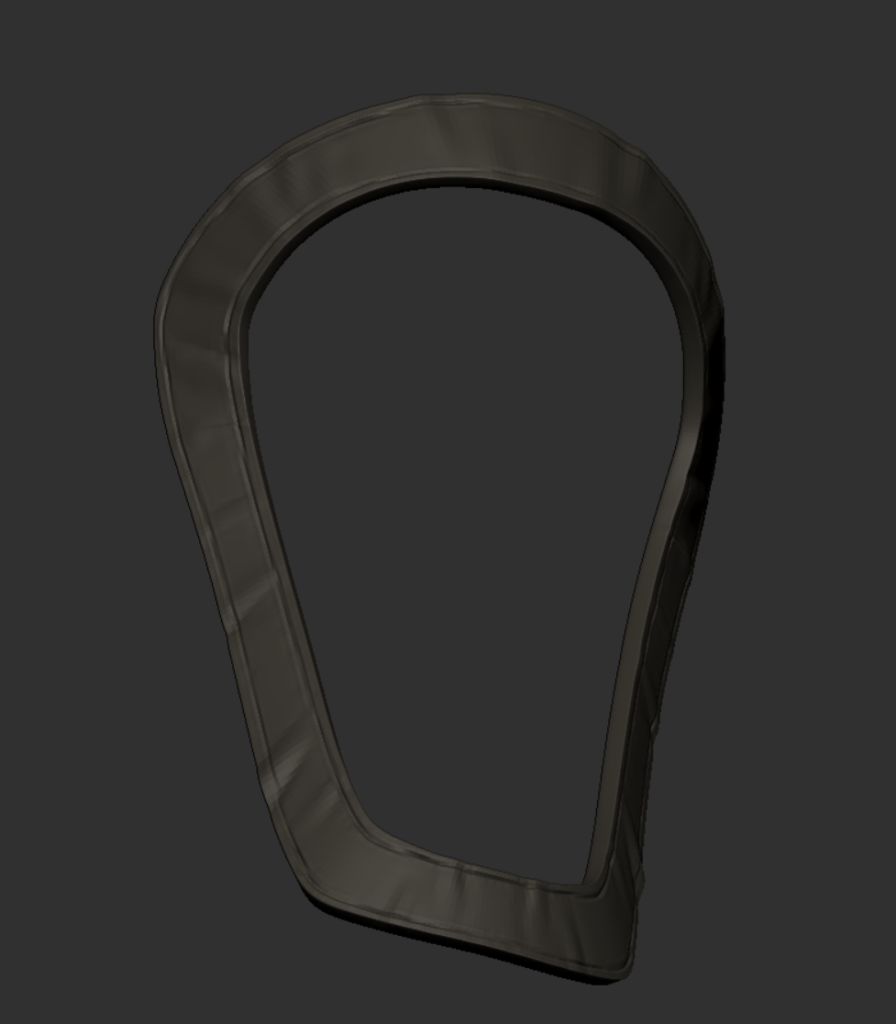
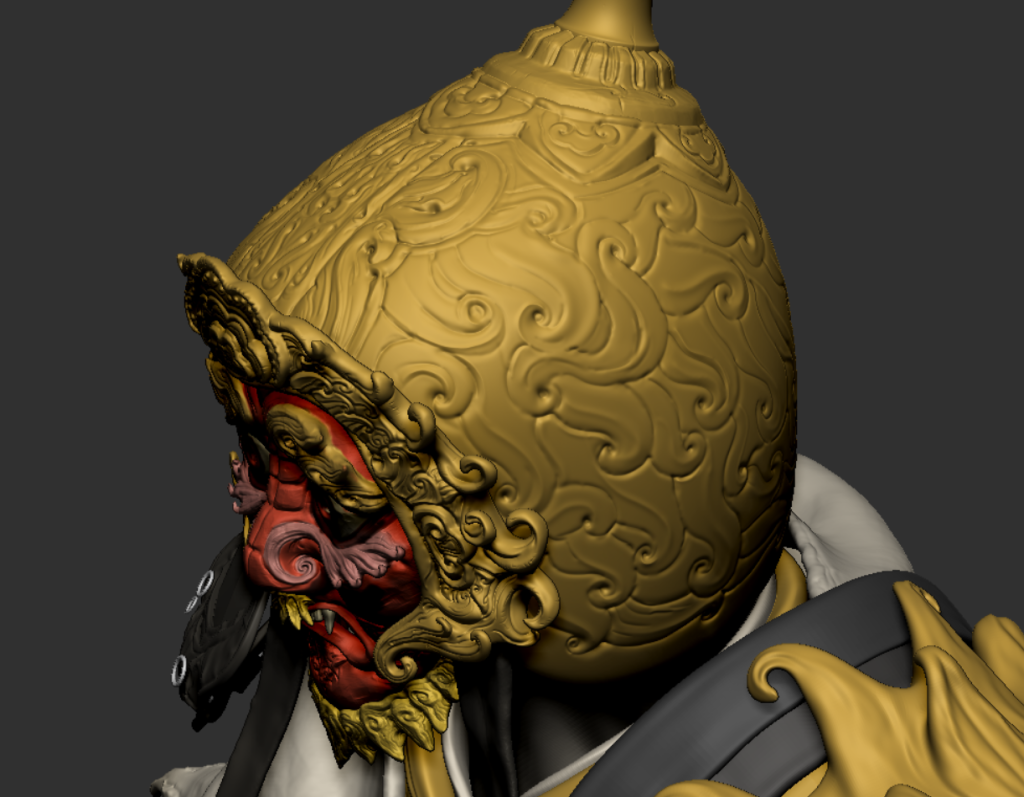
I did some thinking about the face piece on the front of the helmet, because in the design stage I also referred to the Peking Opera, in which this part is similar to a ring, but if this is no way to be the same as my conceptual drawings, so in the end I chose to design it like a helmet.
20/11
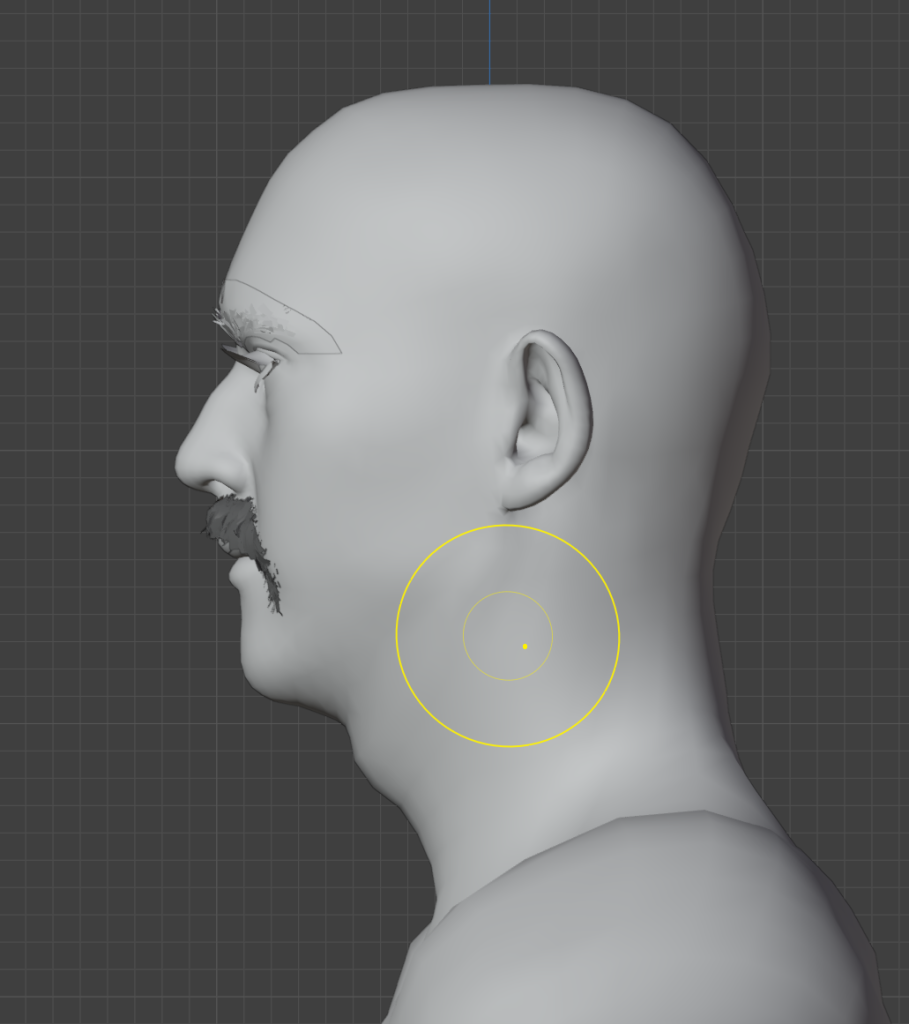
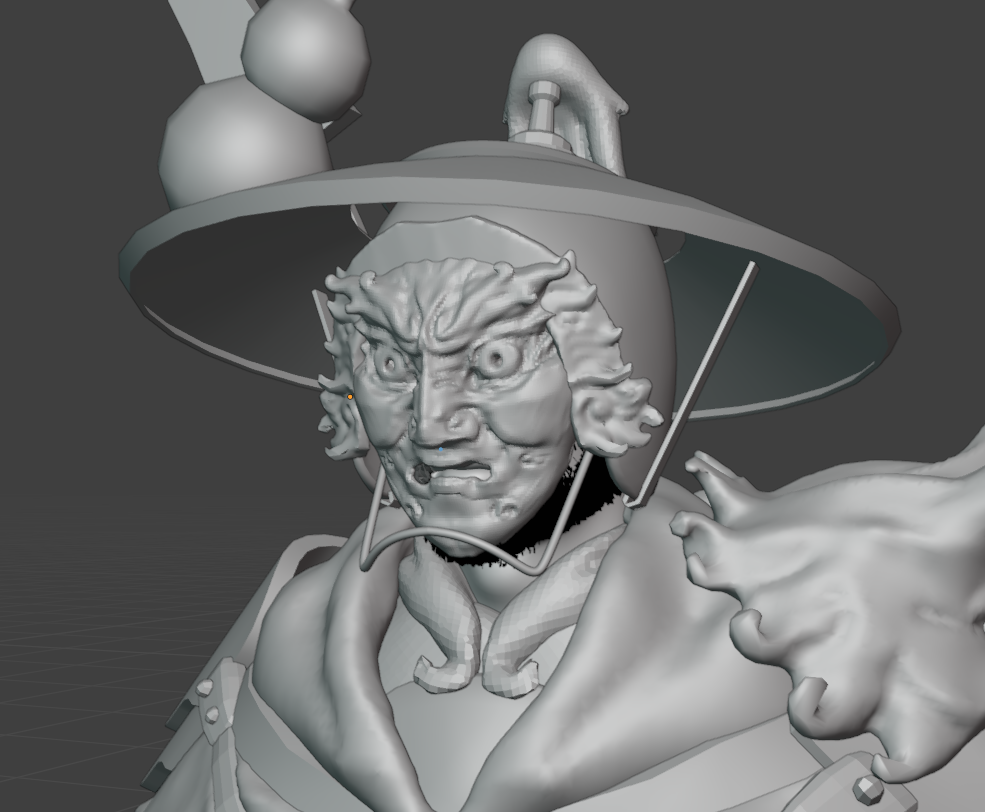
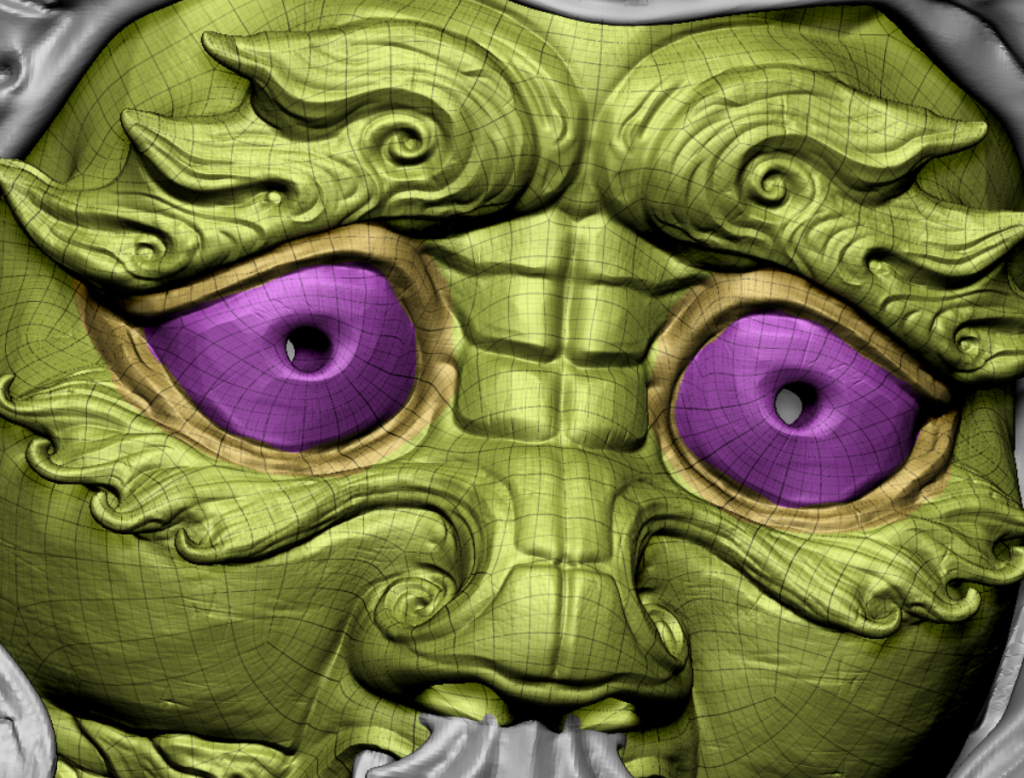
After the adjustment, I refer to the Asian face and make a plan for the next step.And I also made some adjustments to the brow arch and eye size after importing back to CC4
Jun Hu & Yi Sha
23/11
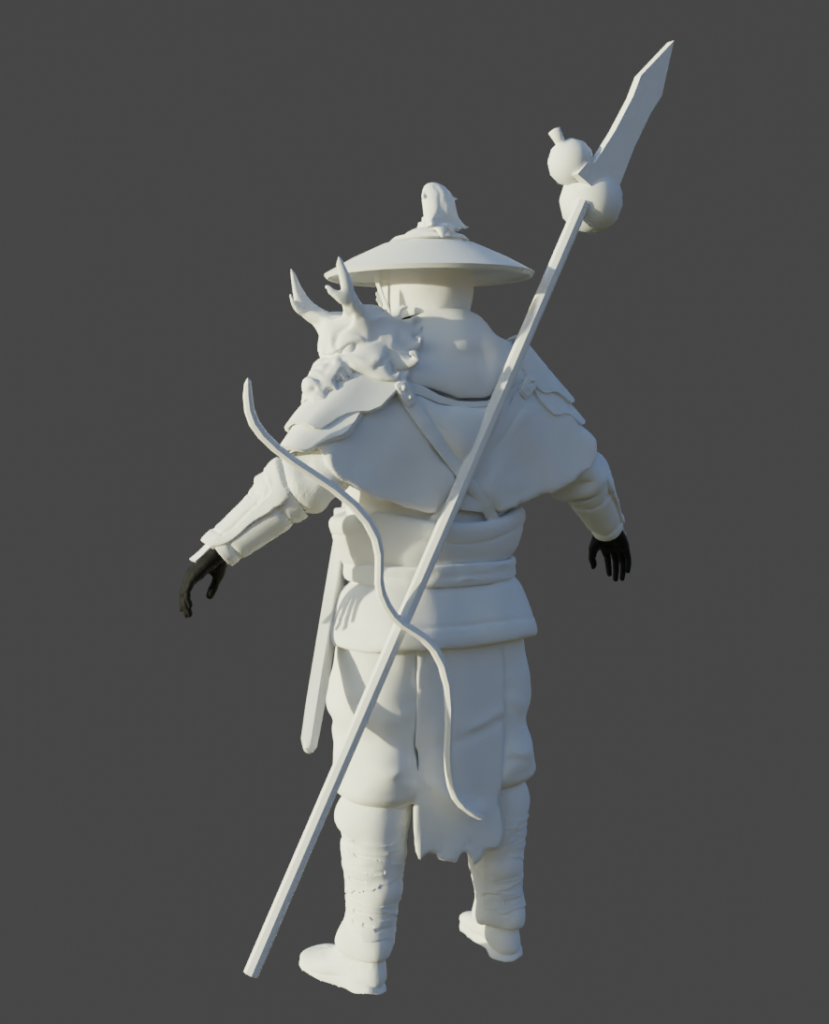
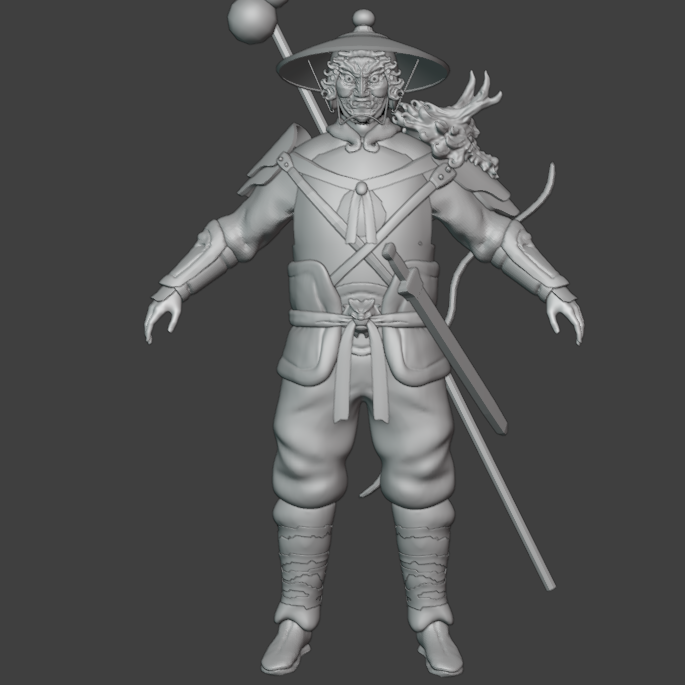
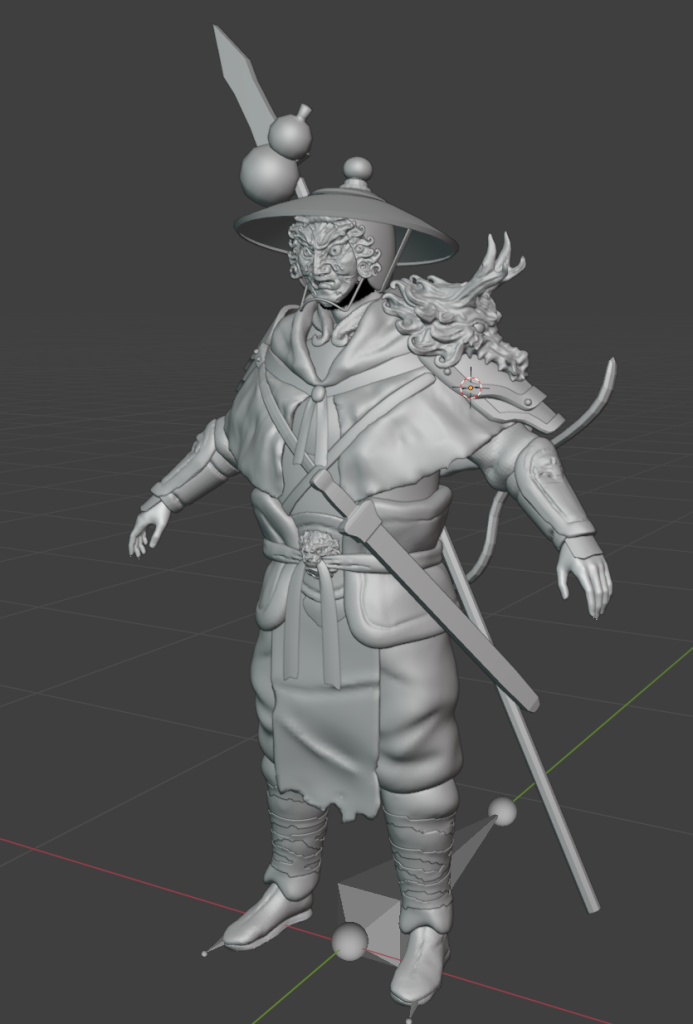
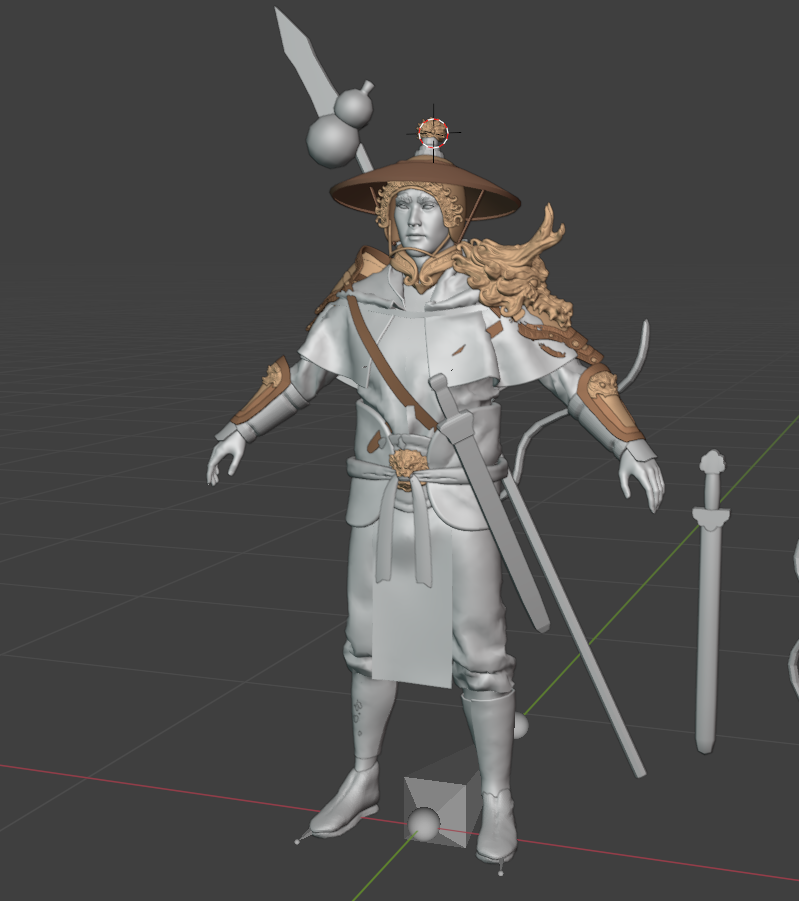
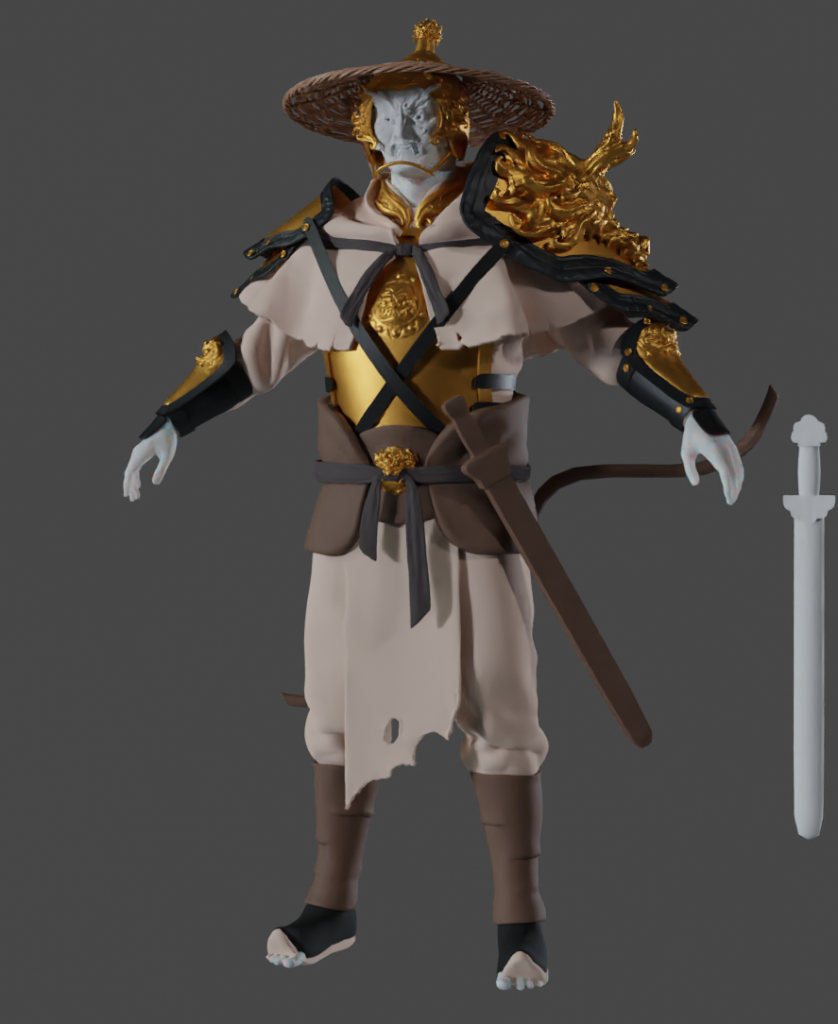
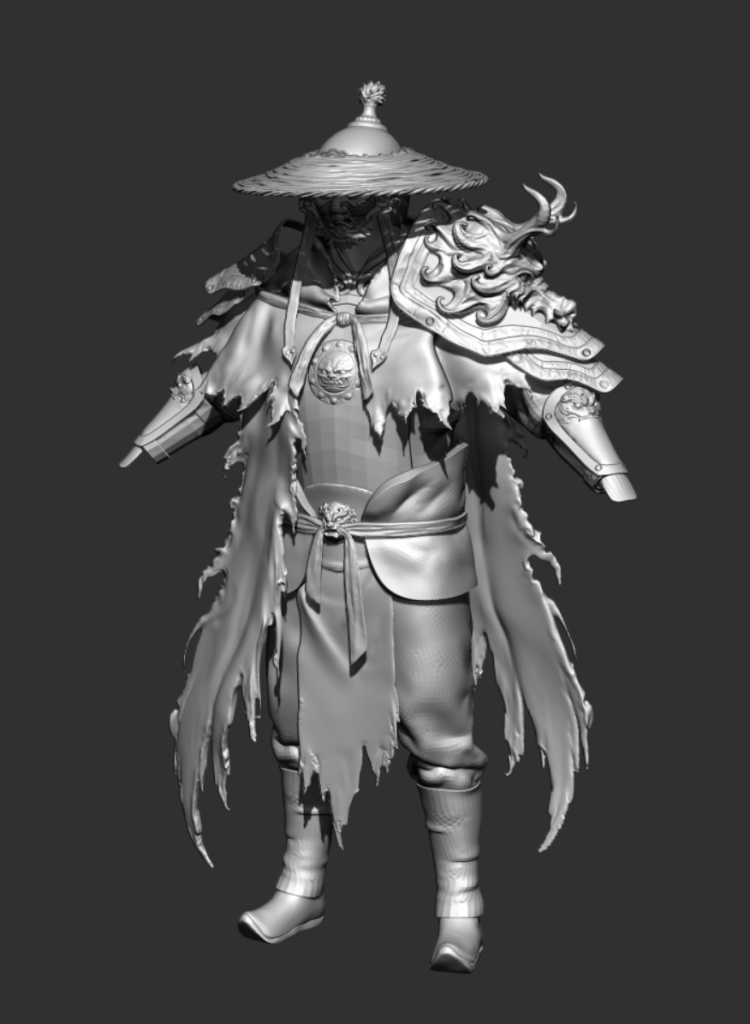
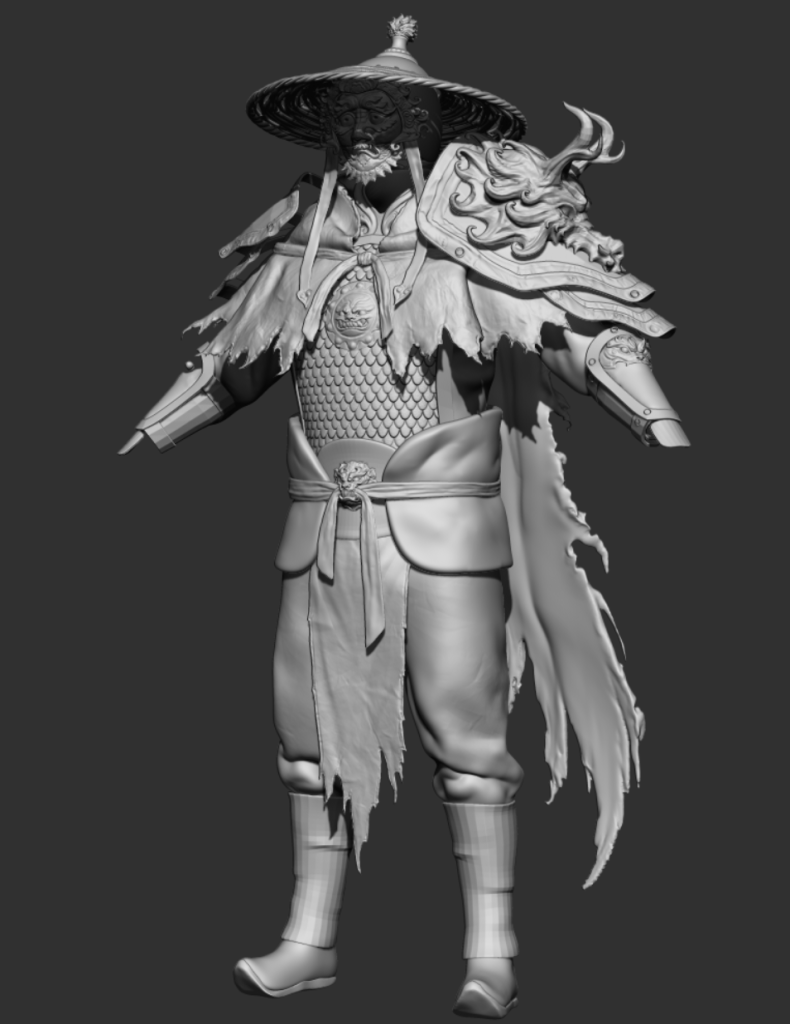
Since this character is only 1.6m, I first adjusted the body proportions of the character in CC4, and then blender did the initial block out afterward
24/11
30/11
13/12/23
After using it for over a week to create my thesis, I just came back to modeling today.
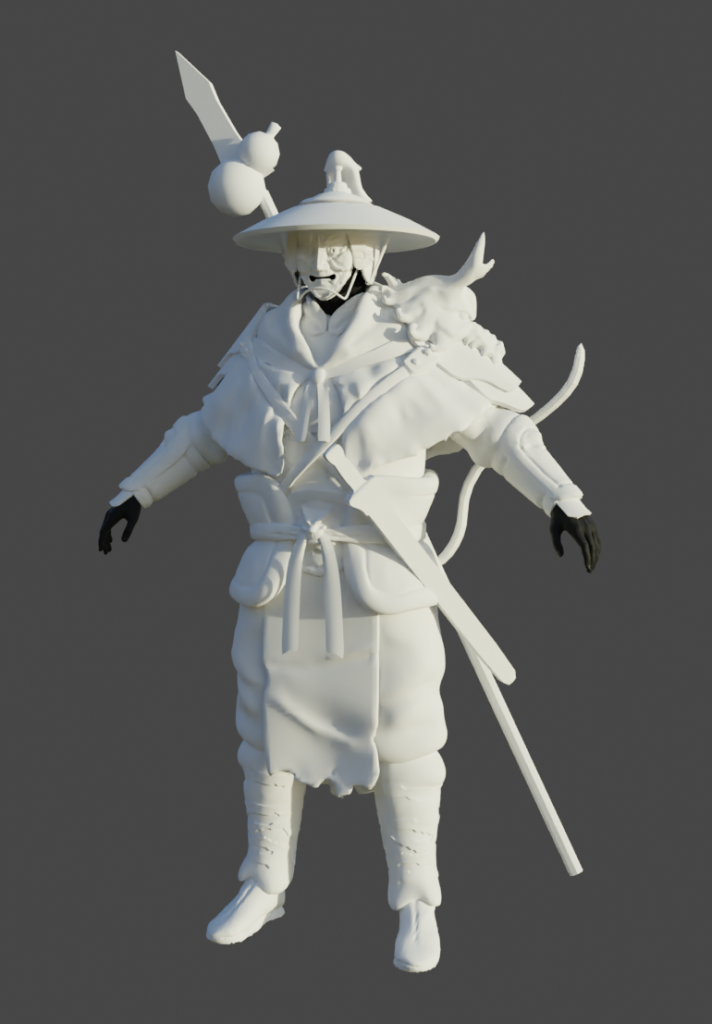
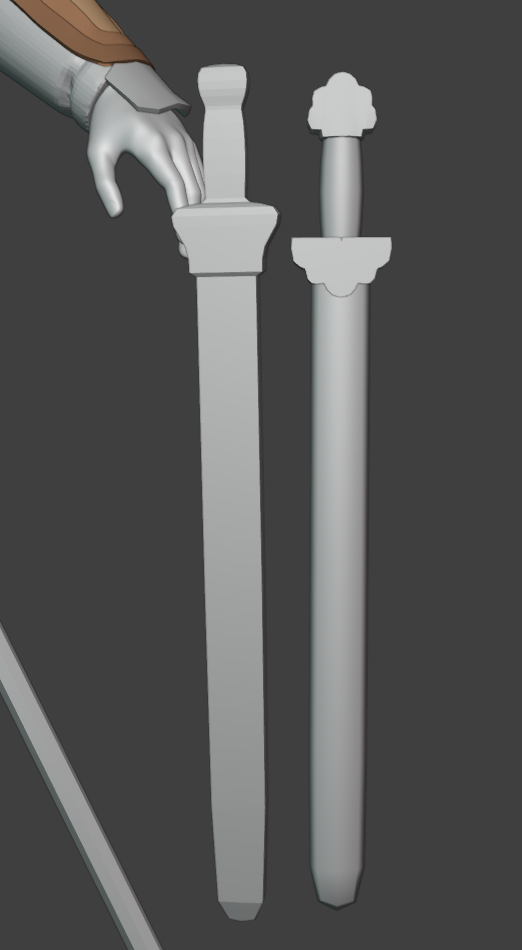
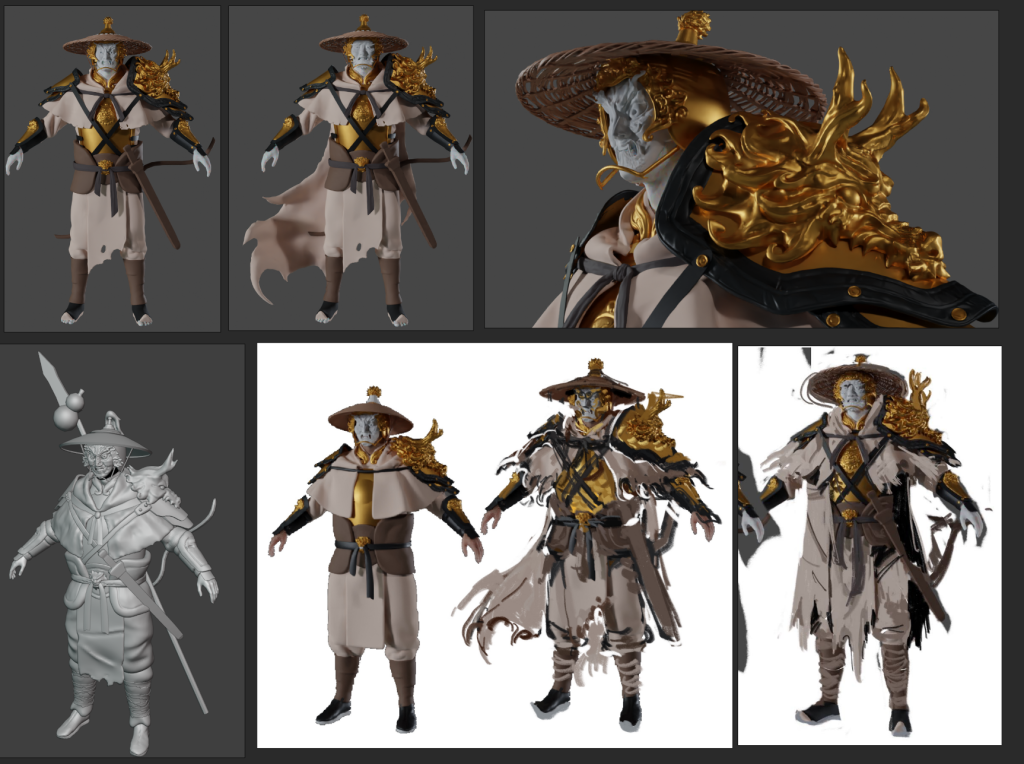
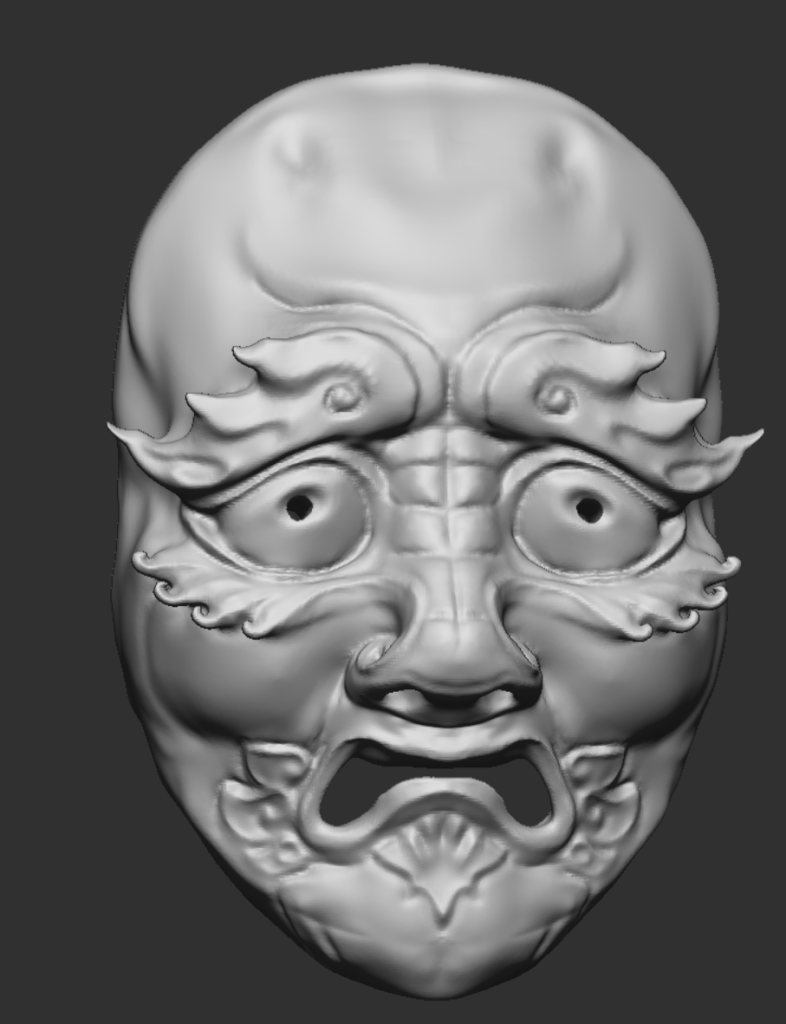
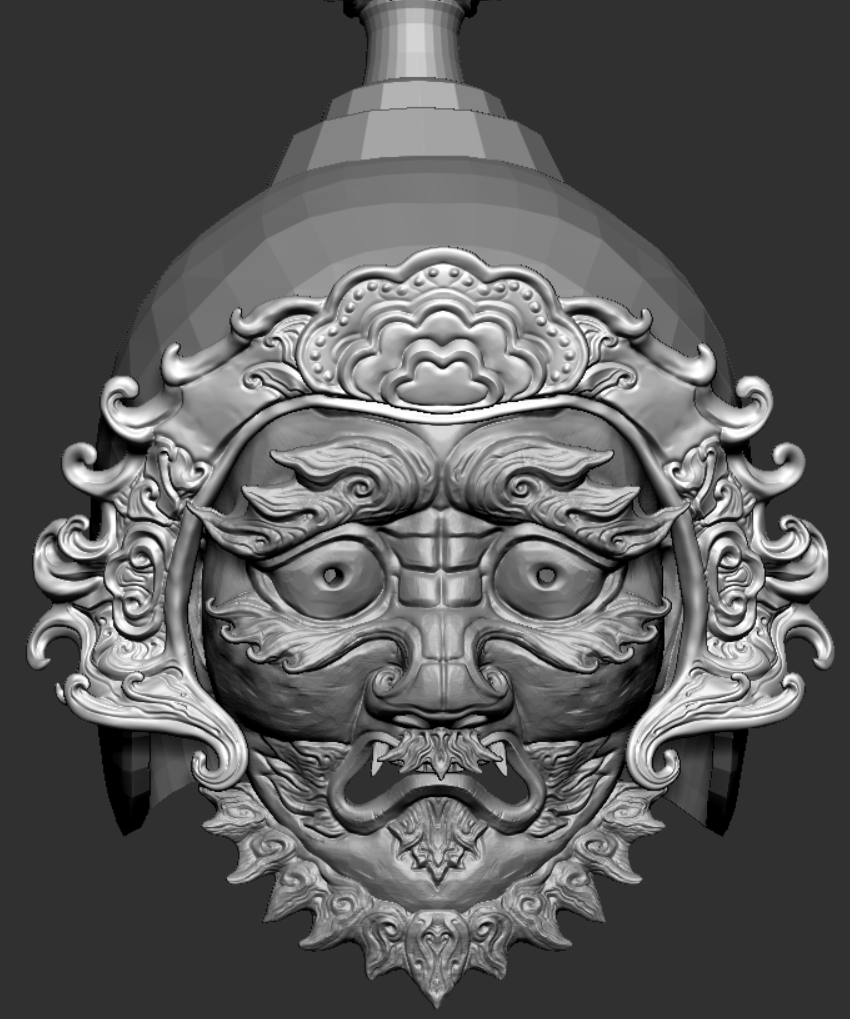
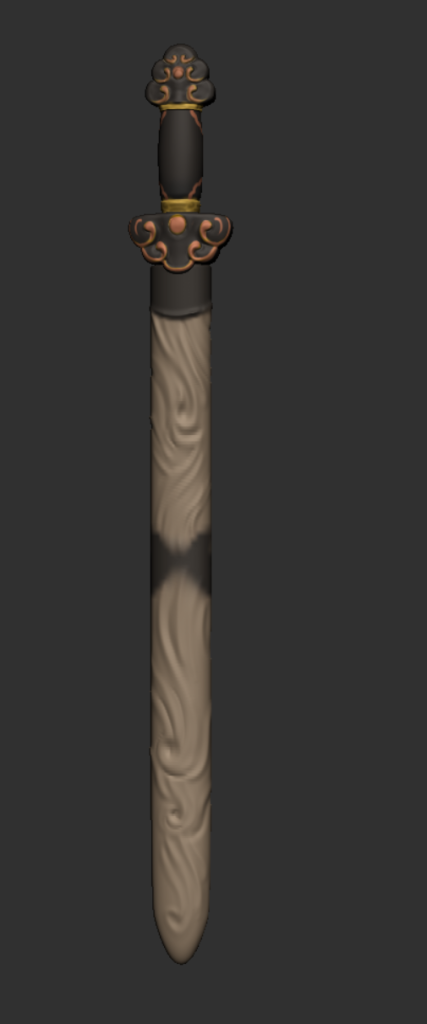
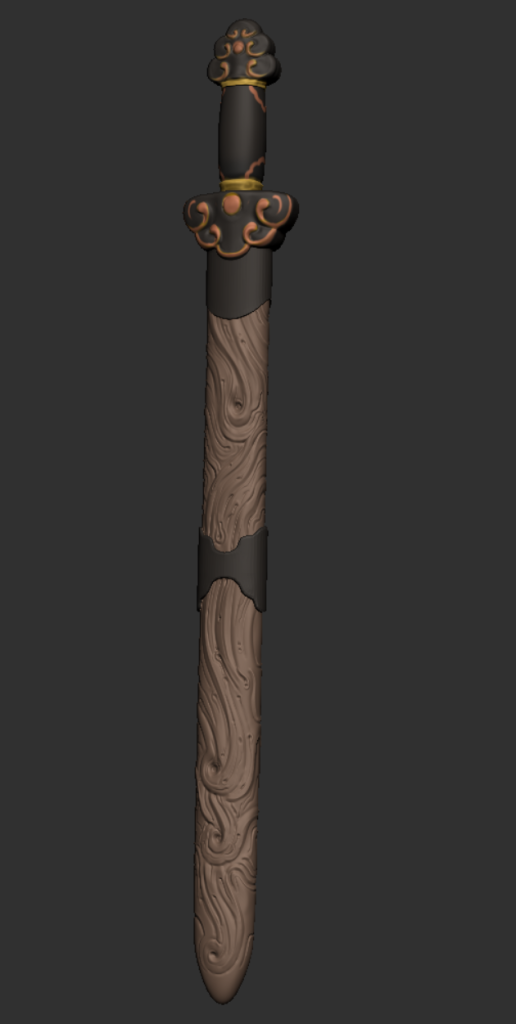
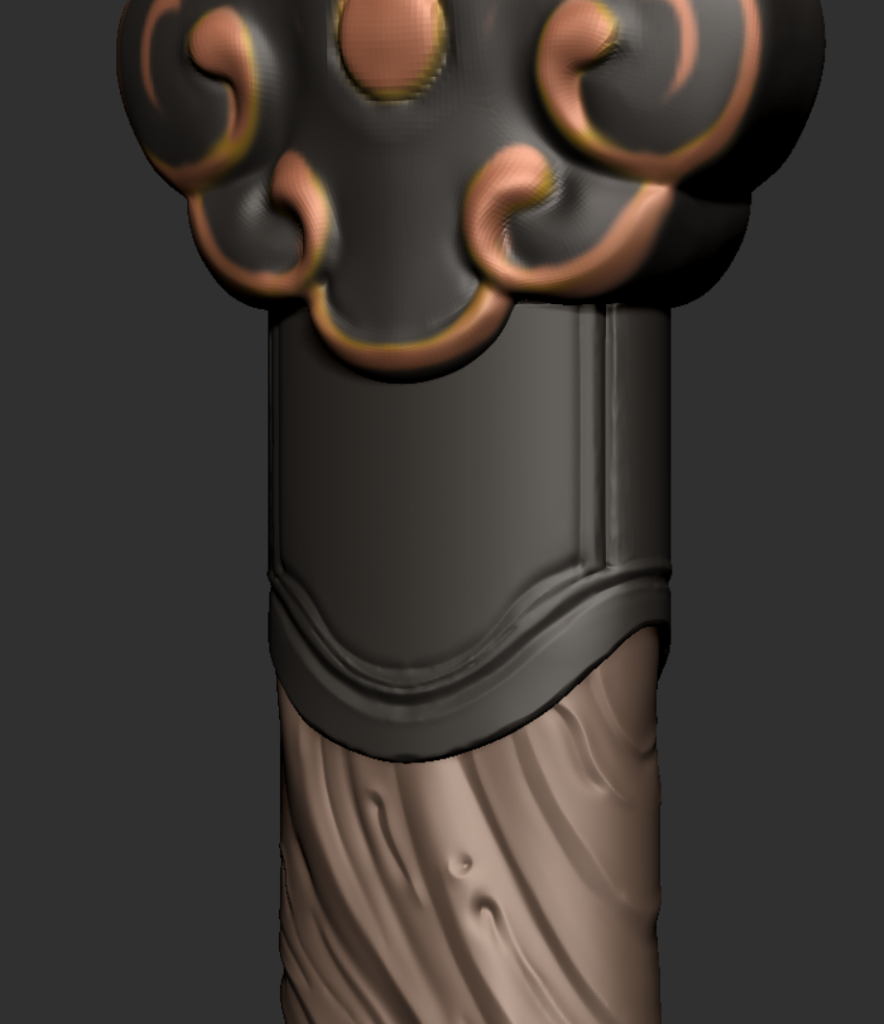
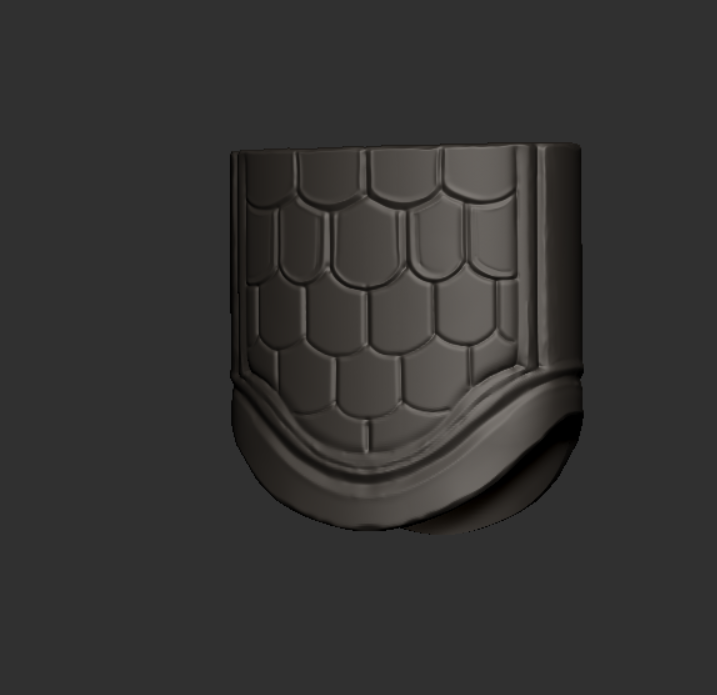
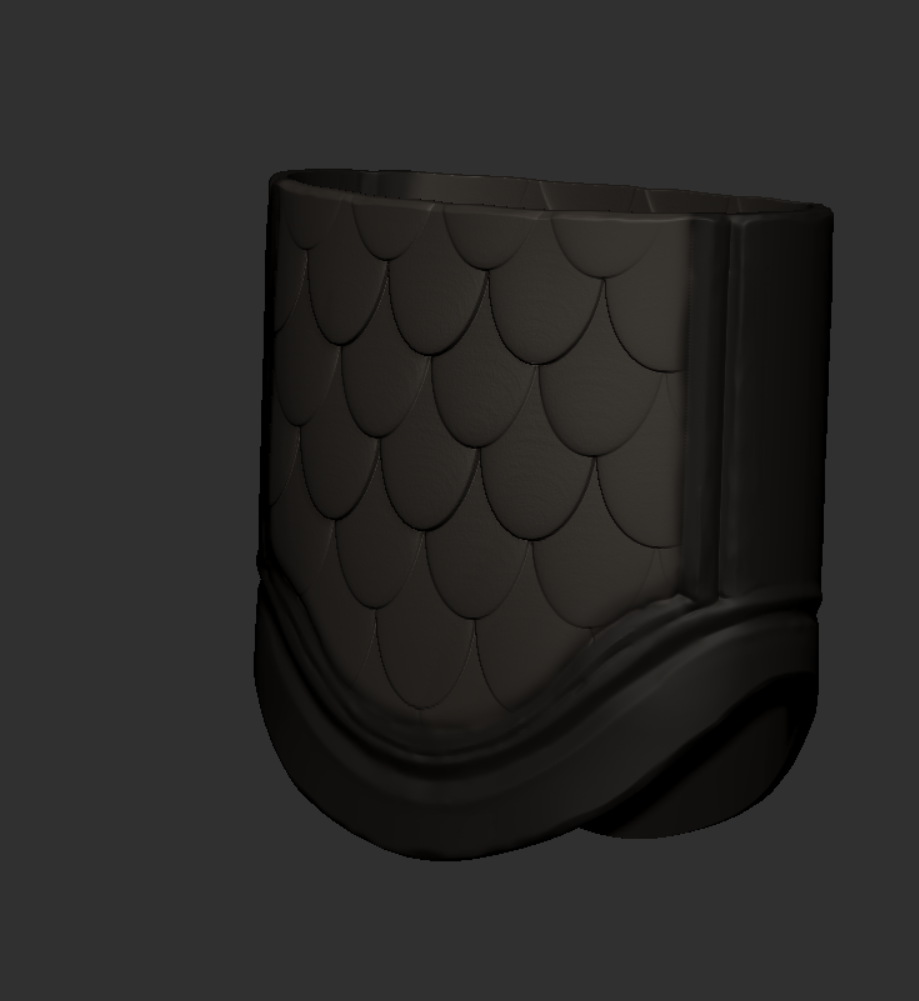
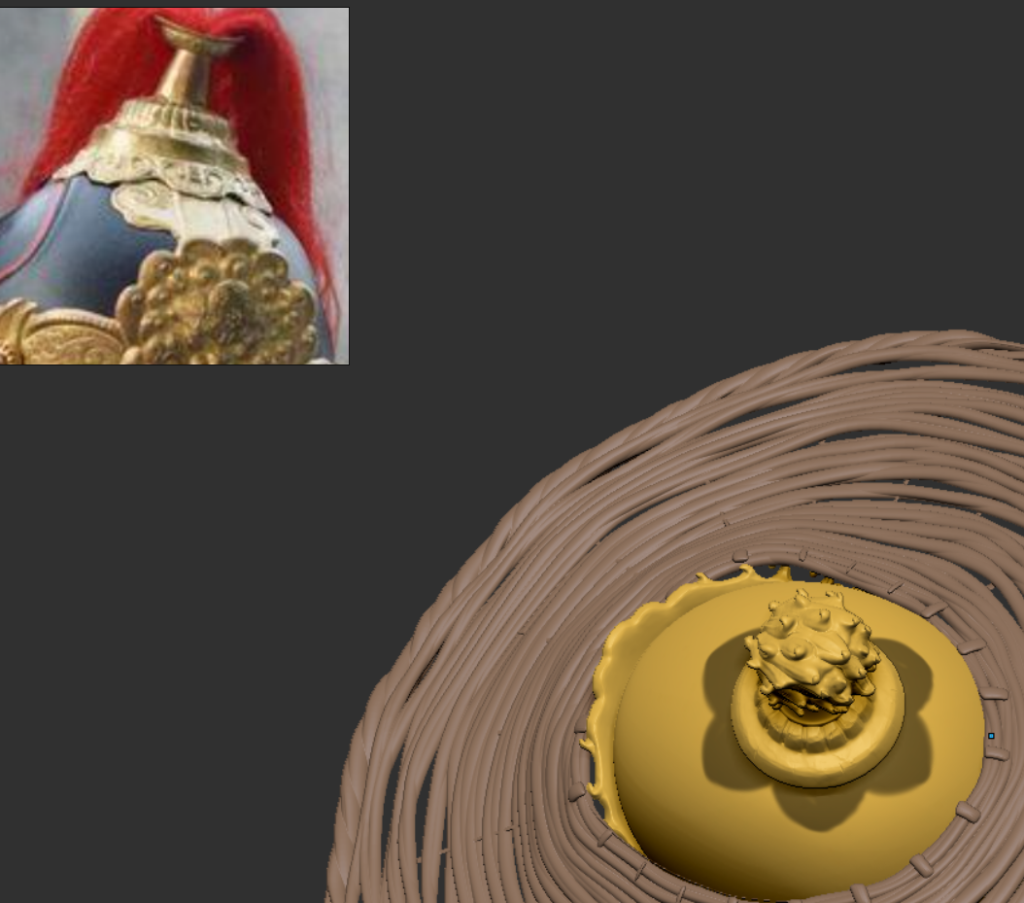
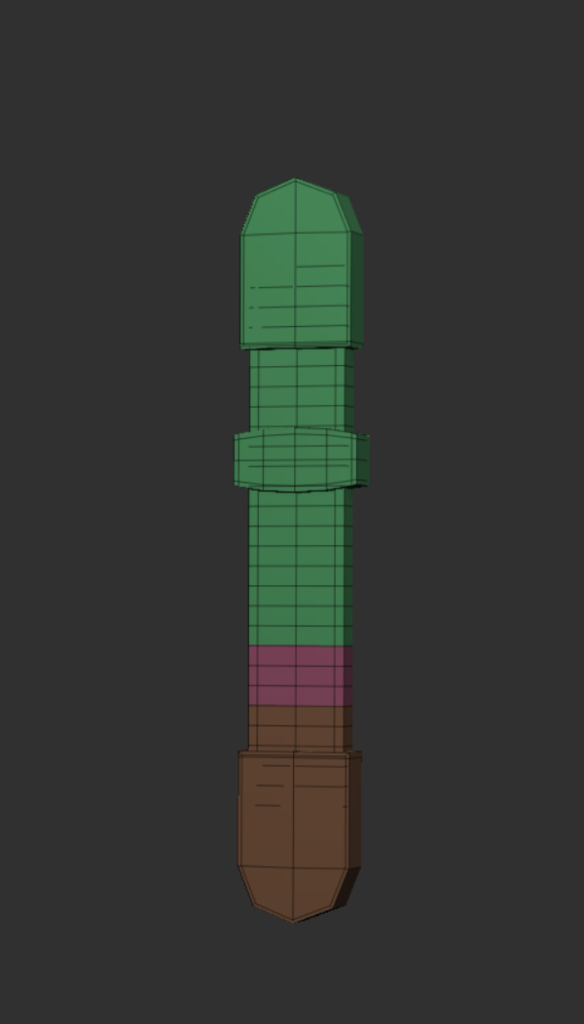
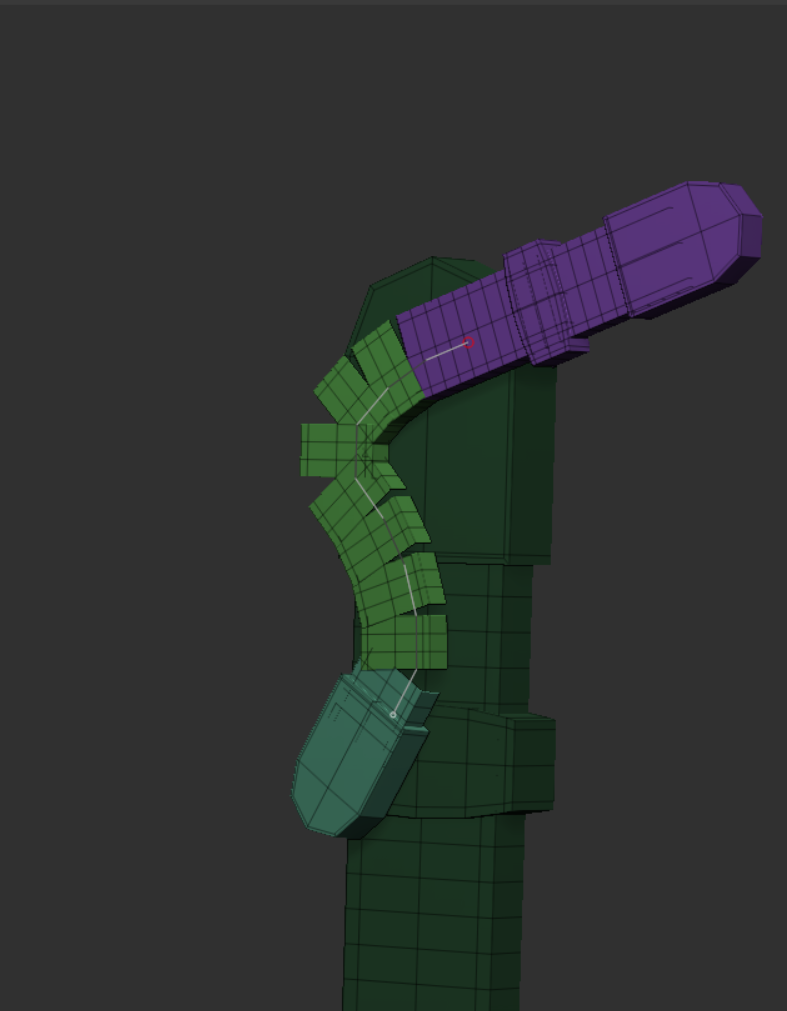
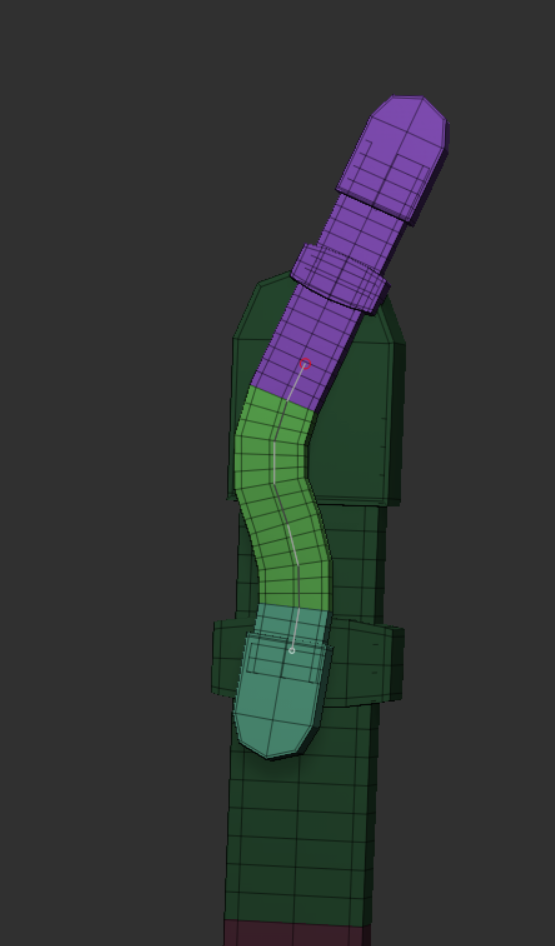
Got the weapon block out crafted, along with the first mask.
14/12/23
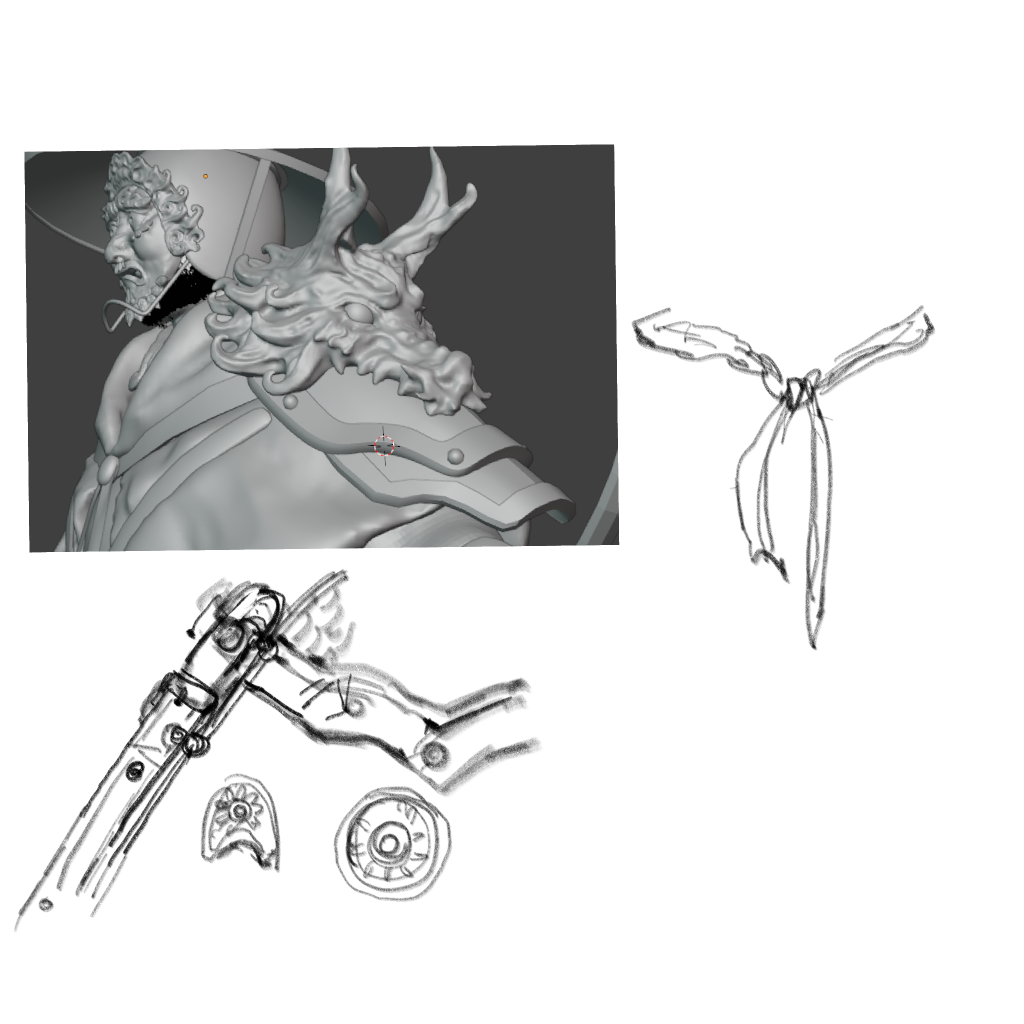
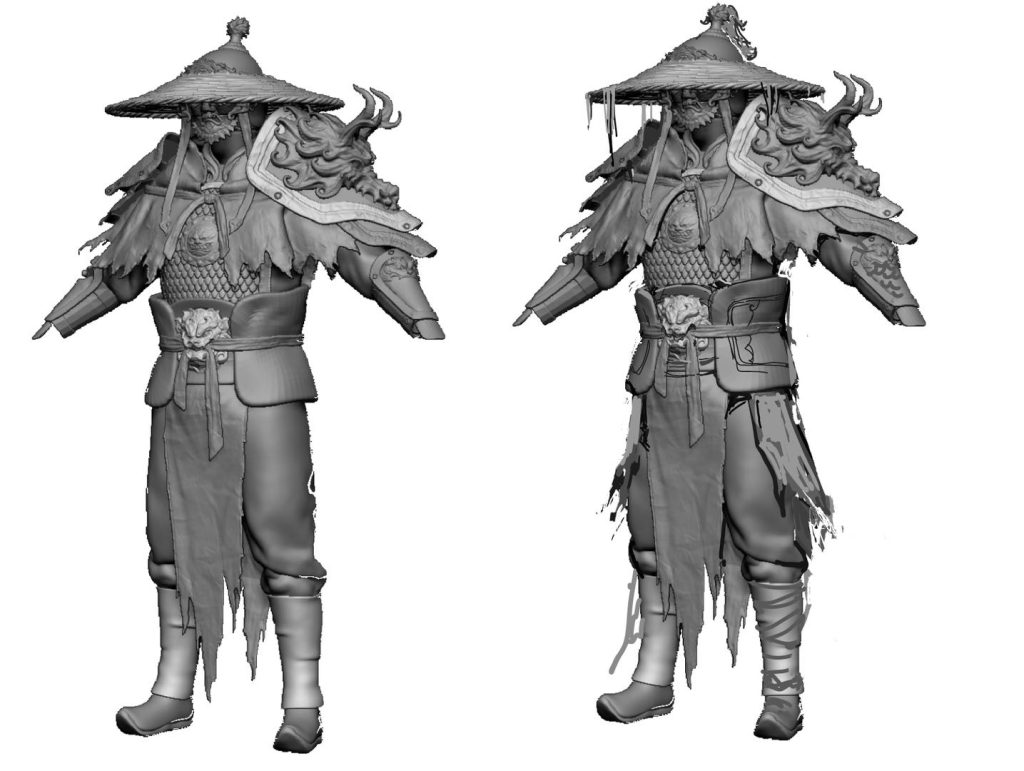
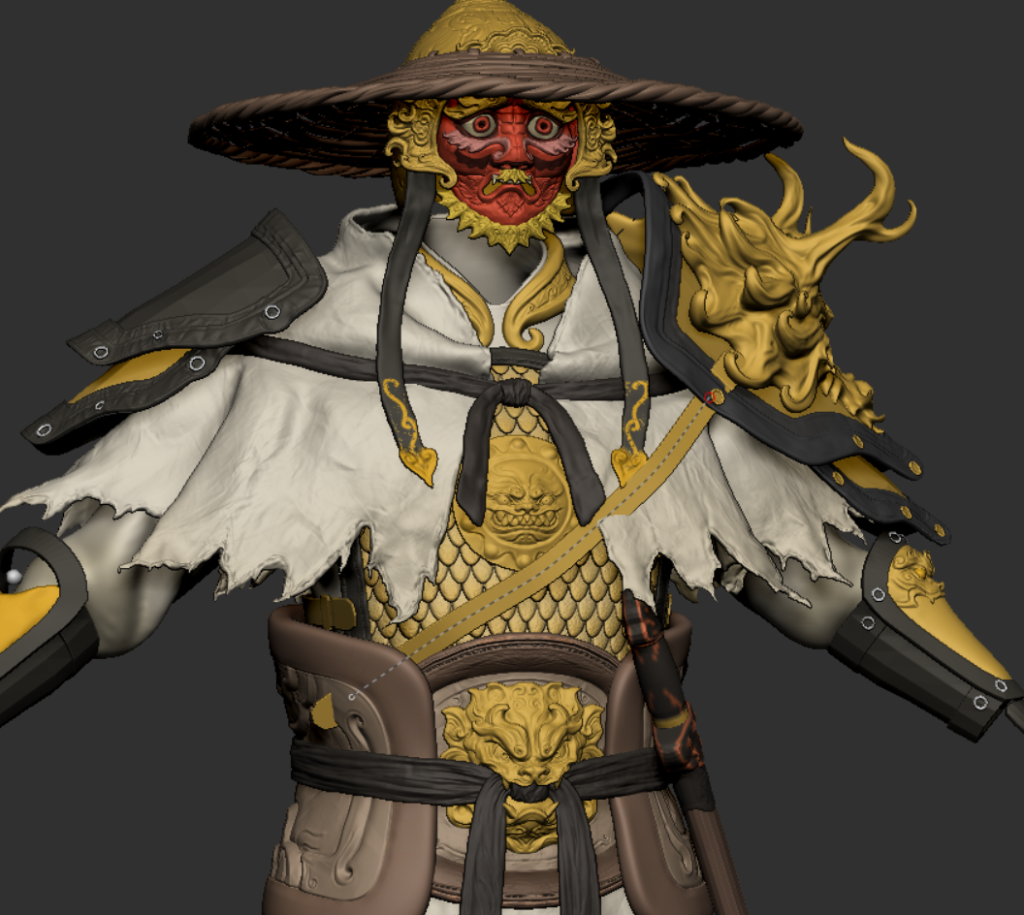
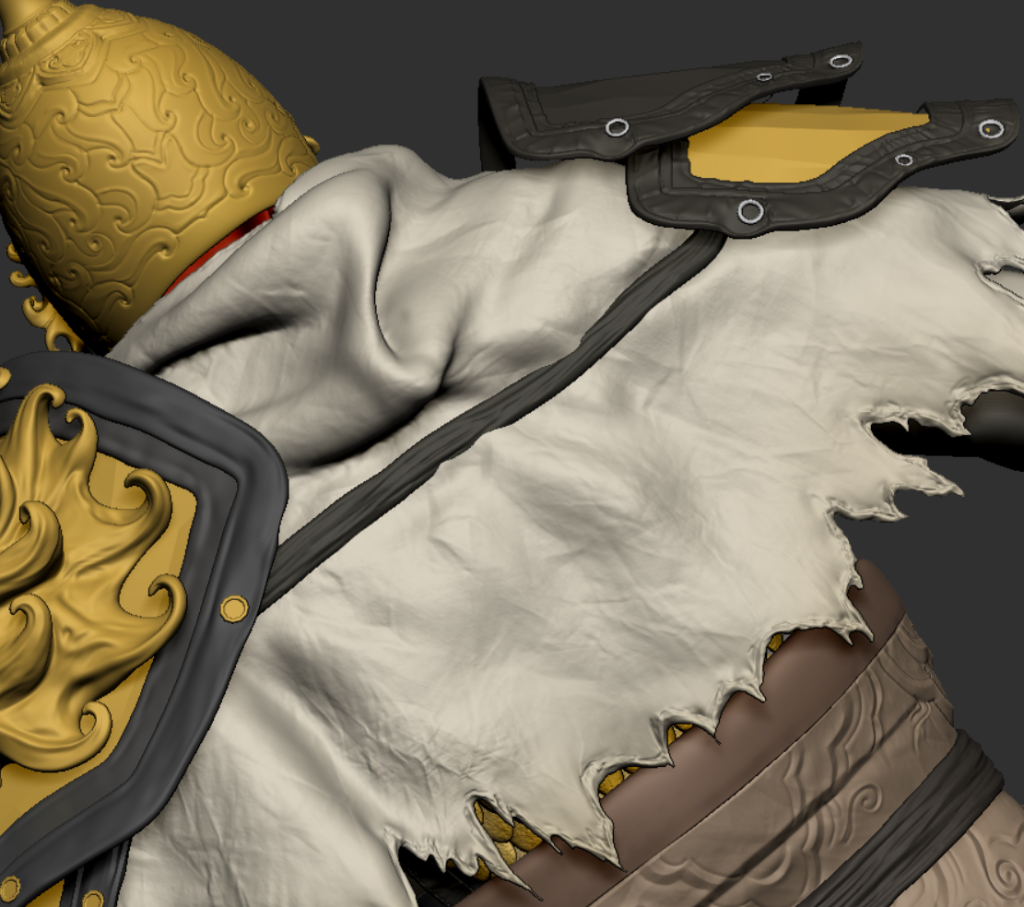
shoulder armor
Lighting inspection structure
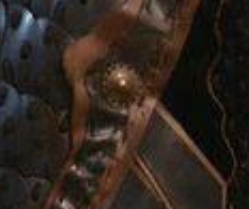
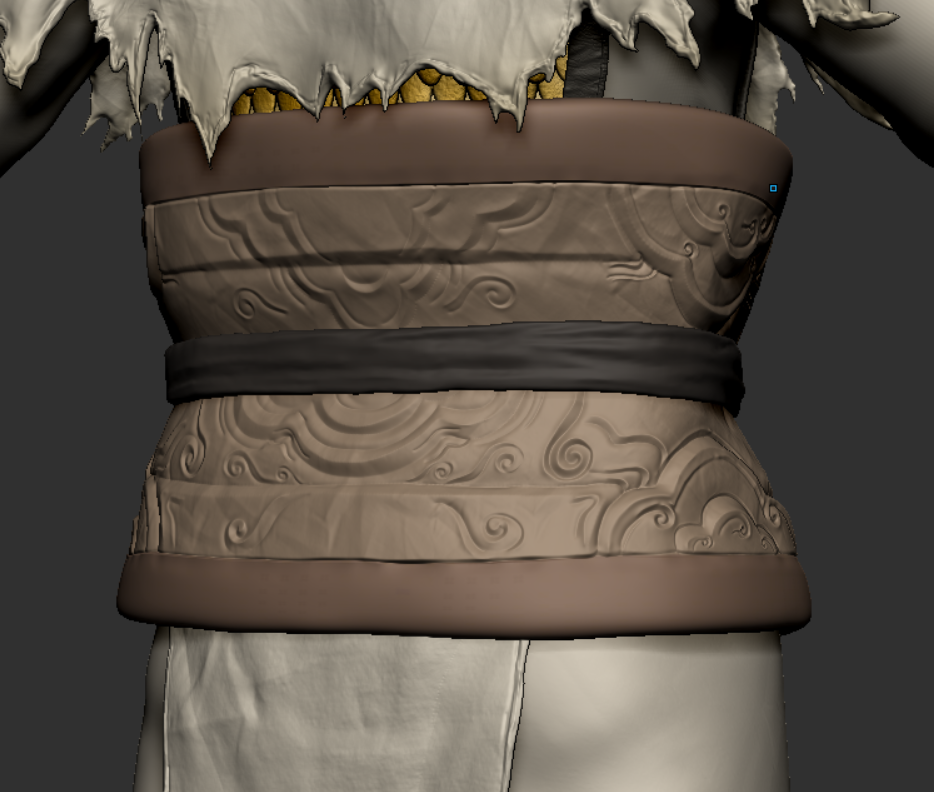
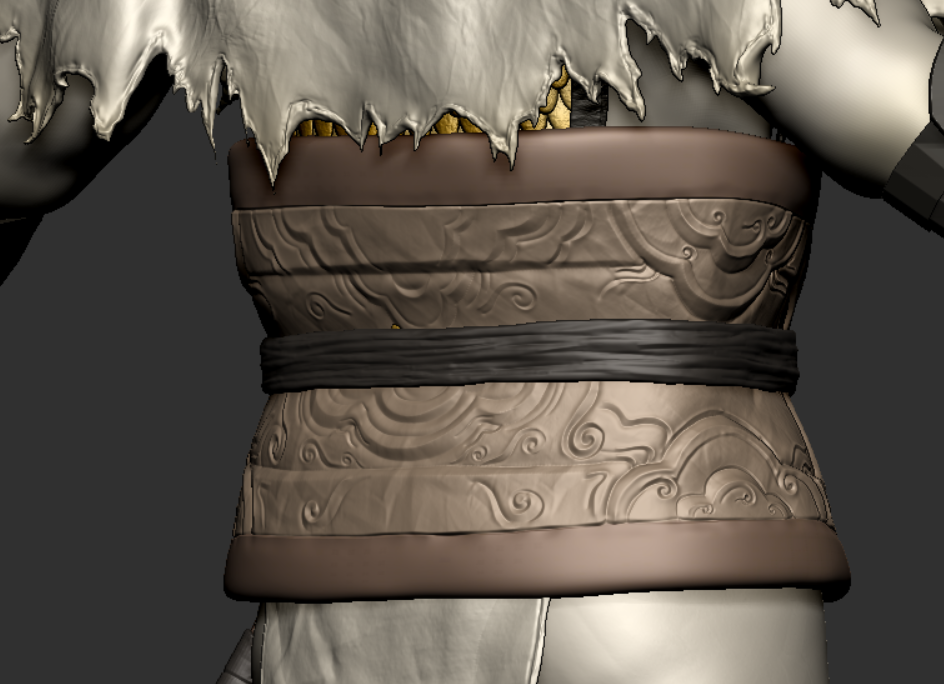
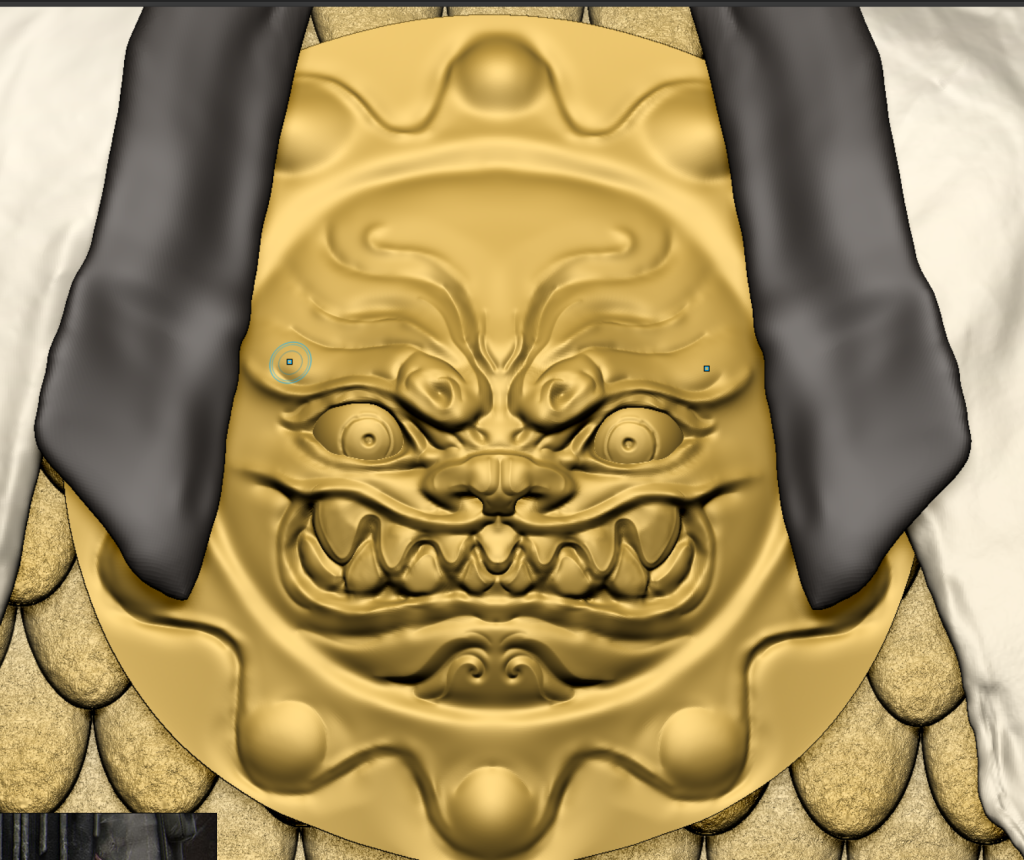
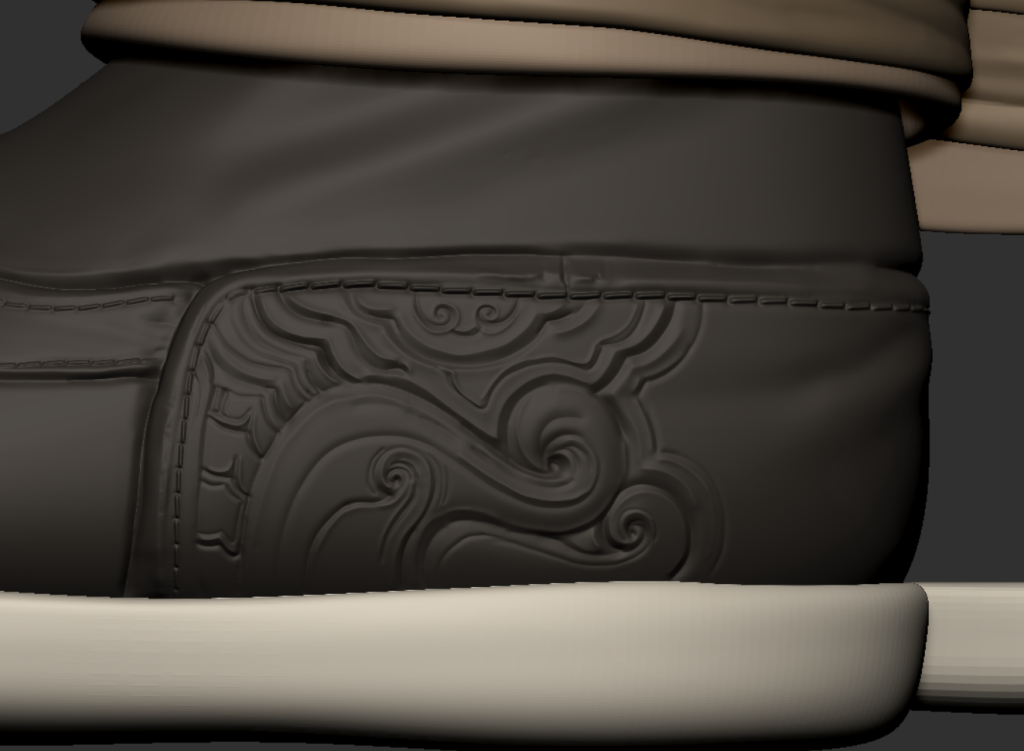
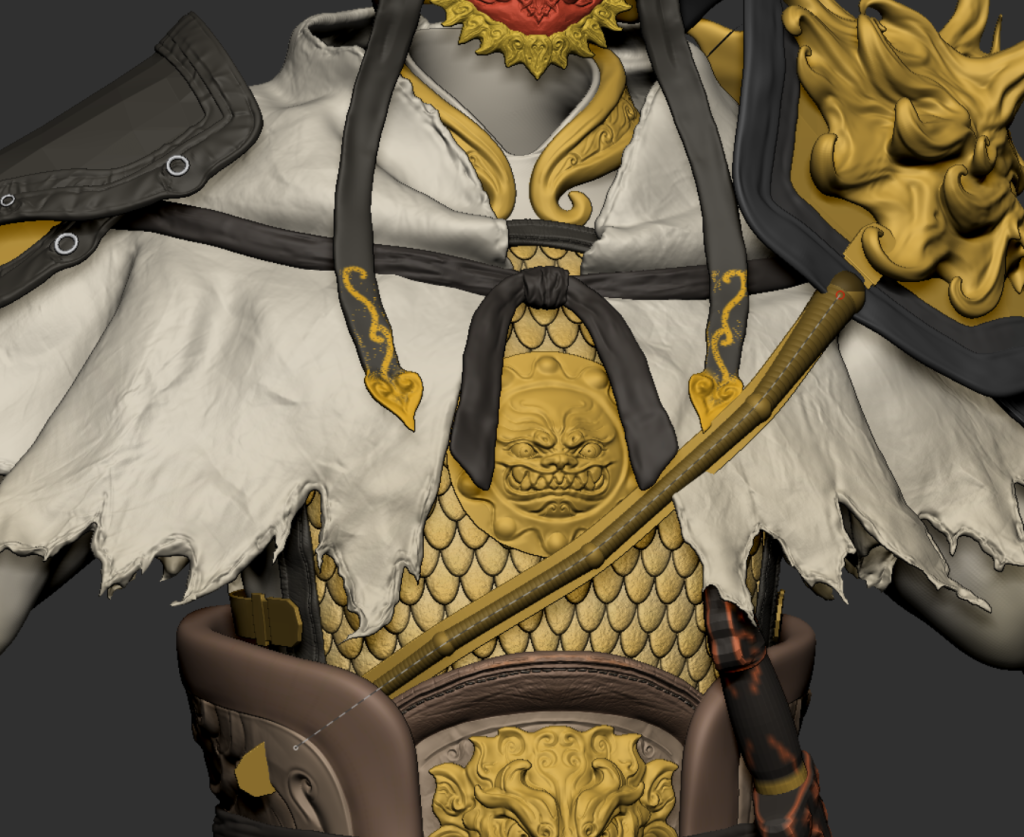
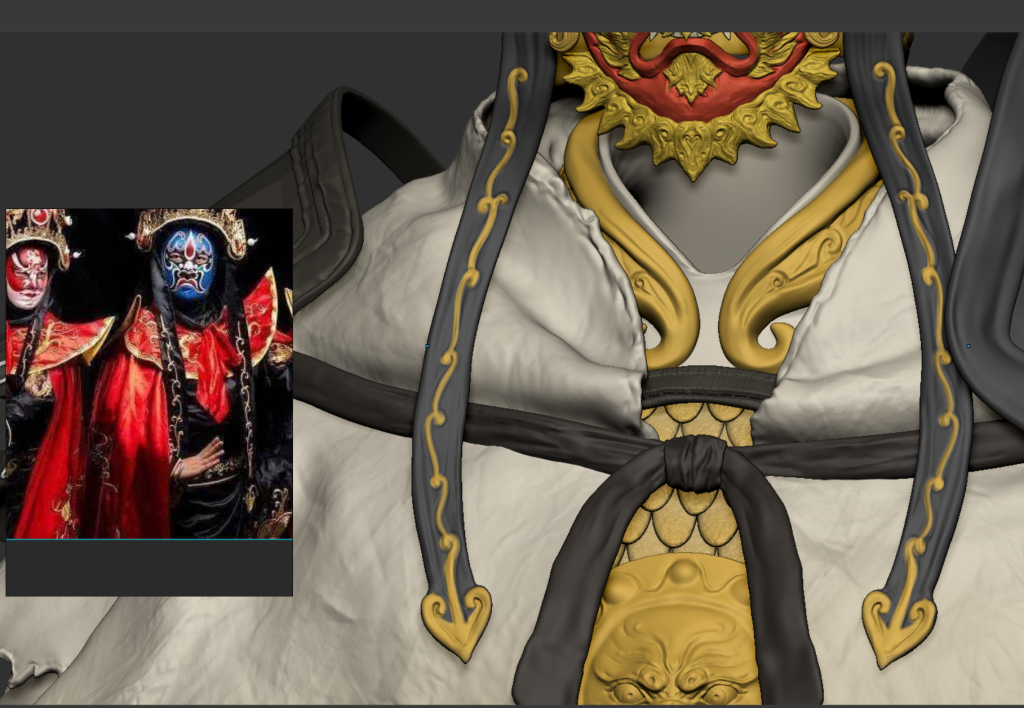
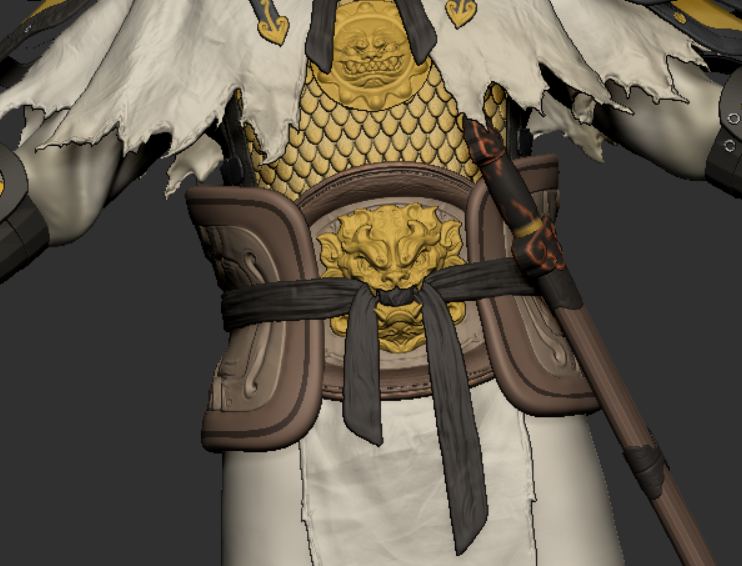
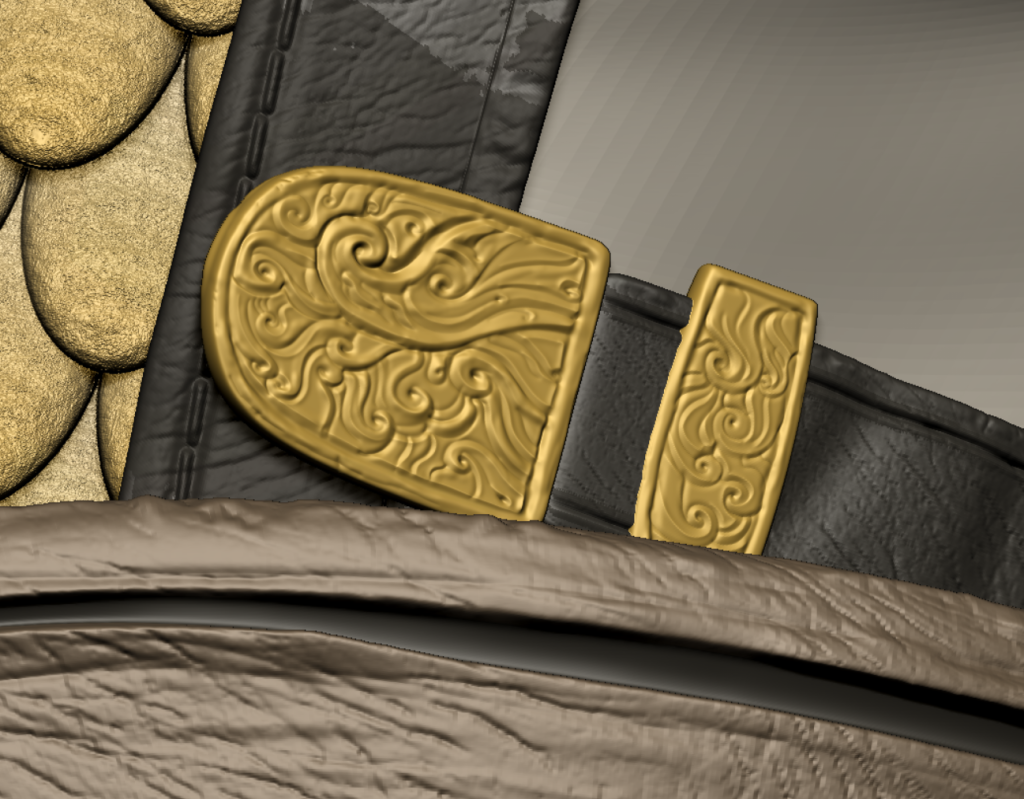
sculpture on the front of the waist

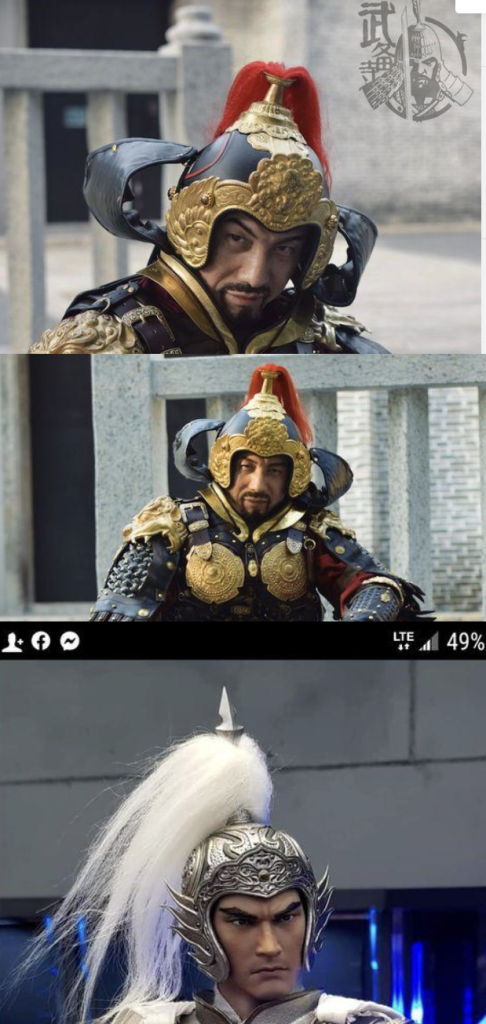
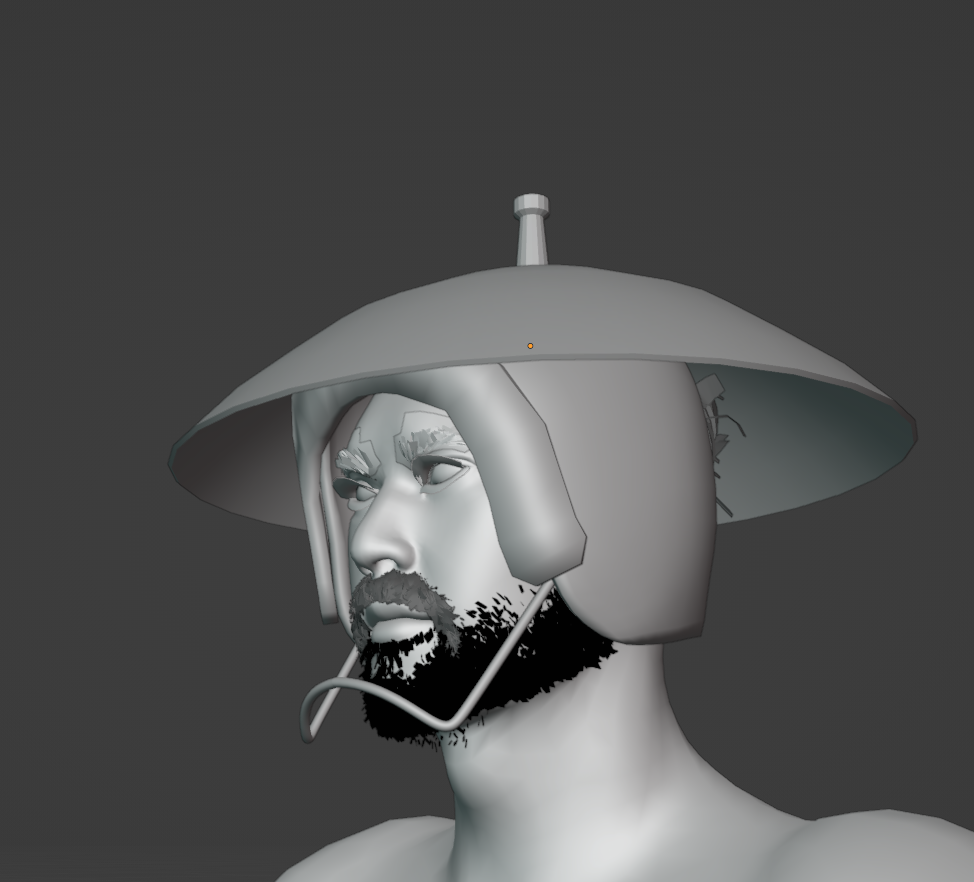
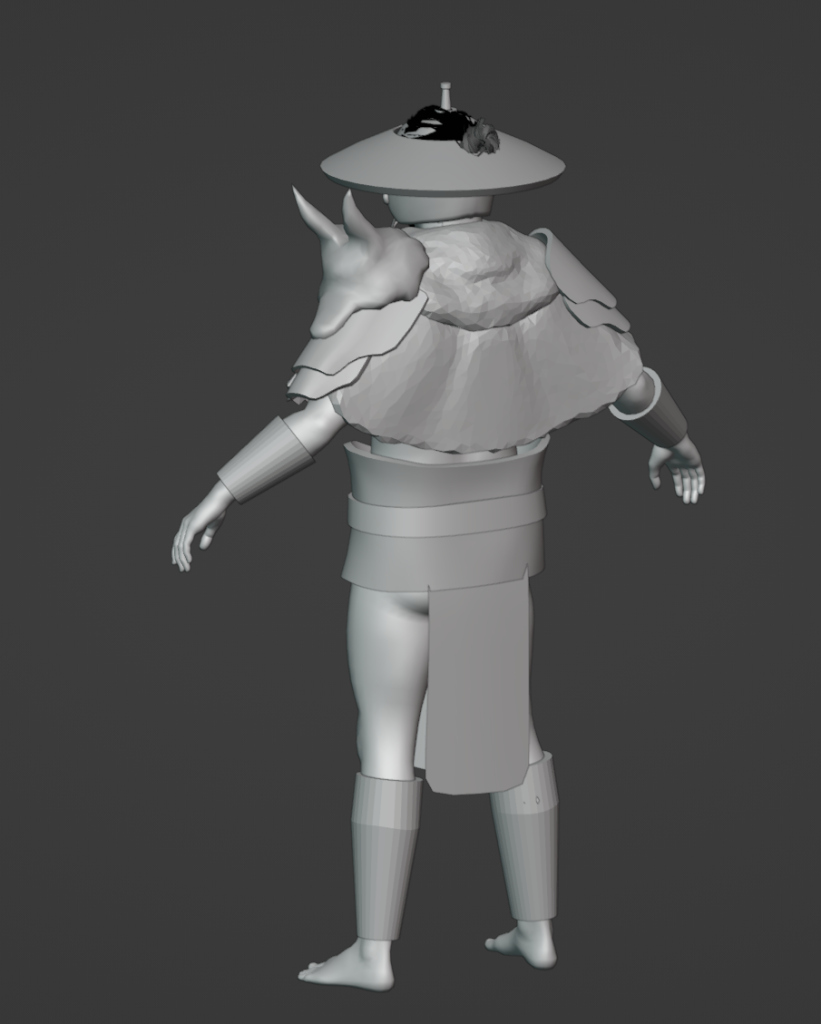
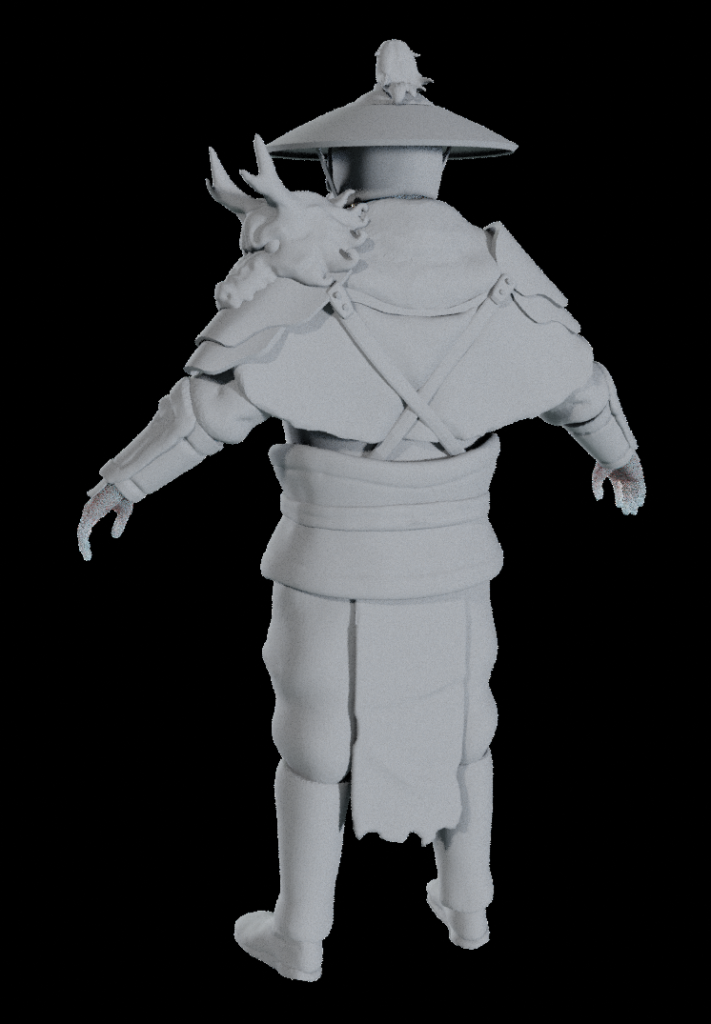
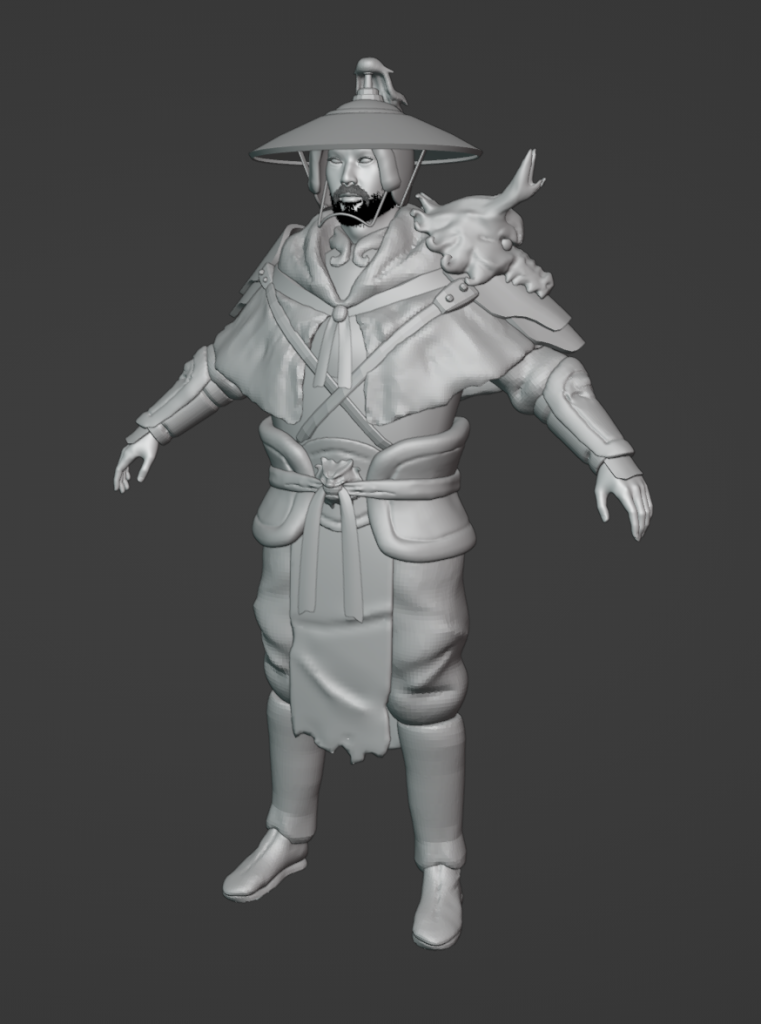
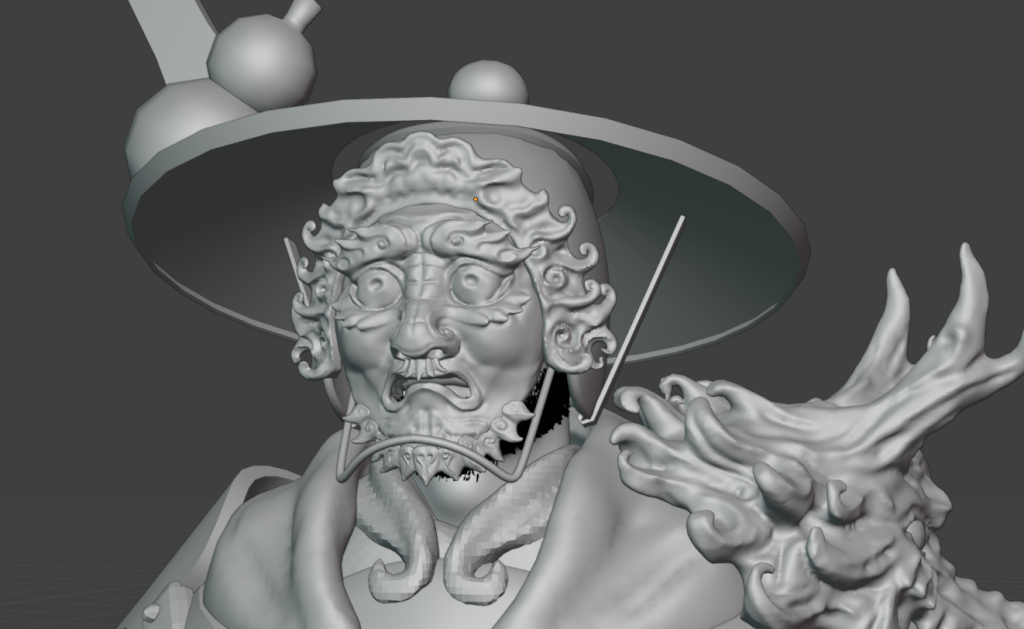
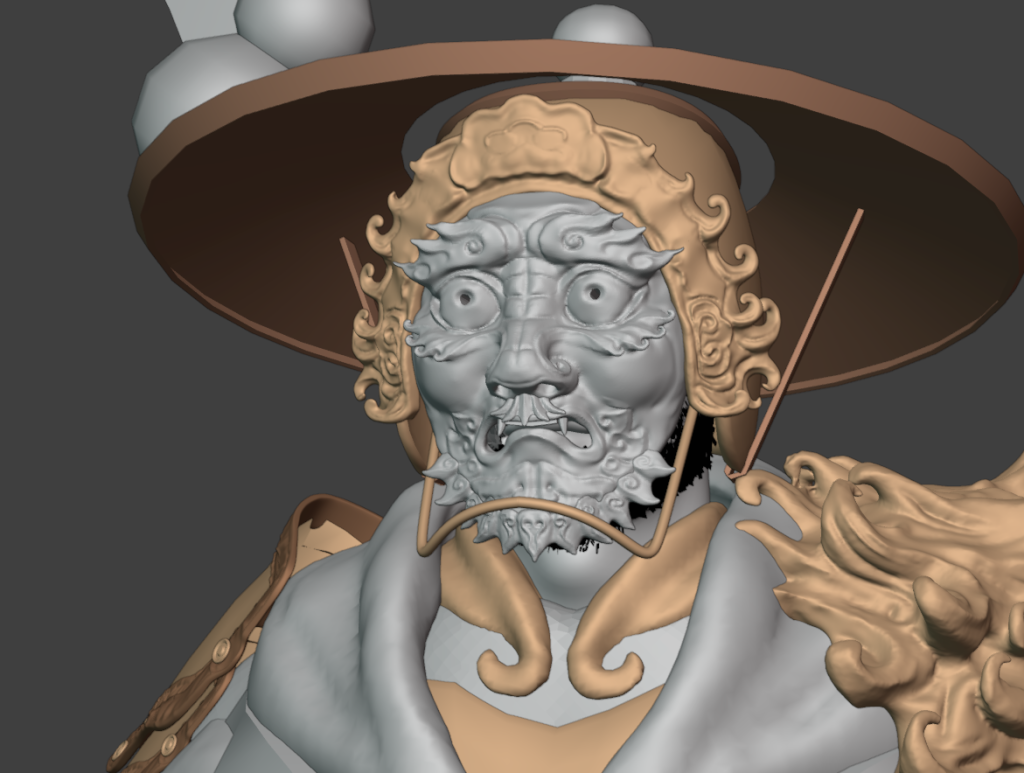
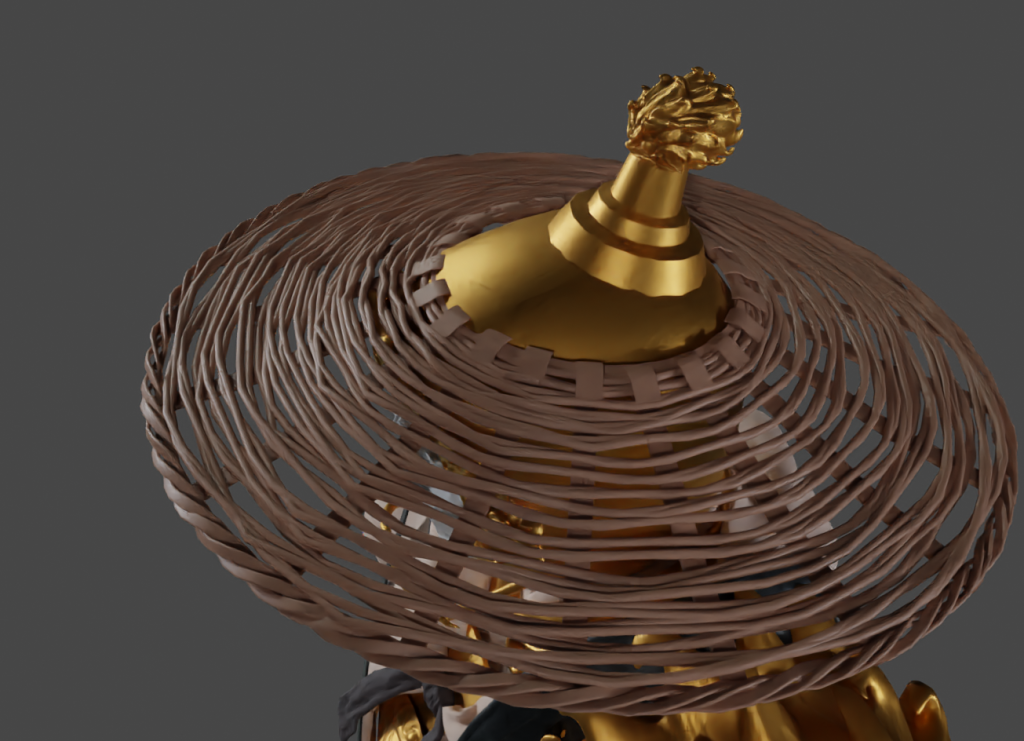
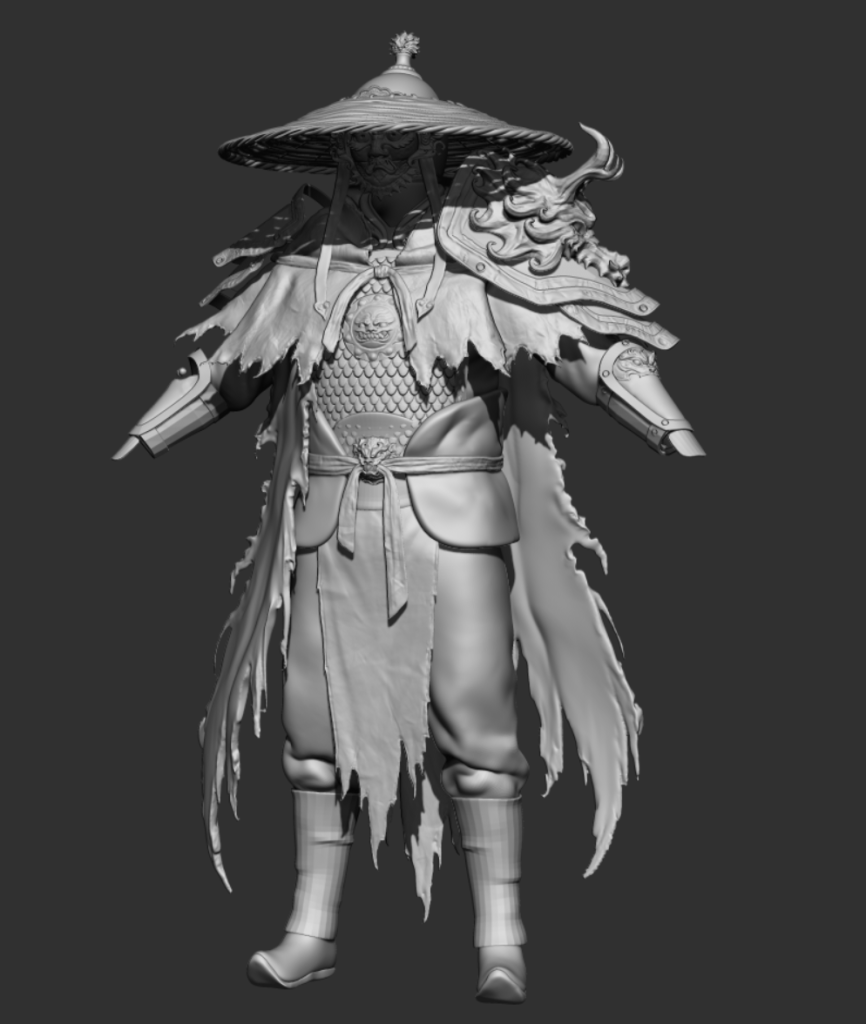
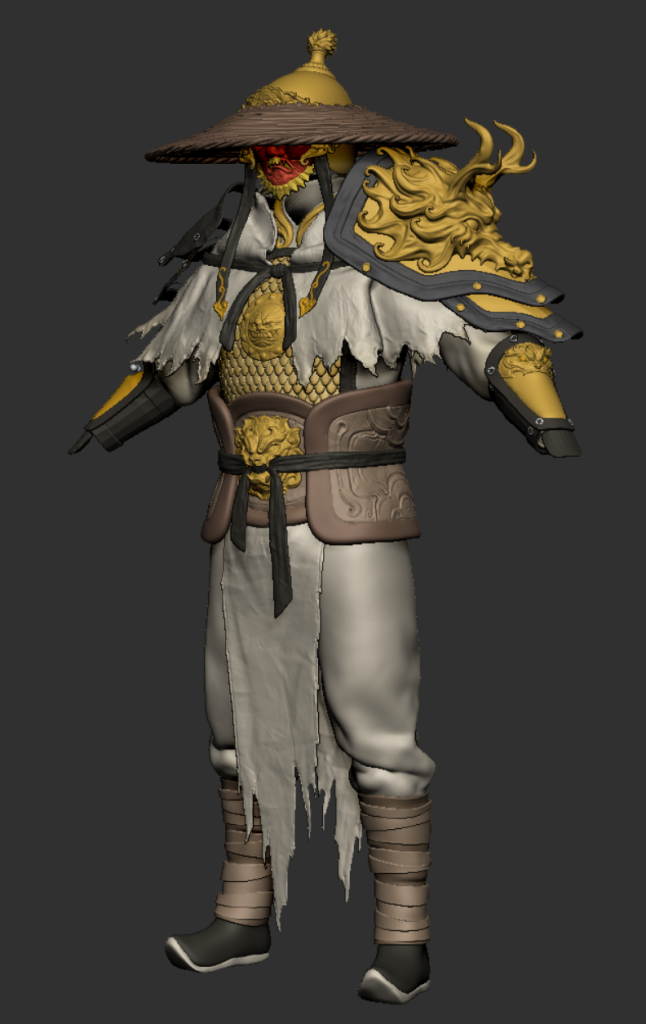
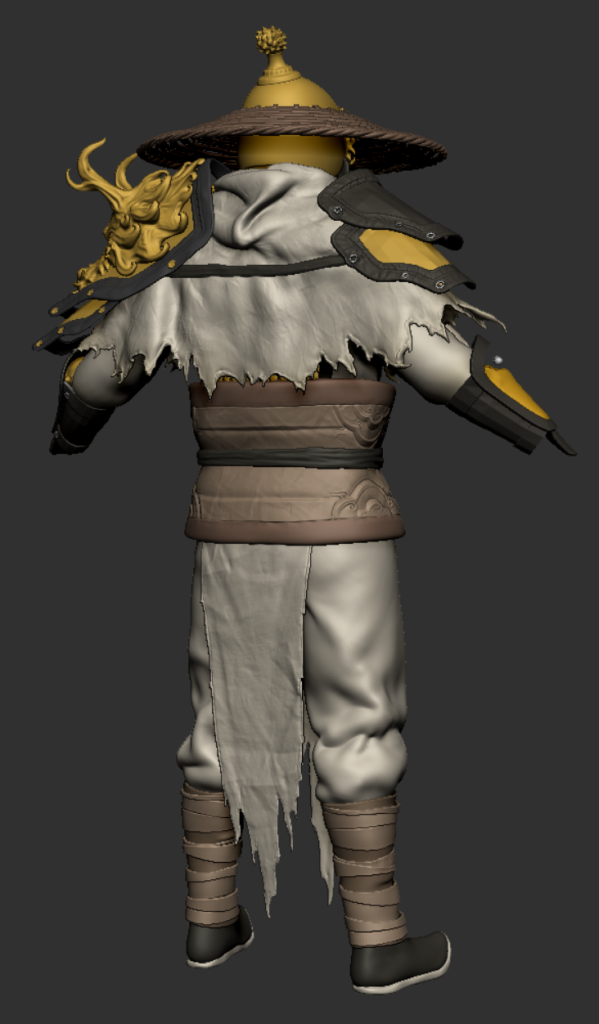
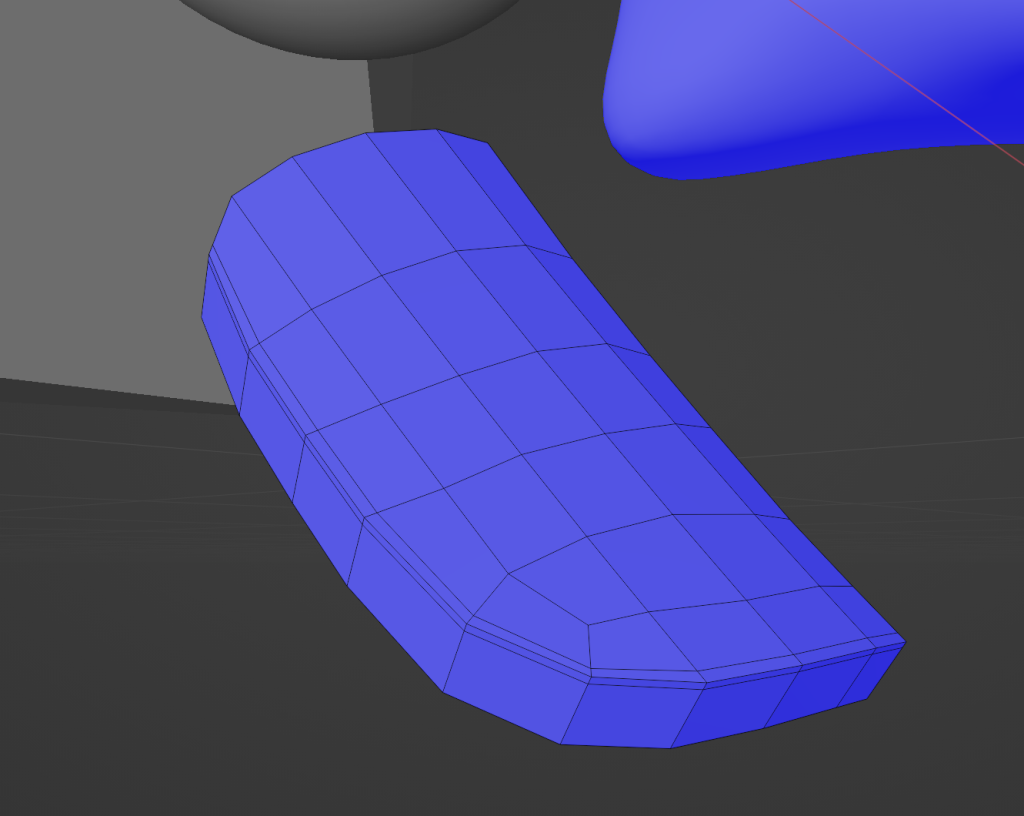
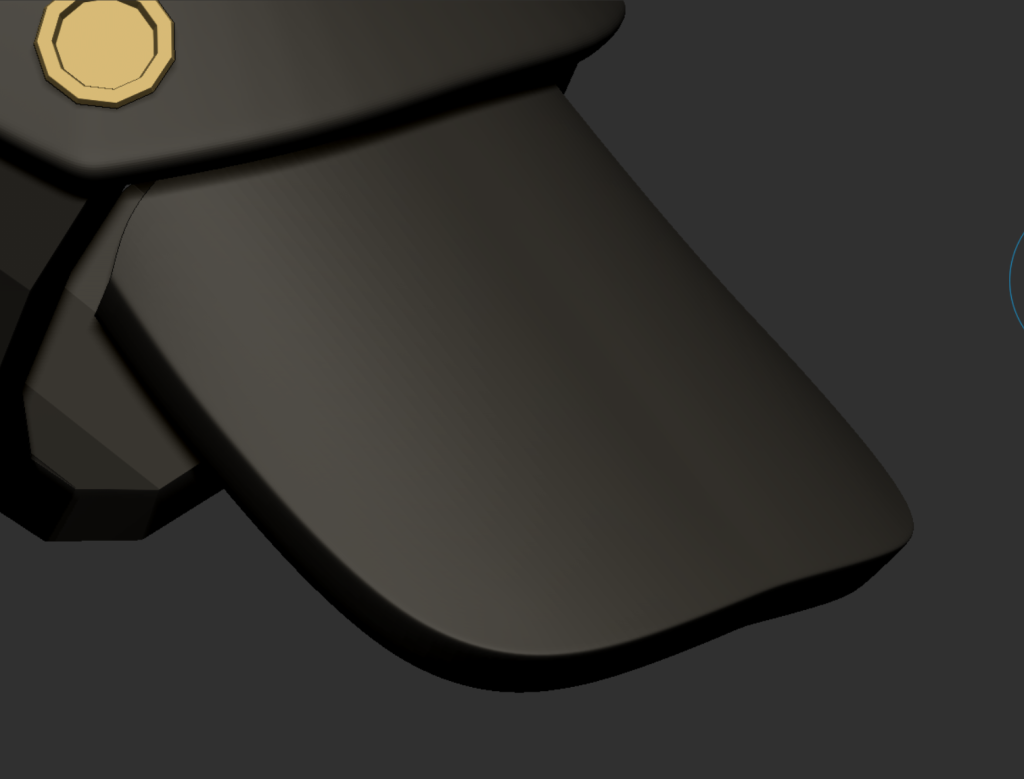
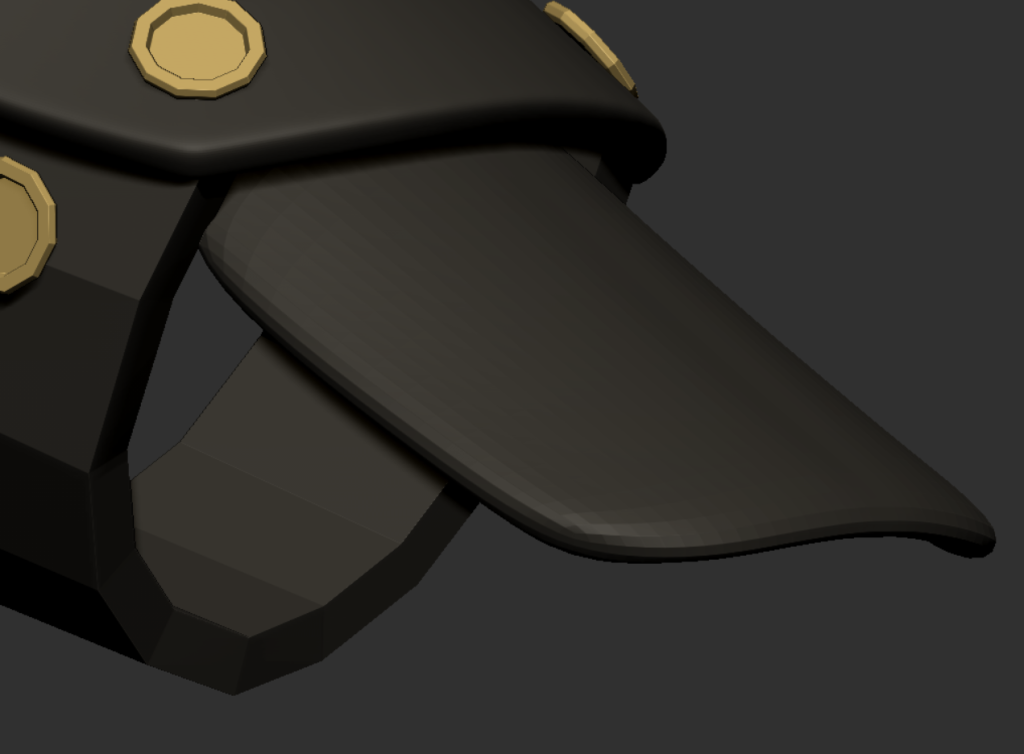
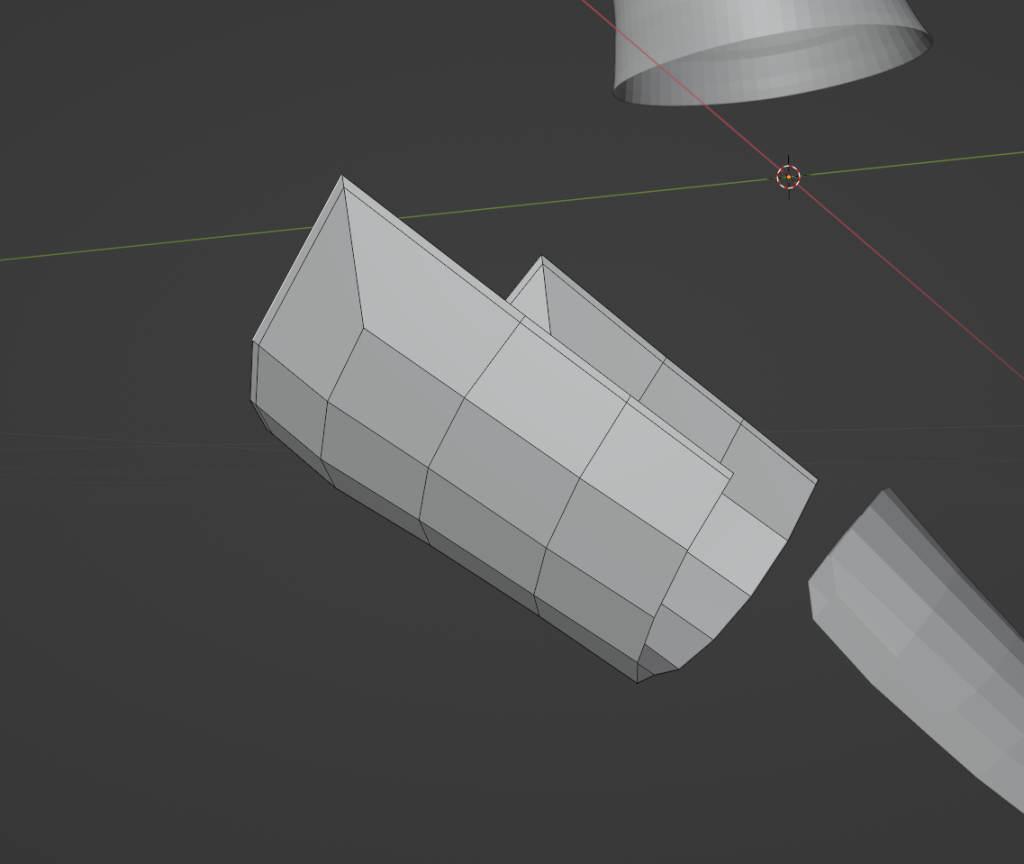
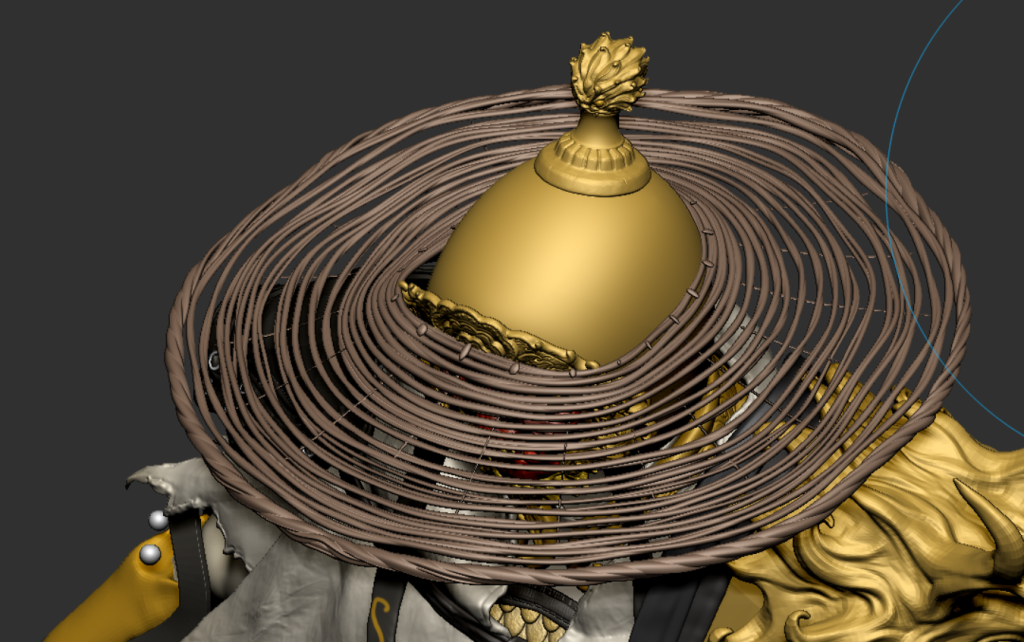
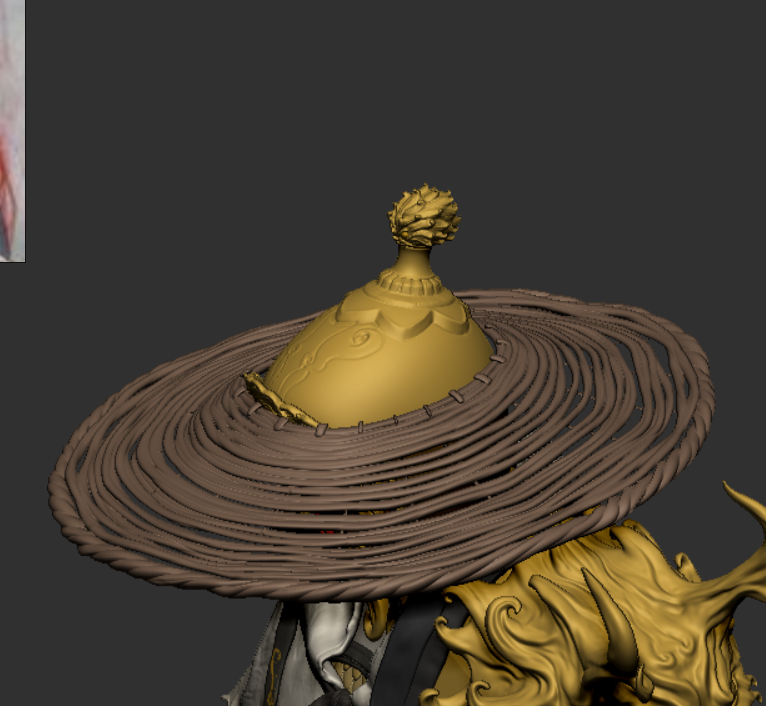
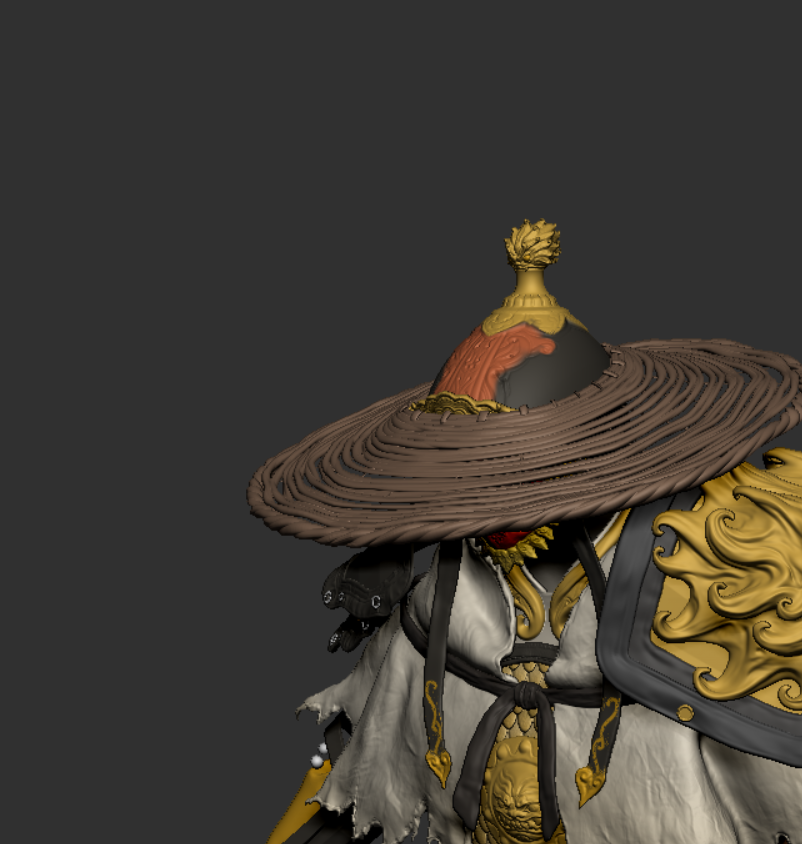
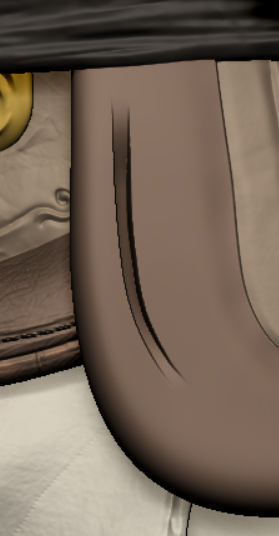
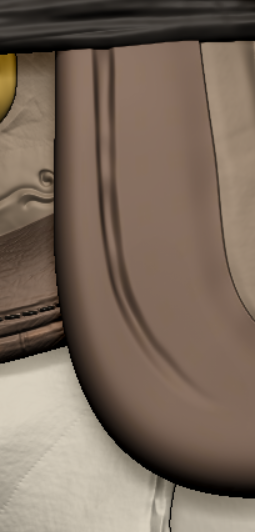
Comparison of bucket hat tilt with and without masks
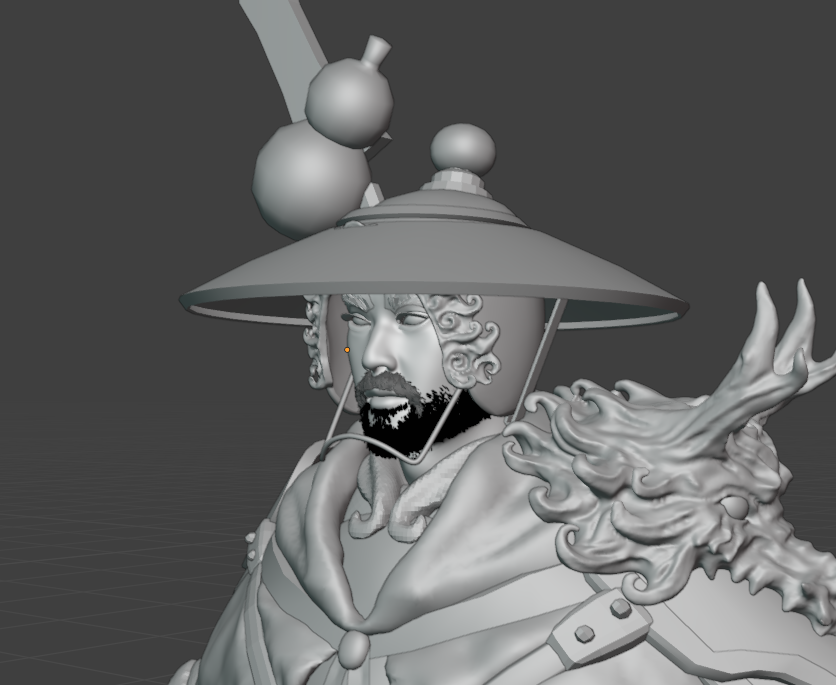
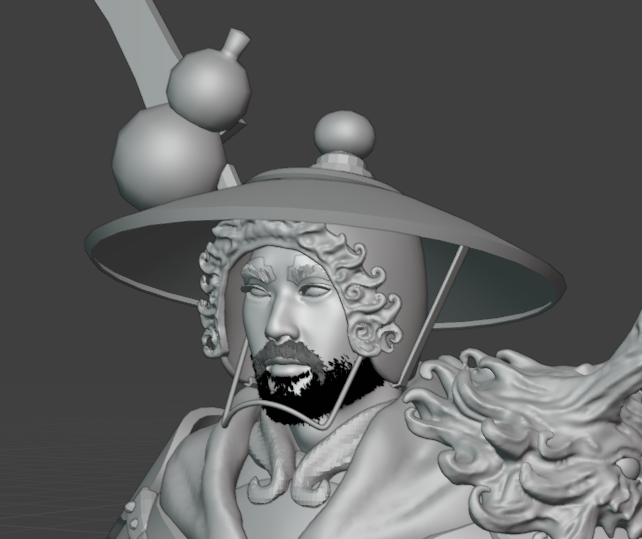
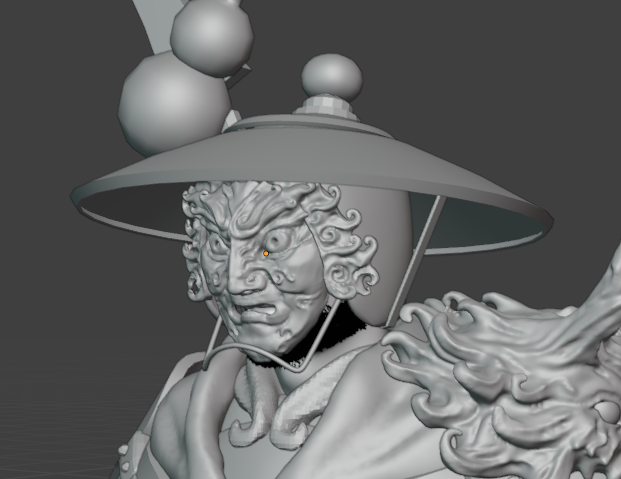
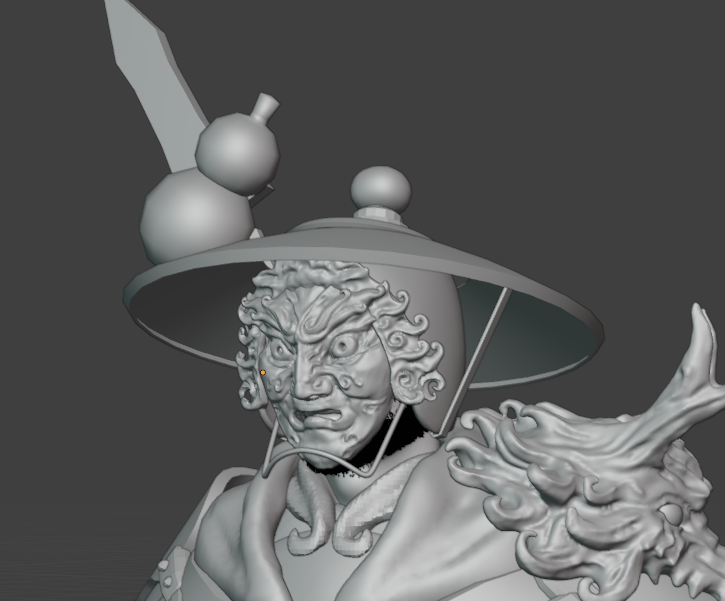
It’s better to show some of it more with a mask, and less without a bucket hat.
Might want to think about how to make it easier to adjust the position of the bucket hat so that the character can adjust it on their own
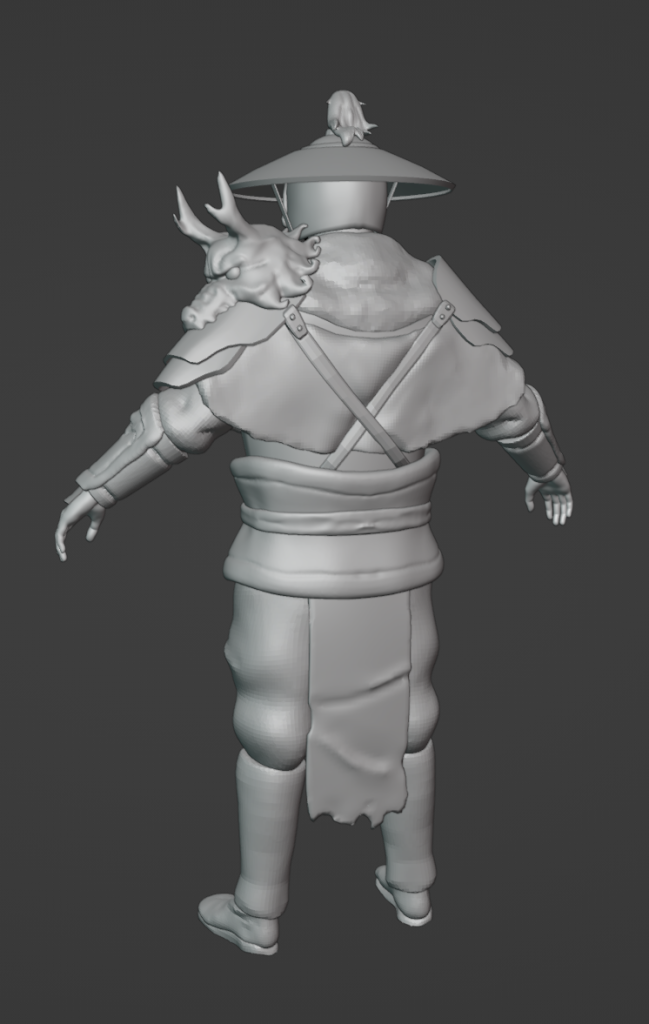
In addition to this, the width of the garments was adjusted and the cover-ups were placed in separate collections for easy comparison adjustments.
The internal body armor has little undulation seems odd and banal and may need further tweaking
17/12/23
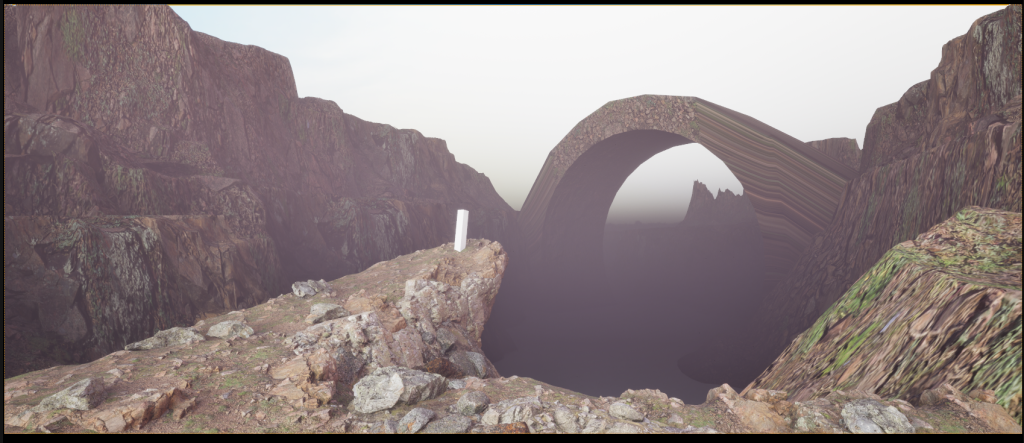
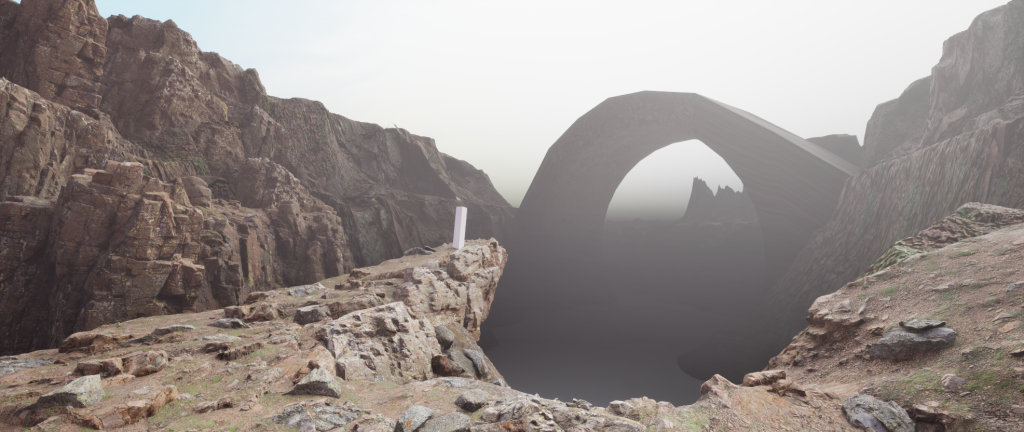
In the past two days, I purchased the online course to learn UE5 scenarios. Because of time constraints, I want to produce good work as soon as possible in the field of no not-so-good scenes, so this time I have created block out in UE5 and have a better understanding of the various settings of.
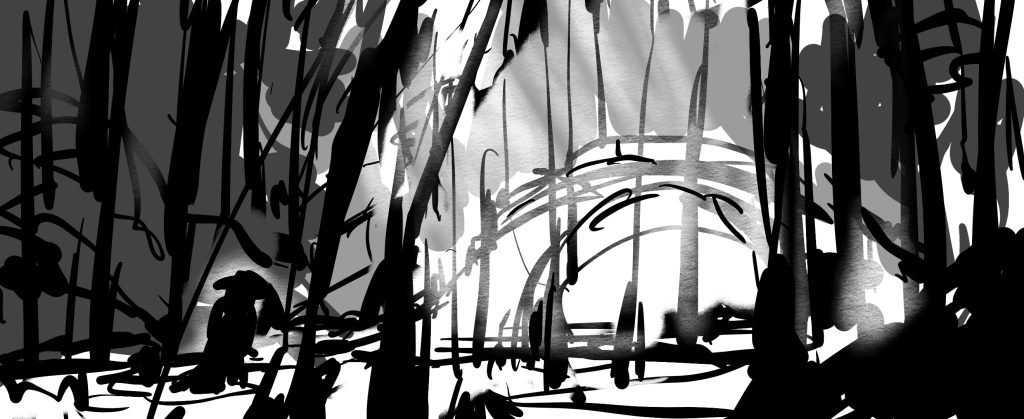
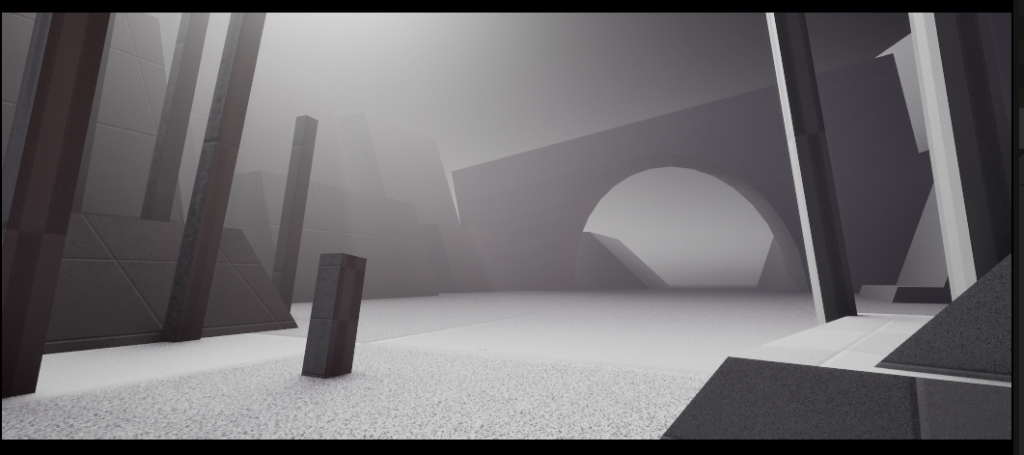
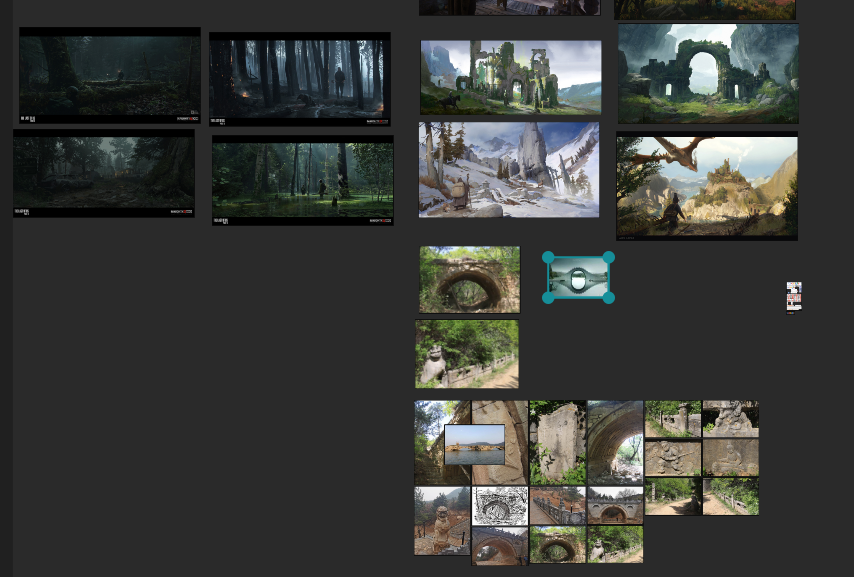
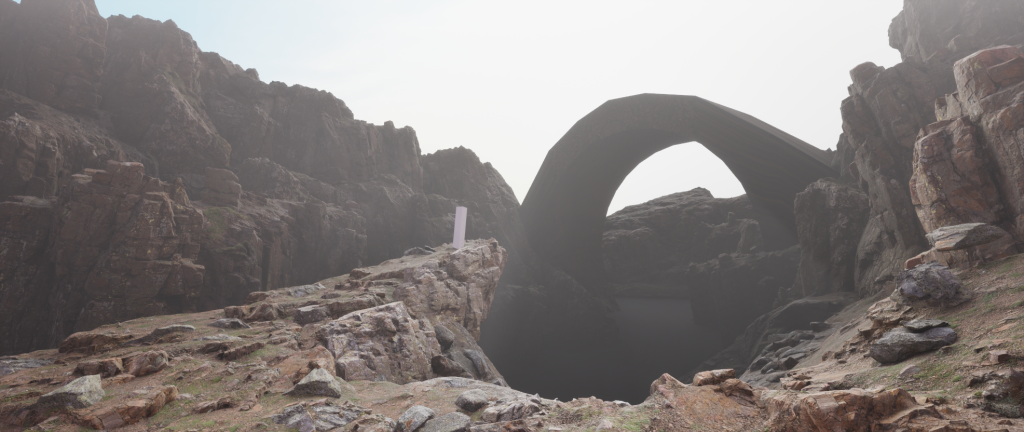
Since the scene I’m working on is a Fengdu scene and I’ve drawn the main character entering the seal from a blue-tinted forest in the storyboards, I’d like to make this scene feel similar to the landscape along the way and have the keystone be the crumbling arch bridge.
However, I must admit that because I was influenced by the course I changed what should have been flat ground to standing in the peaks of a mountain, and while this is not an uncommon element (I made a similar composition my sophomore year of college) I wanted to keep the online course as little of an influence as possible on my work.But it has to be said that the design makes for a more pronounced distribution of foreground…
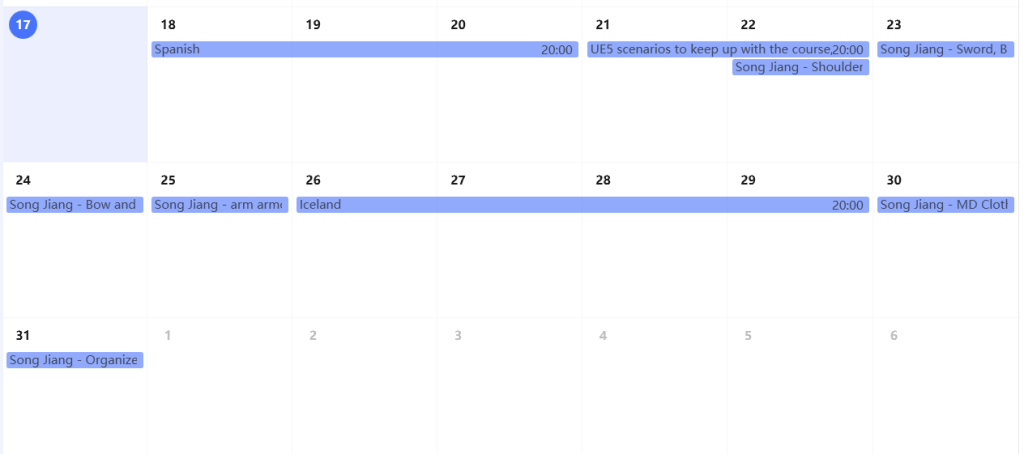
I’m going to be traveling to Spain for the next three days, but I’m worried about my progress, worrying too much about whether or not I’ll be able to finish it and letting my work go poorly, so until then I’m going to organize my workflow for the rest of the year.
Currently for the characters what I need to do:
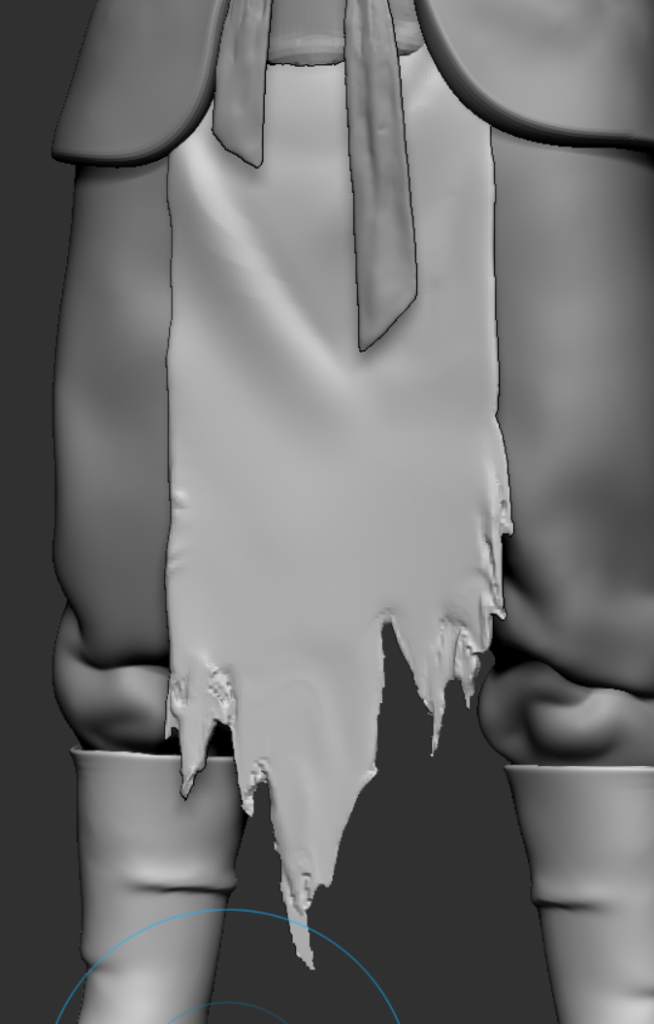
Stop further refinement for the already sculpted medium molds for now.
Next to focus on: the specific design of the shoulder armor, the buttons on it and how it links to the waist.
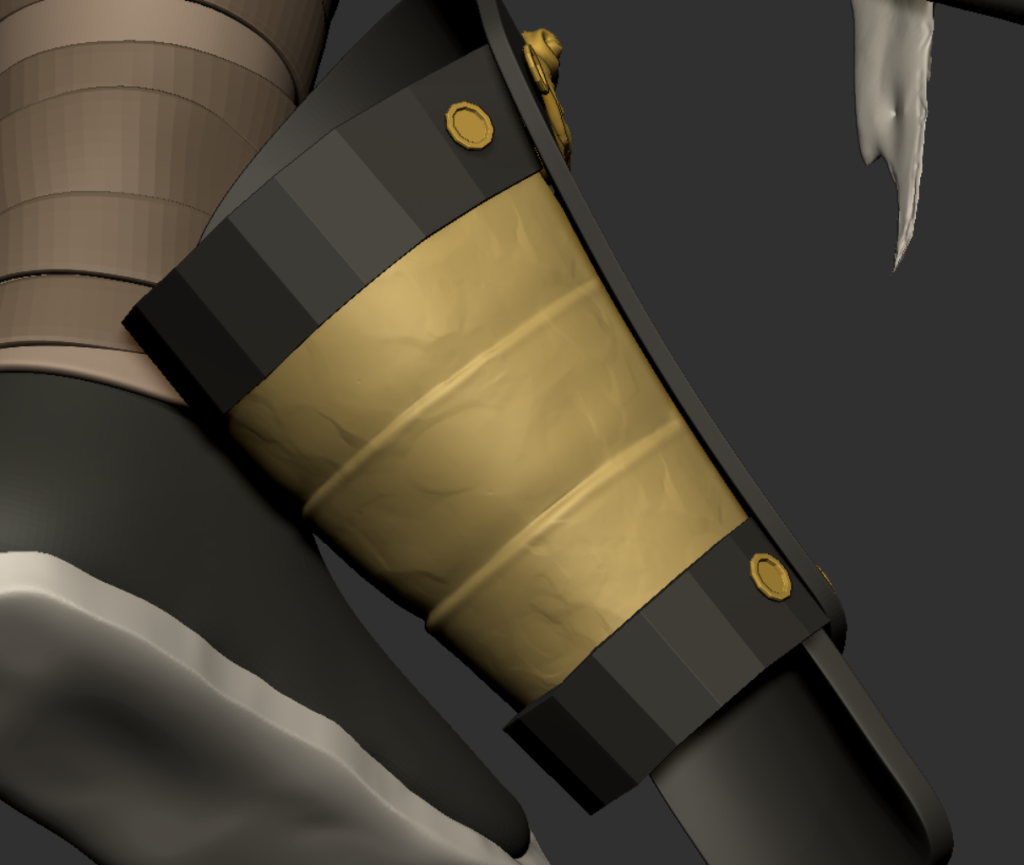
Arm armor medium mold and design.
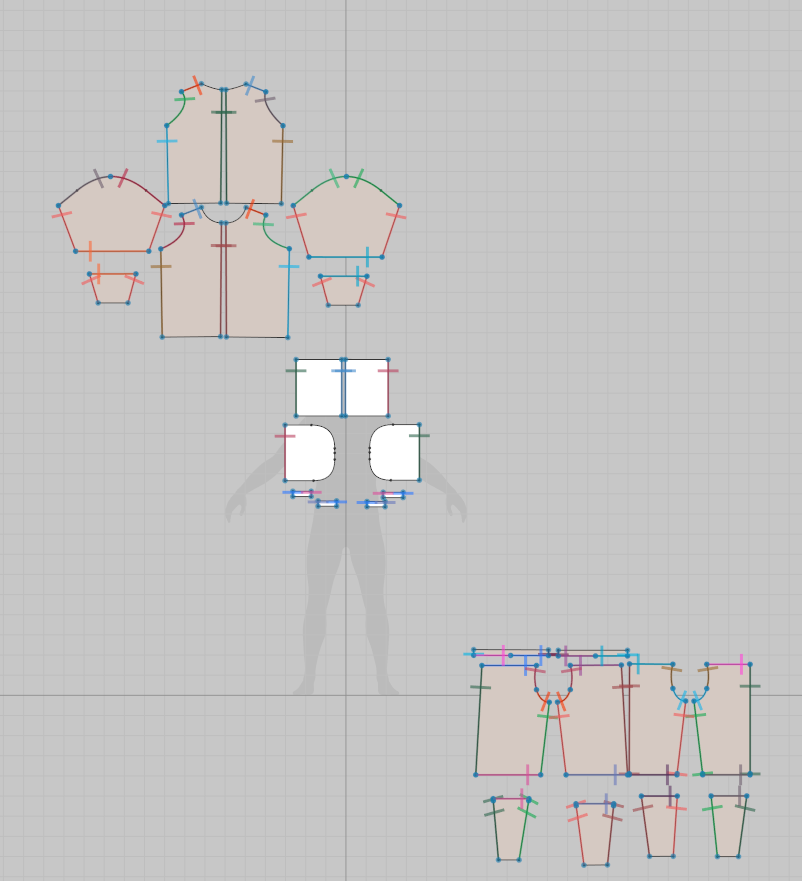
Cloth sculpting
Clothing production, may need to use MD
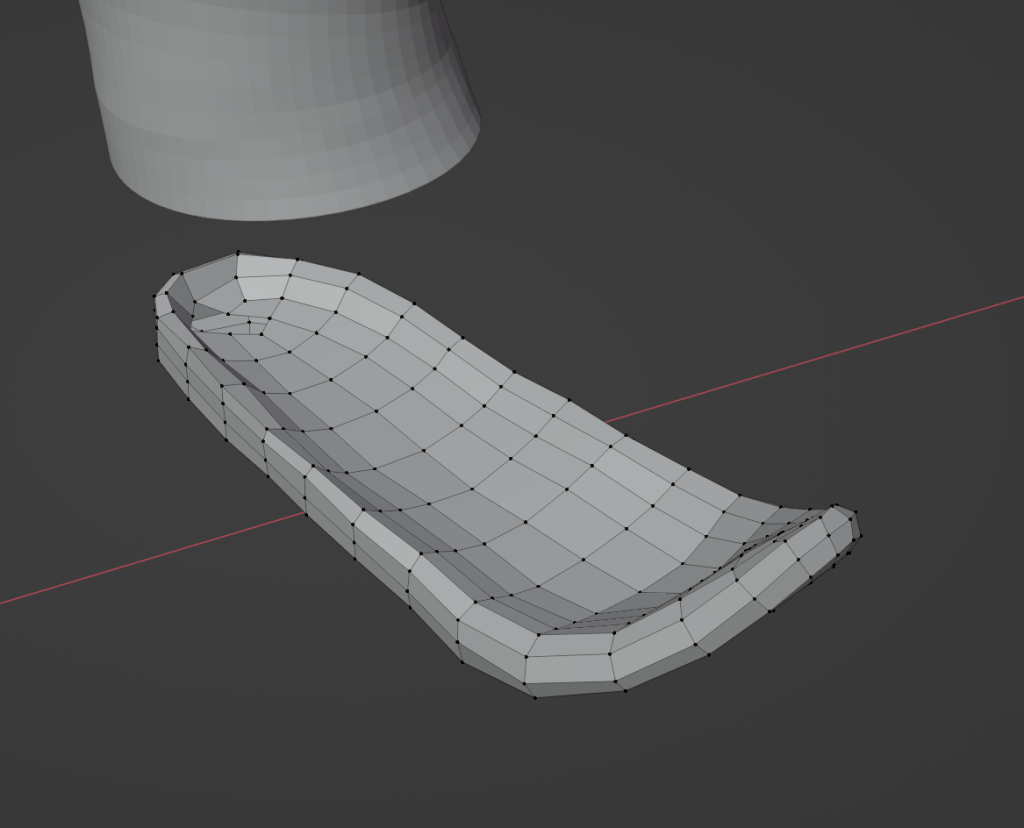
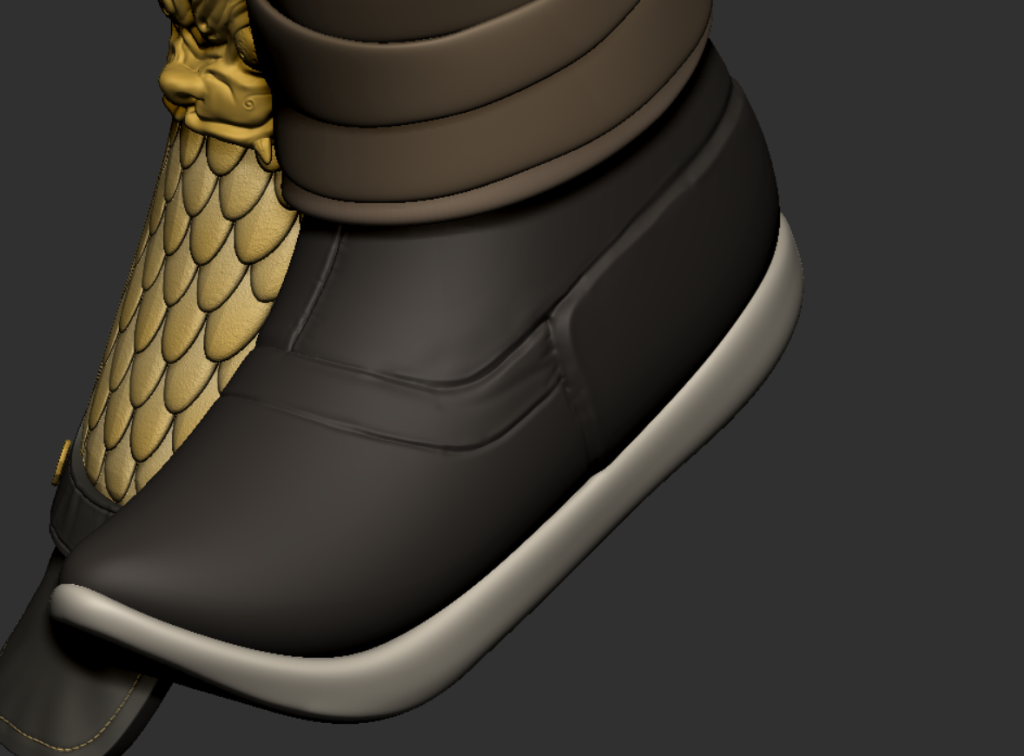
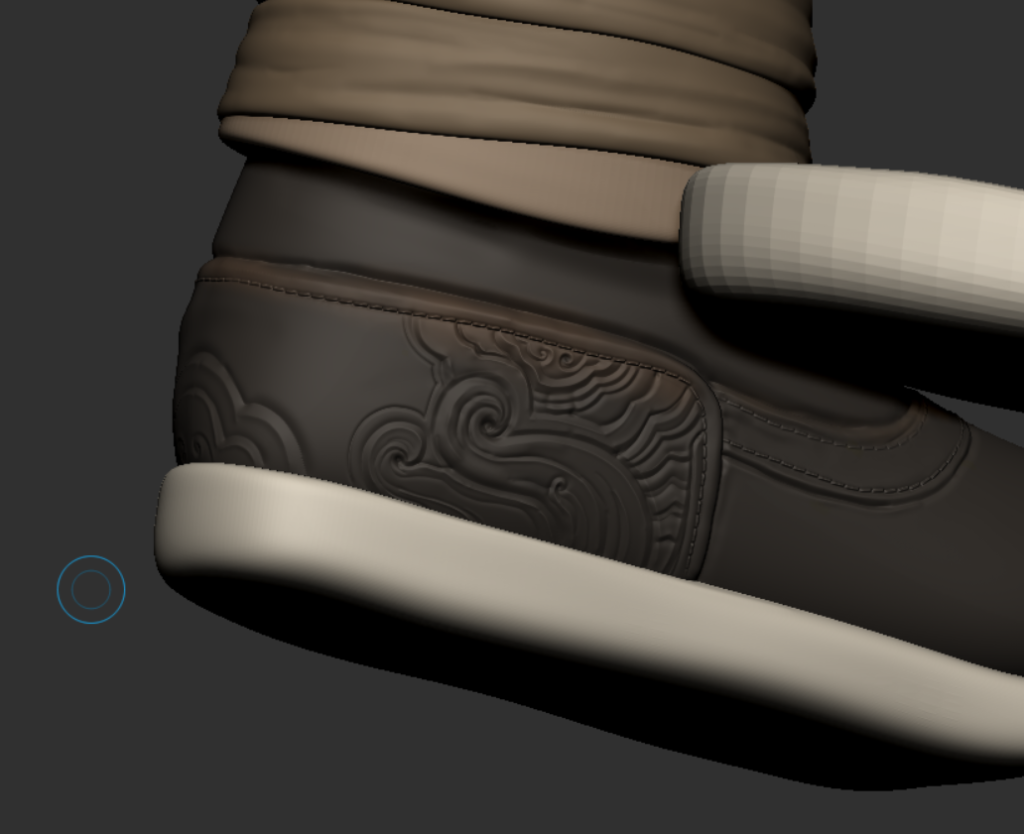
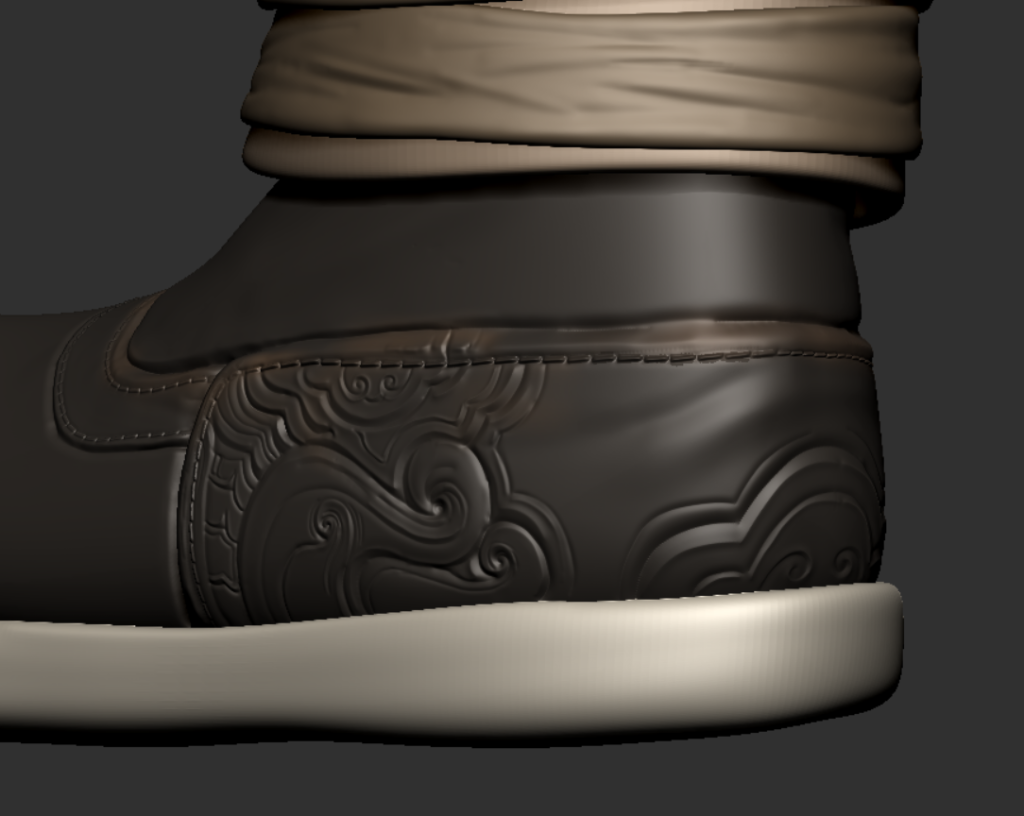
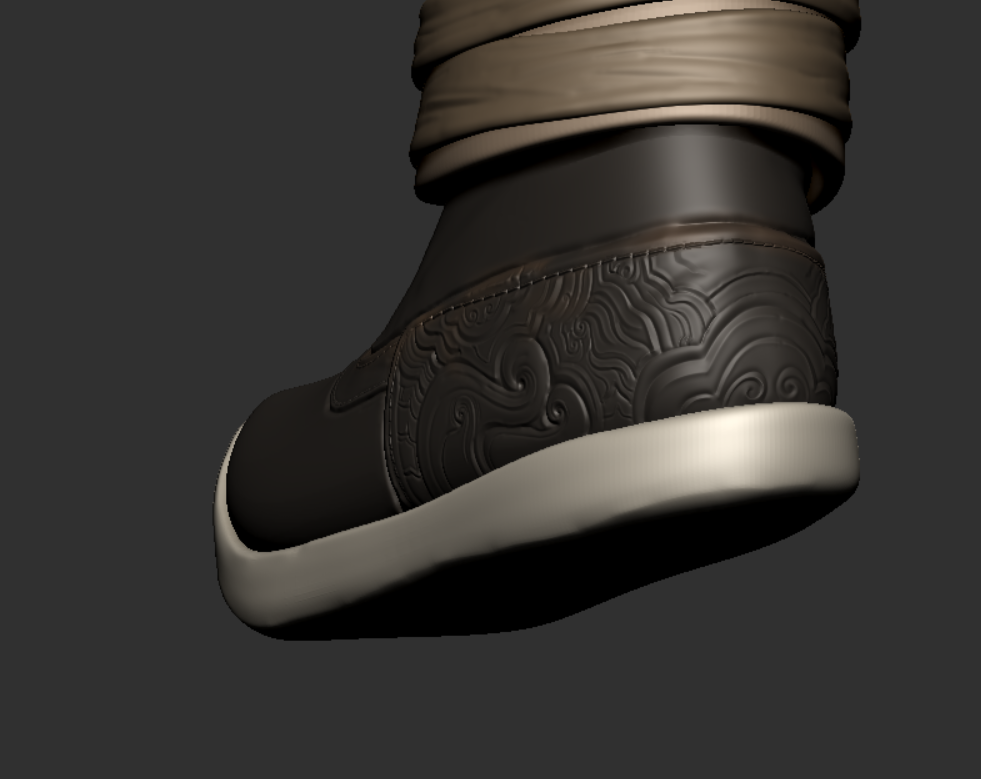
Medium mold of shoes for further detailing
Trouser legs as well as cloth strips.
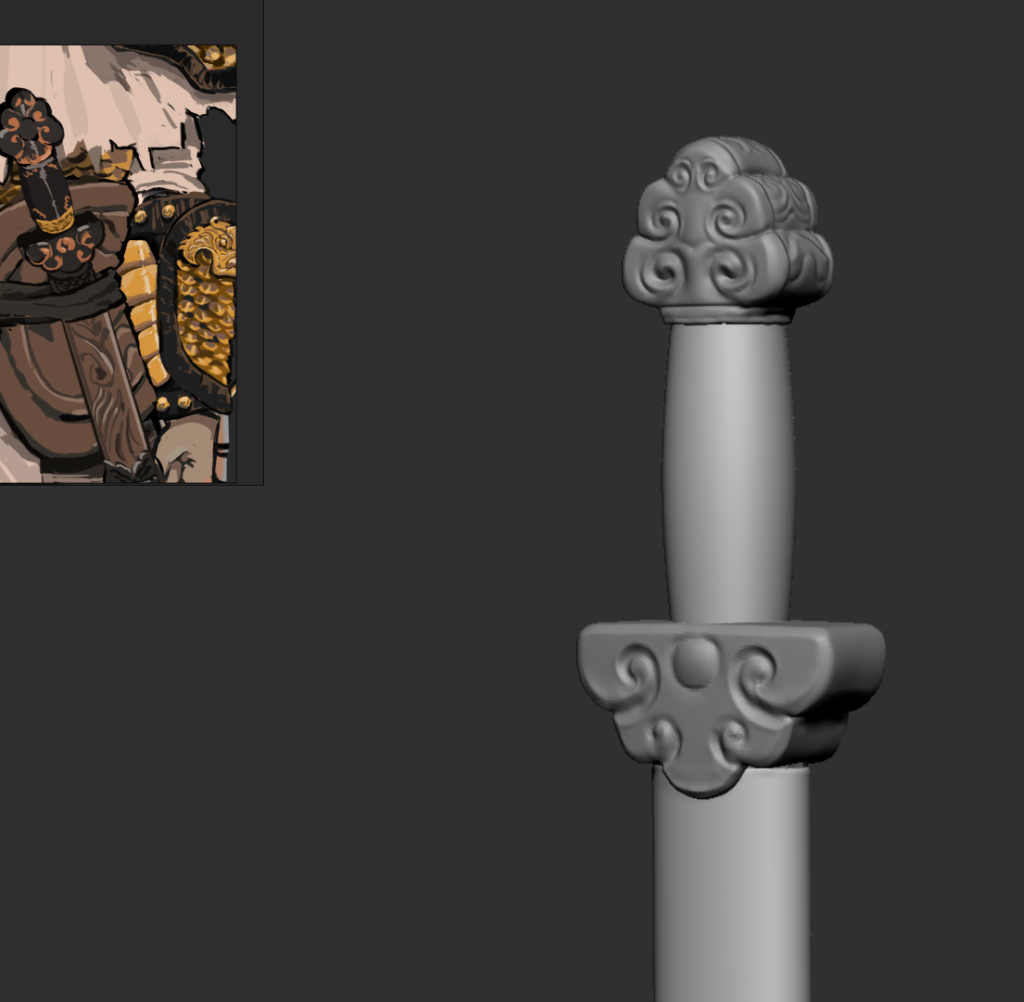
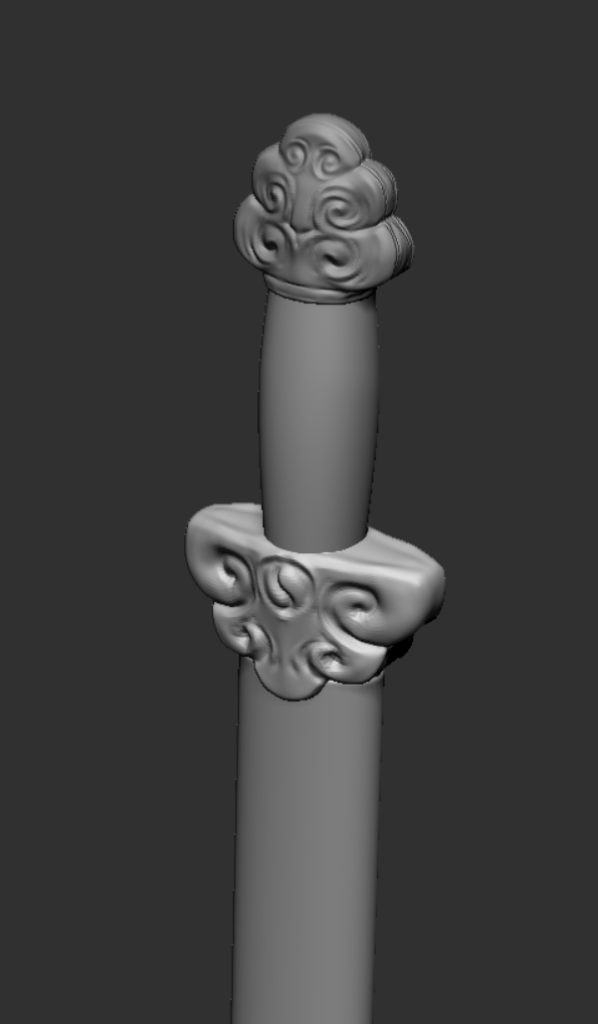
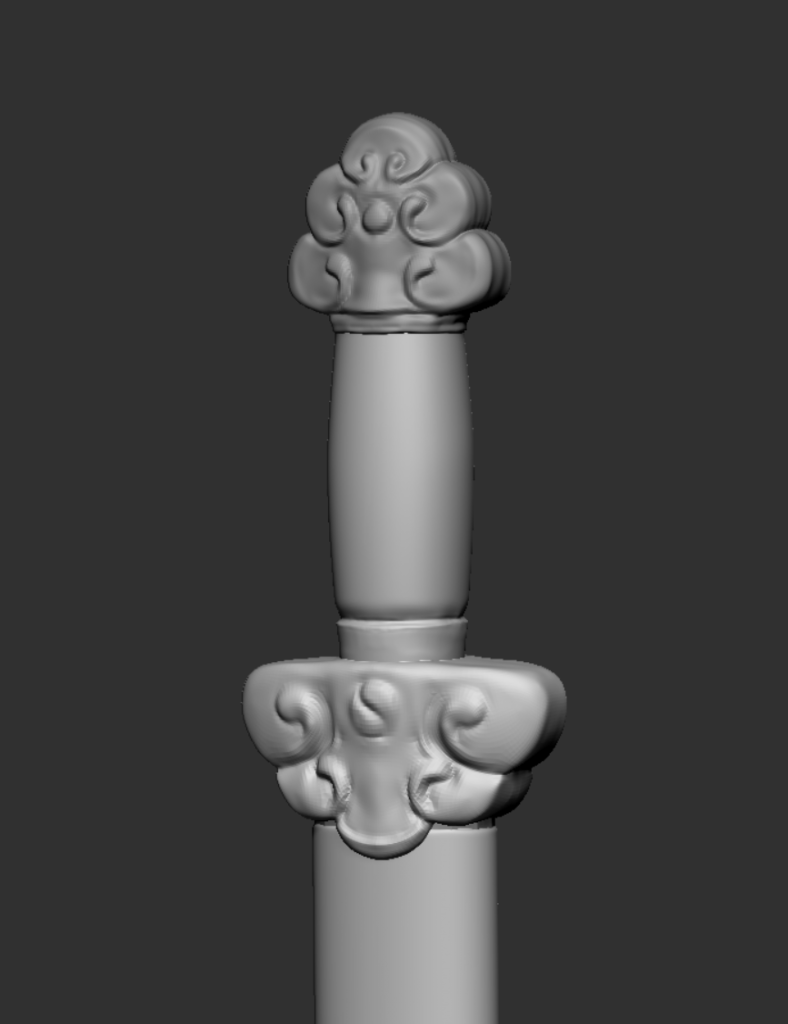
Weapons to be further designed and made, and how they are to be worn on the body
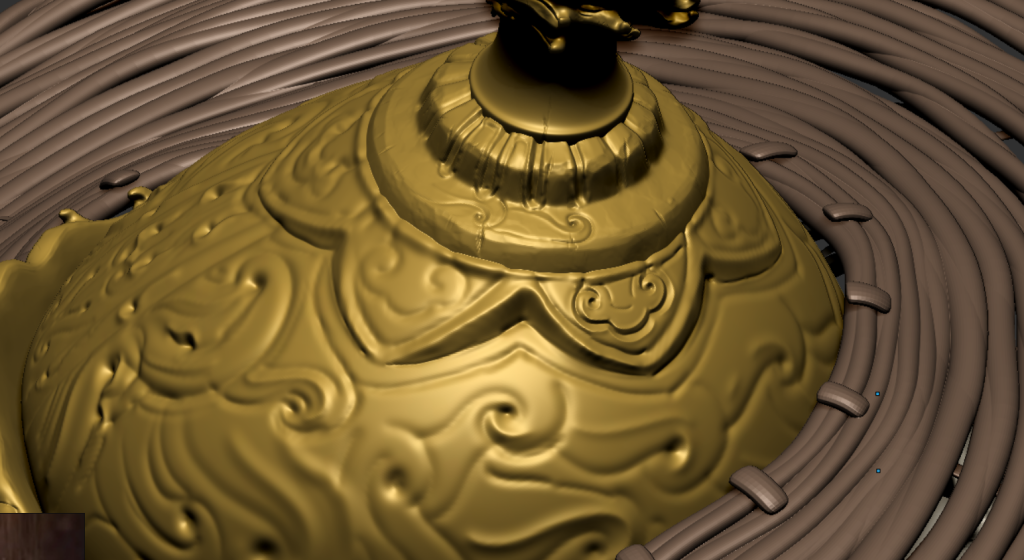
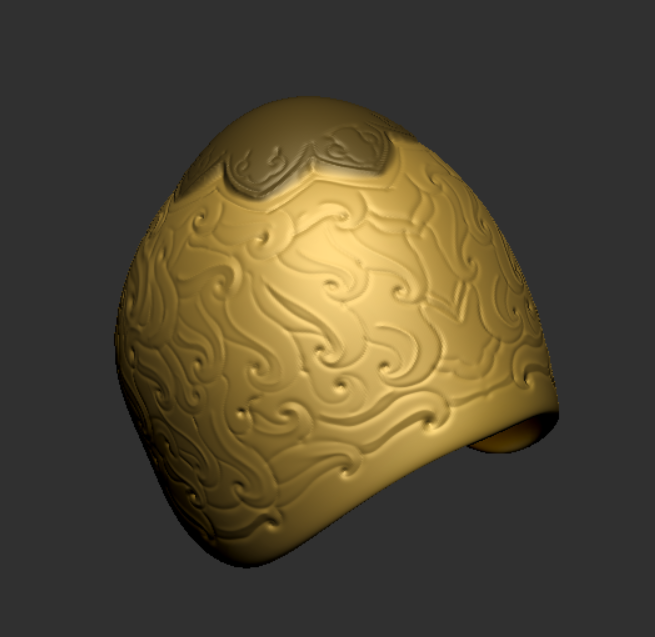
Helmet design.
Chest armor design as well as sculpting
The two remaining masks
Once this is done, it needs to be all topologized and then the high mold made.
Then make the materials and go to CC4 to bind the bones.
This way the character is officially complete and I need to revisit my timeline as to whether or not I’ll be able to make a second character, but for the scenes, since I’m mainly using Bridge material, I don’t need to worry too much.
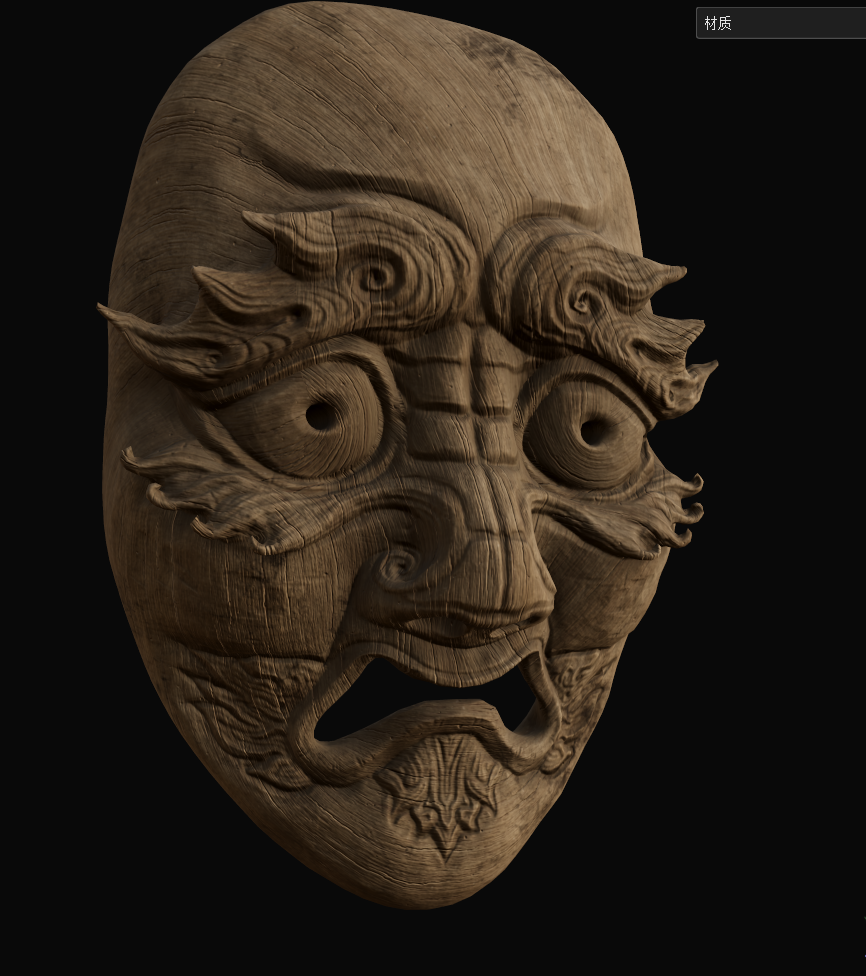
At the same time, I made the mask of Gong Sun Sheng
22/12/23
I thought about the material and style of the shoulder armor in detail, and I found that if I wanted the shoulder armor to “bind” to the shoulders, I needed to fit the armor or body “collision body”, and then modify the cloak or clothing accordingly.
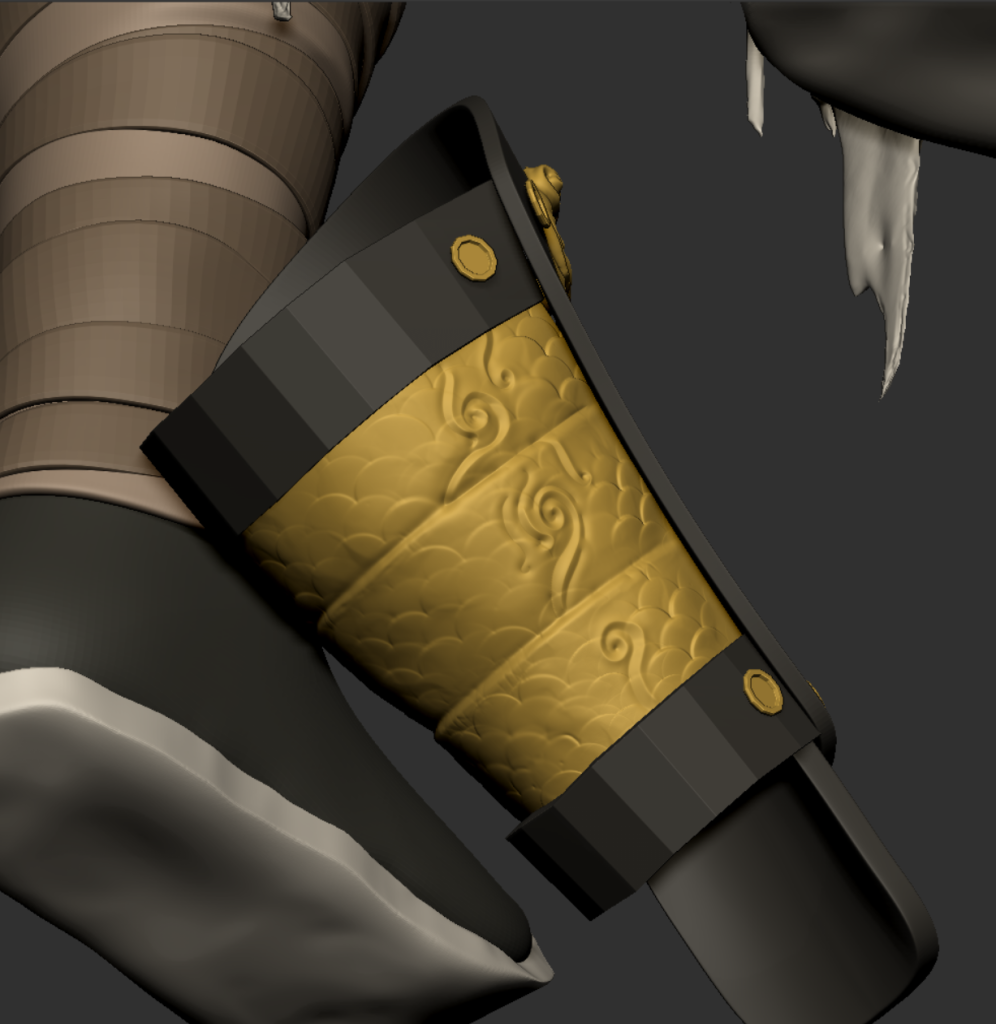
Engraving according to design
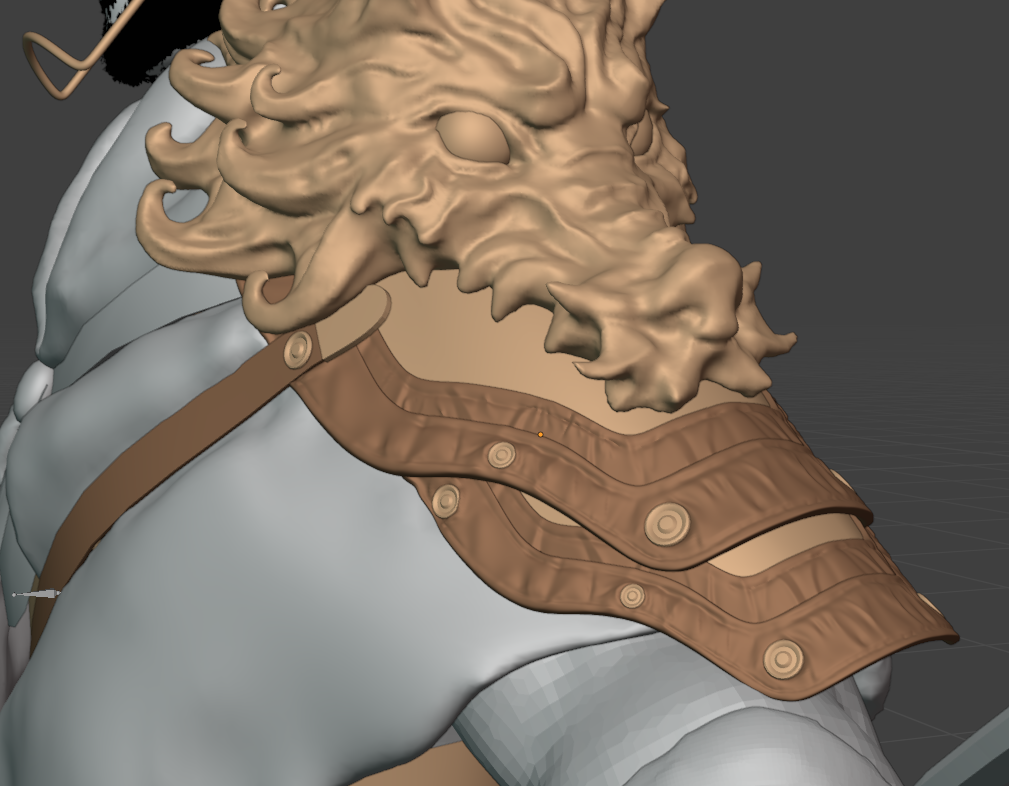
On top of that, I gave them materials and changed the materials in the view to make it easier for me to tell the difference.
23/12/23
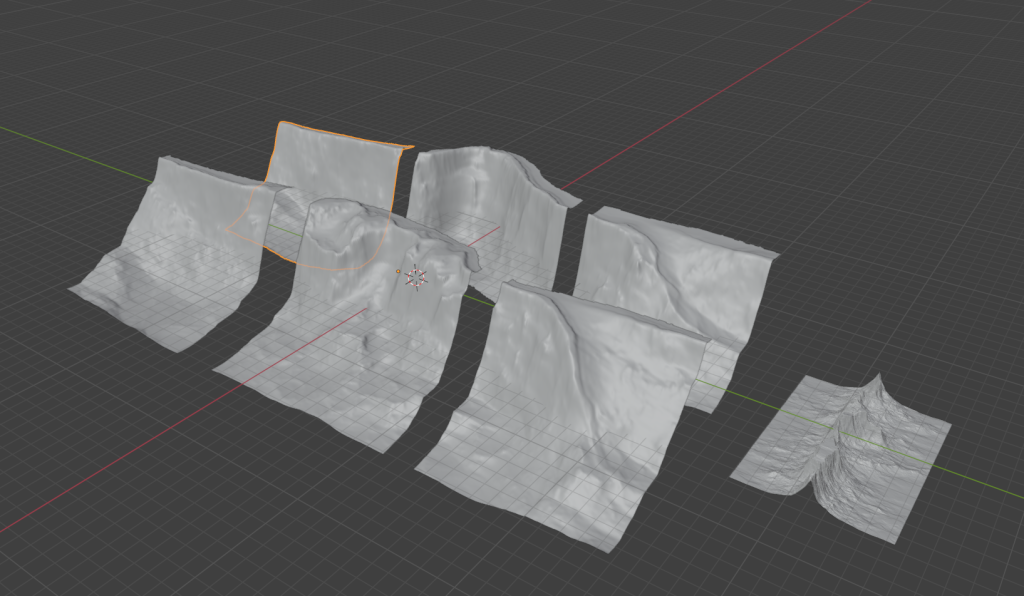
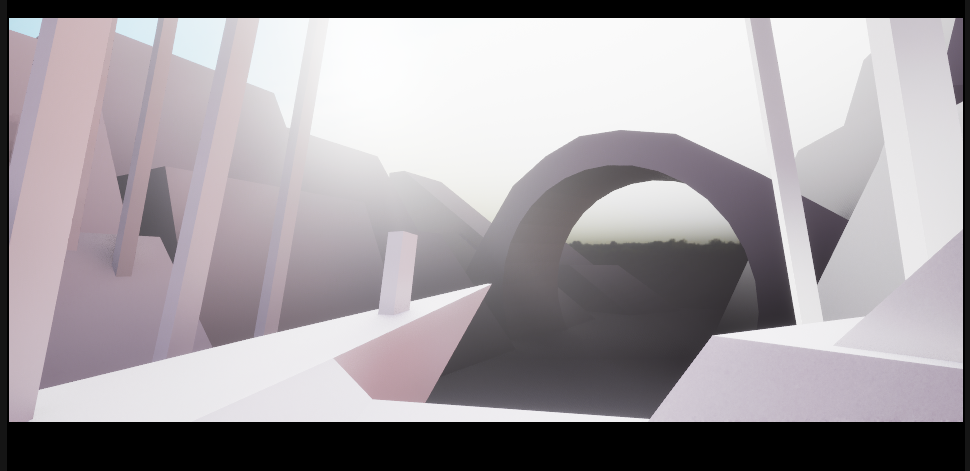
https://www.artstation.com/marketplace/p/yX9G/25-free-displacement-maps-for-terrain
I start by using free footage to displace in blender, then remove the excess to organize it into more build-friendly footage.
Then replace my previous block out, slap on a bridge material, and then use the material to stack the final scene afterward.
24/12/23
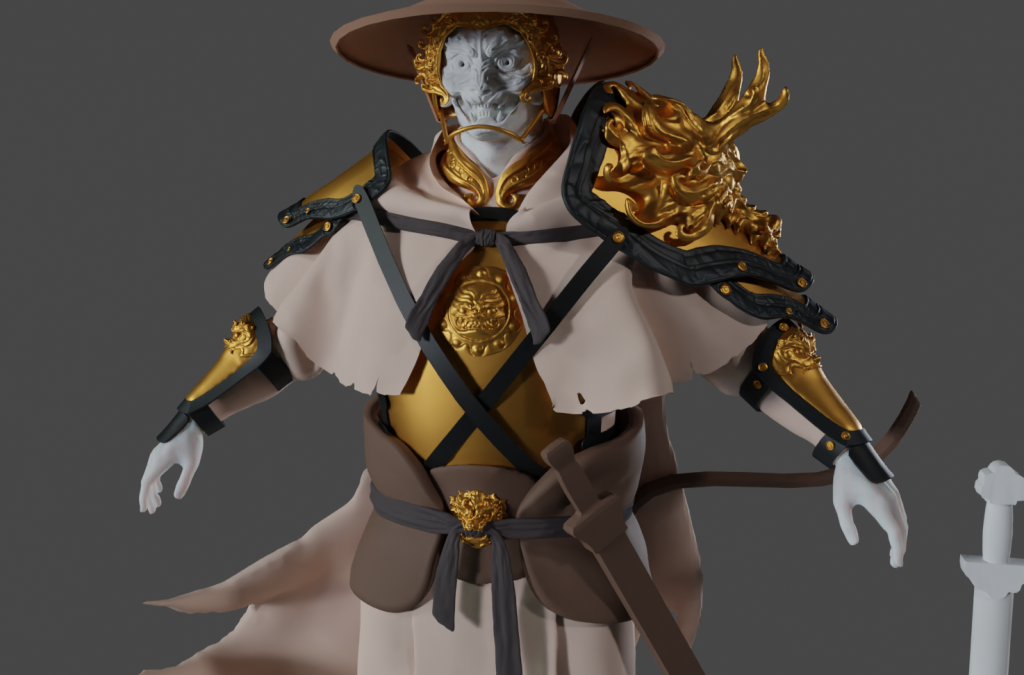
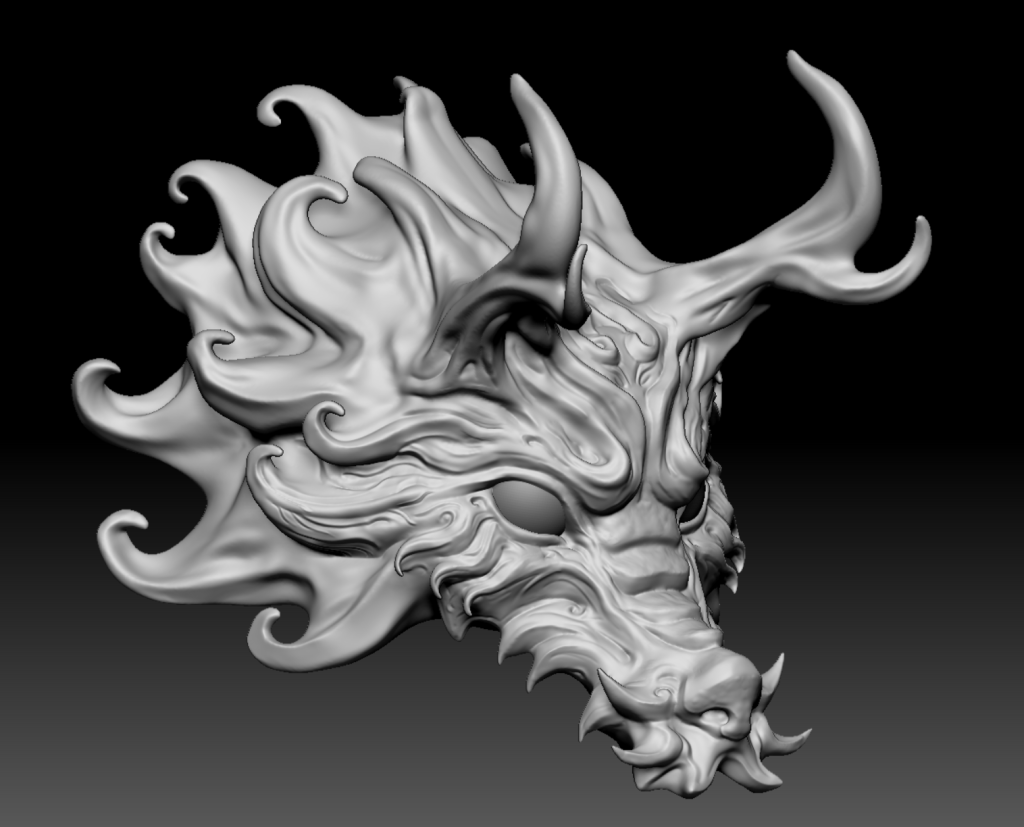
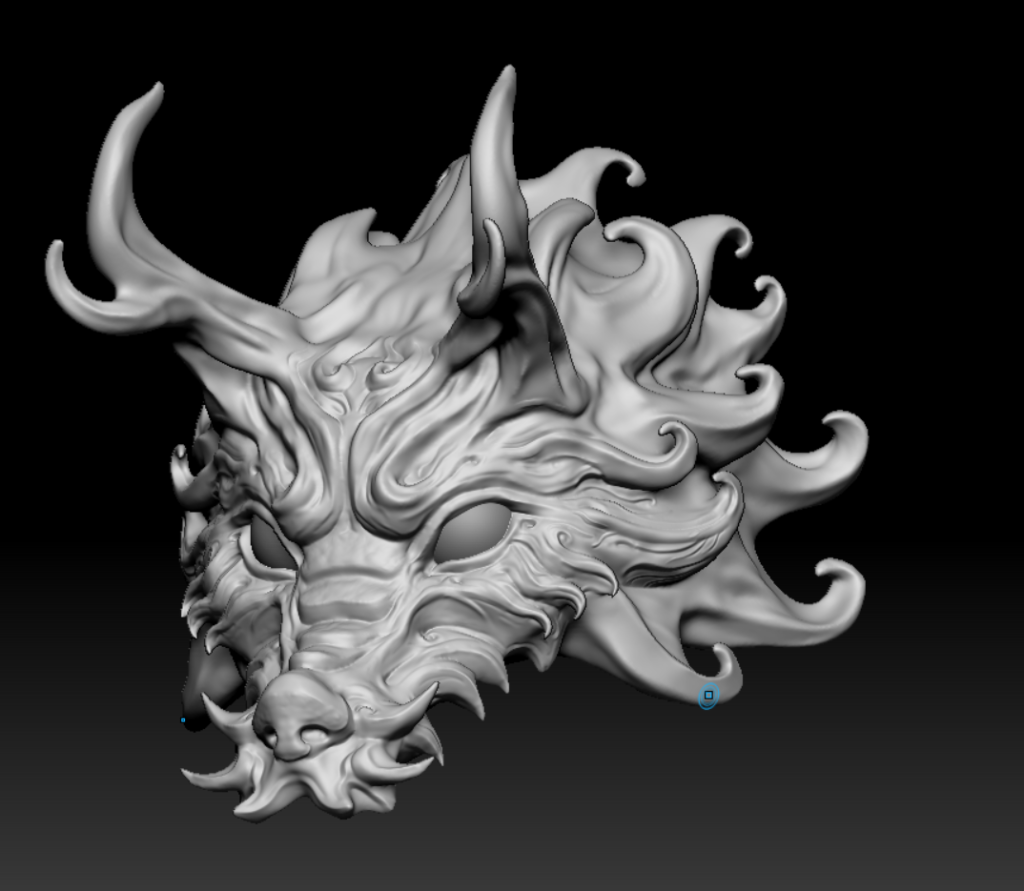
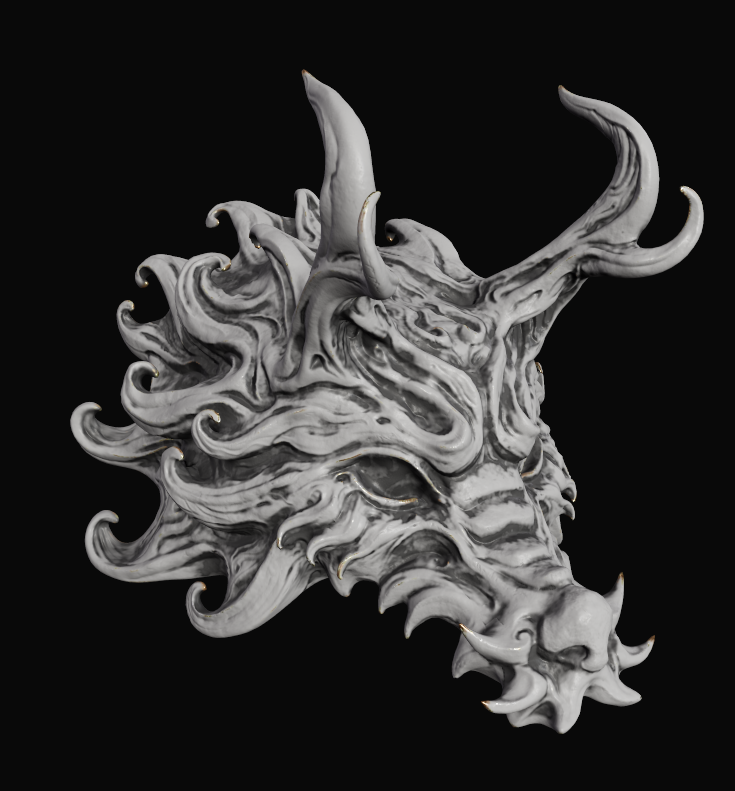
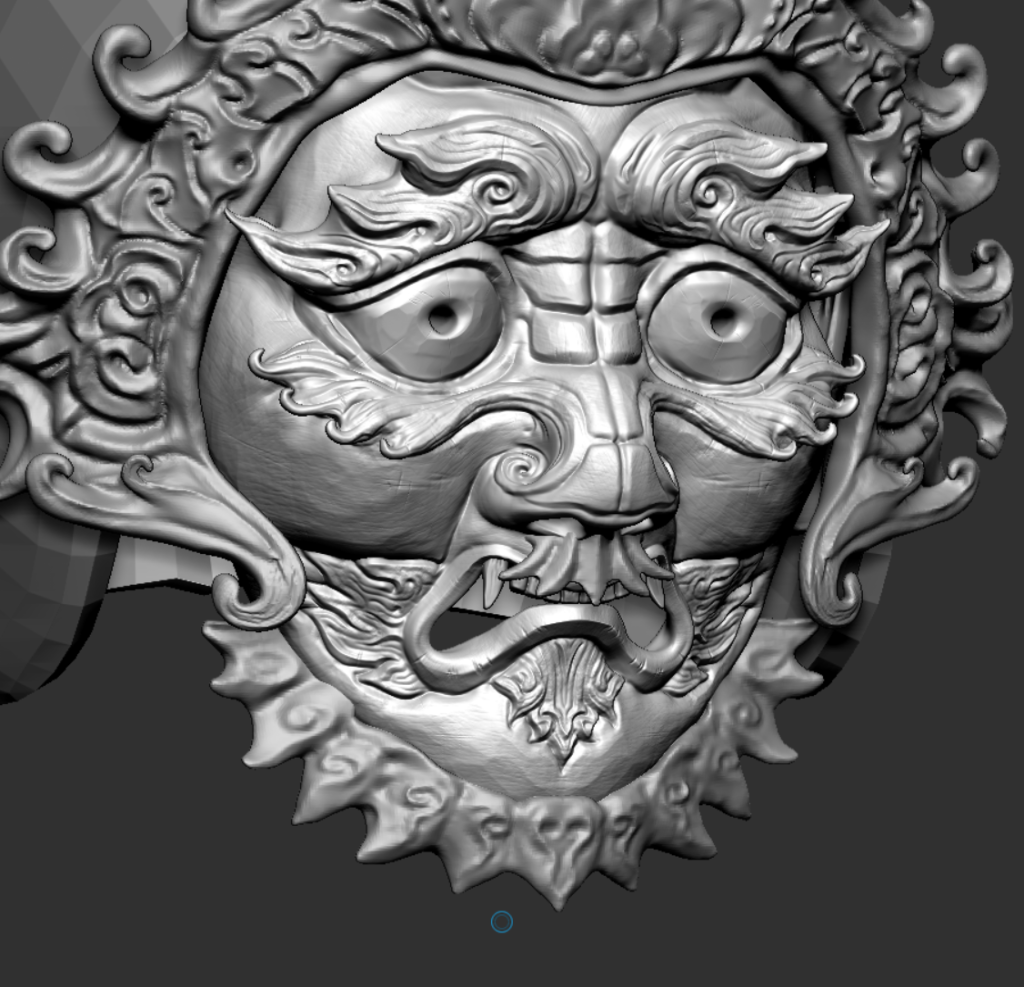
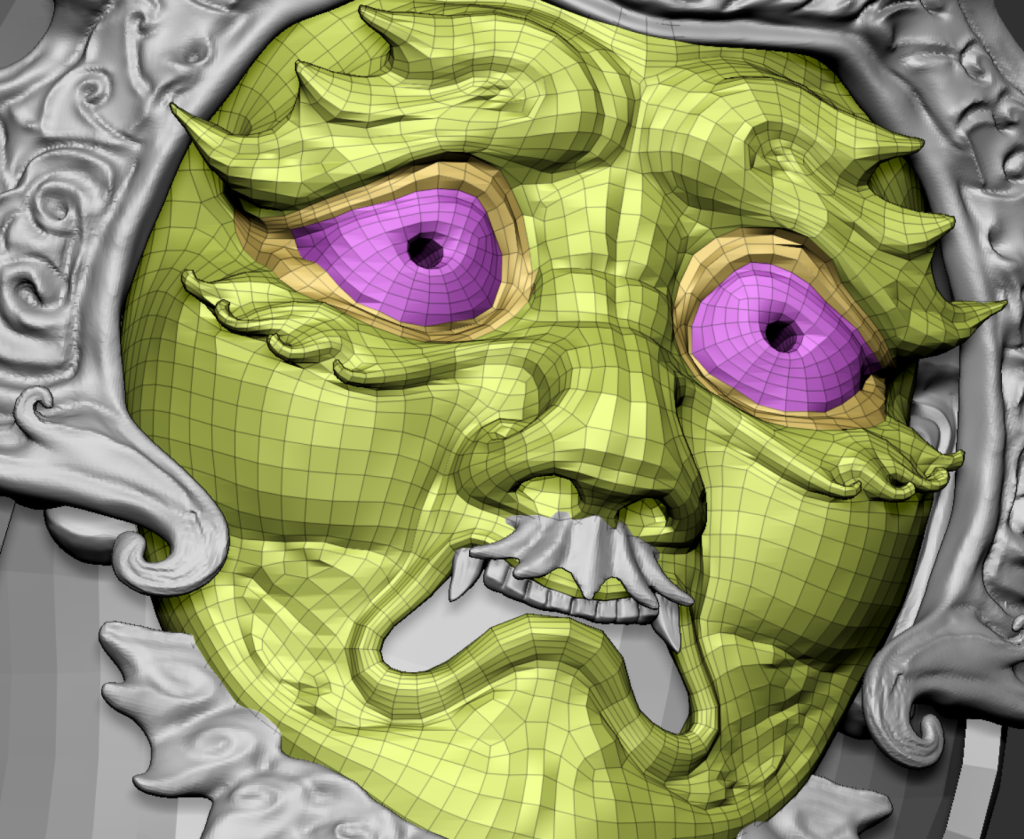
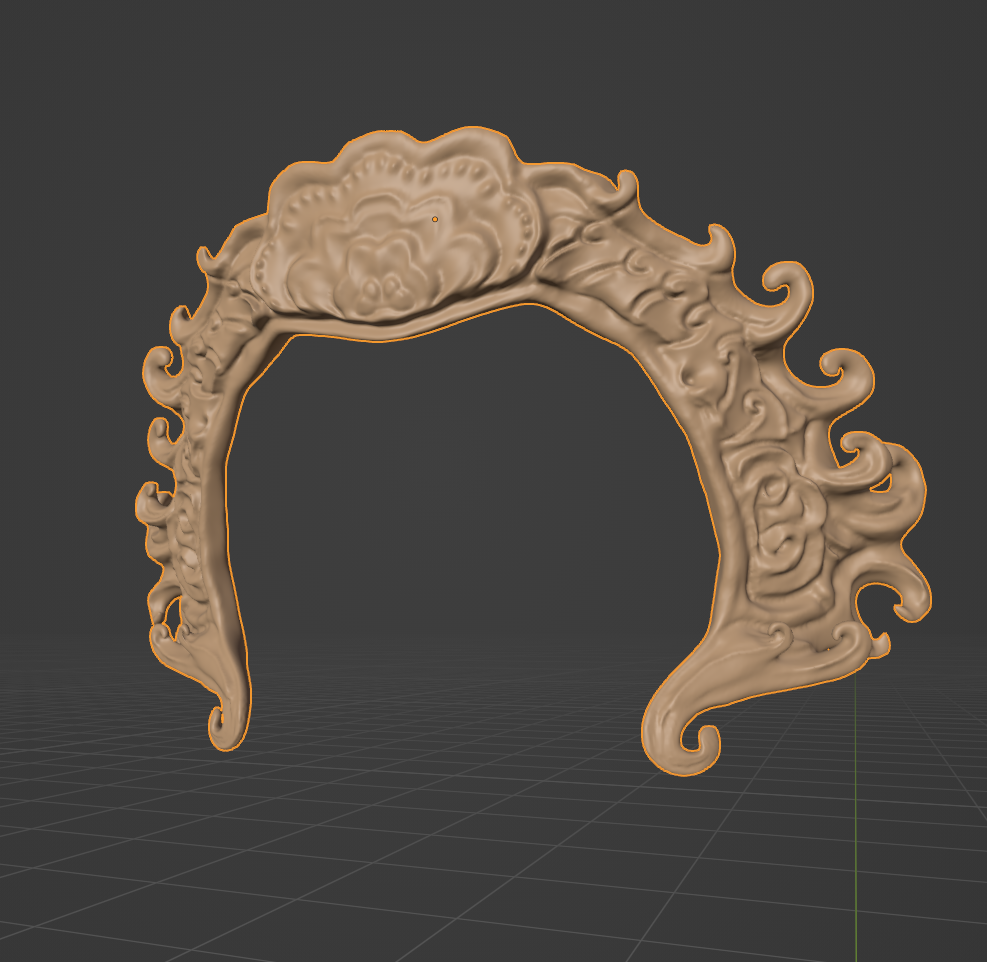
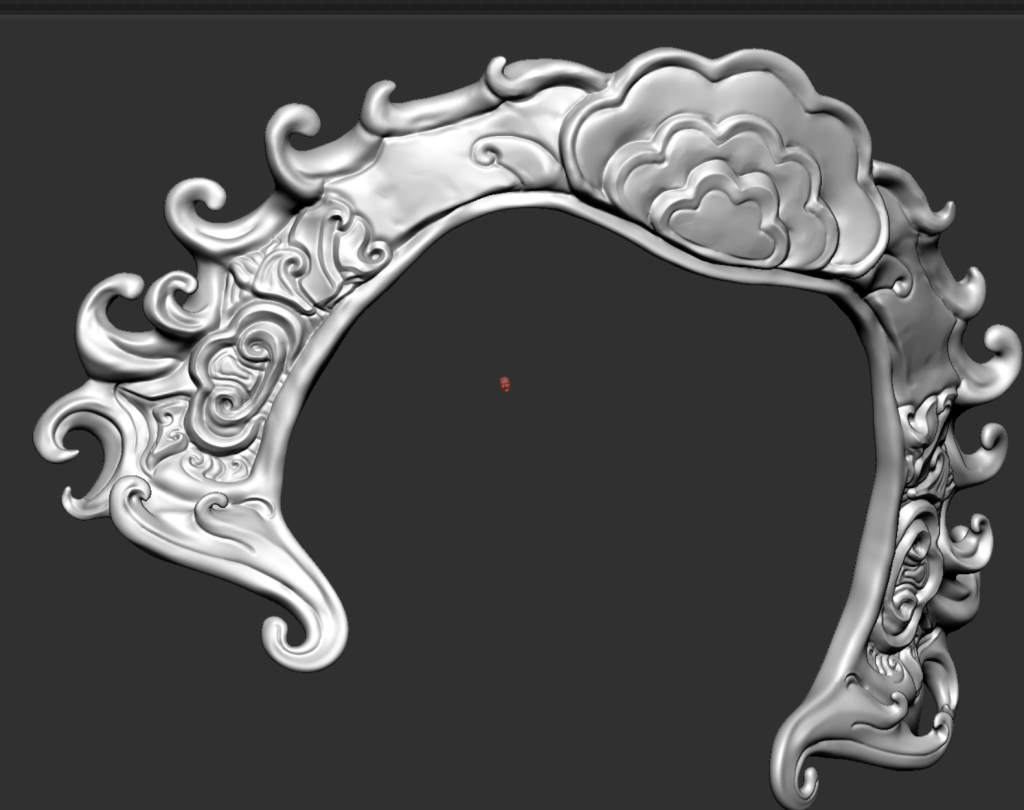
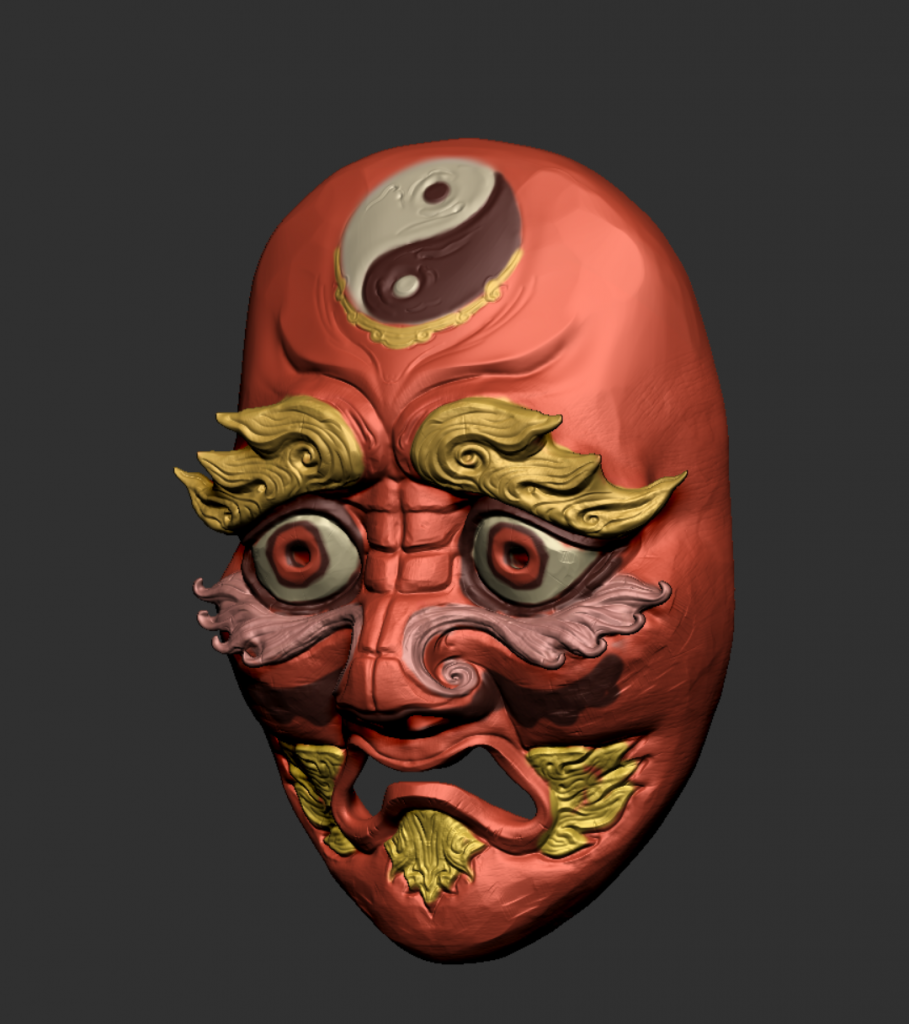
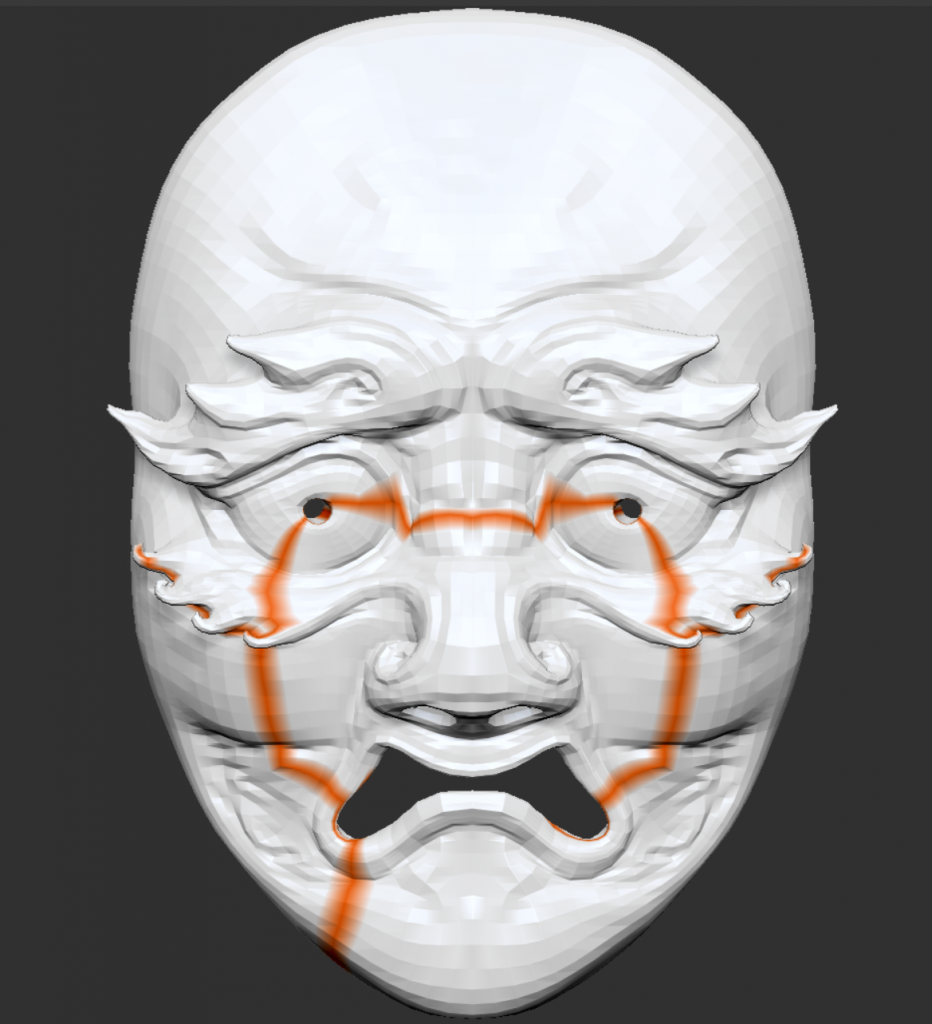
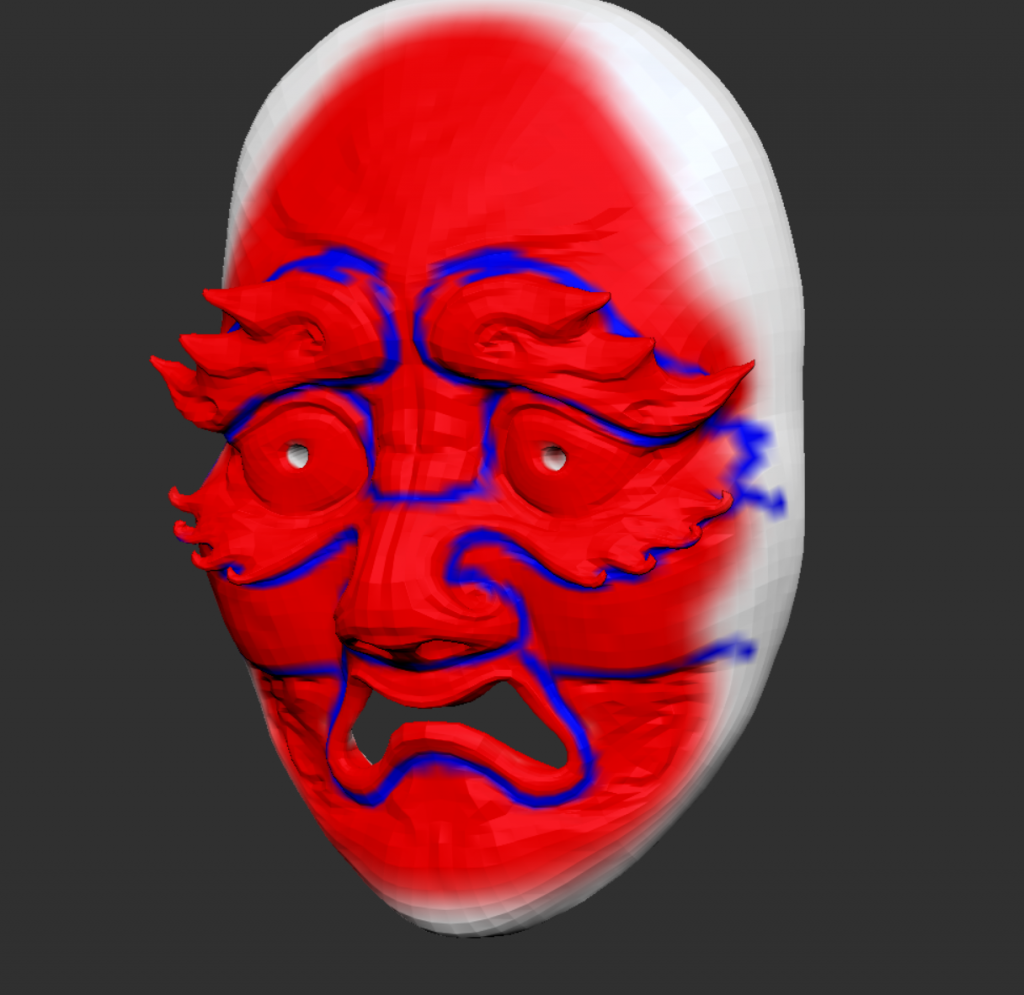
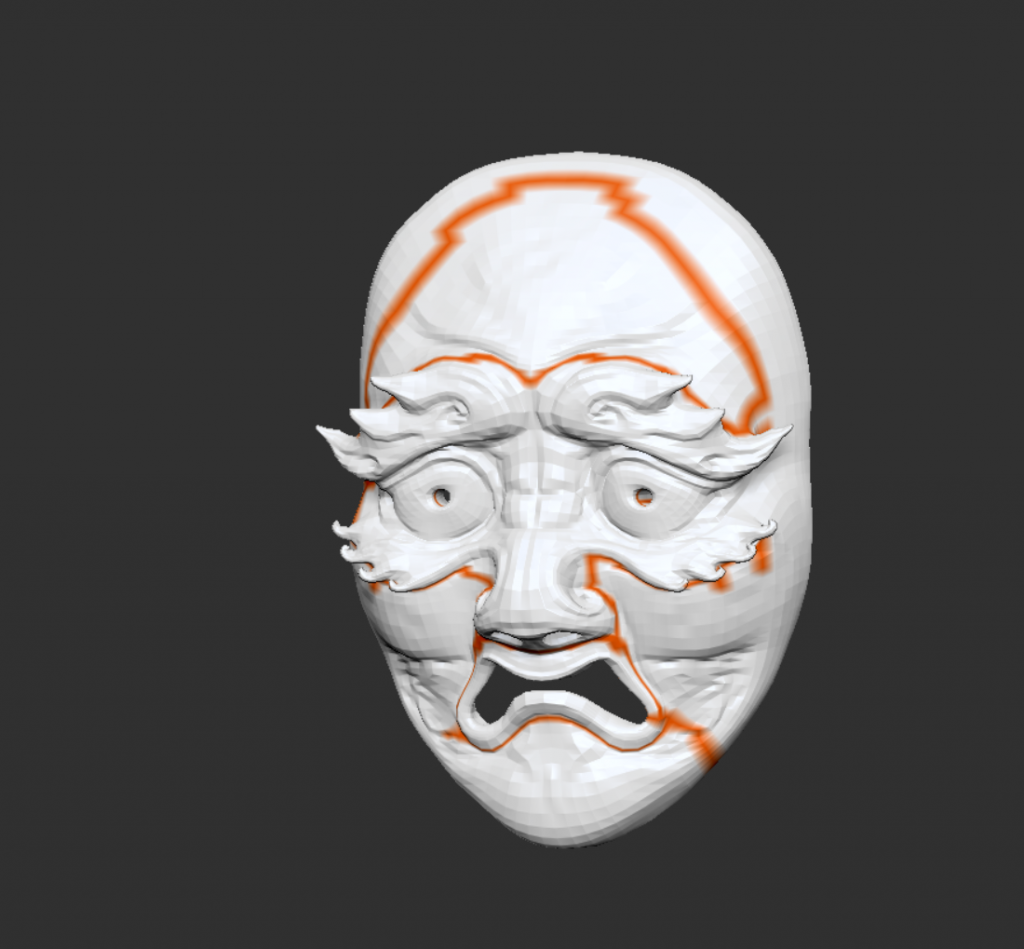
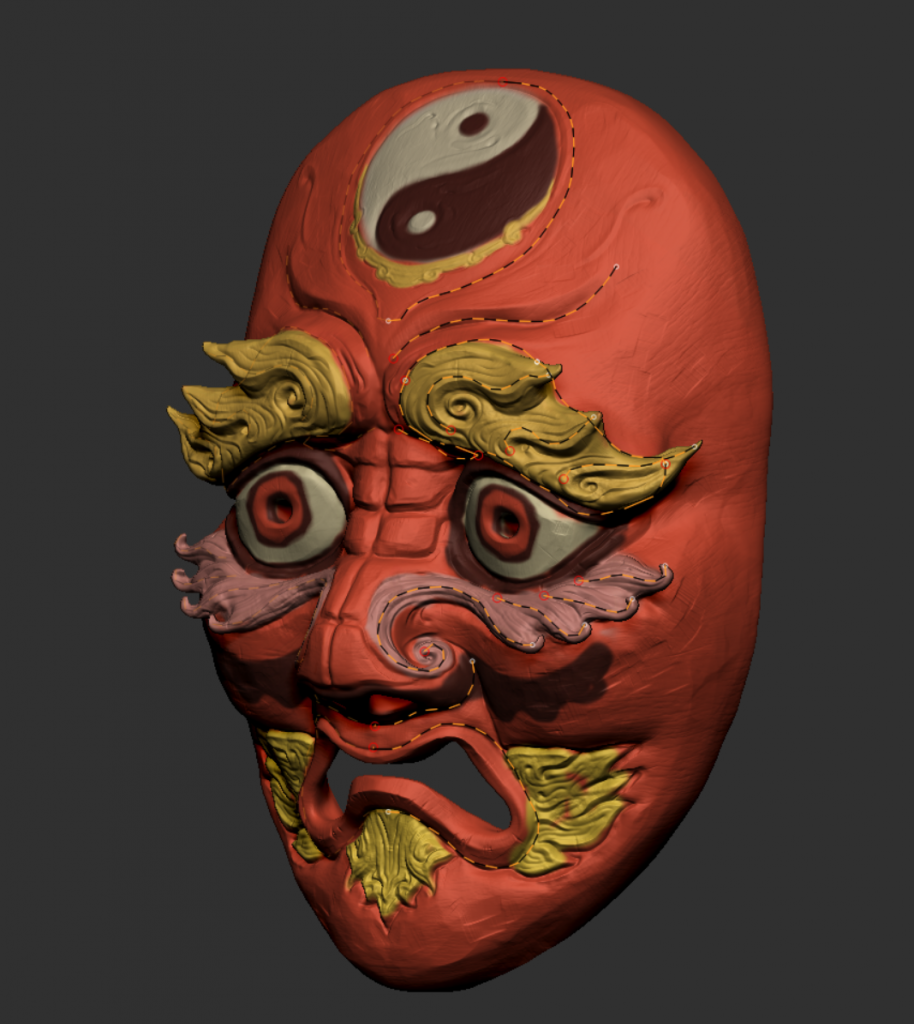
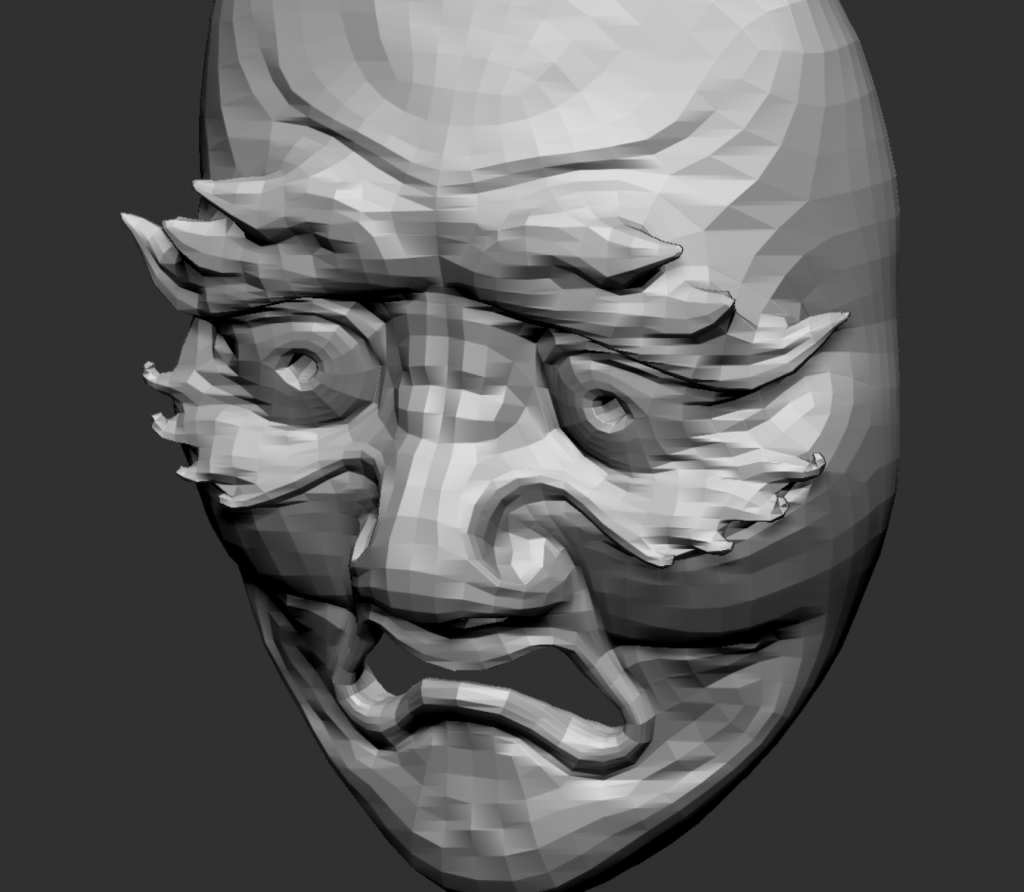
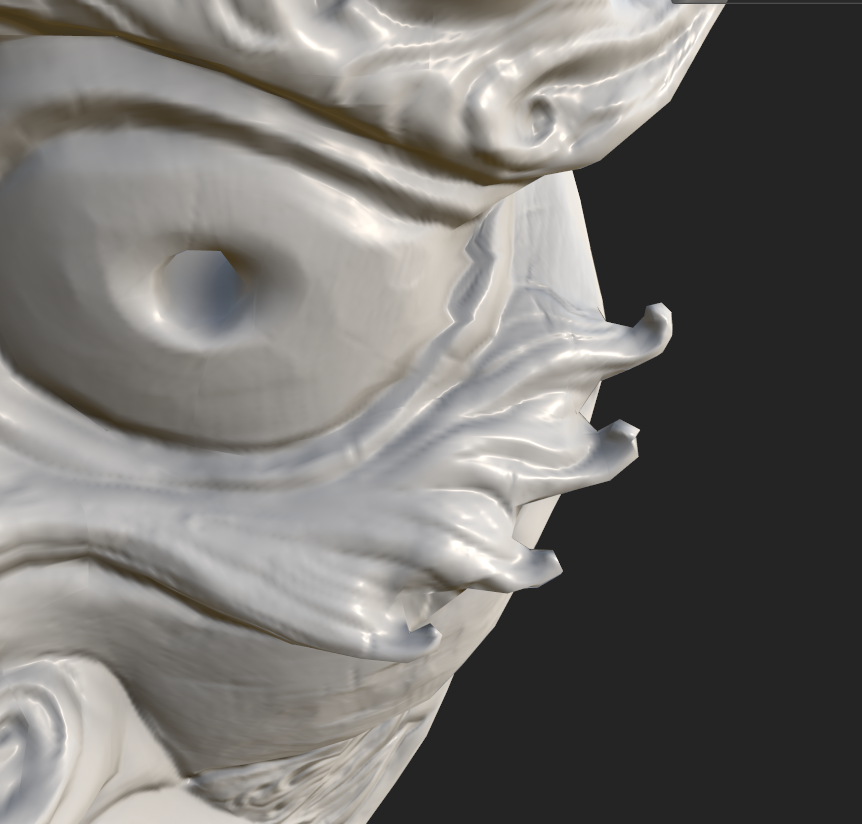
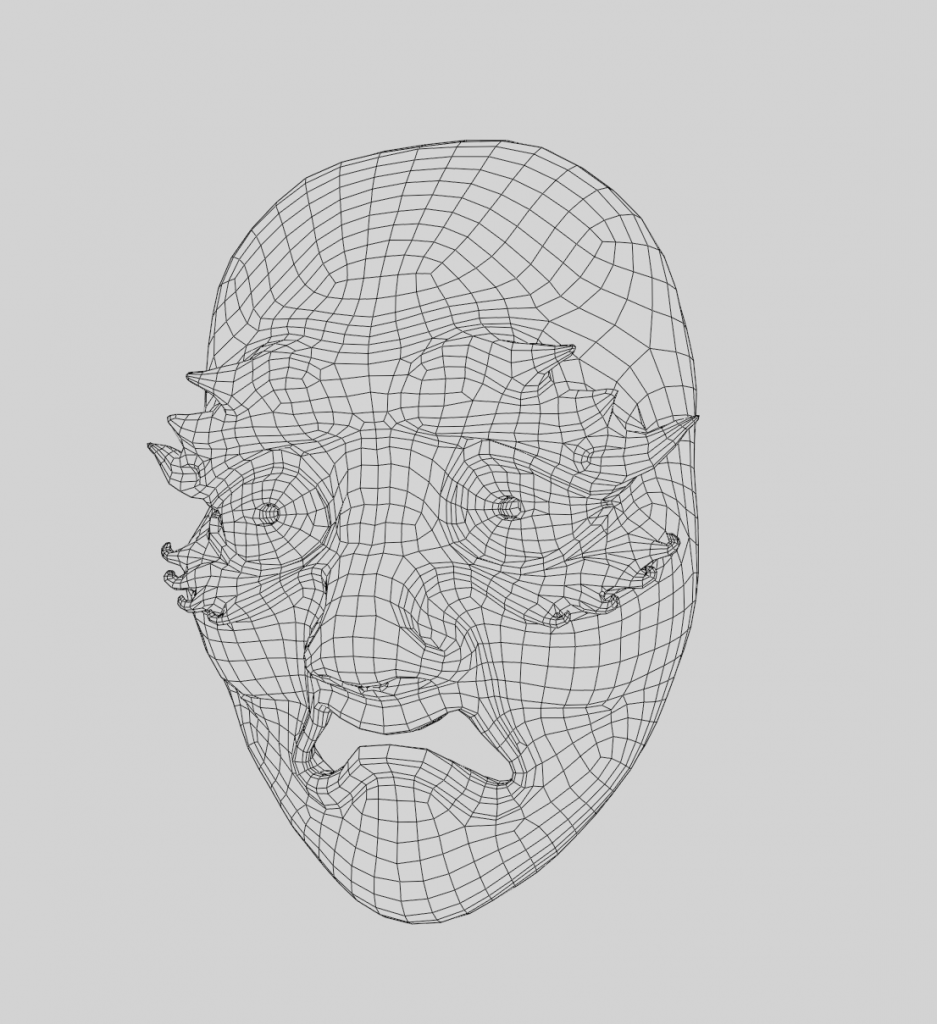
The arm armor was further modeled and the mask was refined to look more like an “nuo mask”.

1/1/24
After watching the process, I realized that perhaps I should have created the base of the garment before creating the details, and I realized that most of the tutorials were created using ZBrush, and using Blender largely made me feel struggle.
But actually, the first thing I made wasn’t the costume either, but the props on the other hand, so I didn’t go off on a tangent.
In the process of learning MD, I noticed that my simulation was unusually fast, and after comparing the base model, I realized that it was my avatar that was too small, due to the fact that the size was mm instead of cm when imported


3/1/24
5/1/24
7/1/23
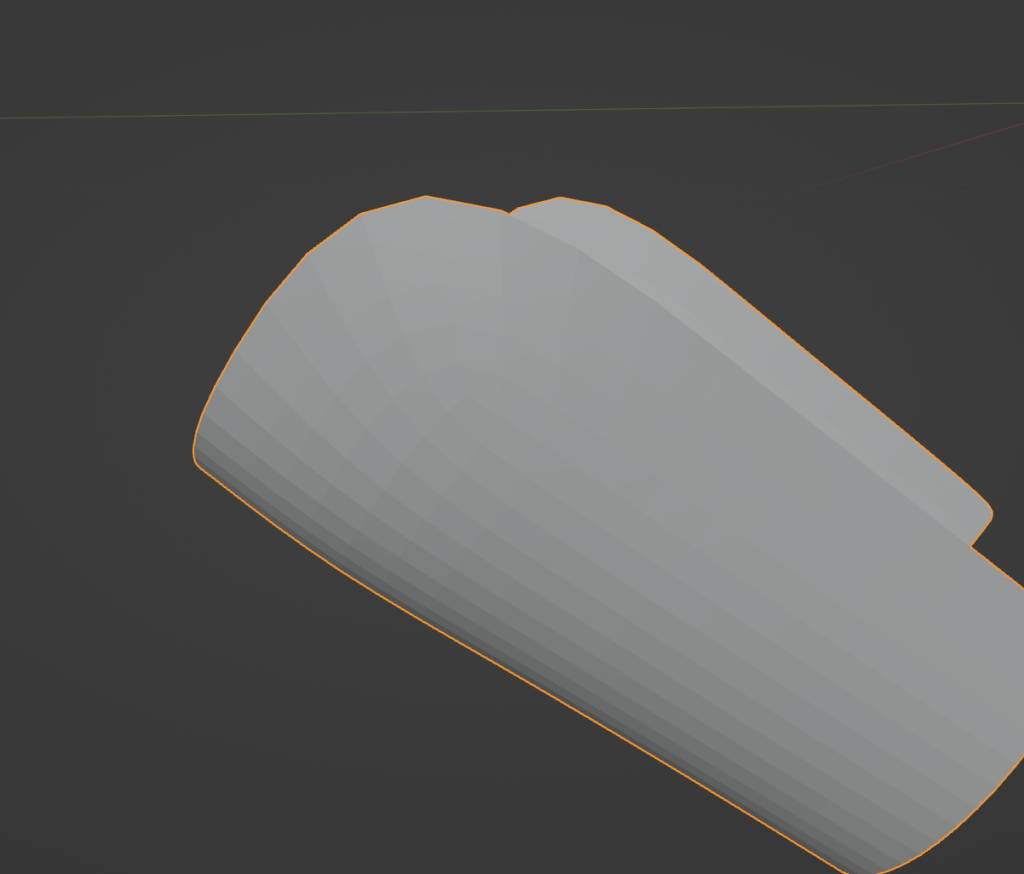
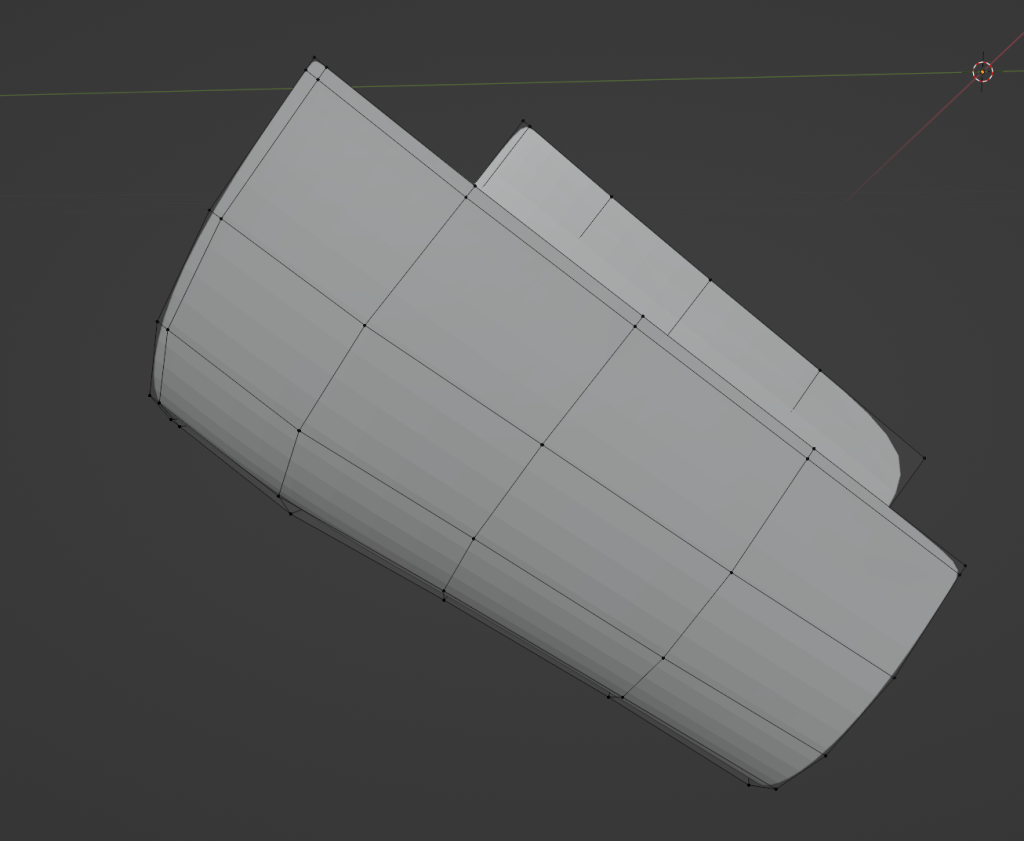
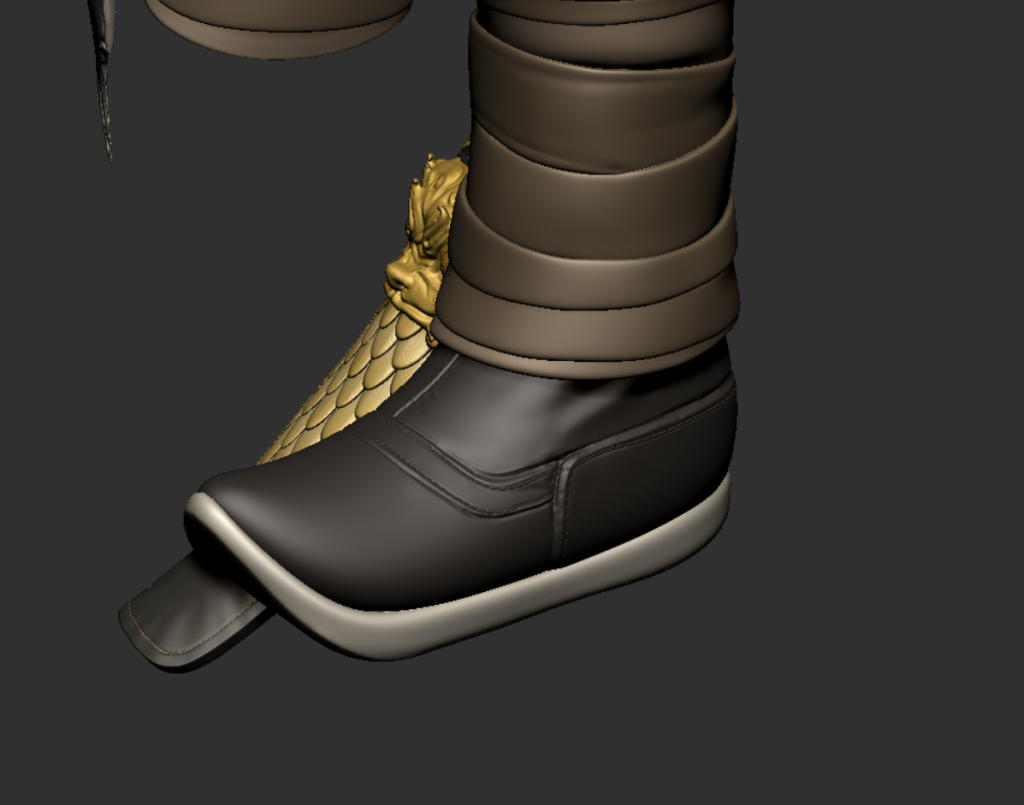
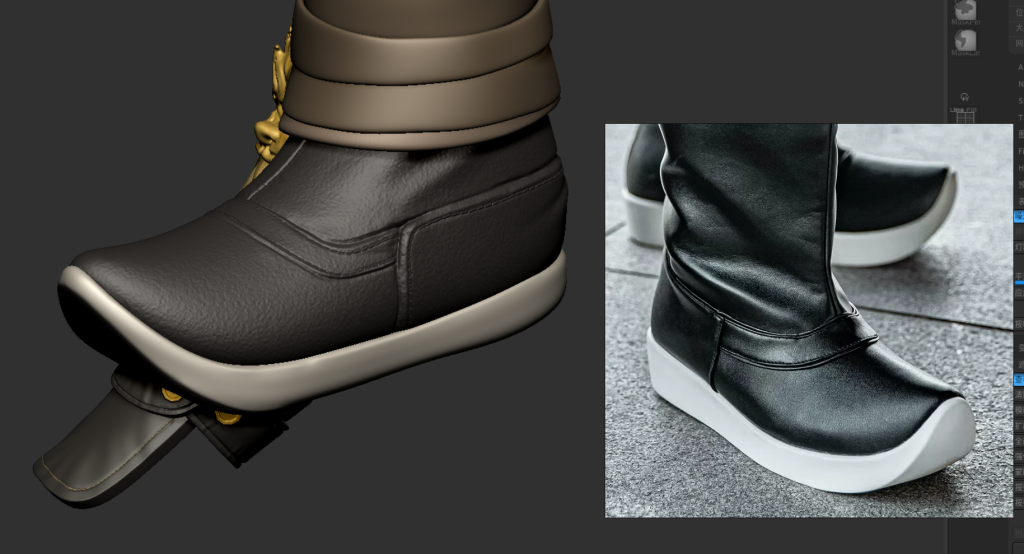
Still have the bucket hat and shoes to make, then I can topologize and go to zbrush to make High-Poly
8/1/24

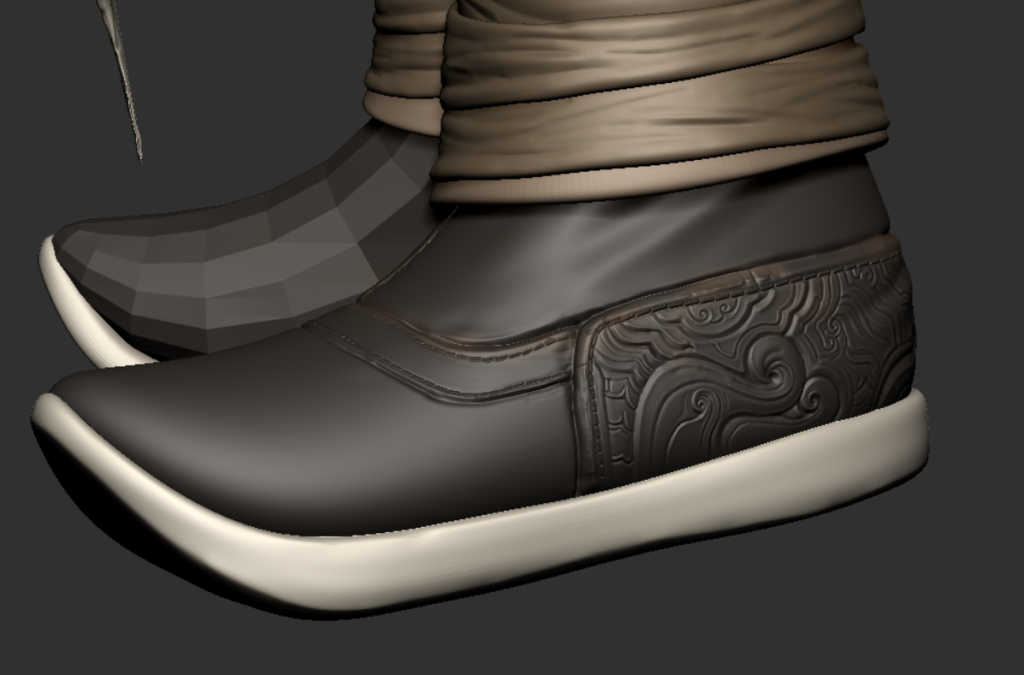
shoe look too big
10/1/24
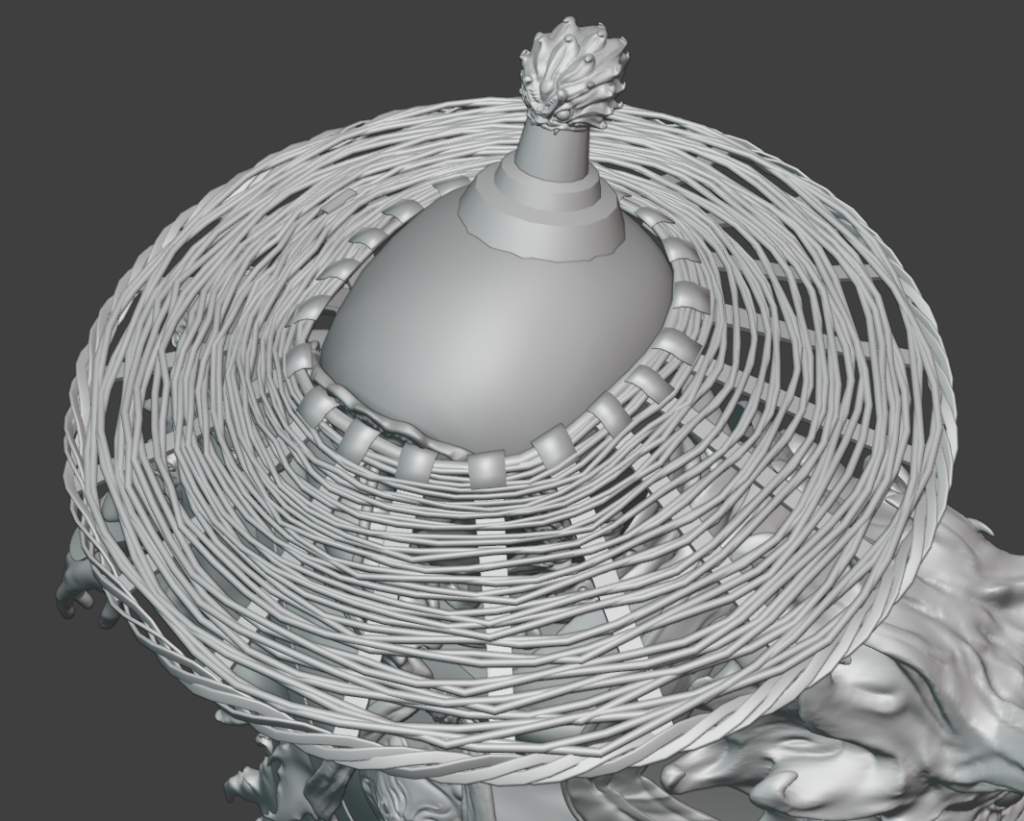
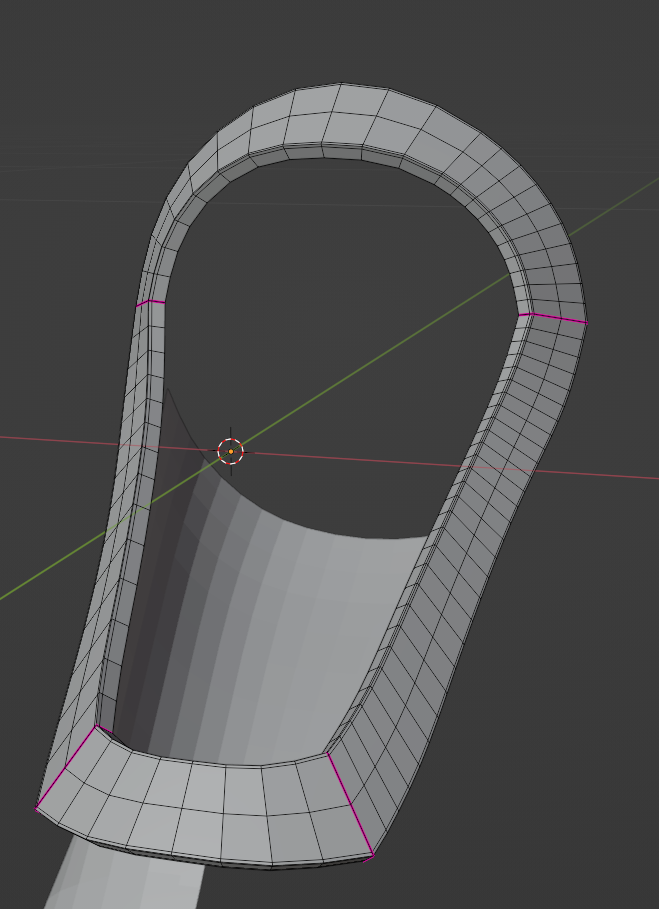
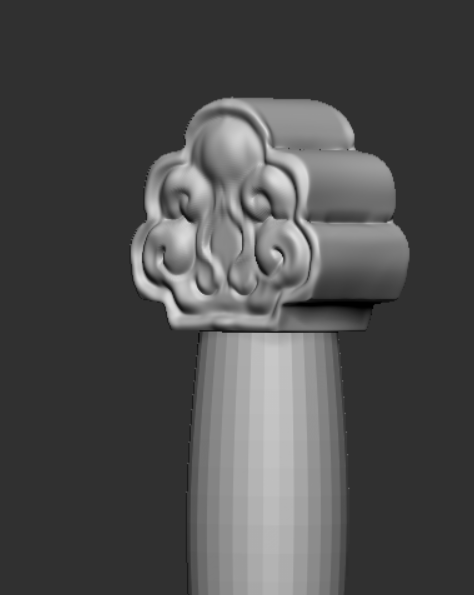
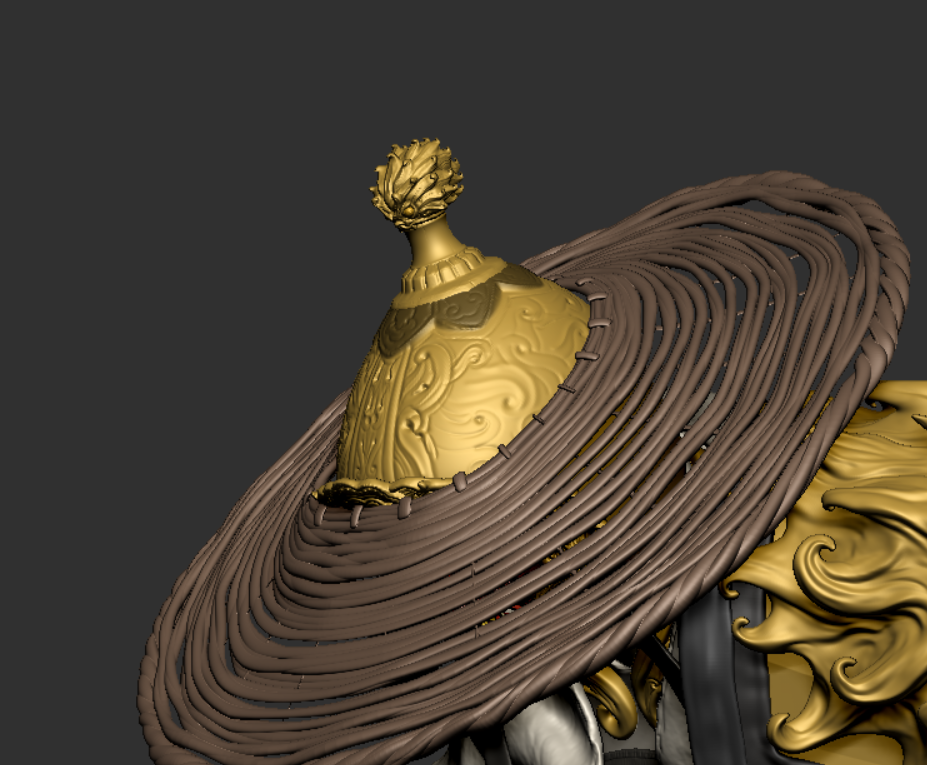
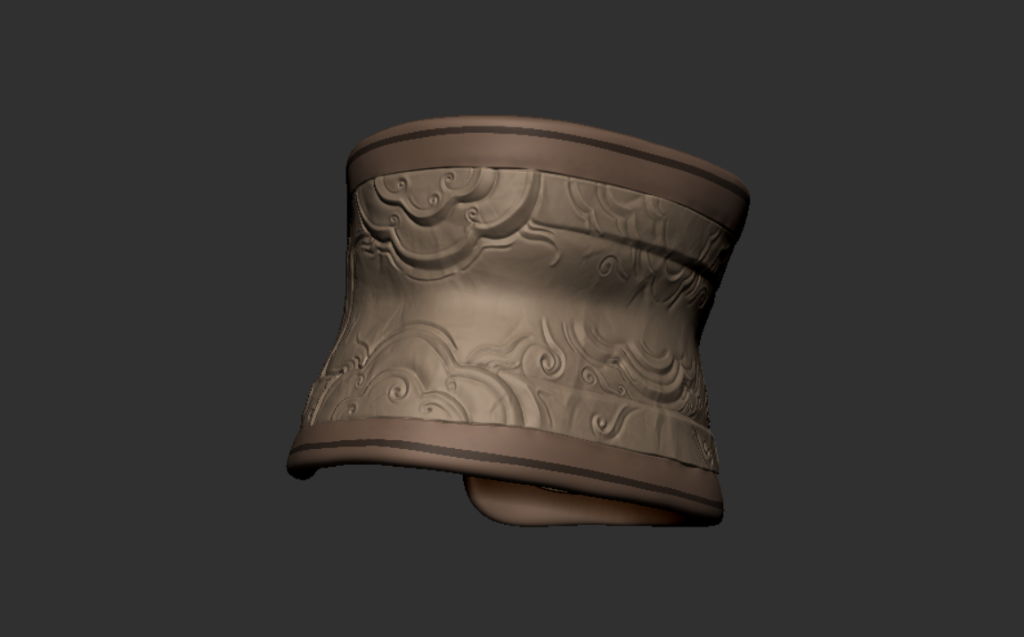
Made the hat and adjusted the parts to make it look slimmer.

After returning to class today and having further presentations with luca and micheal, it made my plans for the future much clearer:
First of all I have to finish my medium mold, the broken feeling of the cloak is going to be done in this step, luca affirmed my further conceptualization but to propose that I am going to make some big shapes in the present. In the meantime we discussed about the optimization of the hat, which is to bake it into pieces, and about the transparent part I need to search further about how to do it, and that this way can be used for the cloak.
12/1/24
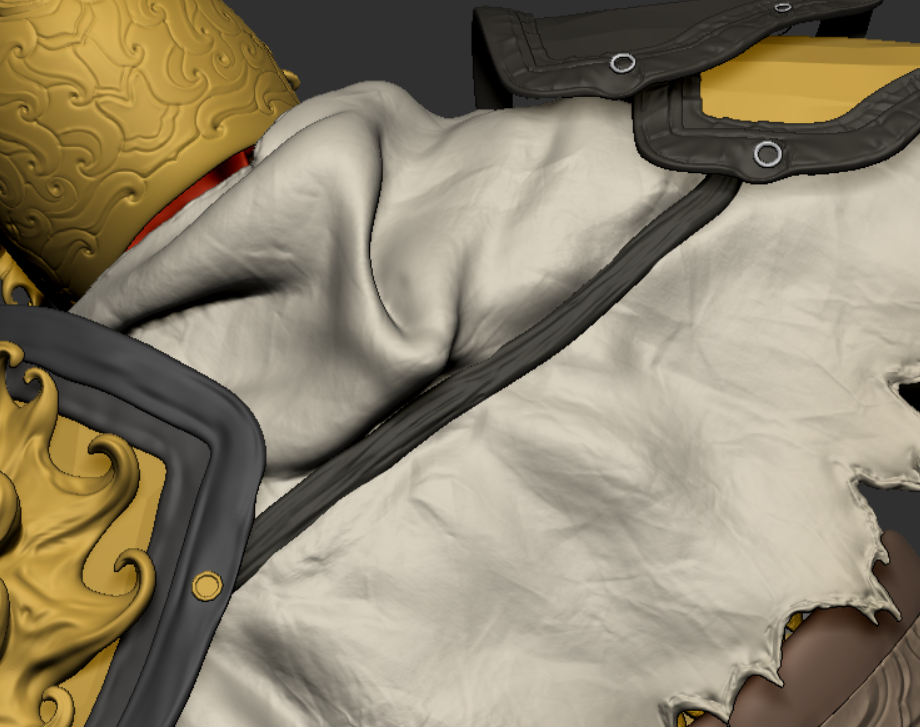
When I saw Yasso’s appearance, I realized that the reason the bucket hat would make me feel handsome is because of the mystery of how it covers my eyes, so I adjusted this bucket hat of mine below again, but it would make the decoration on the helmet come out, so I adjusted it again. Then I focused on adjusting the tattered feel of the fabric, I actually thought it looked better before but didn’t go ahead with it, after luca’s reminder I quickly crafted it to what it is now.
As well as I made the cape before and after my design drafts
14/1/24
In Thursday’s class, I had a discussion with Luca and micheal. There were questions about the creation of the hats, like the game model, which we have to optimize as much as possible, for example by baking the complex “pipes” of the hats on top of the facets.
And in my research, I found that the same approach is taken for complex edges such as the cloak, which allows more details on the edges.
But as I have no experience in this field and I found it difficult to come up with the keywords for the tutorial straight away, after thinking about it, I found this video which solved my problem completely:
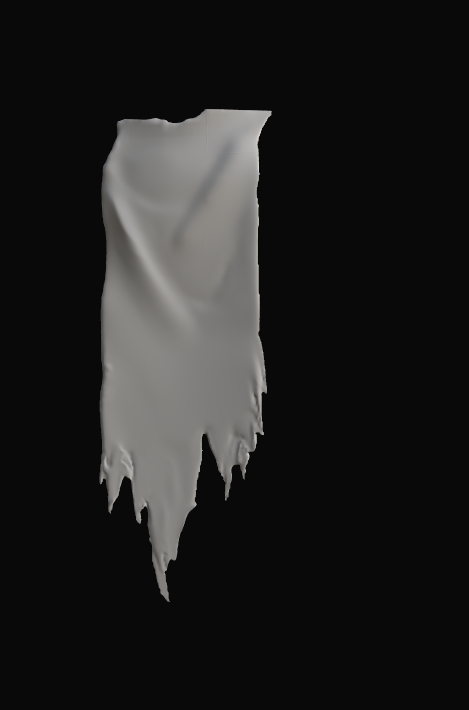
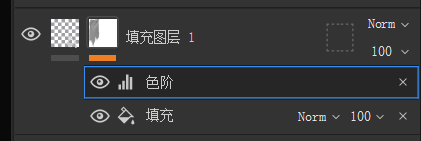
I experimented with one of my fabrics, and the main points I found were 1. the texture channel was added to Opacity 2. for wider original models, the wrapping needs to be adjusted 3. finally, this effect can be achieved by adding a fill layer, a white mask, and putting a normal map in it, and then going through the color scales to even out the colors.
One thing to keep in mind is that my edges have to hold up well, which will happen when I make the High-poly
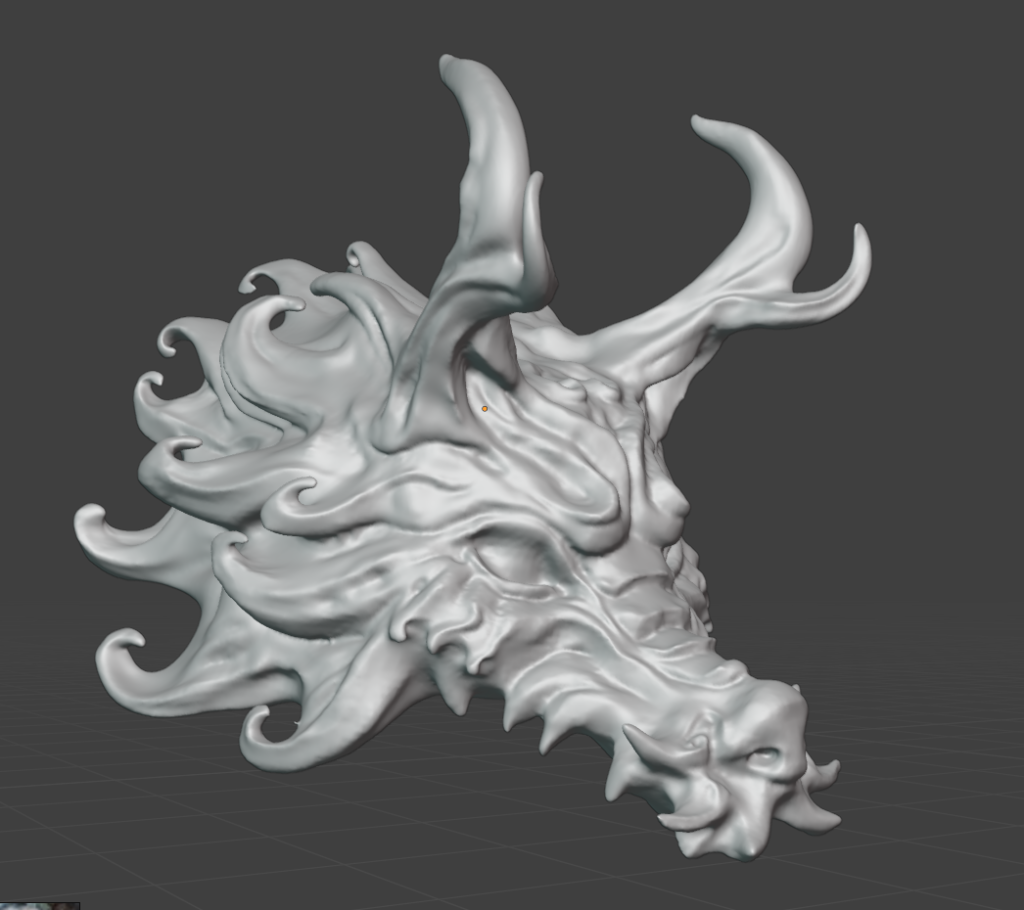
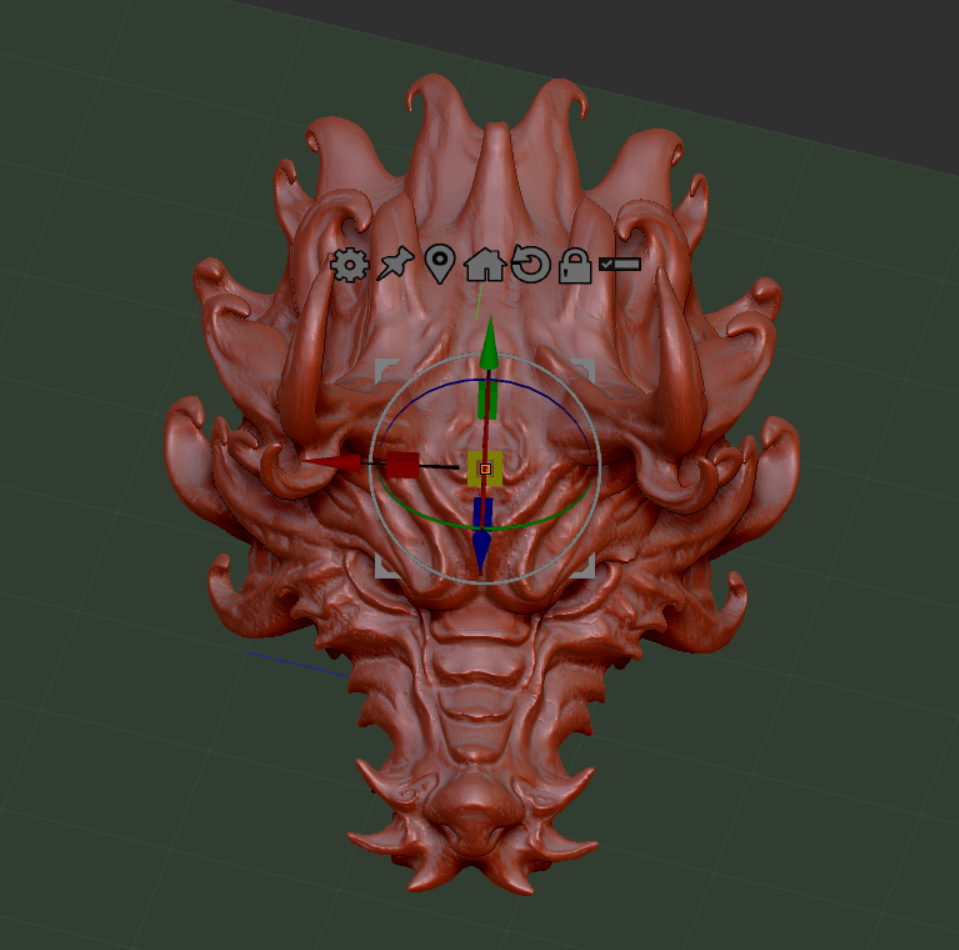
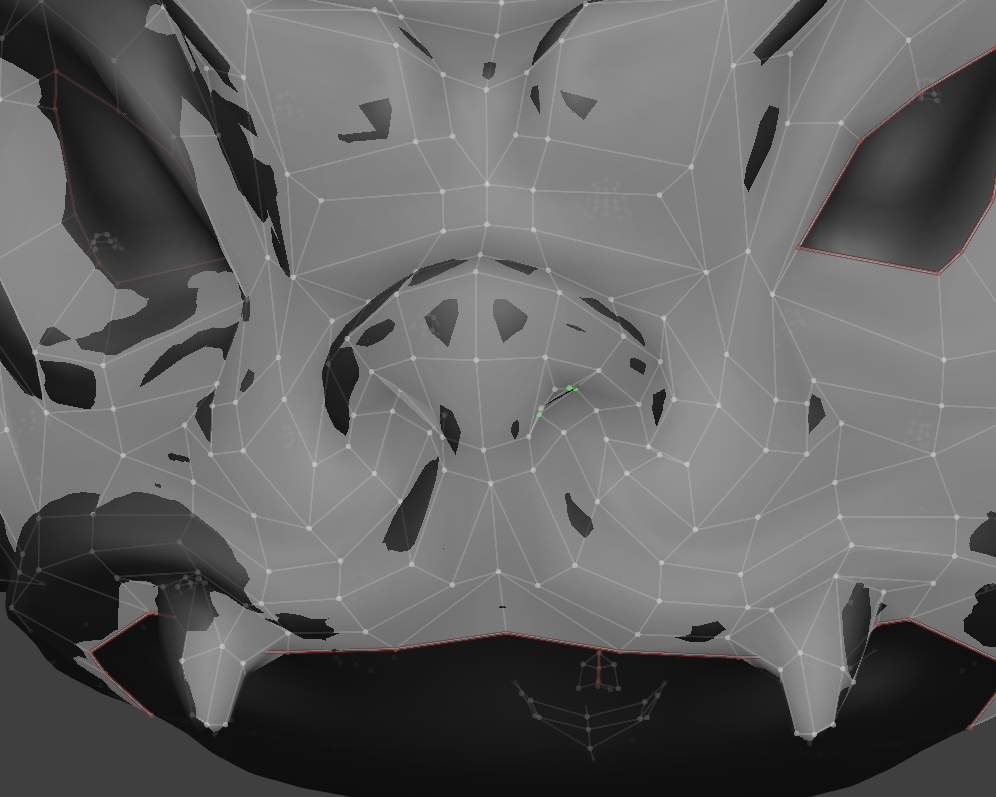
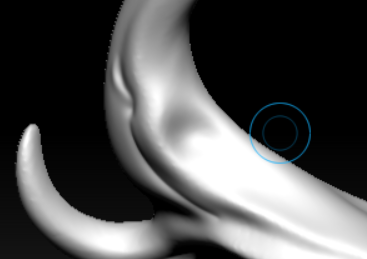
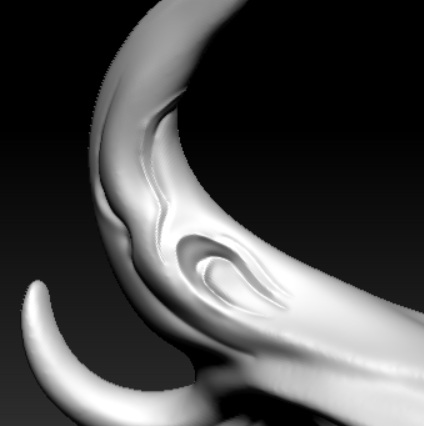
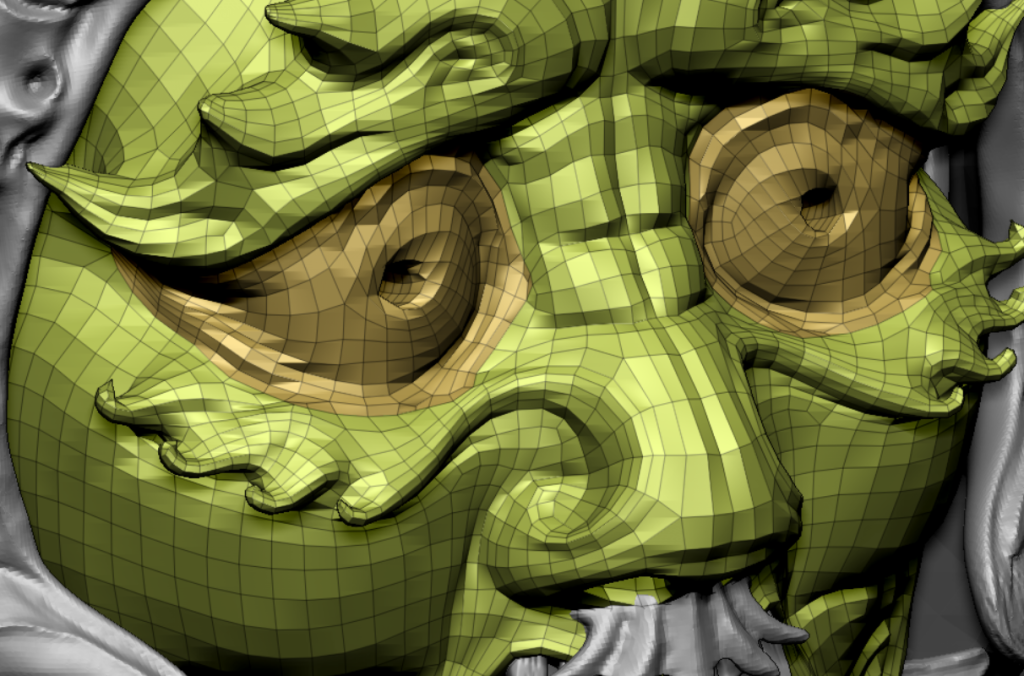
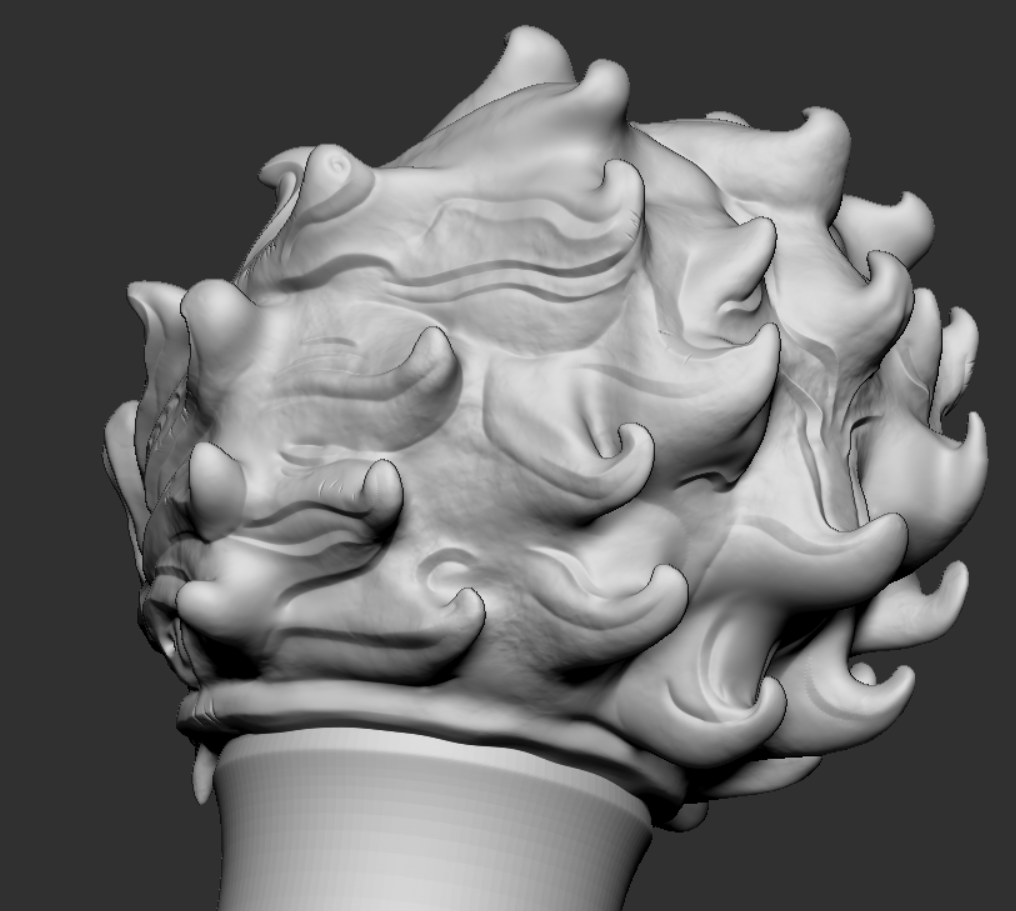
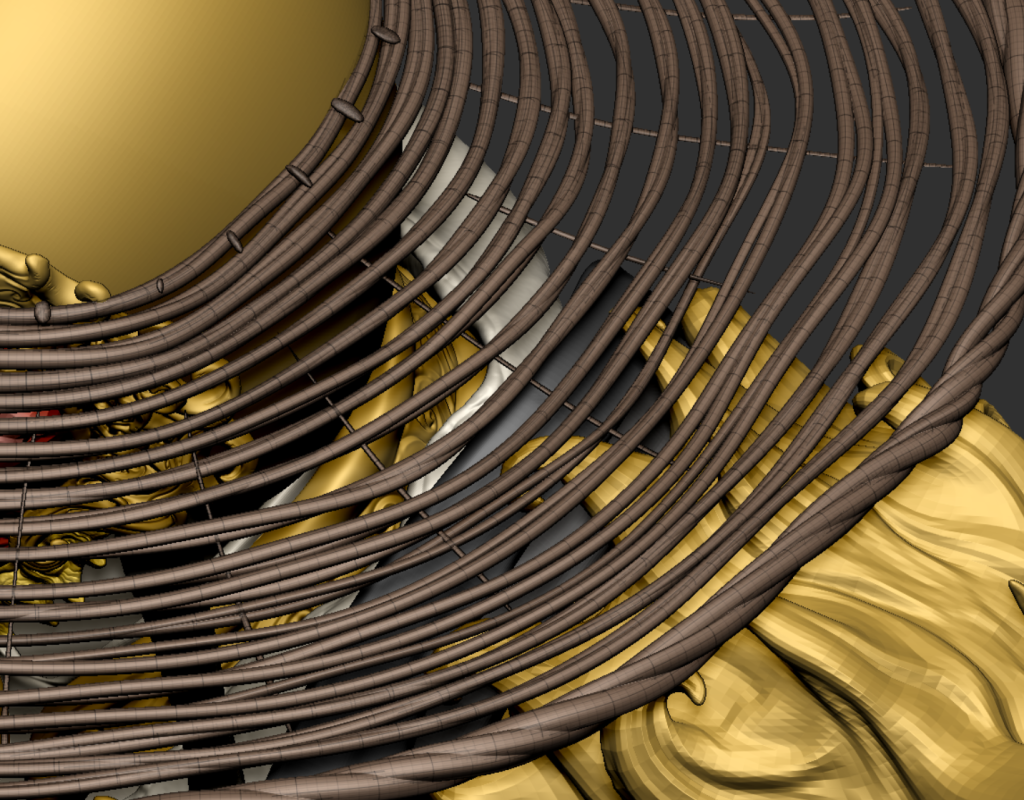
The model imported into zbrush was not centered, I made it stay mirrored by adjusting the axes plus mirroring, and then for sculpting details, zbrush is just too powerful.
On the tall model, I deliberately followed the flow of the model to carve it, making angles with damstandard brushes and adding detail with clay brushes.
15/1/24
For sculpting details, I’m more likely to find where the model is going in my Mid-Poly and add the details.
I’m very happy with the view from the front, but I also realize that the viewer sees this part from the side and back most of the time, and it’s a bit more cluttered in that view.
As well as I need to think about the silhouette about the hairy part to keep it smooth
16//1/24
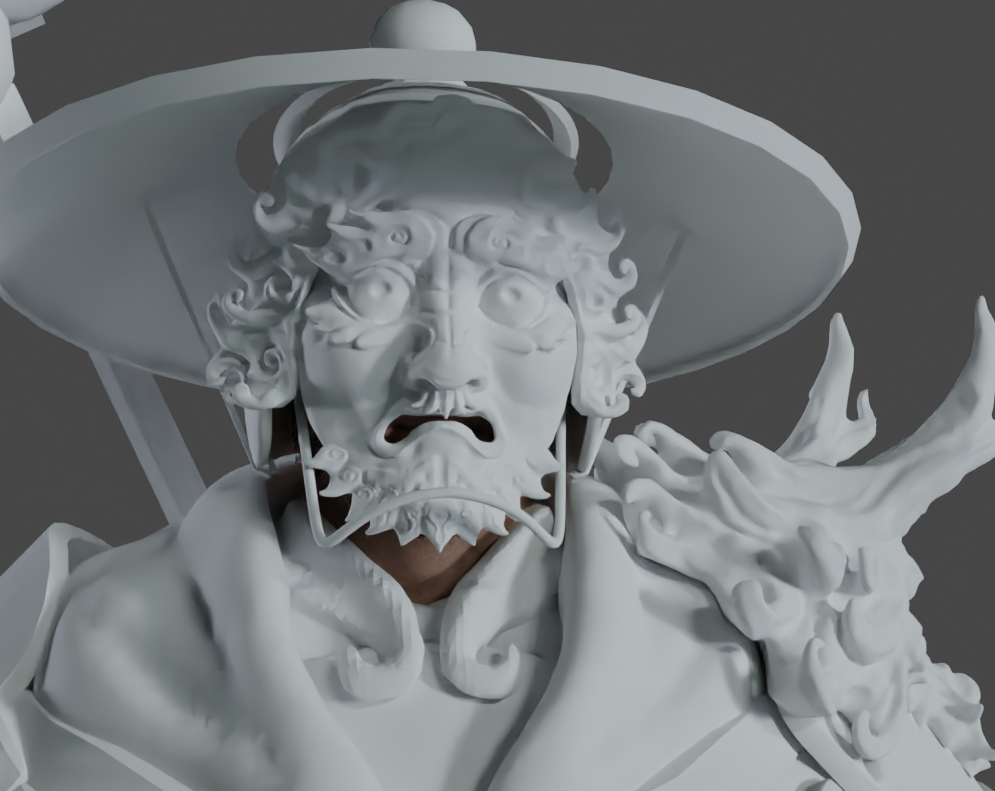
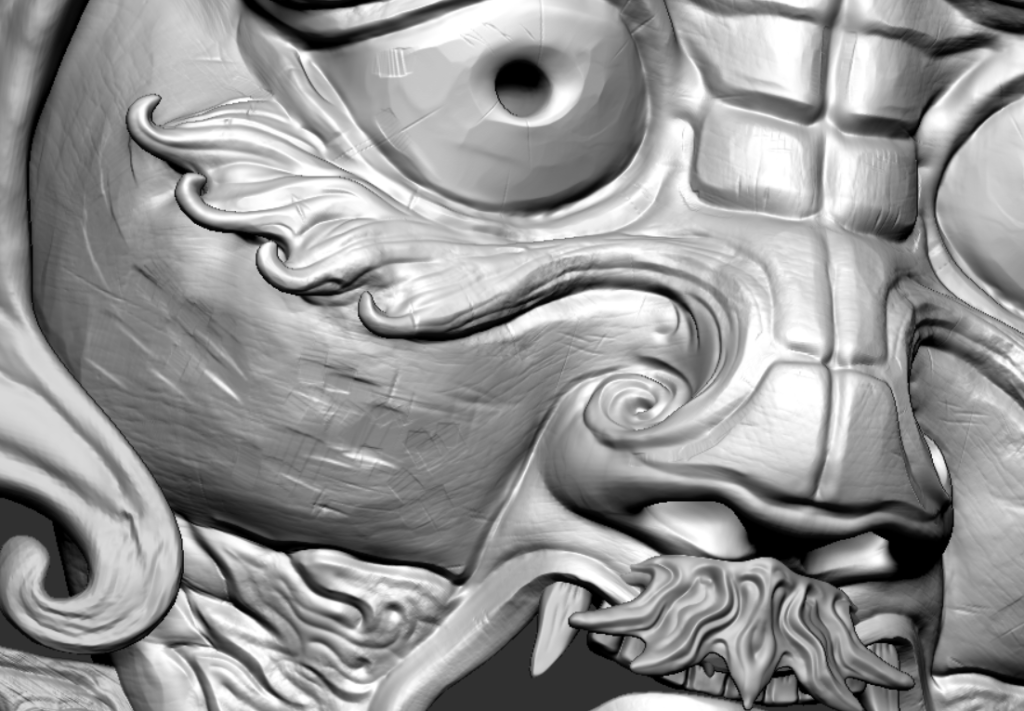
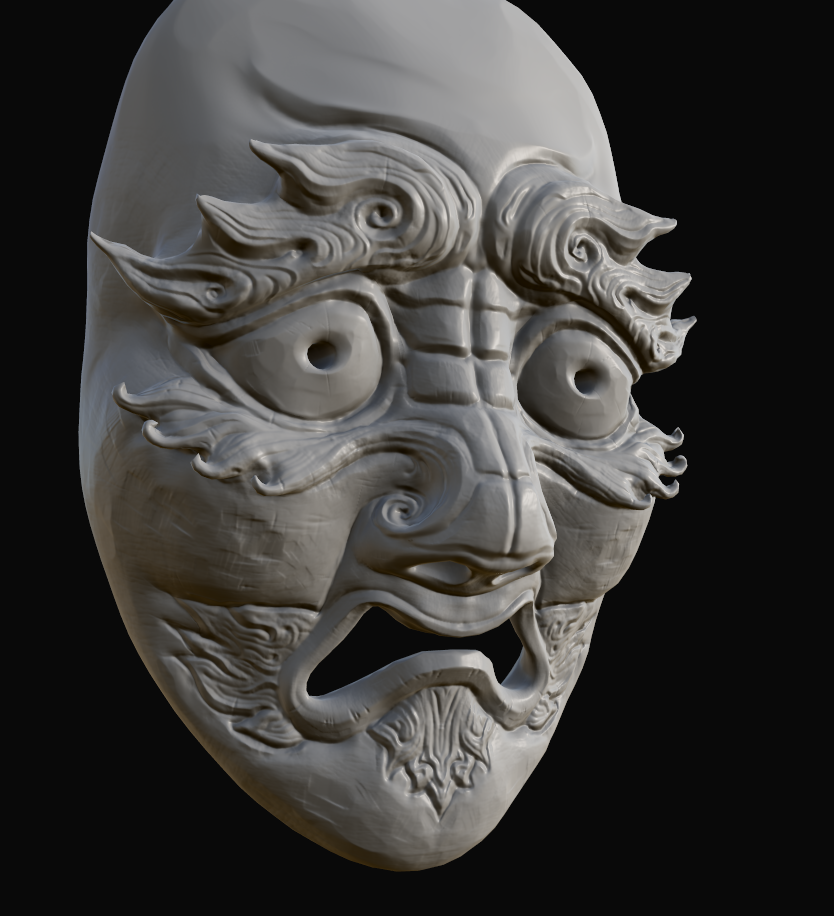
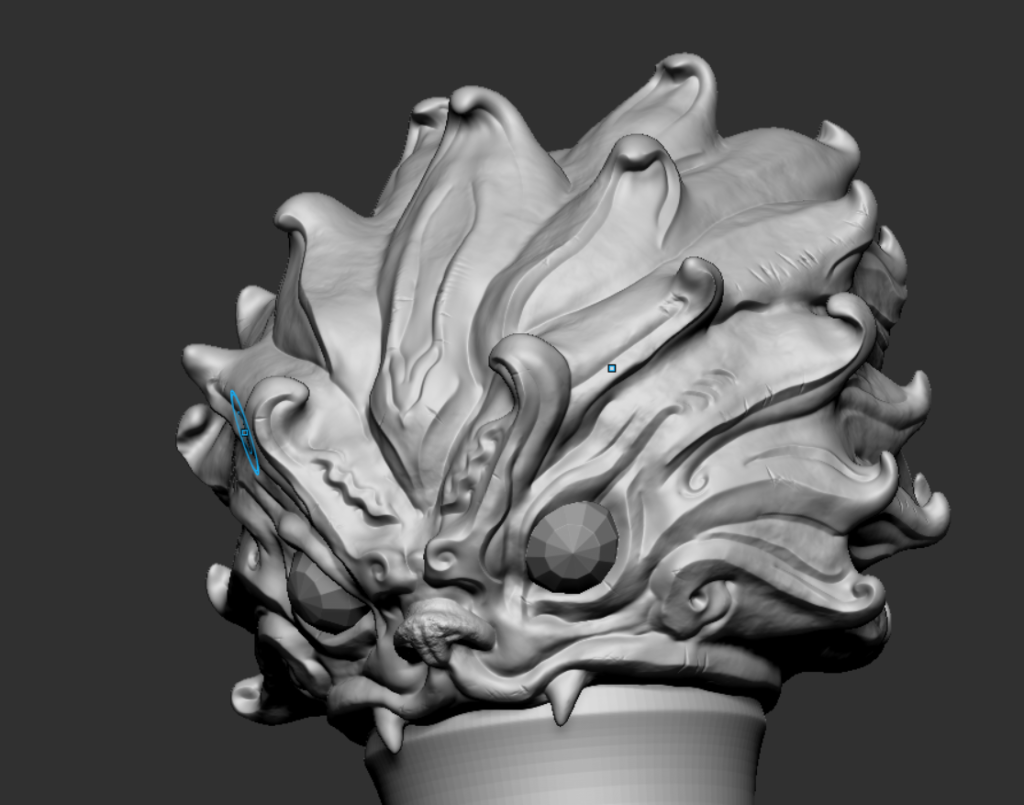
I had a discussion with micheal today, and micheal thought that he liked the detail around the face, and that I could try to make the face more detailed to get the viewer to focus on the face, which made perfect sense to me
17/1/24
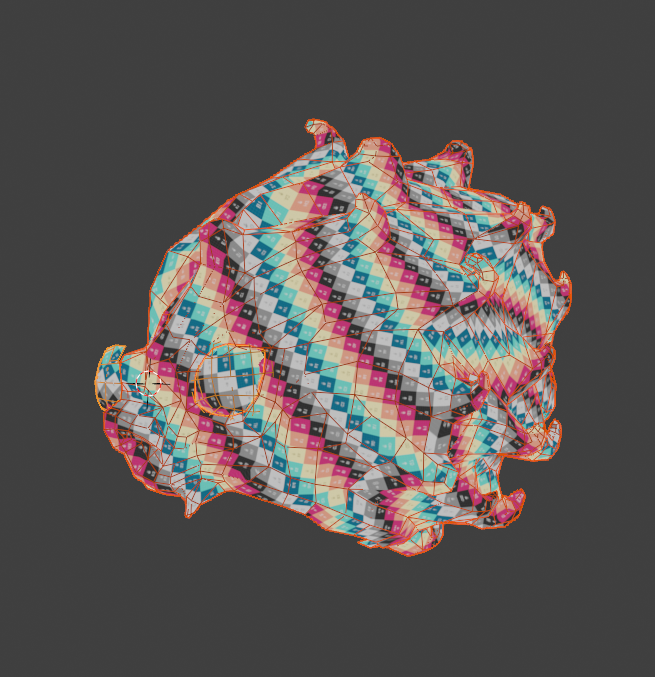
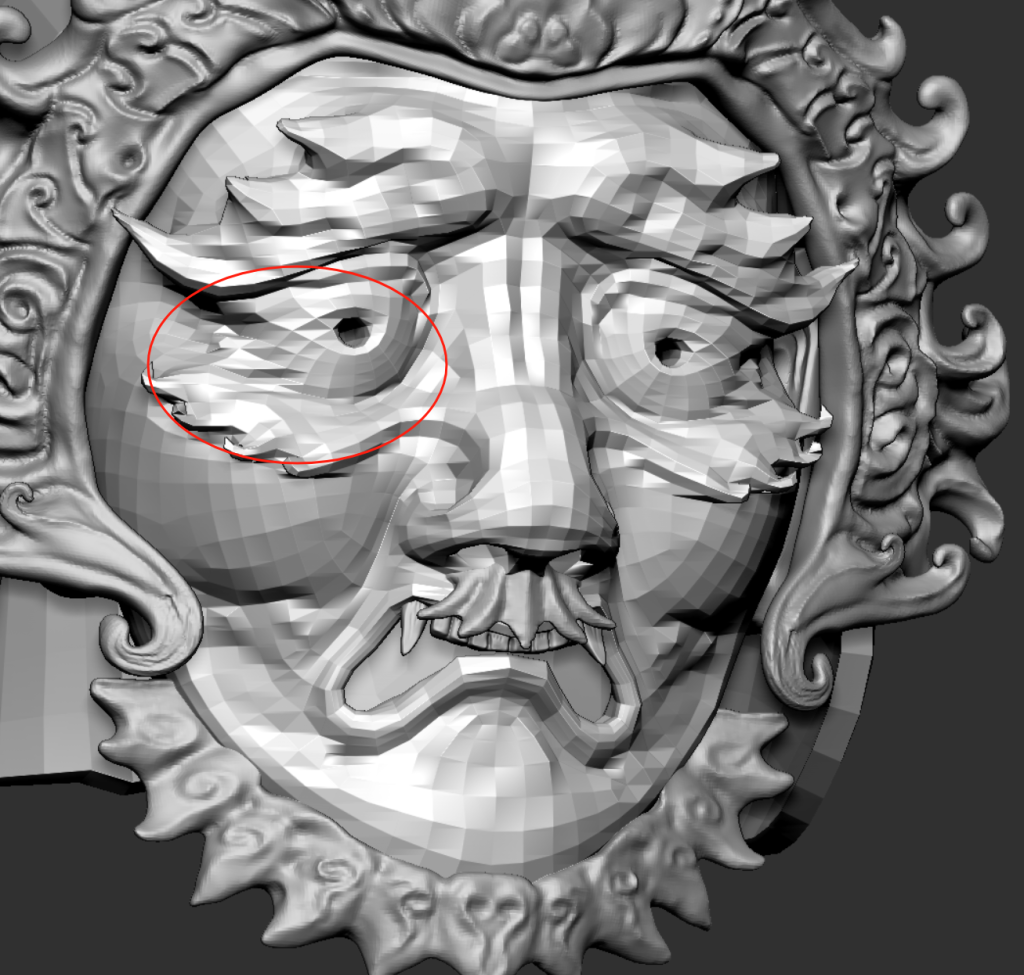
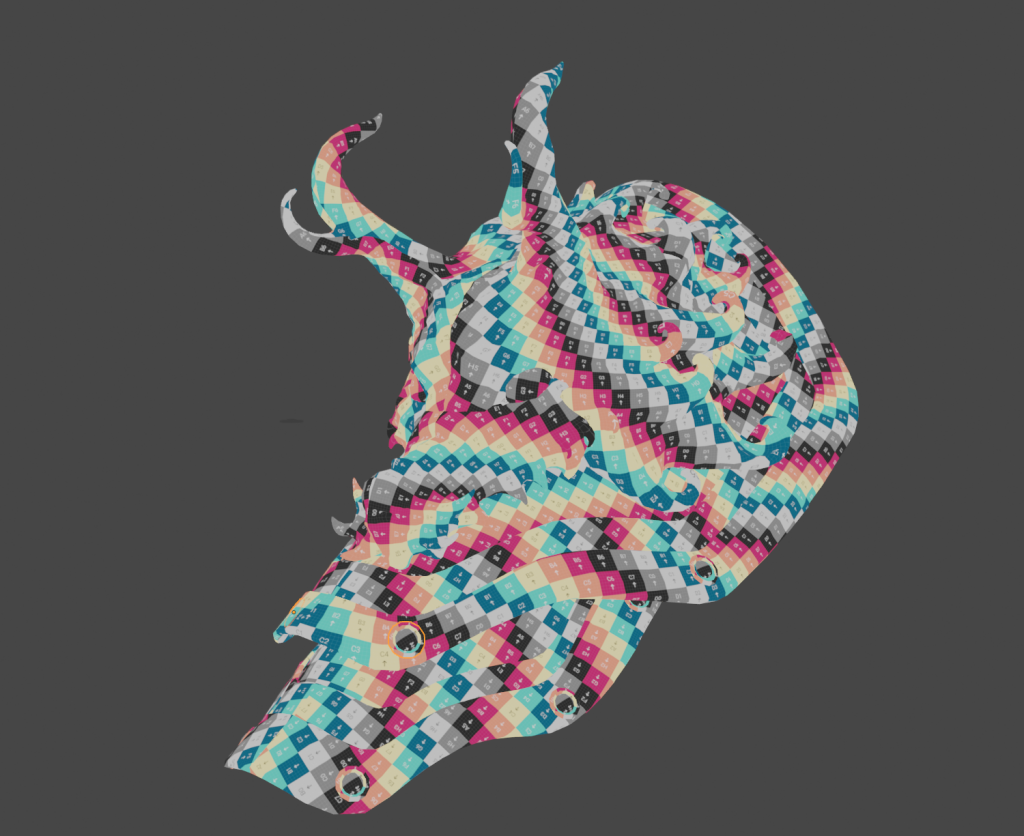
Today I tweaked the pattern as well as adding more detail and I used Orb’s rock brush. The feedback I got from my classmates was that it’s best not to use mirrors when making abrasions, which does make sense to me. After that, I was using zremesher topology and put it into SP to preview it, to prevent problems when making other parts and to provide a reference, I adjusted the canvas size but didn’t make good use of the UV area because of the auto-expanding UV’s.
22/1/24

23/1/24
26/1/24
Last week, I was primarily troubled by issues with Zremesher and local pivot points in Zbrush. I discovered that the only way to correctly mirror the model was to adjust its position in Blender. To preserve my high-poly model, I chose to export it, then change its position in Blender while keeping a record of the keyframe positions. (Actually, I could also adjust the position in Zbrush and perhaps even consider using its posing features). This consumed a significant amount of storage space on my computer and created issues when bridging between the two software programs.
Later, I found the GoB plugin, which facilitated the integration between the two, but I also noticed that importing a Blender model into Zbrush with a high-poly model can cause bugs. Overall, I encountered numerous technical challenges.
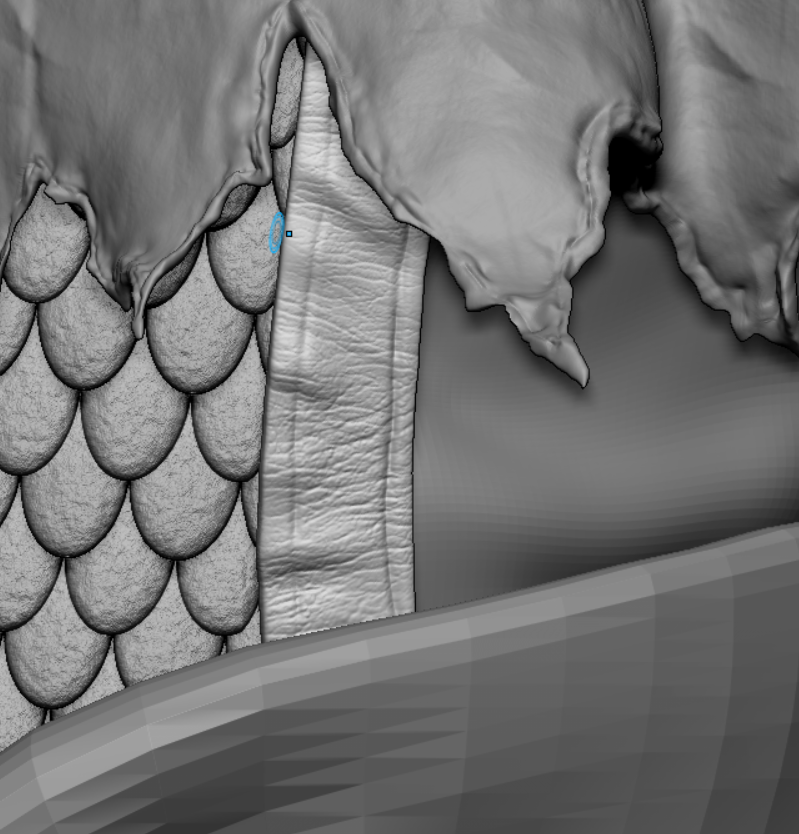
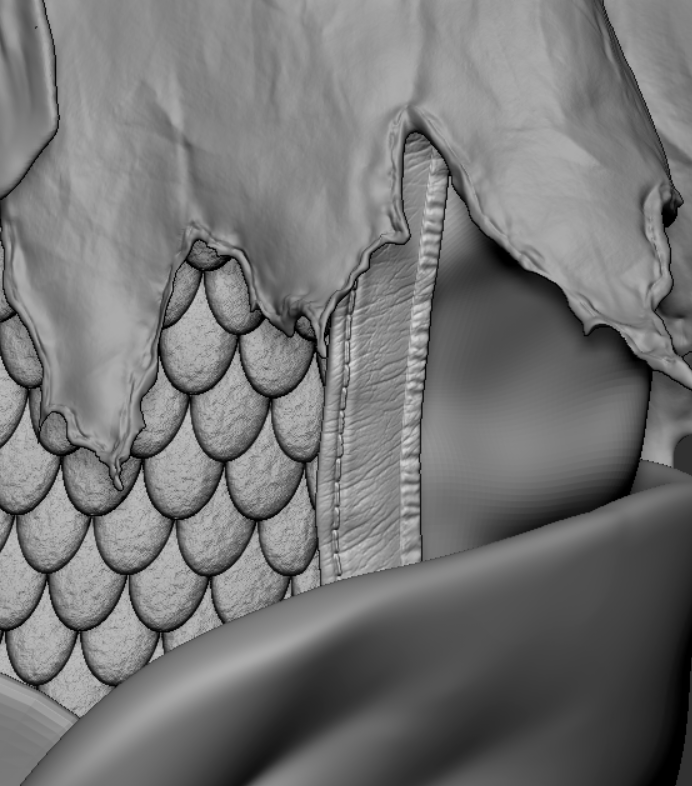
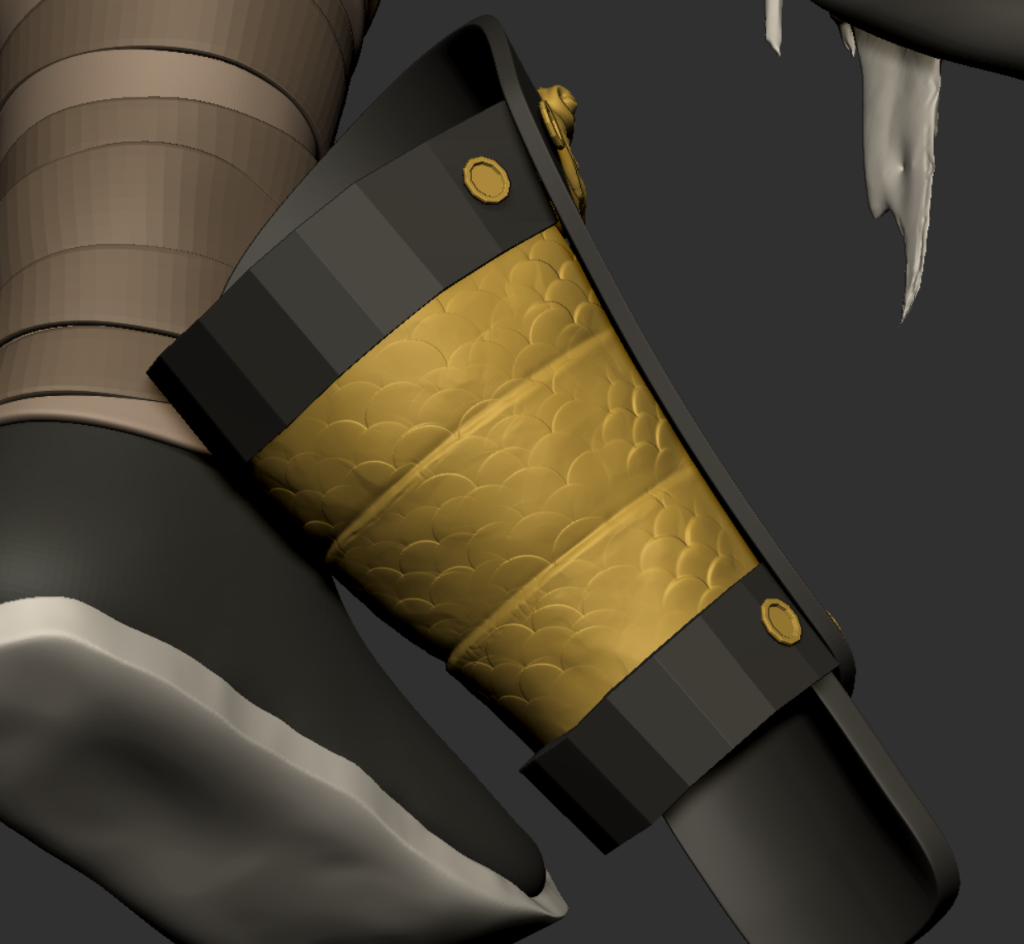
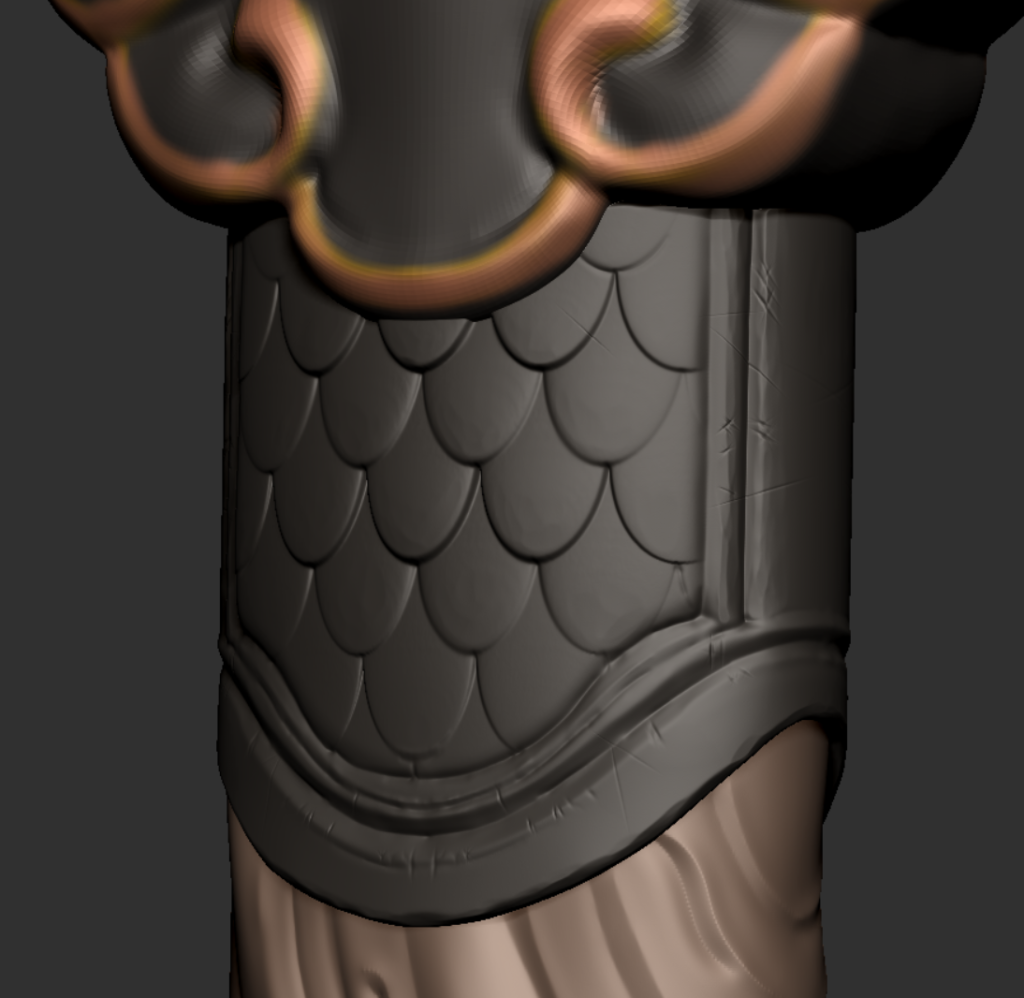
Regarding the creation of cloth and scales, the scales were relatively simple to make. I purchased an Alpha brush, unfolded the UVs, and then used the surface noise feature for the creation. However, while sculpting the leather texture, I applied too much pressure, resulting in an excessive number of wrinkles, which made it look less like leather.
Additionally, I also reorganized and planned my schedule anew.
Regarding the process: I started by creating a basic brush to sculpt the bumps and then used DamStandard to add details around the edges. Once that was approximately done, I used a leather texture alpha map (which comes with Zbrush) to create the texture.
27/1/24
28/1/24
29/1/24
30/1/24
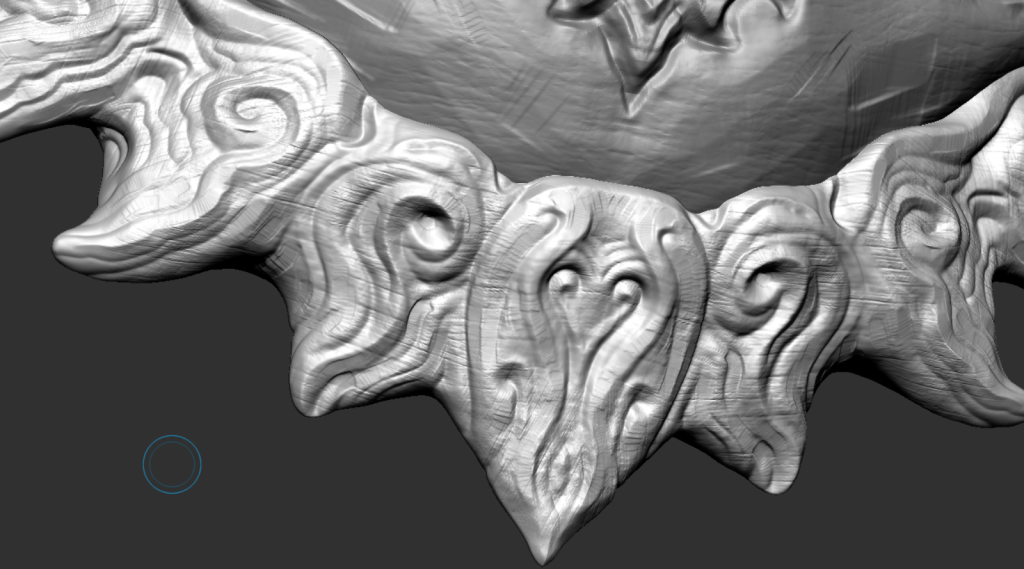
After spending a long time sculpting these details I realized that they don’t actually play much of a role in sp, and that he was actually only a very small part of the model when I imported the whole thing into zbrush. So my primary goal was to get the details out quickly.
The long hours of sculpting details have actually consumed a very large amount of my patience and enthusiasm for this character, so for now I’m going to make the character as fast as I can first.
Thanks to my previous classmates as well as robert for giving me the advice that I am overly concerned with the details and I plan on stepping away from that.
The details produced this week are actually largely invisible
1/2/24
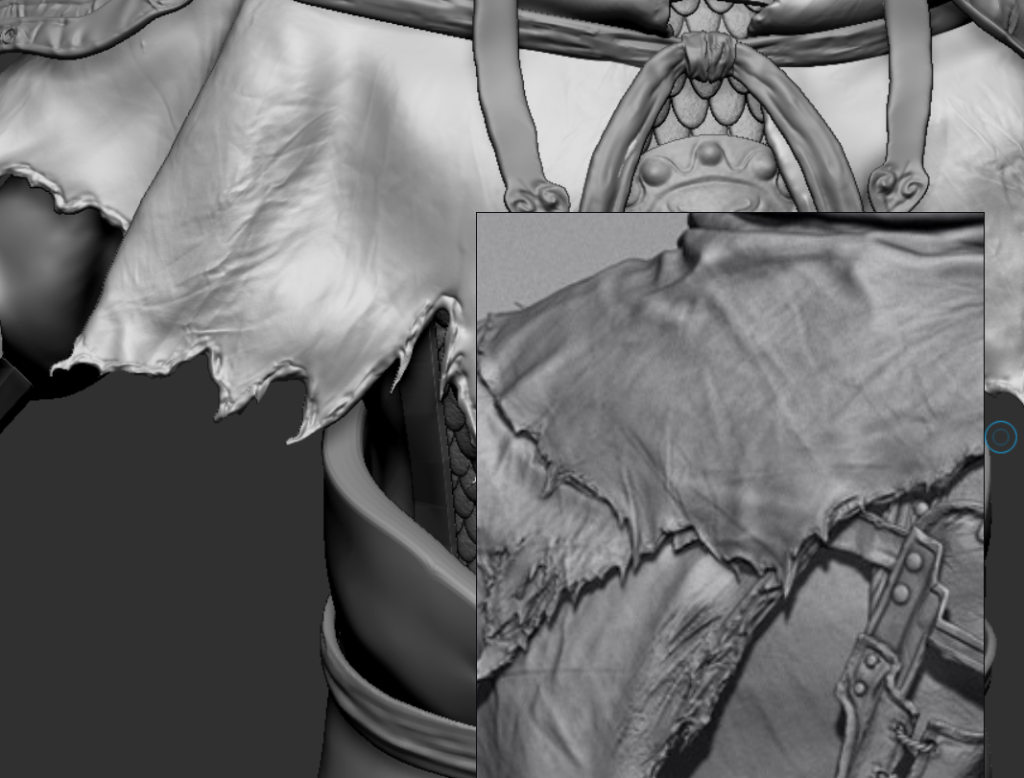
cloth detail
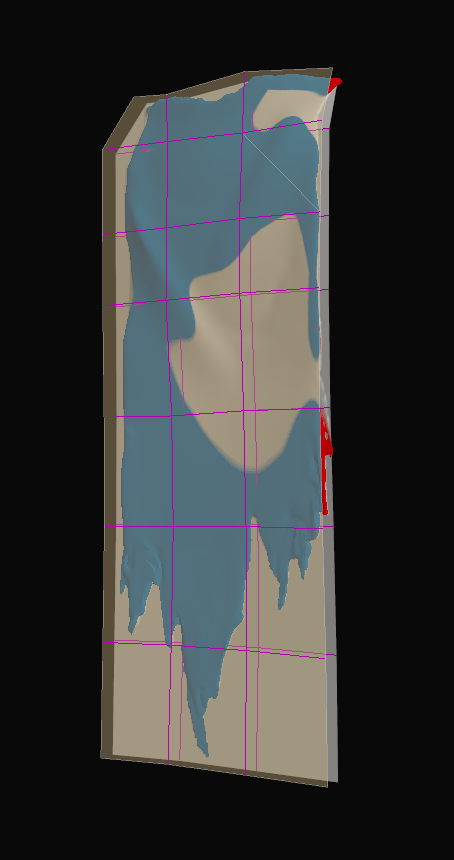
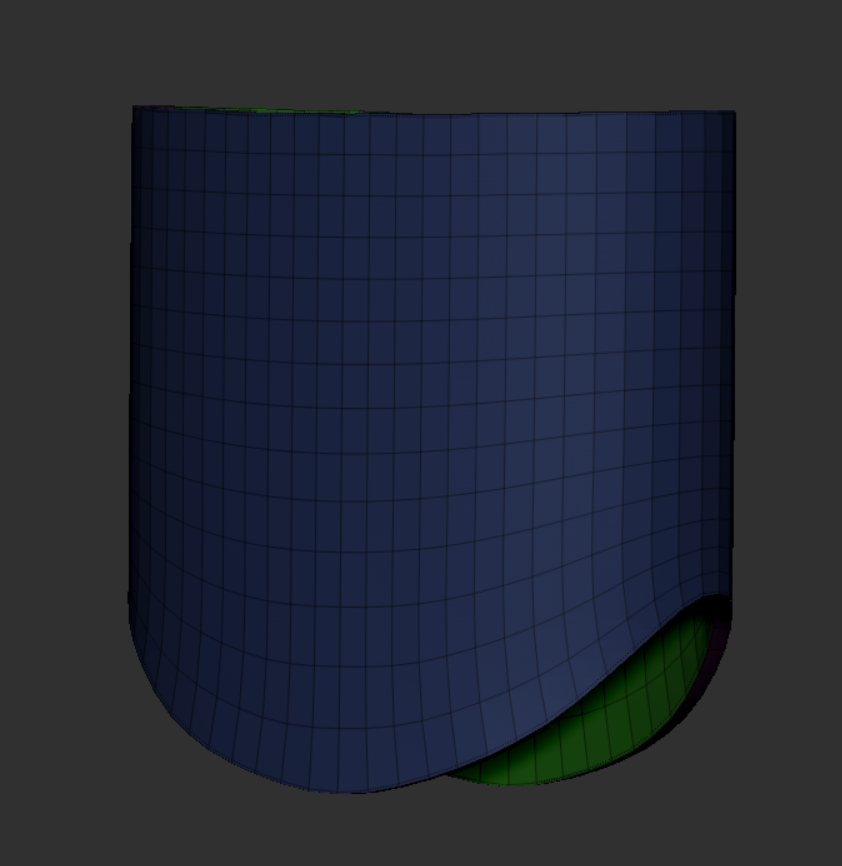
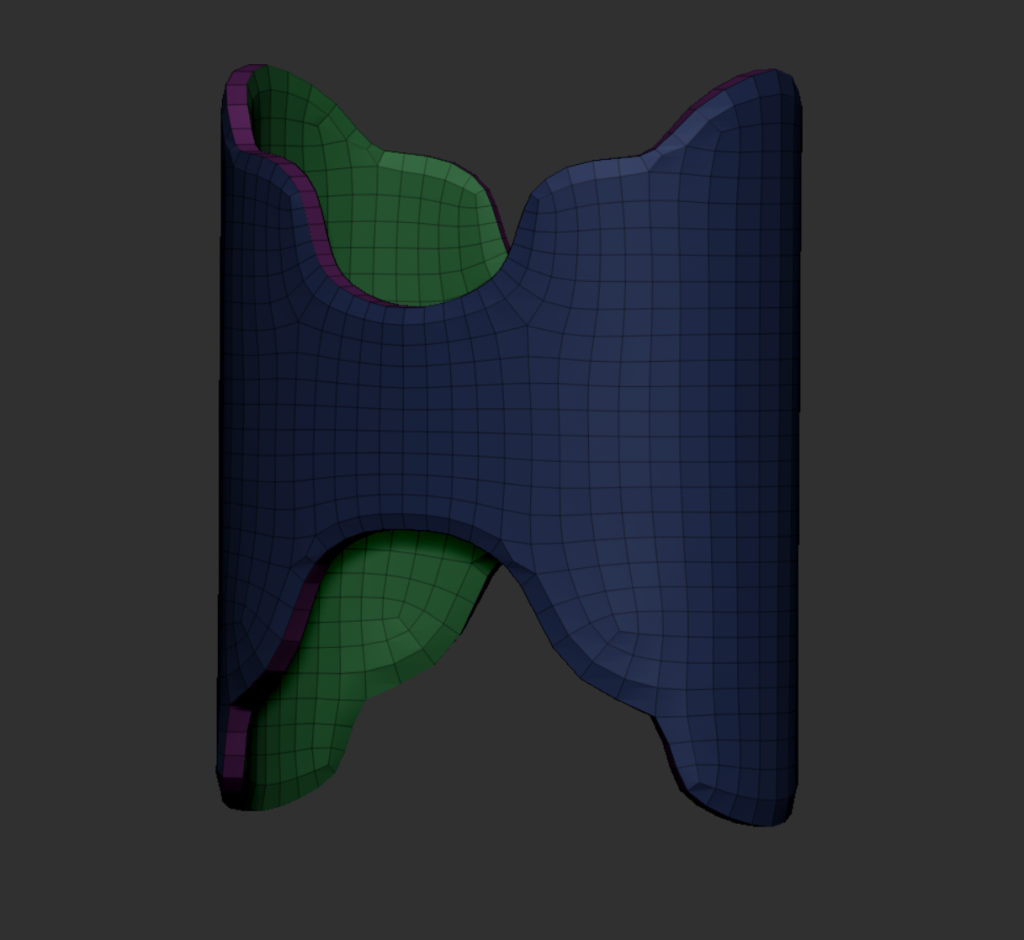
When I do costume detail, I think that this end detail is hard to bake out through normal low molding. So here I tried something else, the same way I made the cape before.
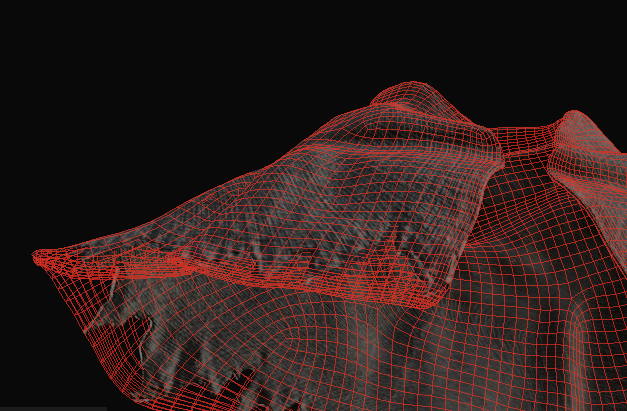
I first change the model to a flat bottom then zremesher and then bake it in sp afterward, but this makes the model double-layered
So I removed the interior, and although there were some issues, they were resolved with some more tweaking, and that’s how I made my cloak, and the topology will probably need to be recreated at a later date as well
This actually works well and saves the process of removing the uv’s
Other than that, I found that the alpha textures I made in zbrush didn’t do much, so this one I’m going to put off for now.
5/2/2024
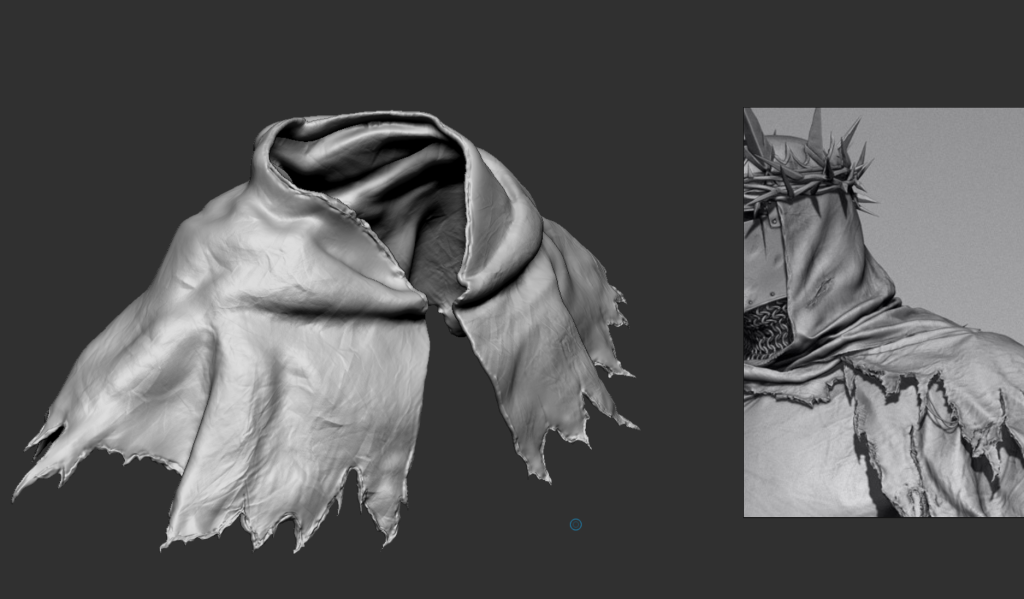
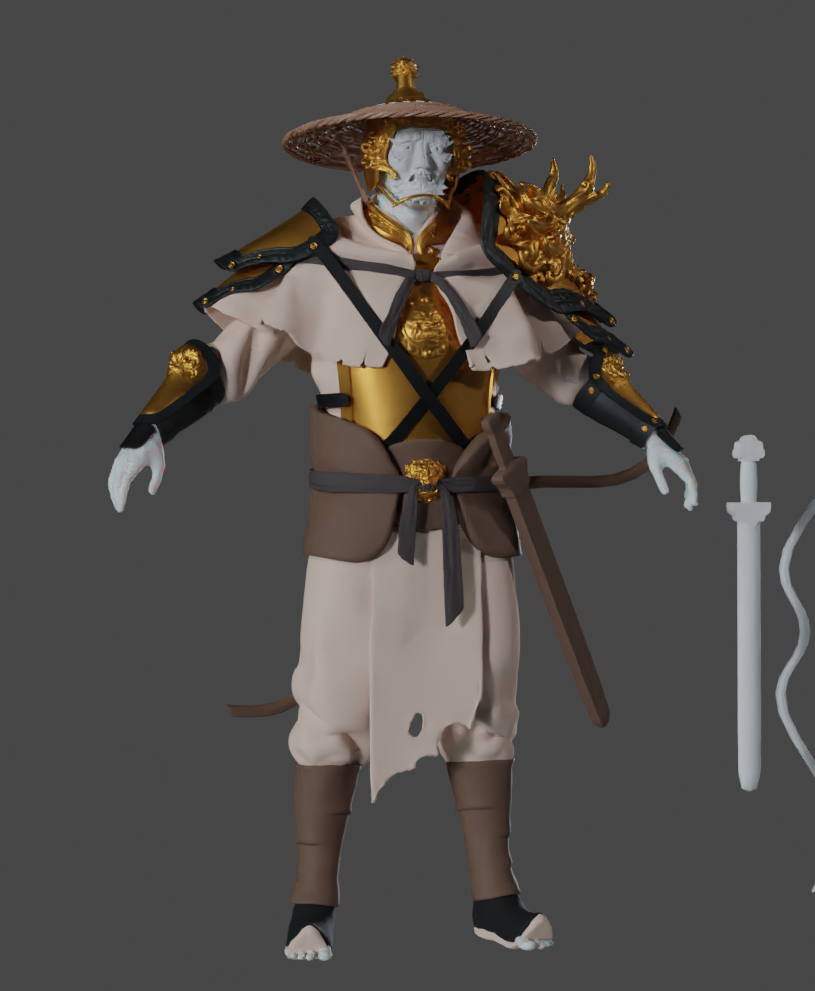
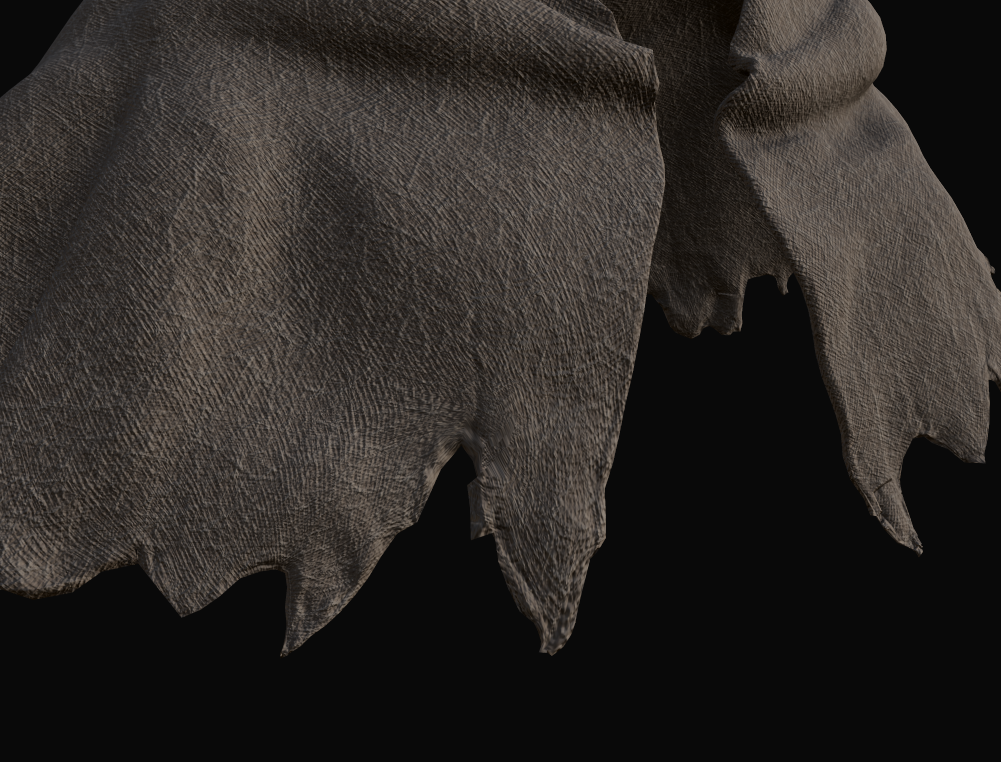
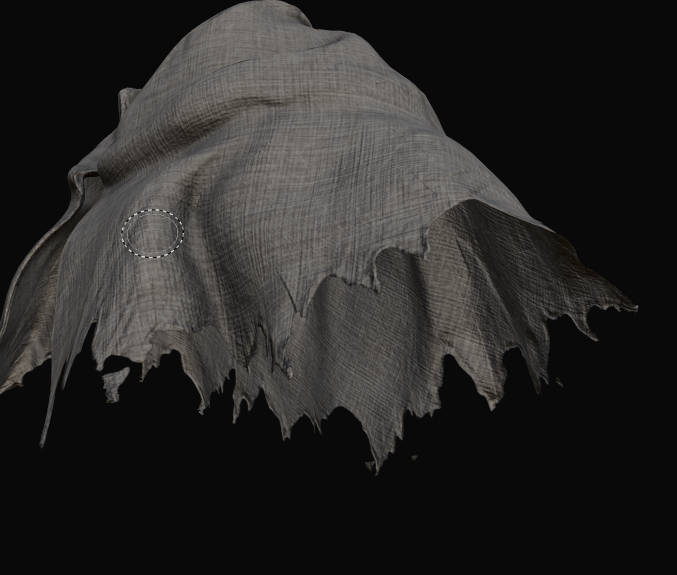
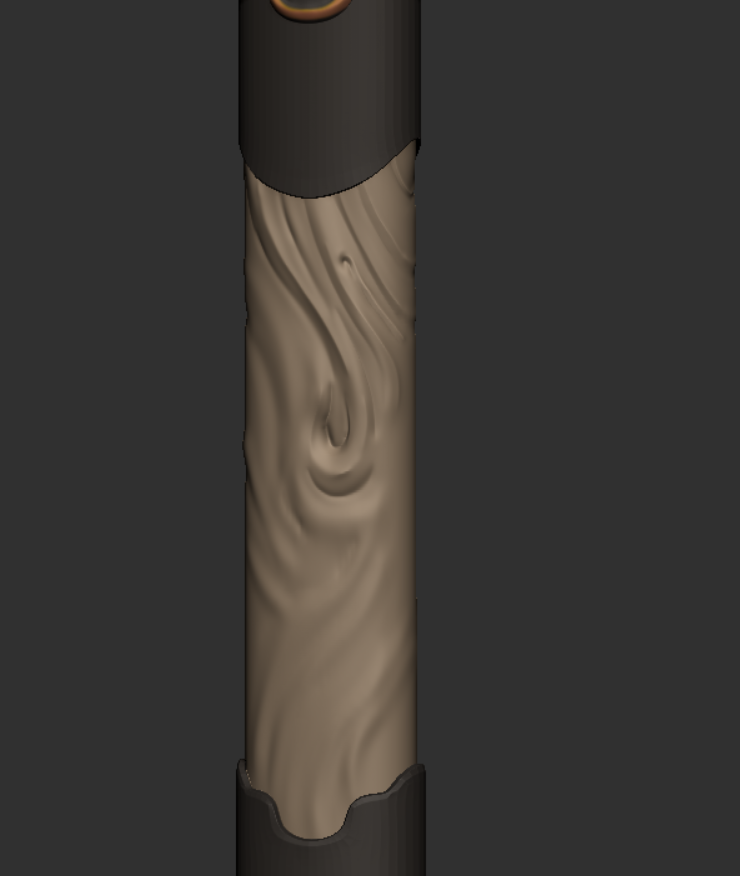
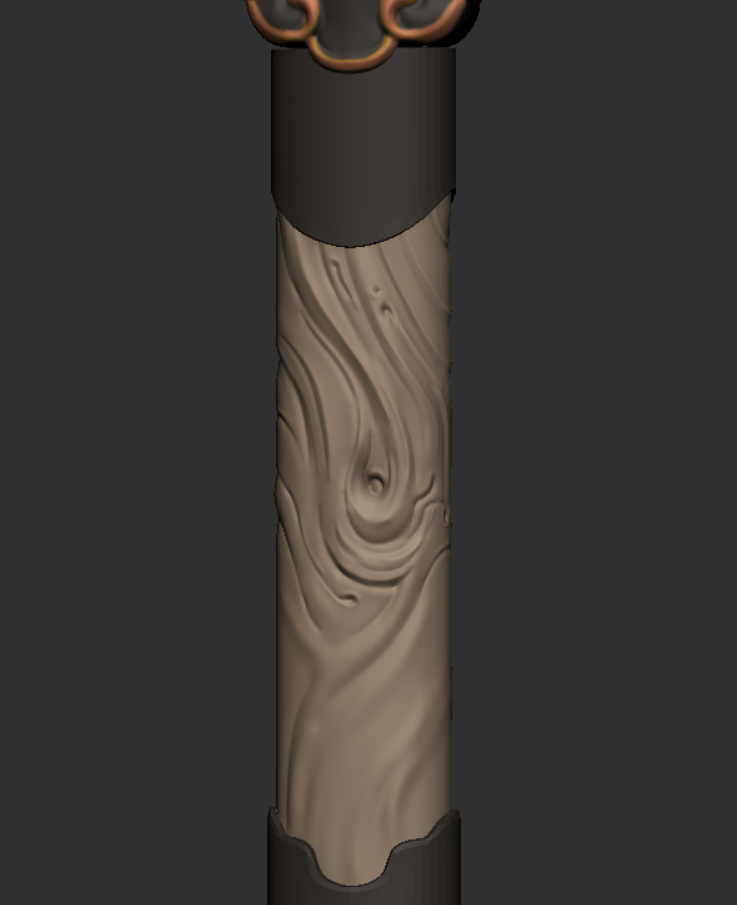
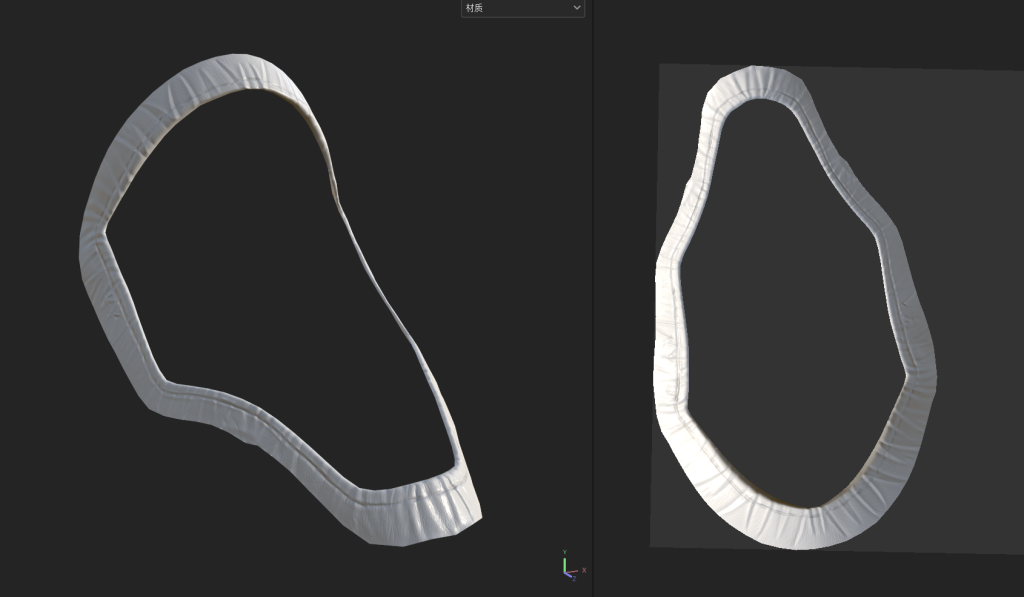
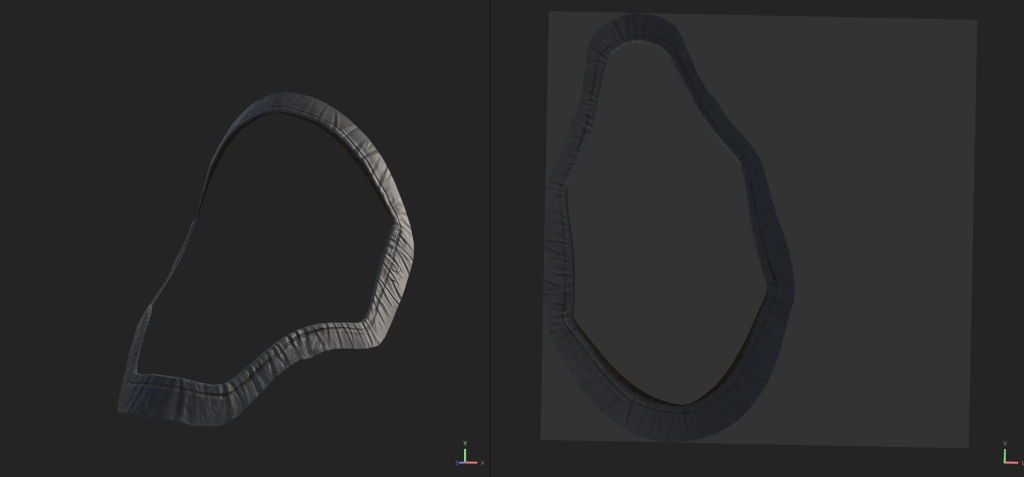
I further refined my cape based on the reference
6/2/2024

First I changed its shape .It makes the silhouette instantly smoother
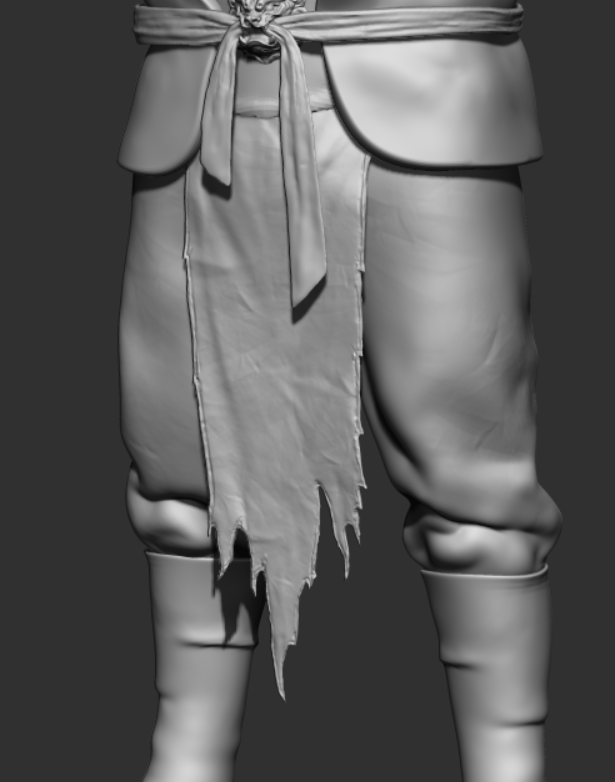
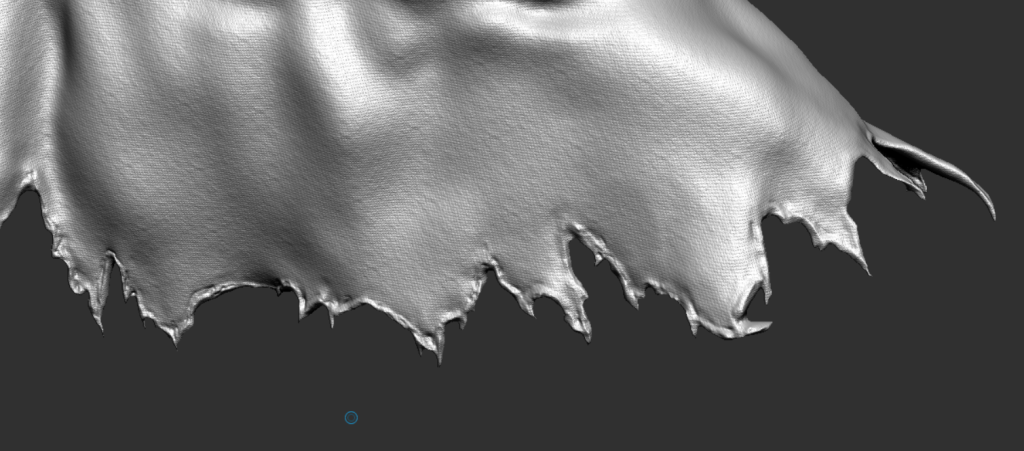
Following the same approach as before, I added the detail of the torn edges
8/2/2024 Thur
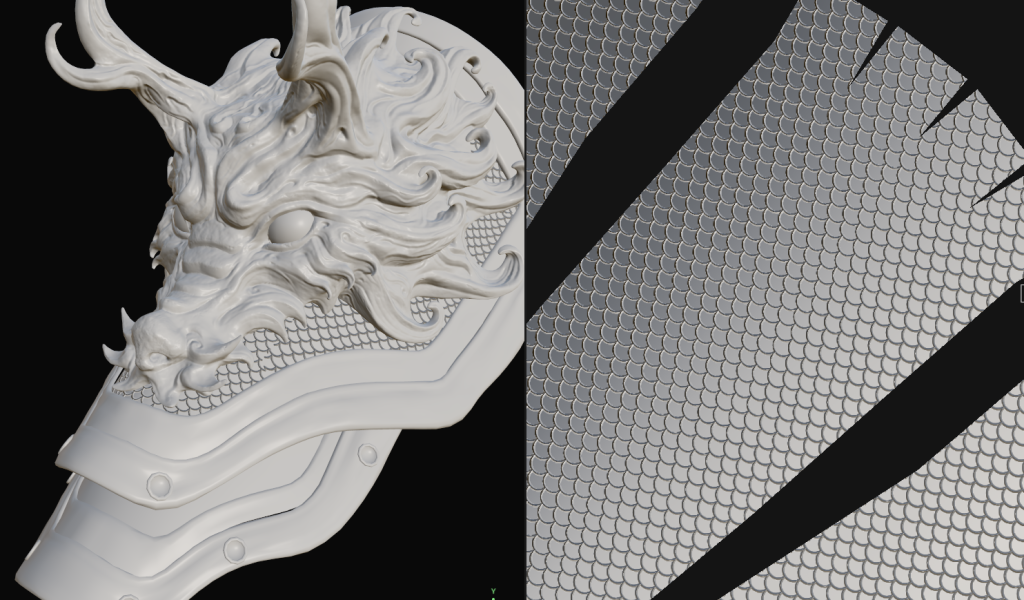
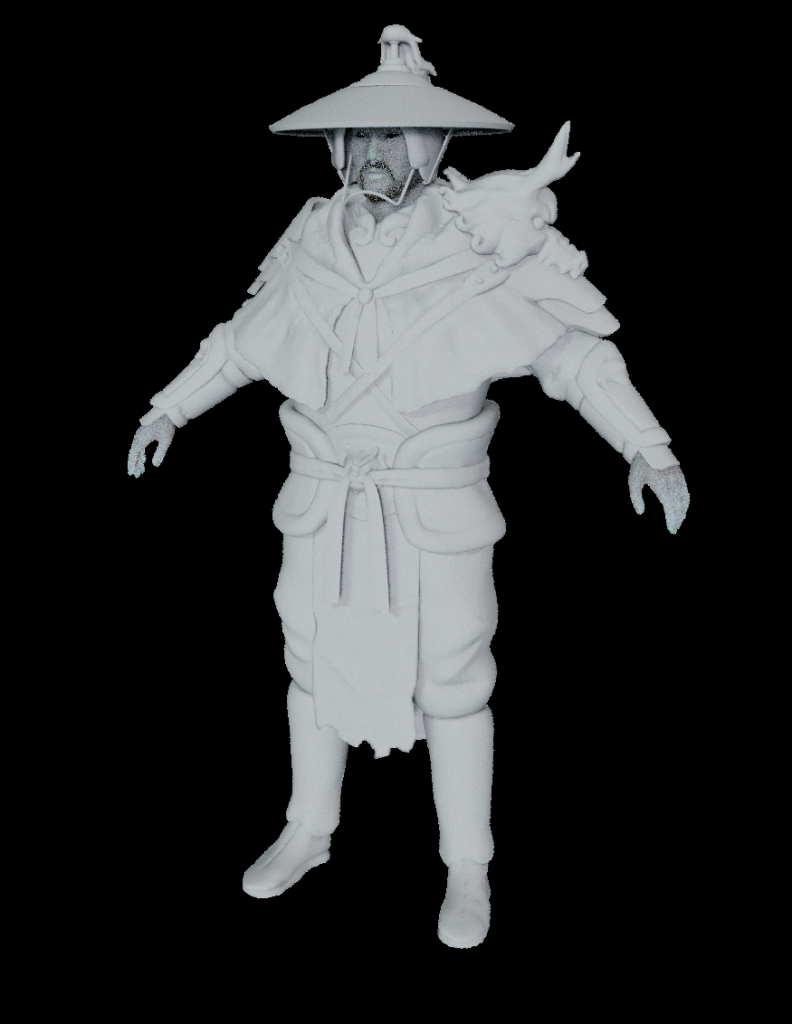
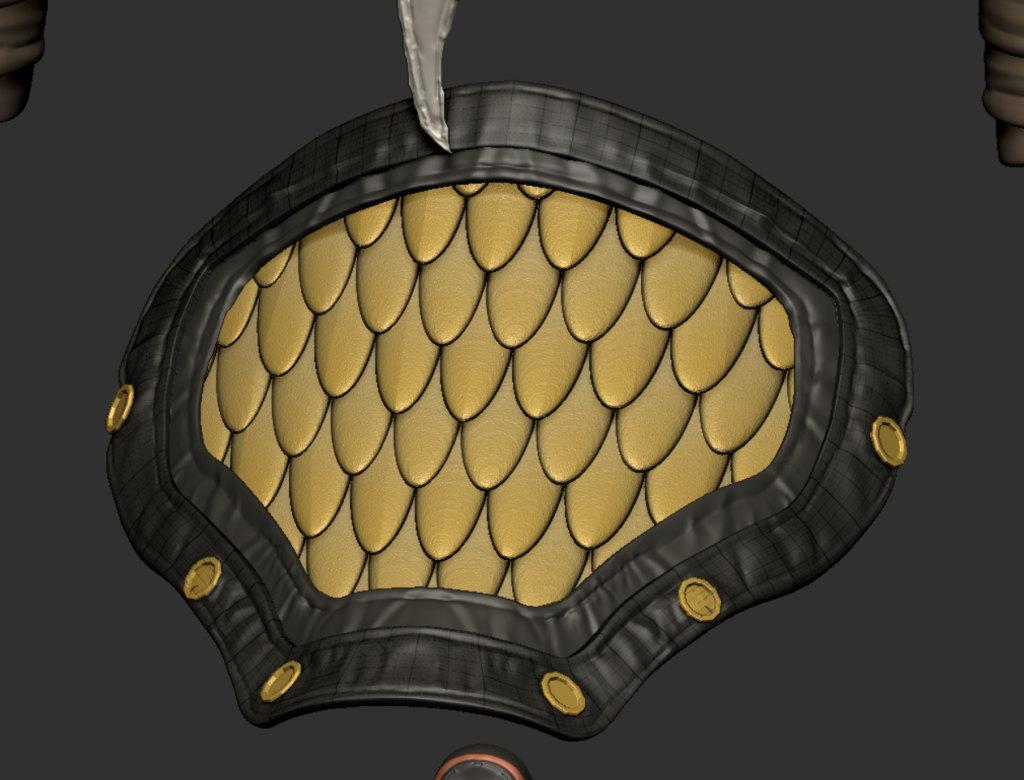
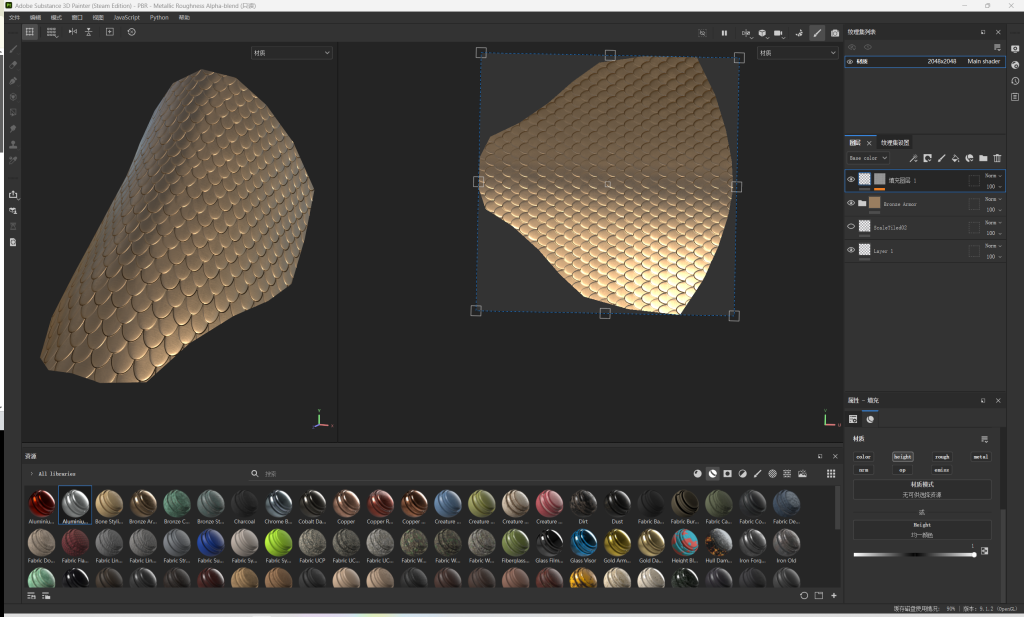
I tested the baking effect today, and it turns out that I can totally make dragon scales in SP, which also doesn’t take up too much memory on my computer (the effect with the scales requires a very high face count)
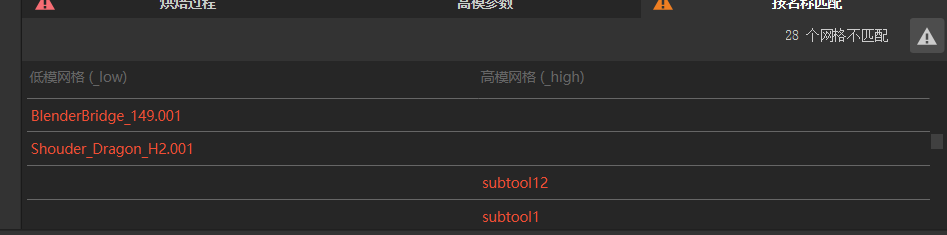
And when exporting the attempts I noticed that there would be name mismatches and that I would change my naming when using Goz. So I want to deal with the naming at the end
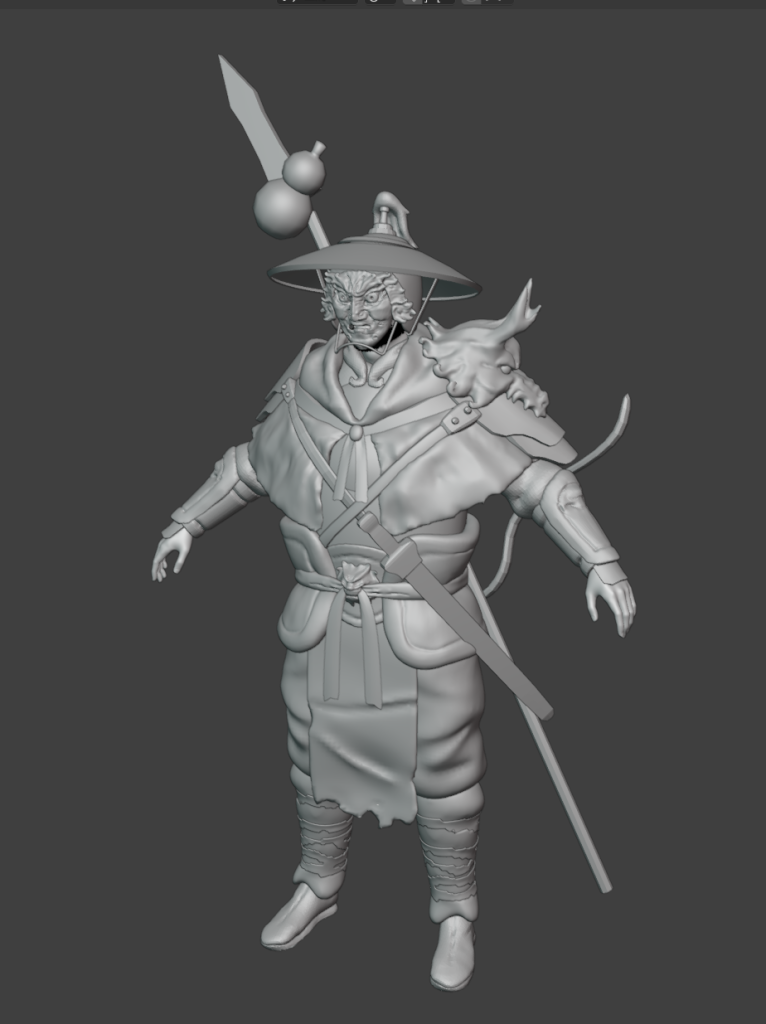
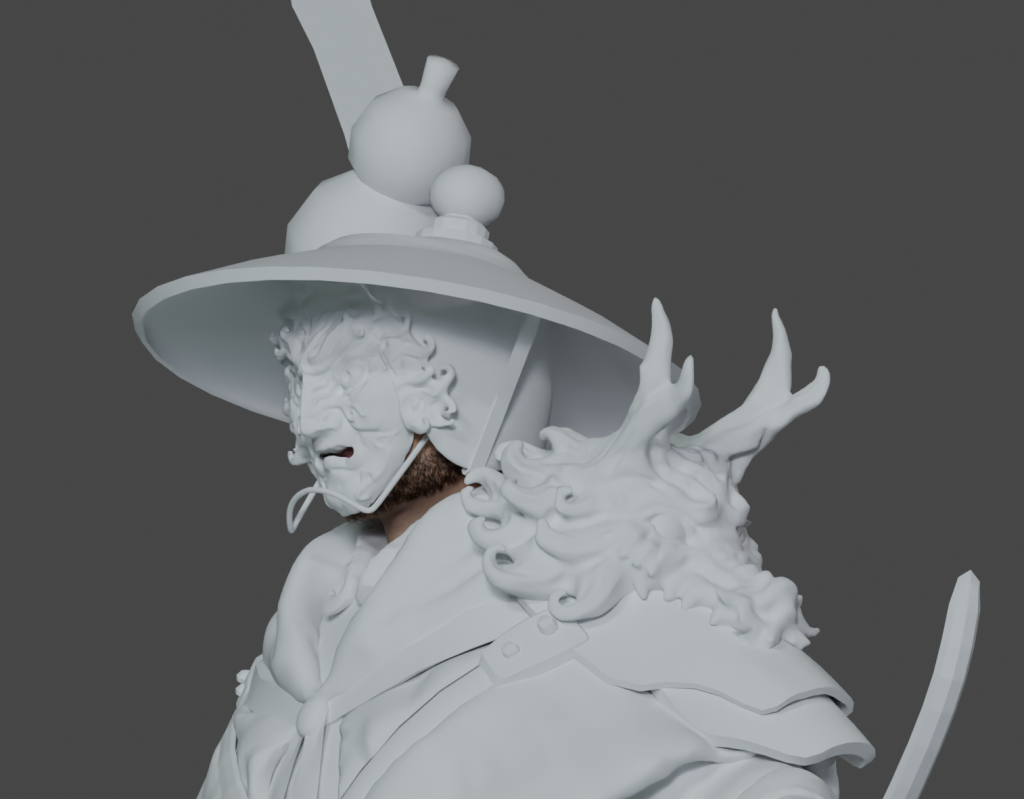
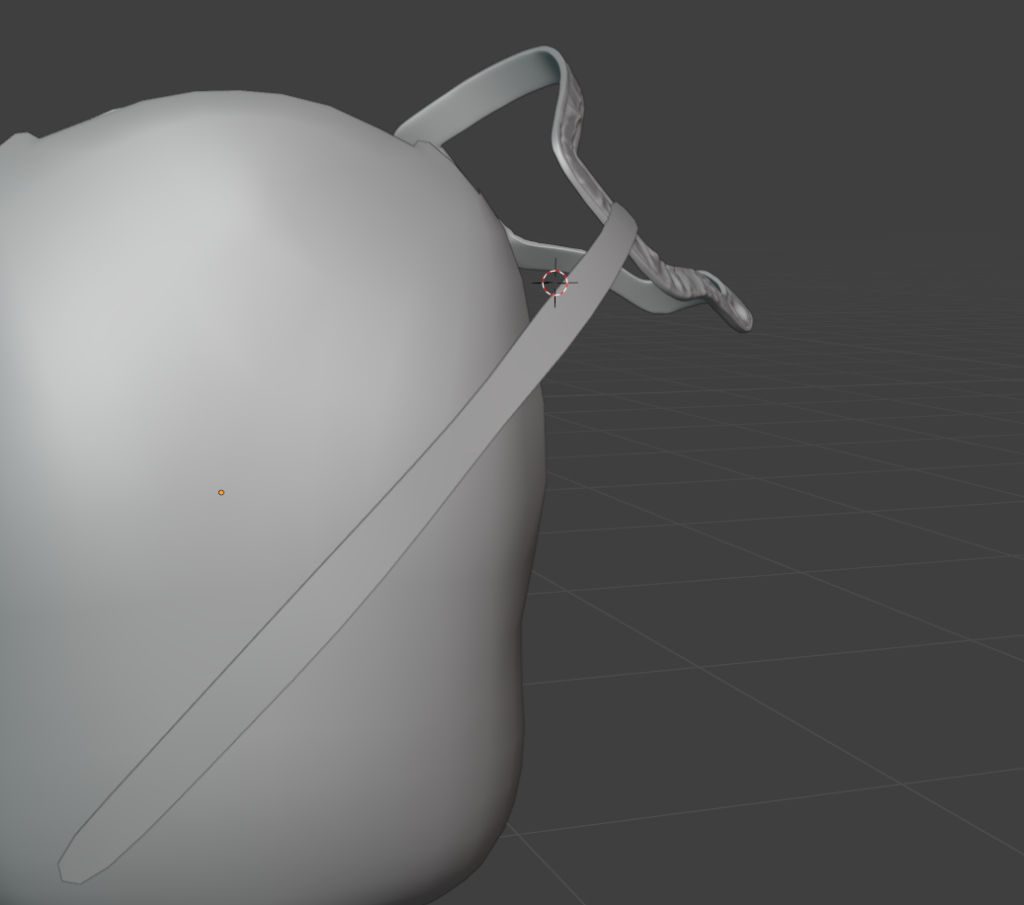
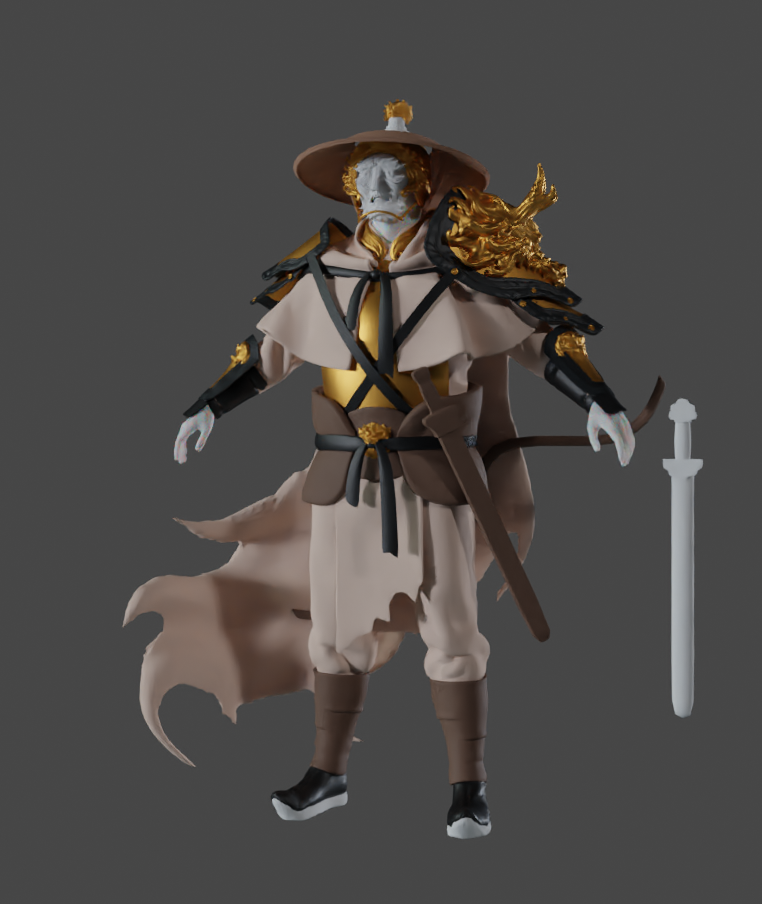
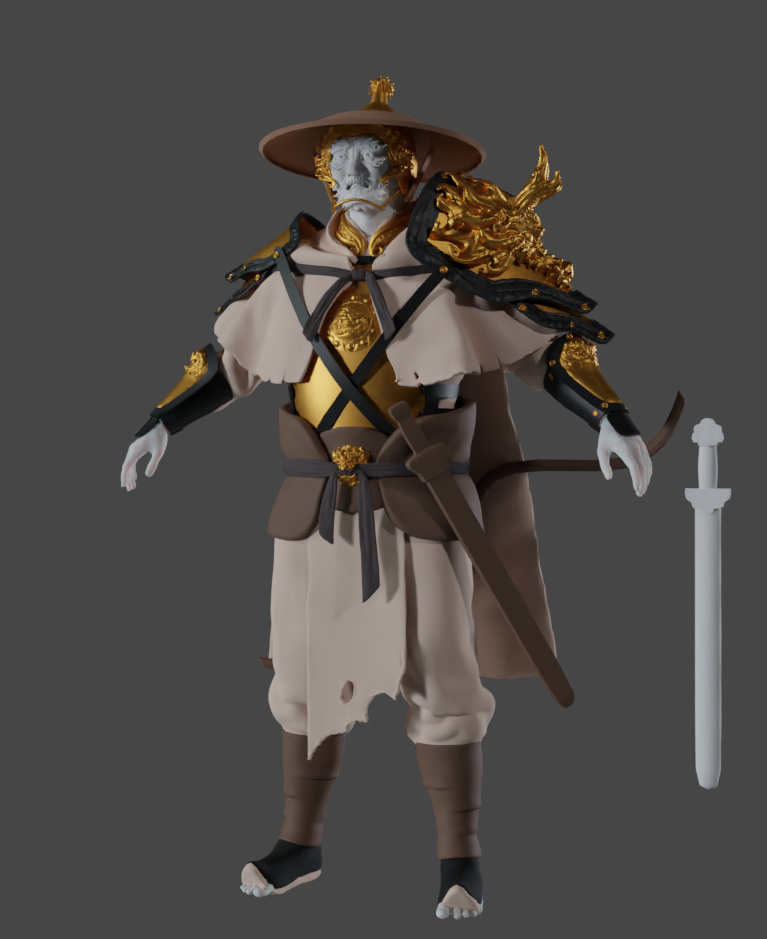
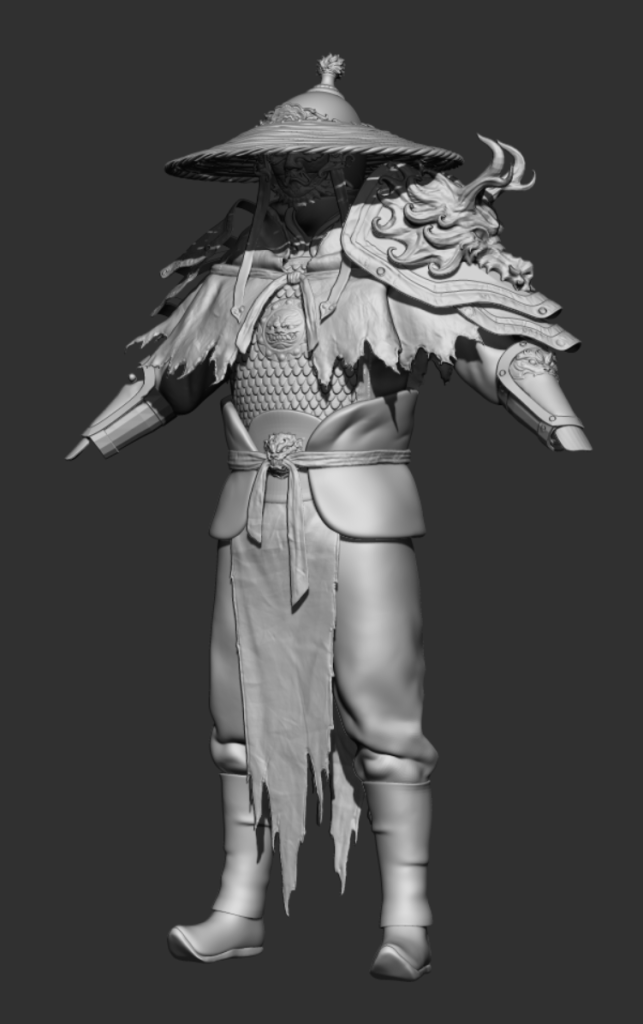
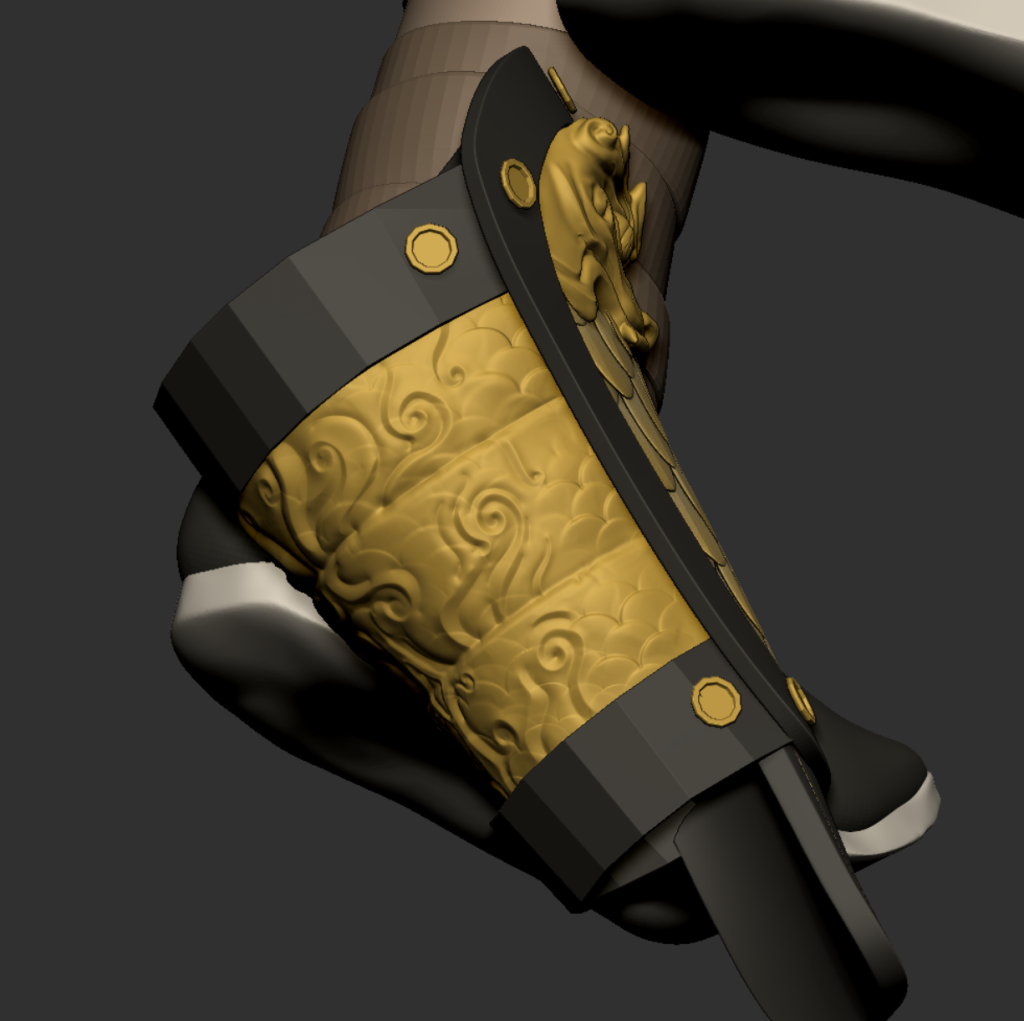
For the attempt at bucket hat placement, I think if the hat is placed flat it makes the top of the character’s head look empty, but if it’s like it is now it feels like the character is scrunching up his neck
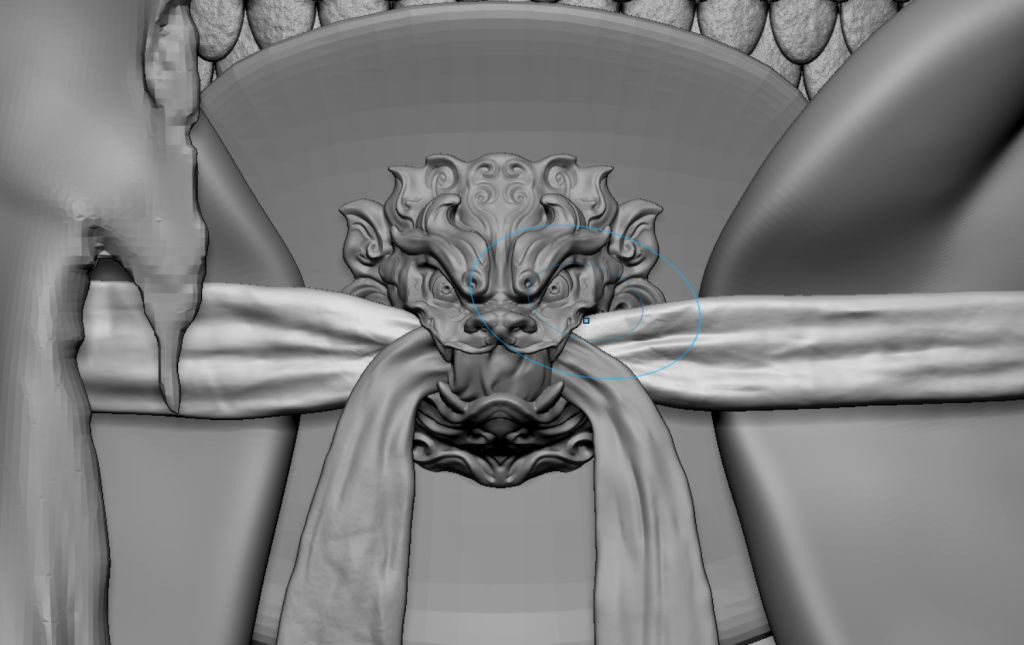
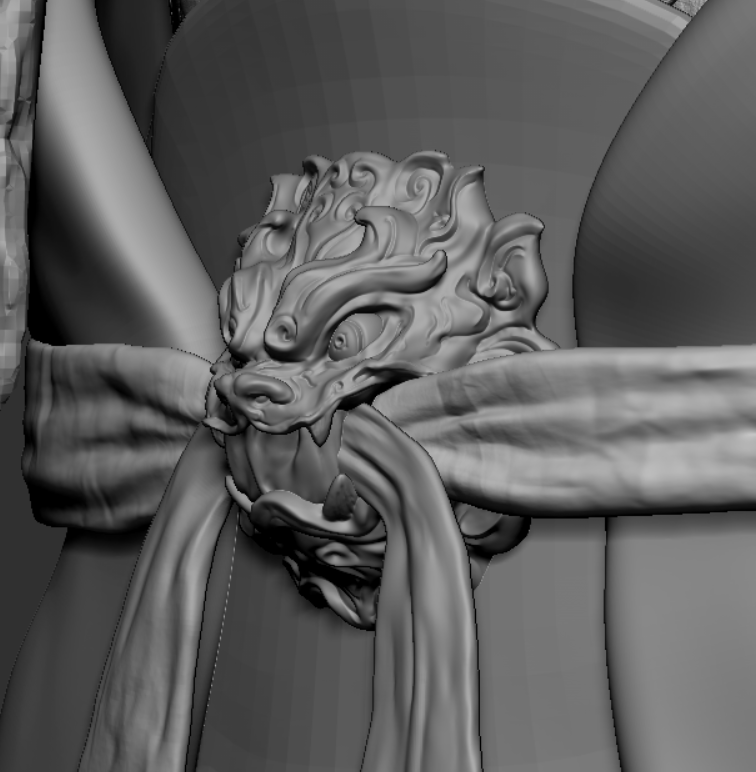
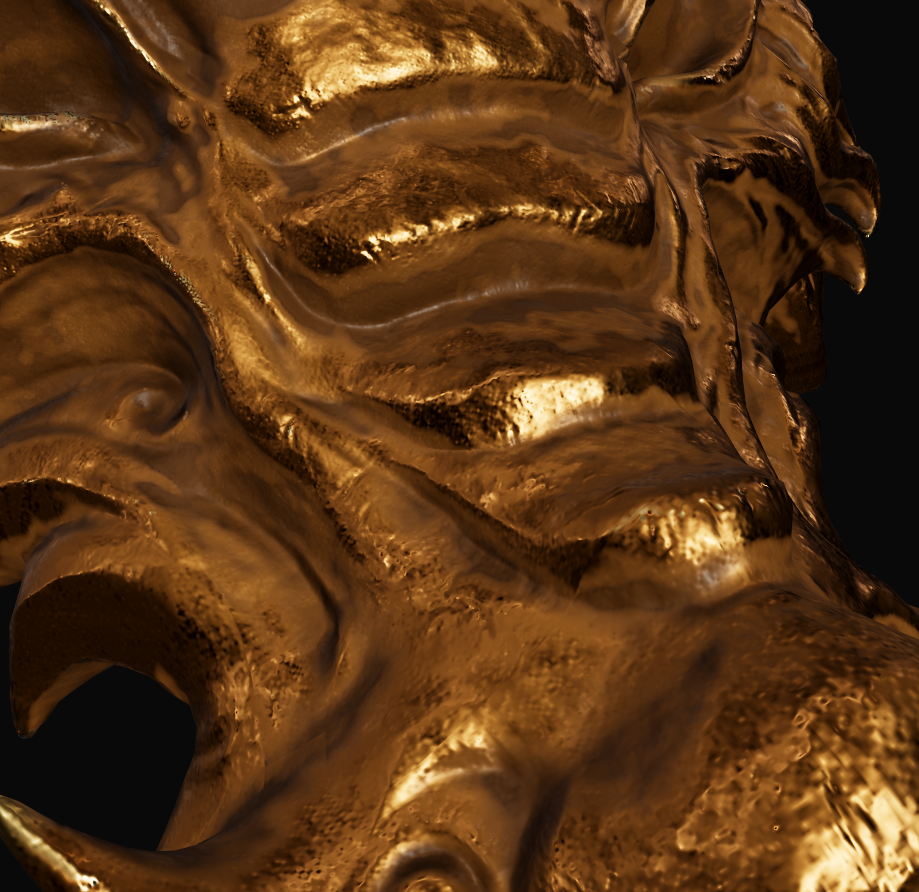
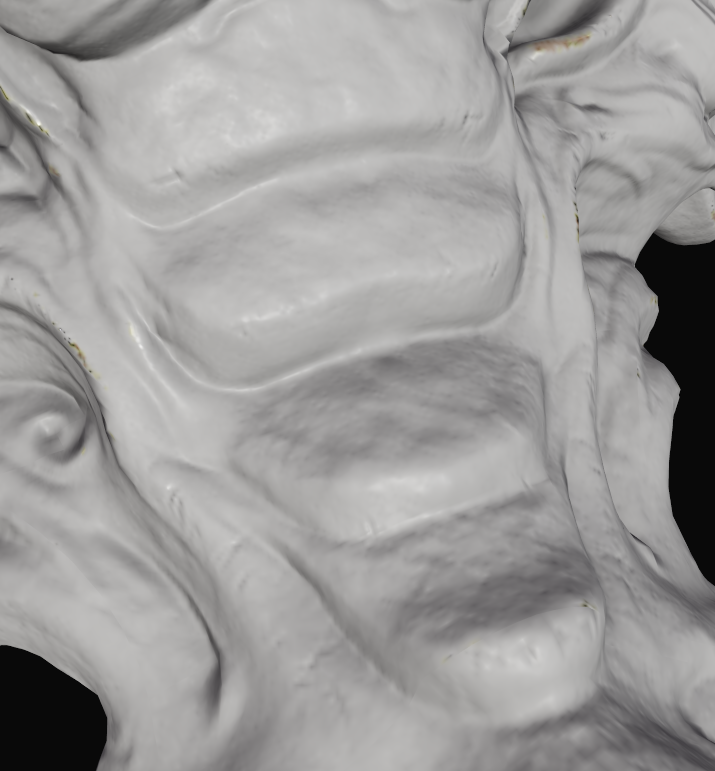
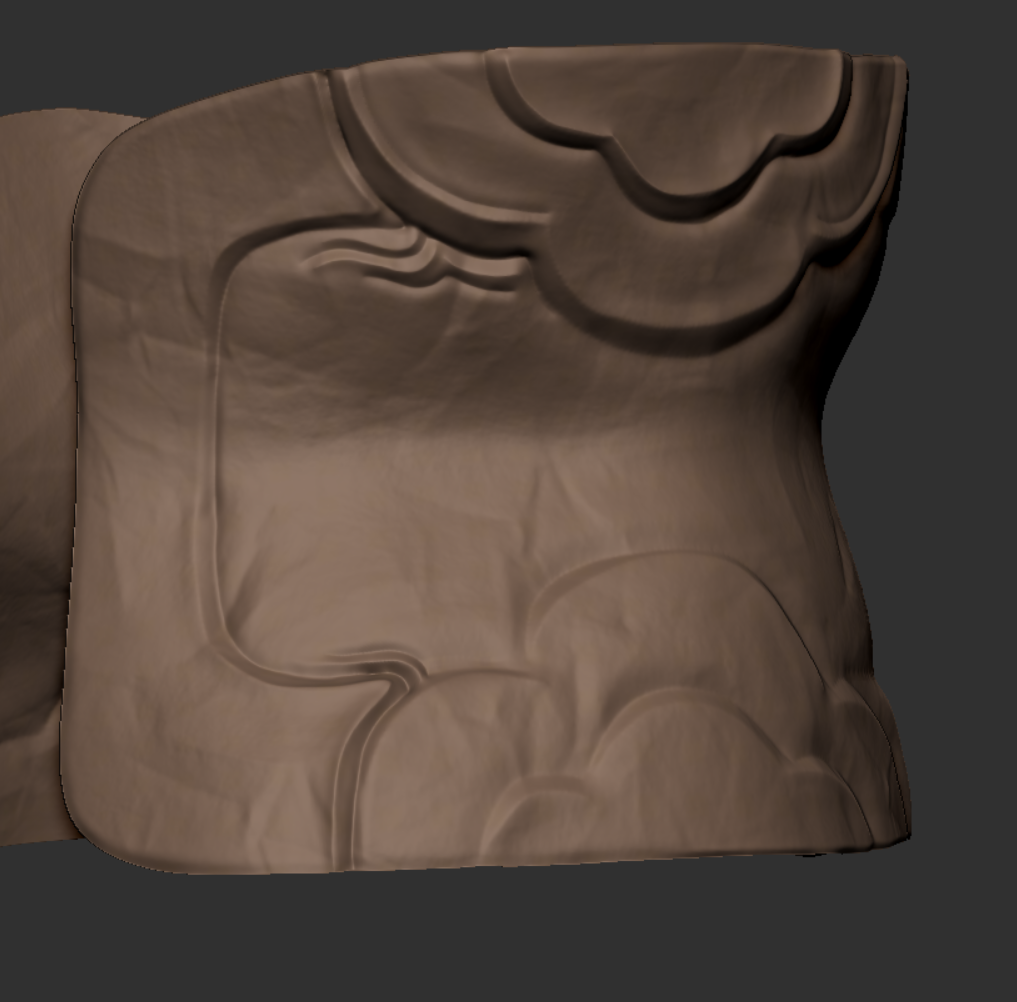
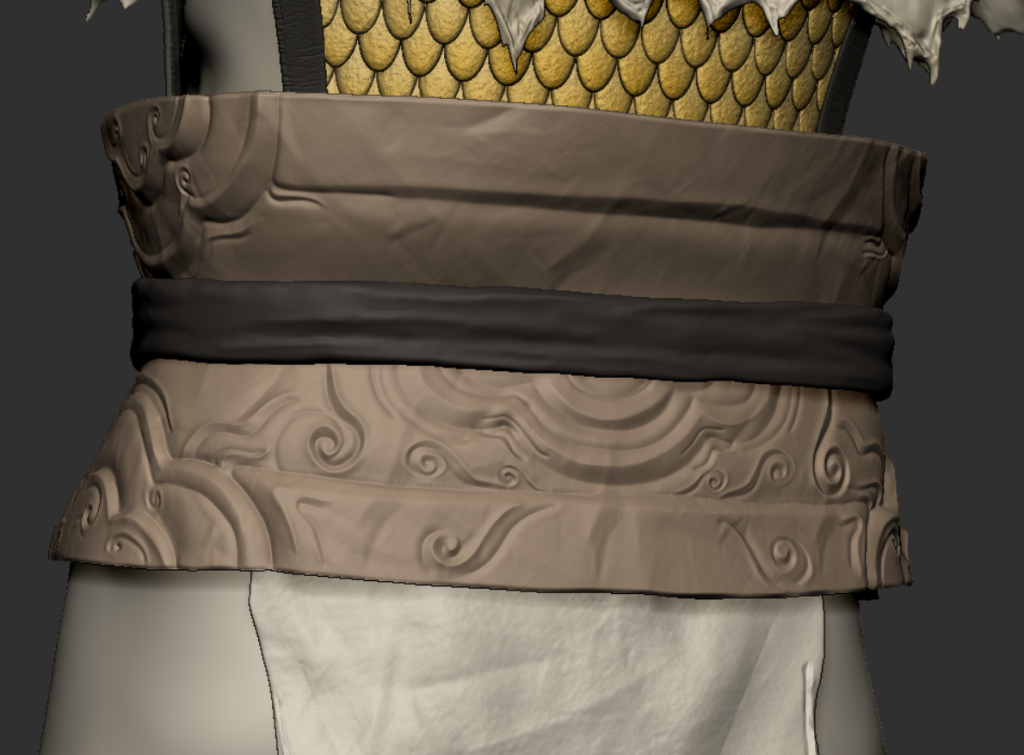
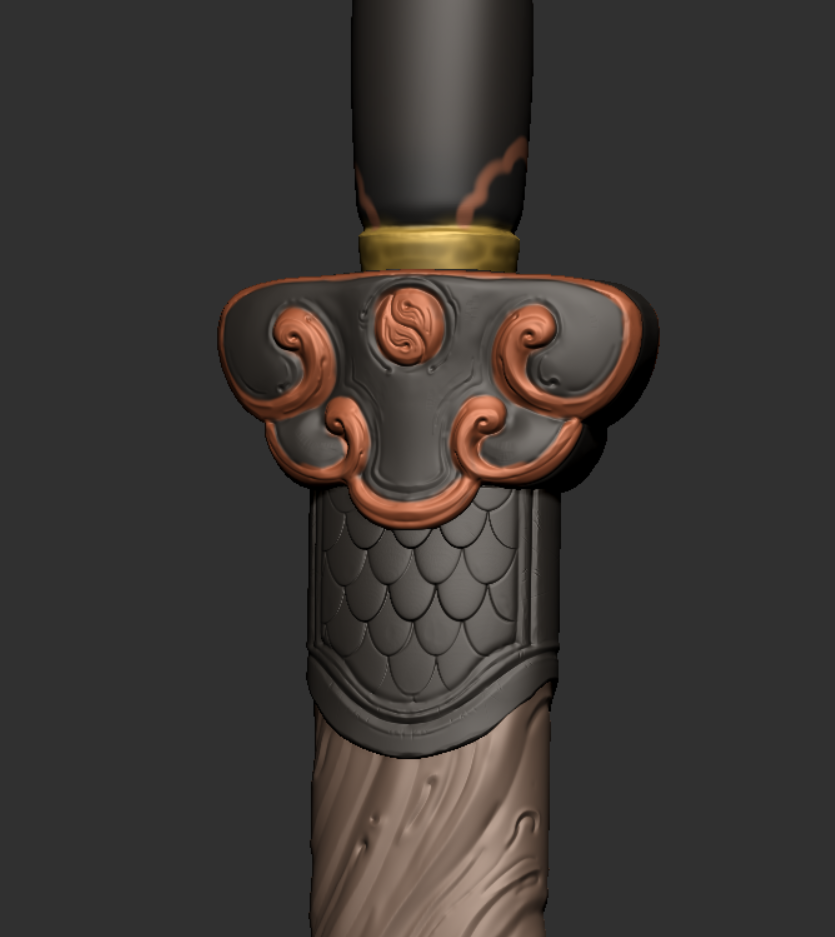
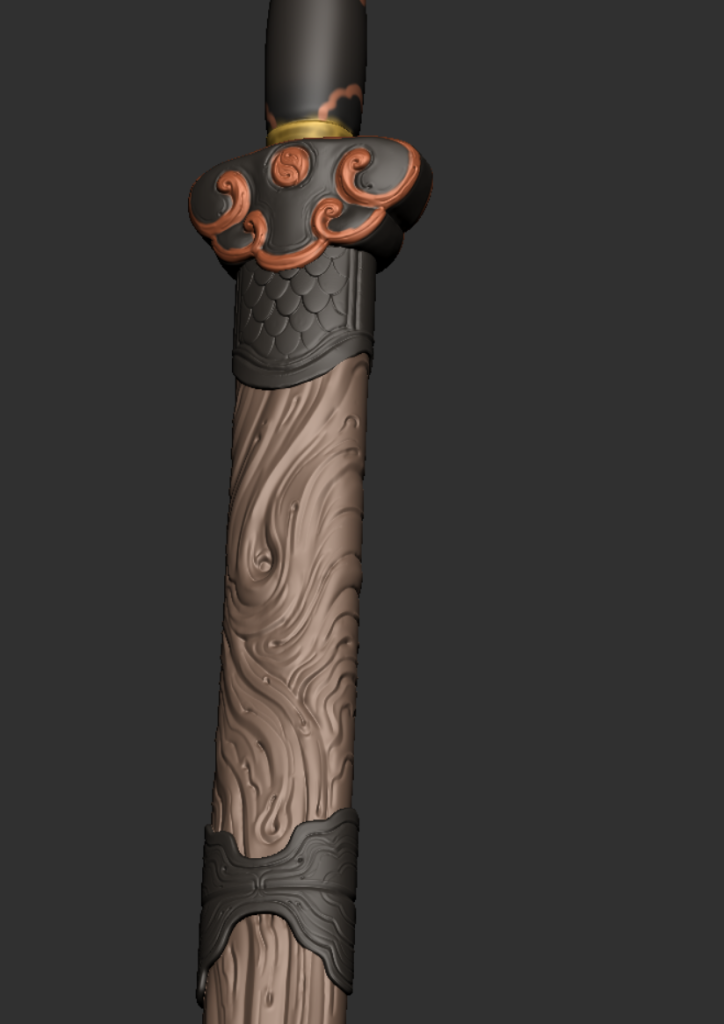
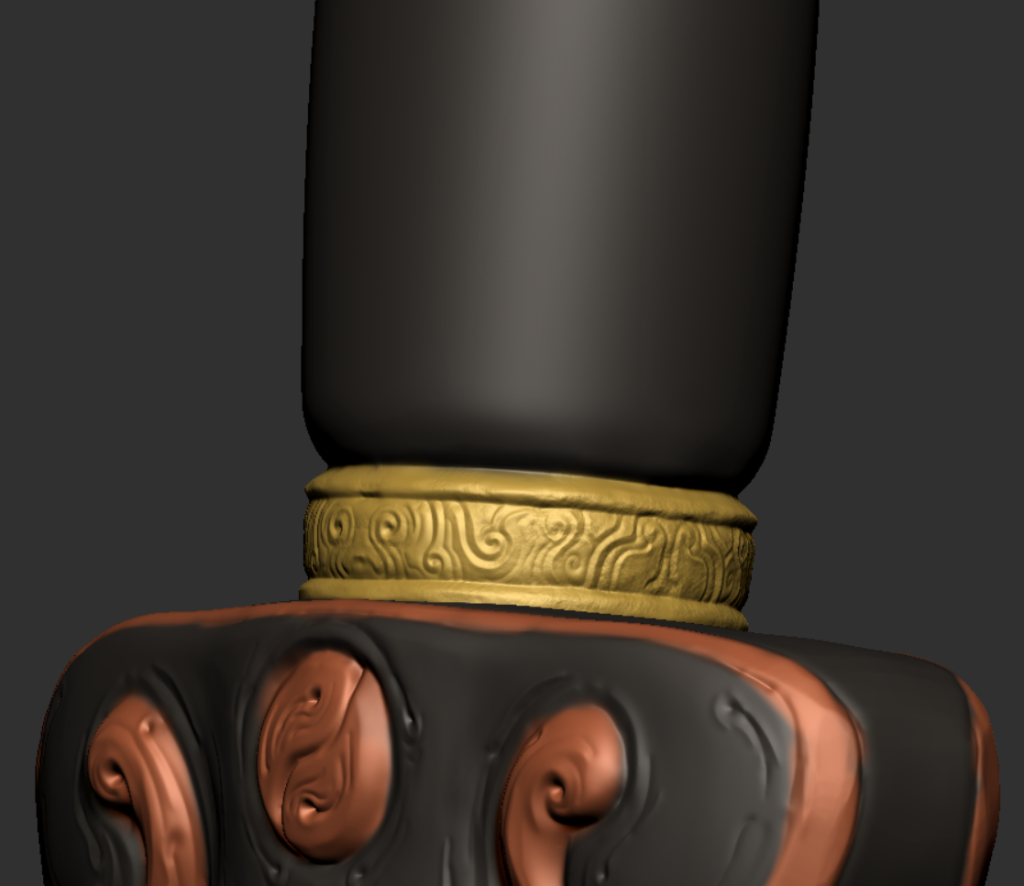
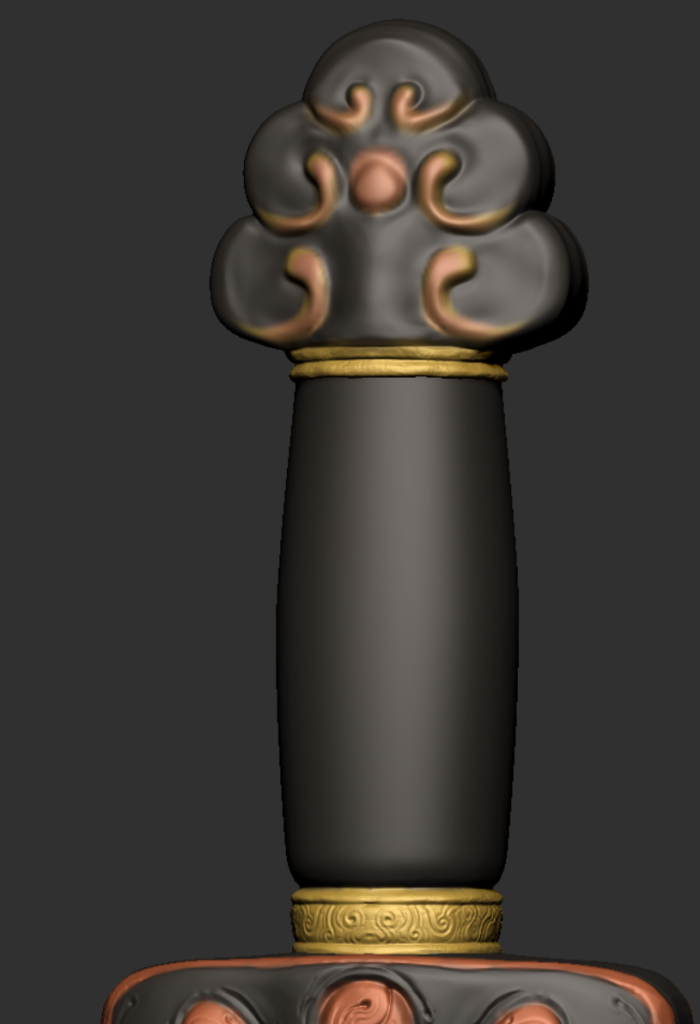
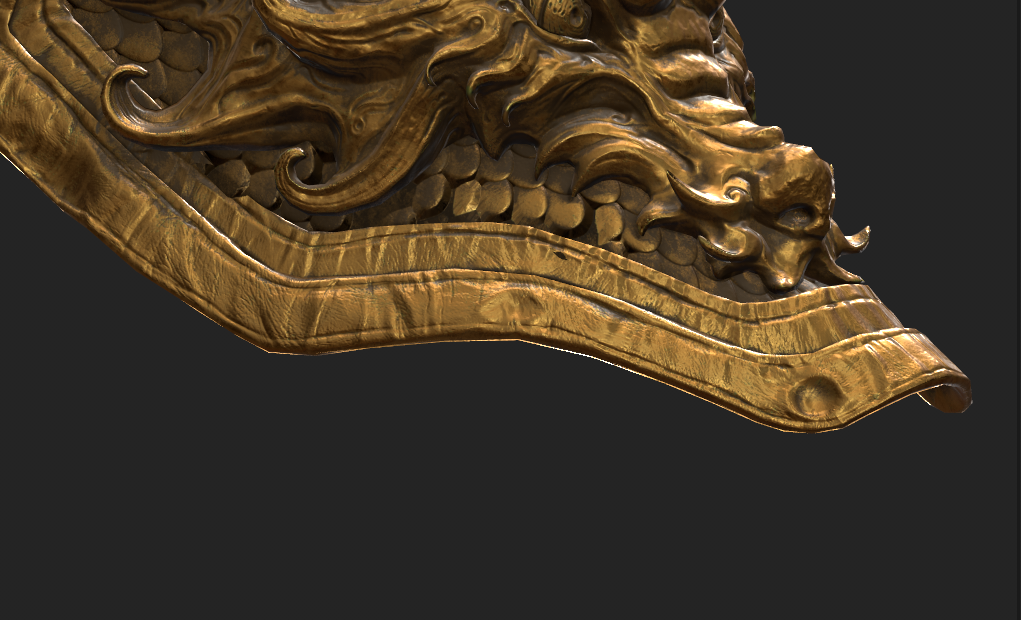
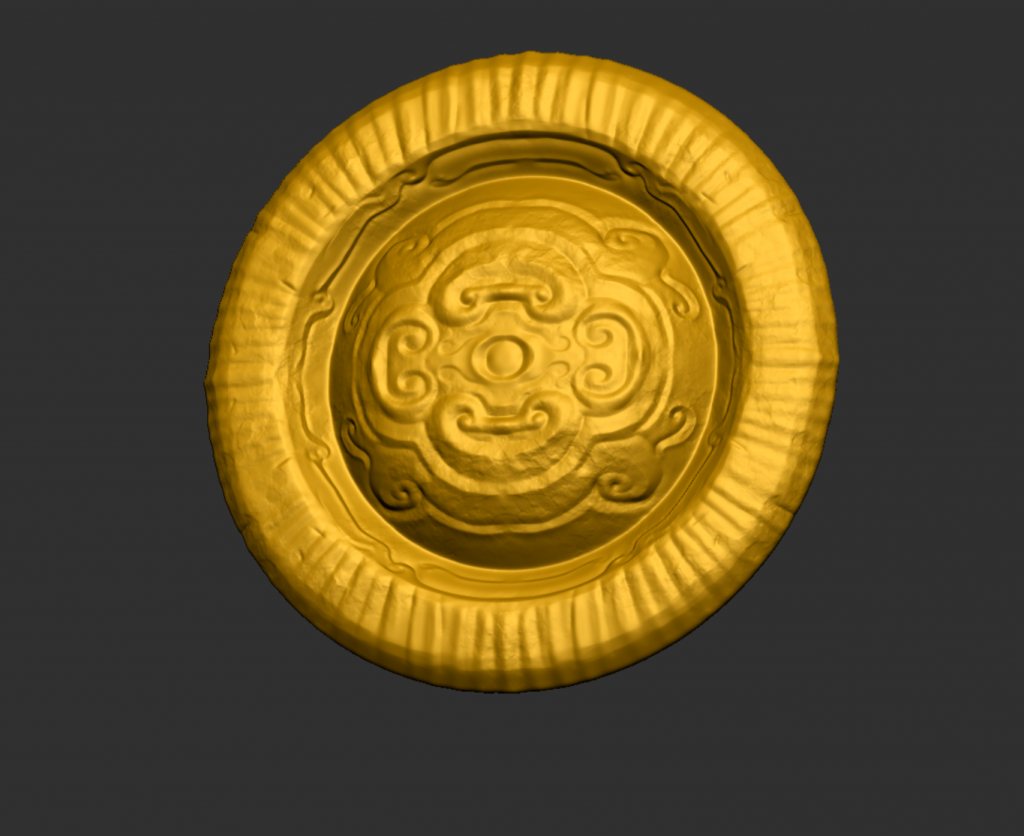
Detail of waist engraving
9/2/2024

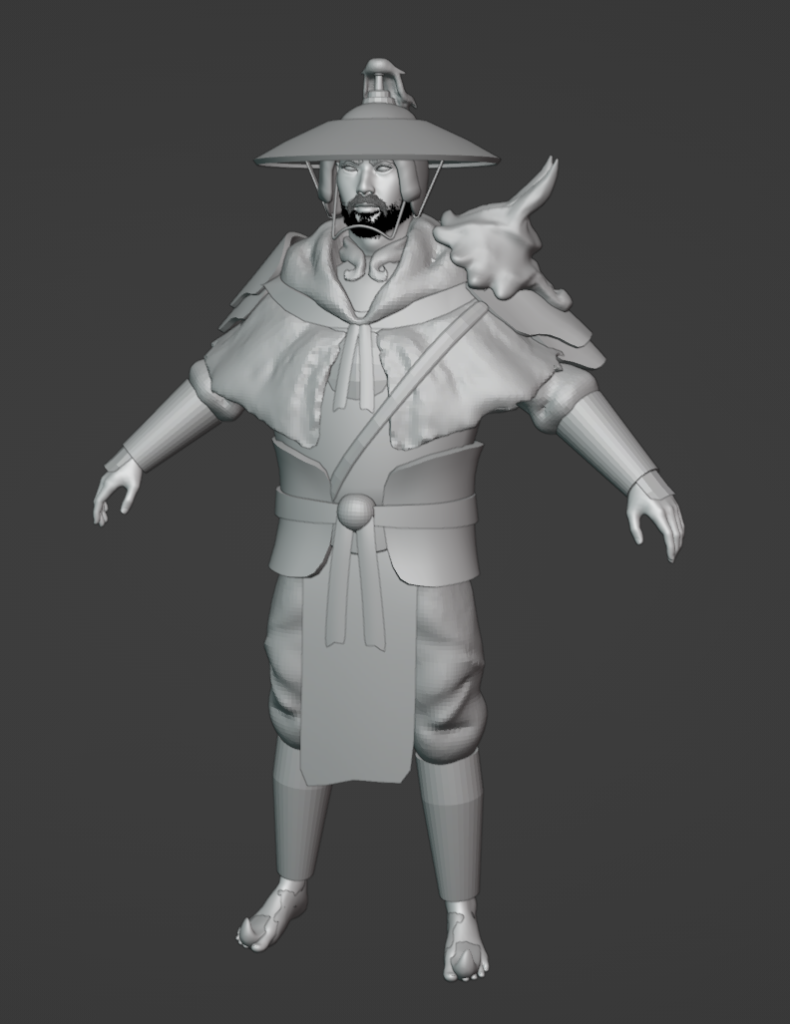
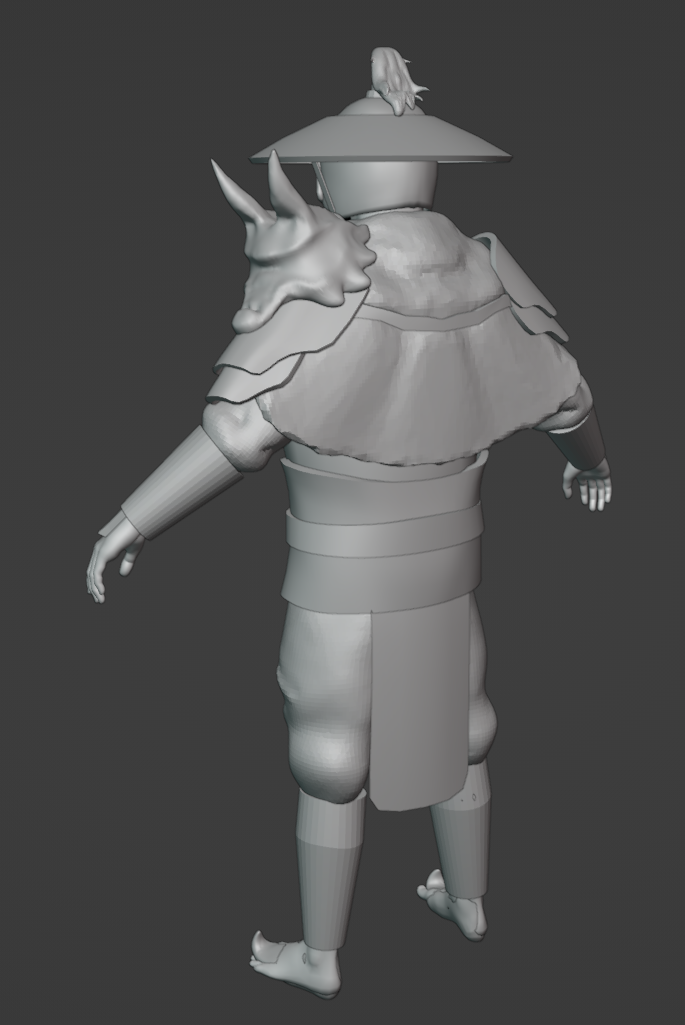
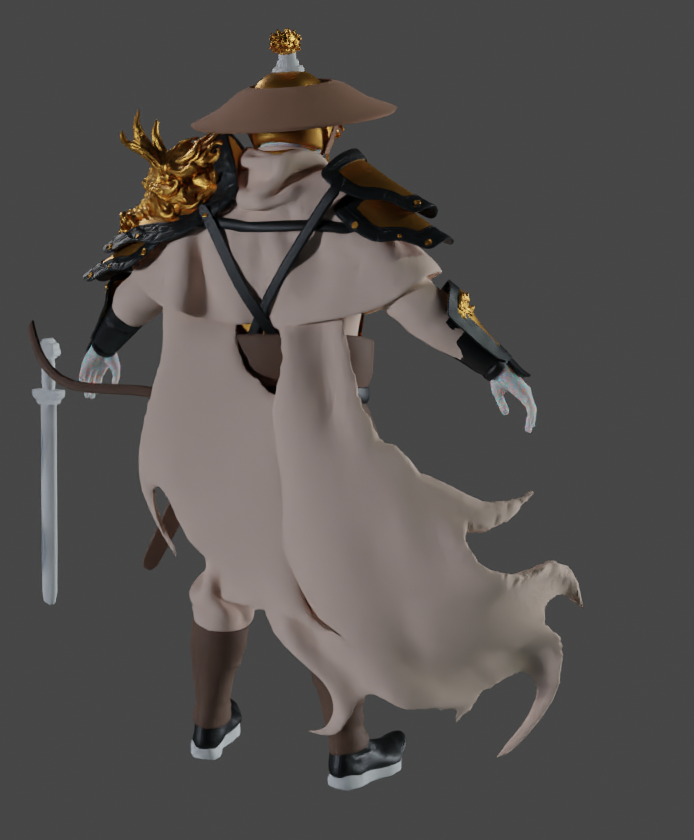
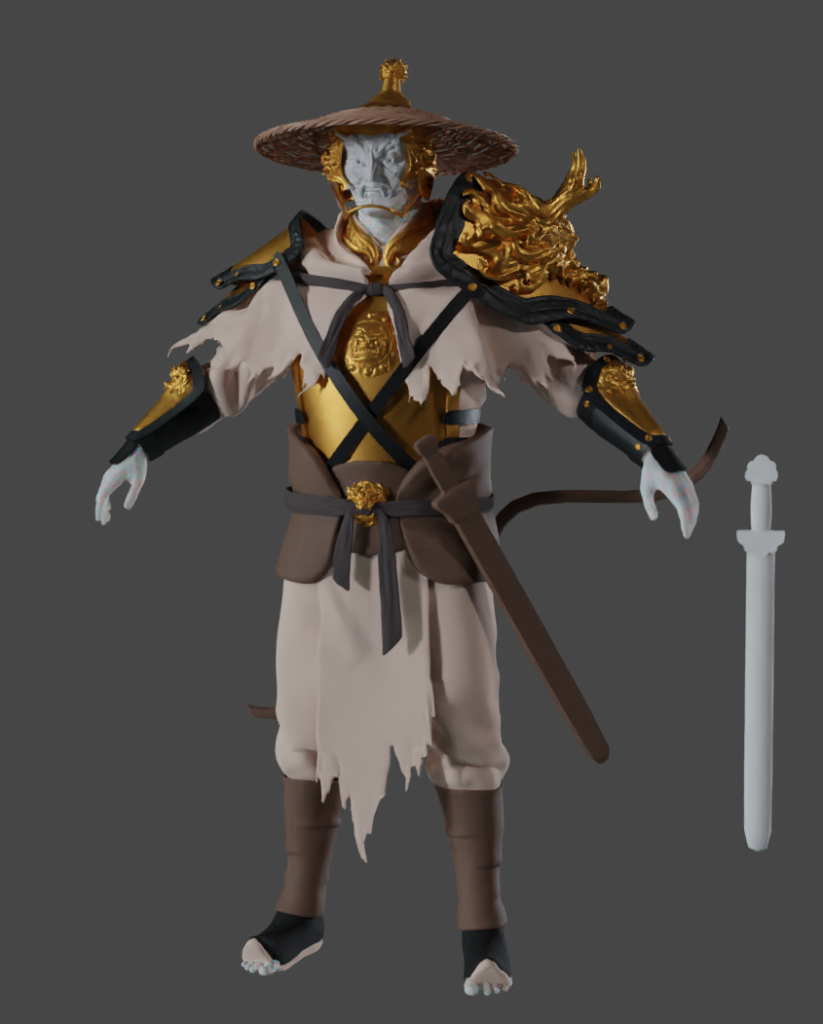
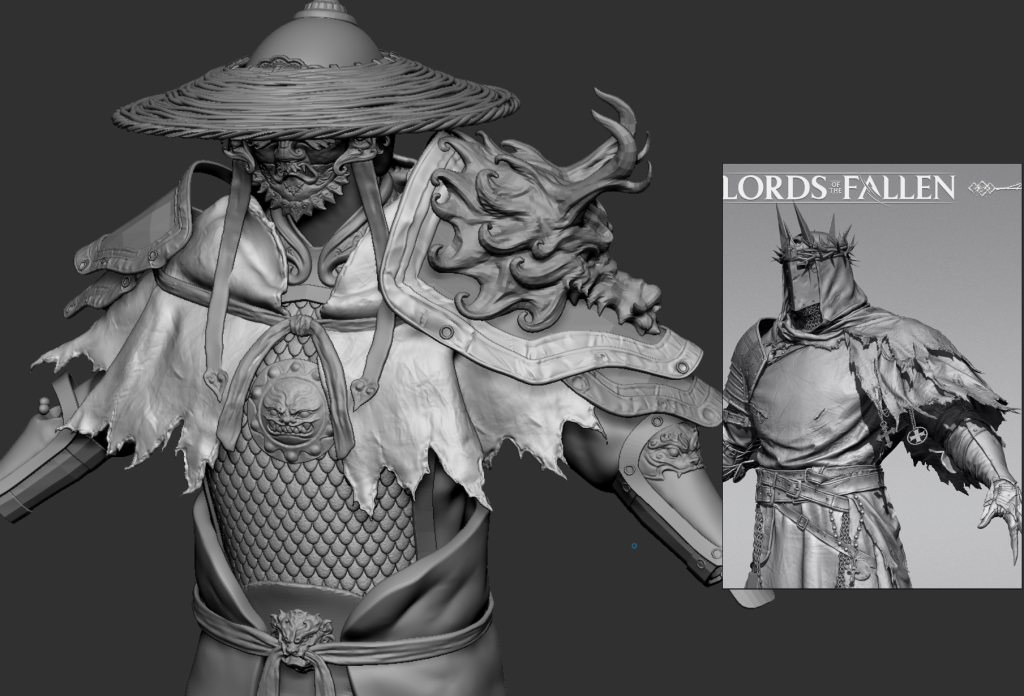
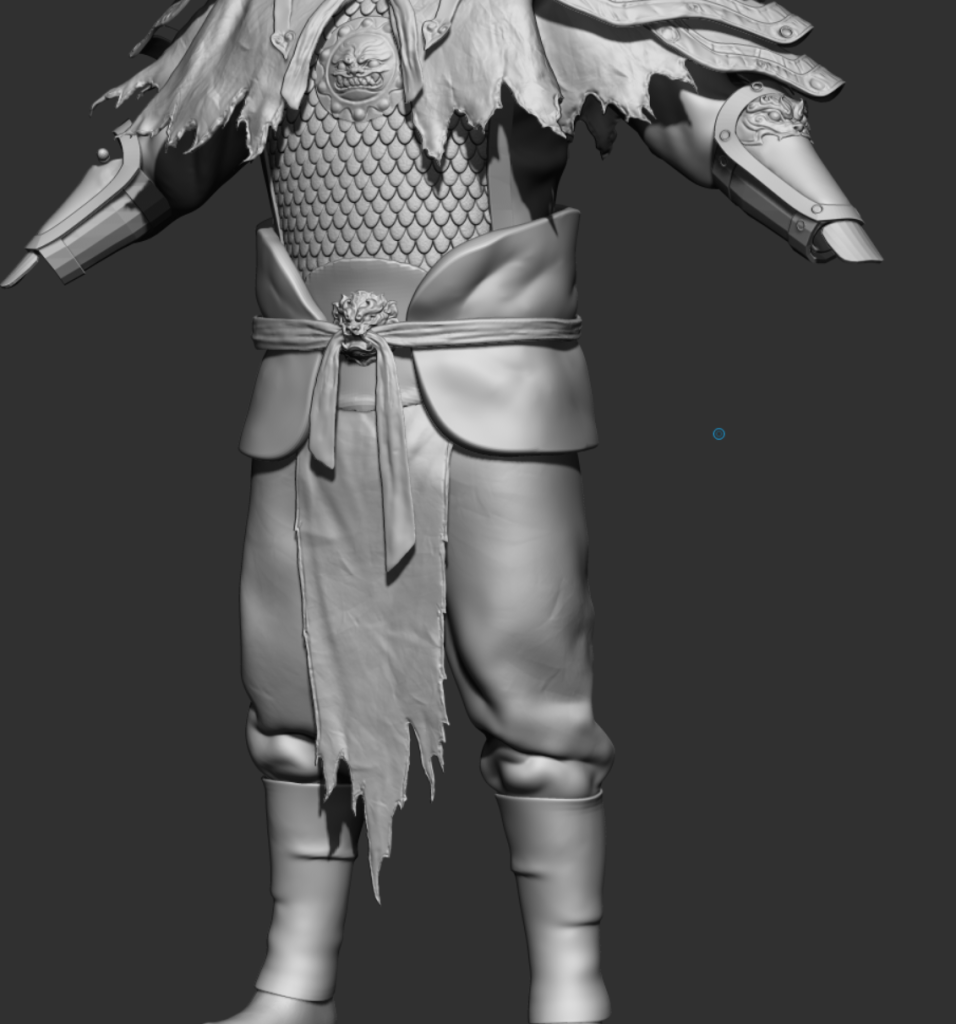
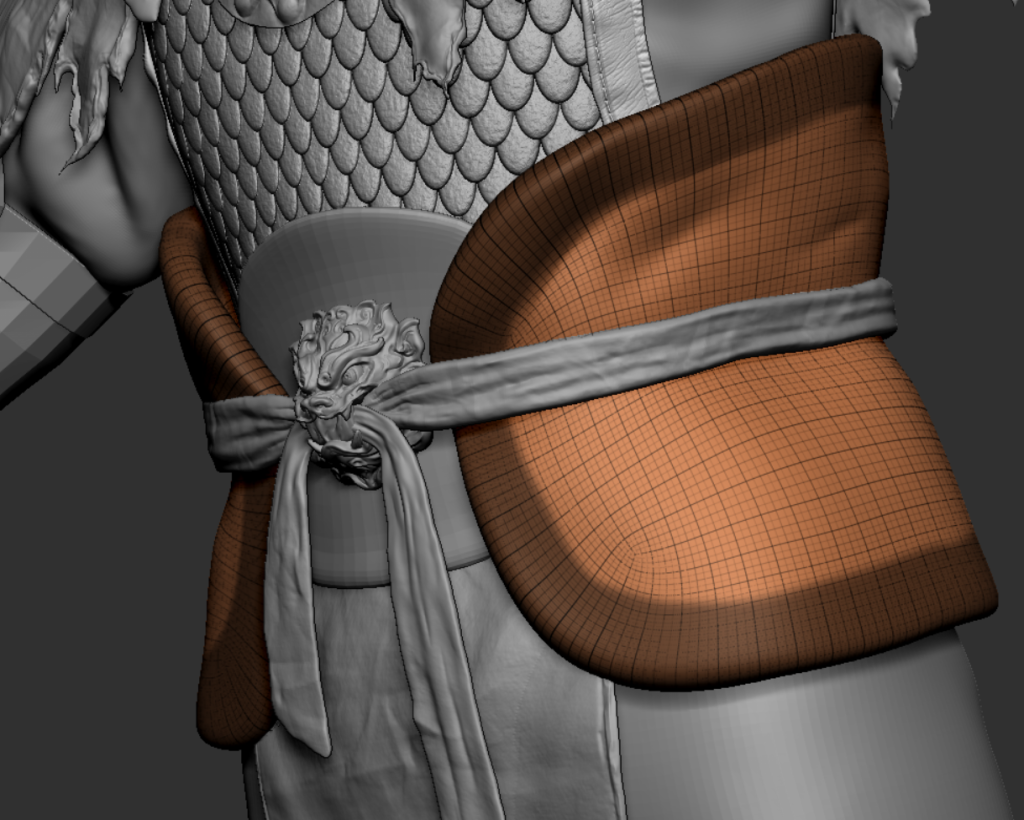
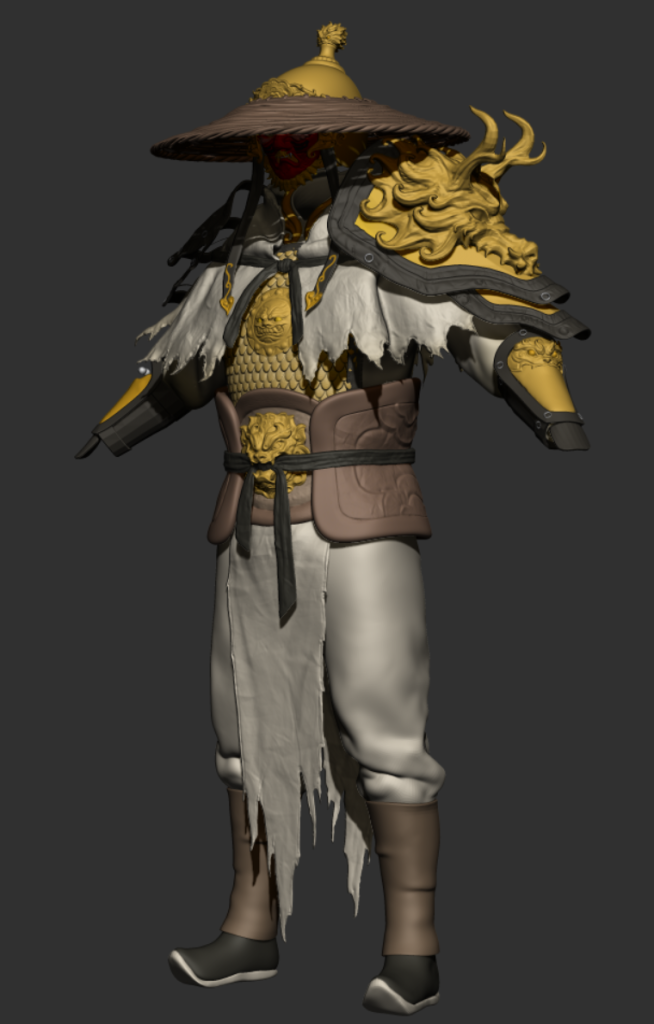
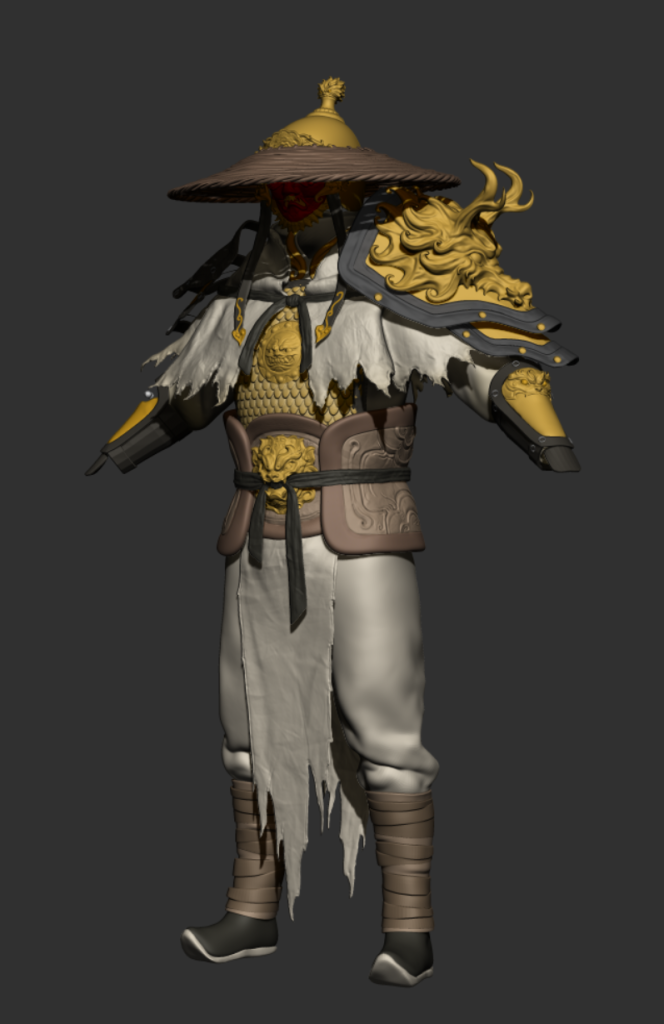
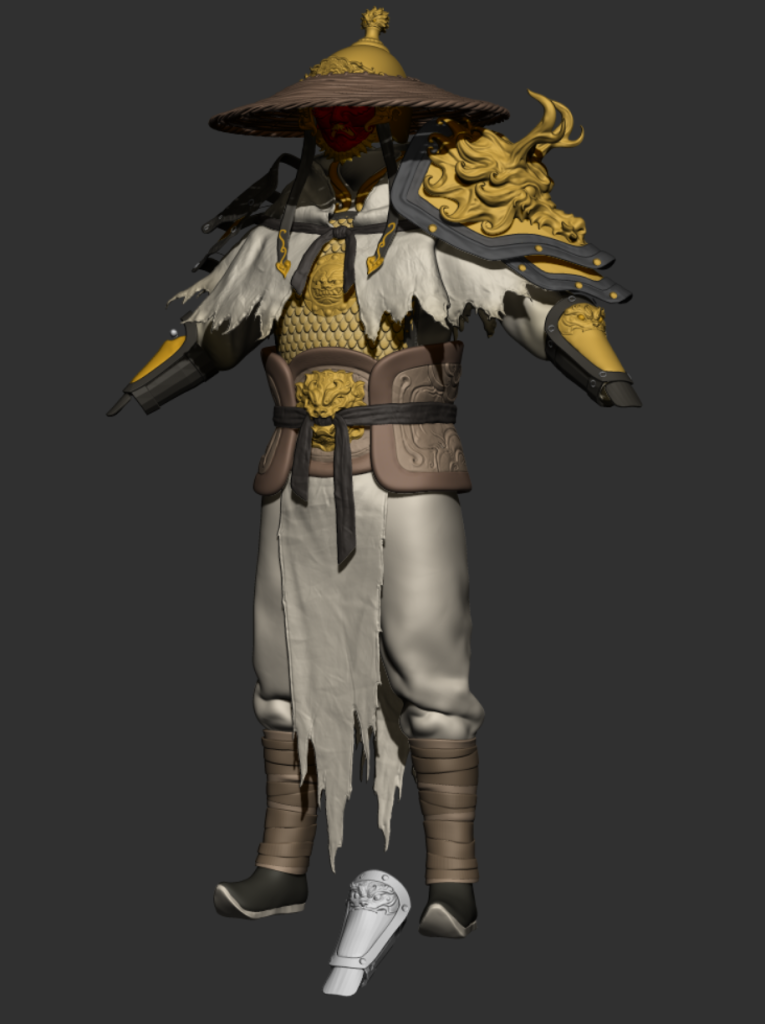
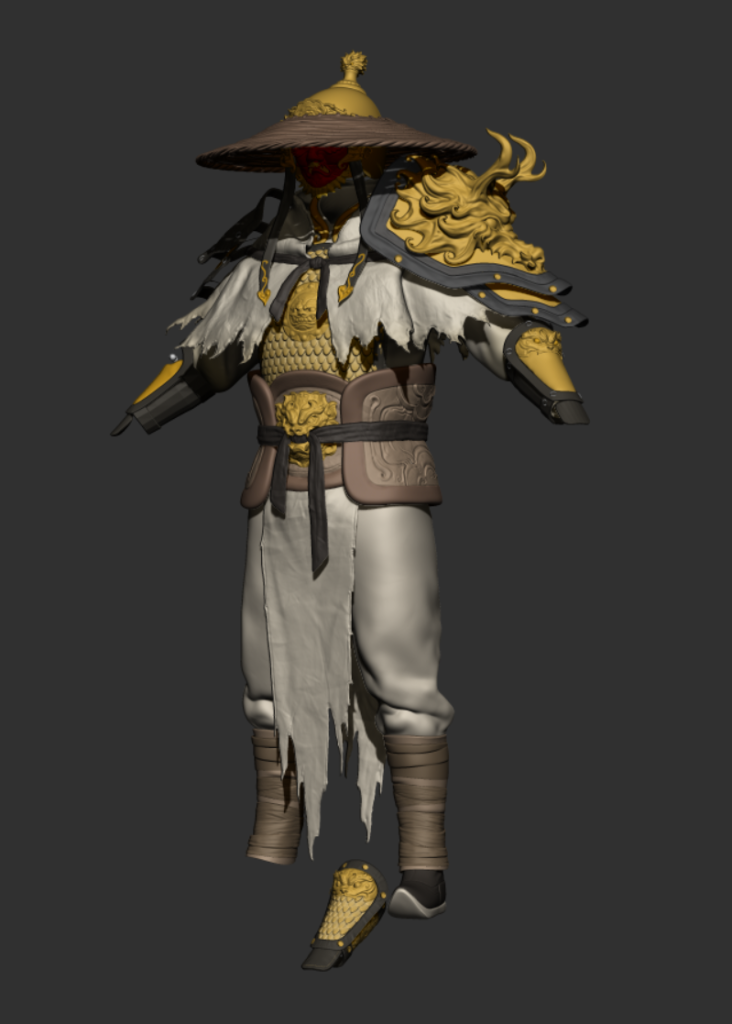
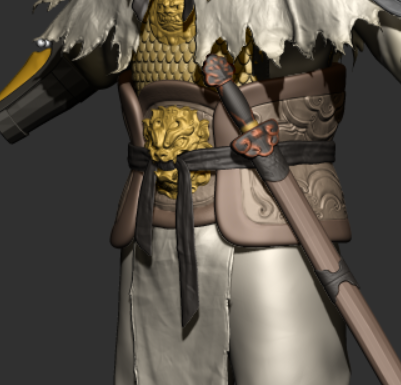
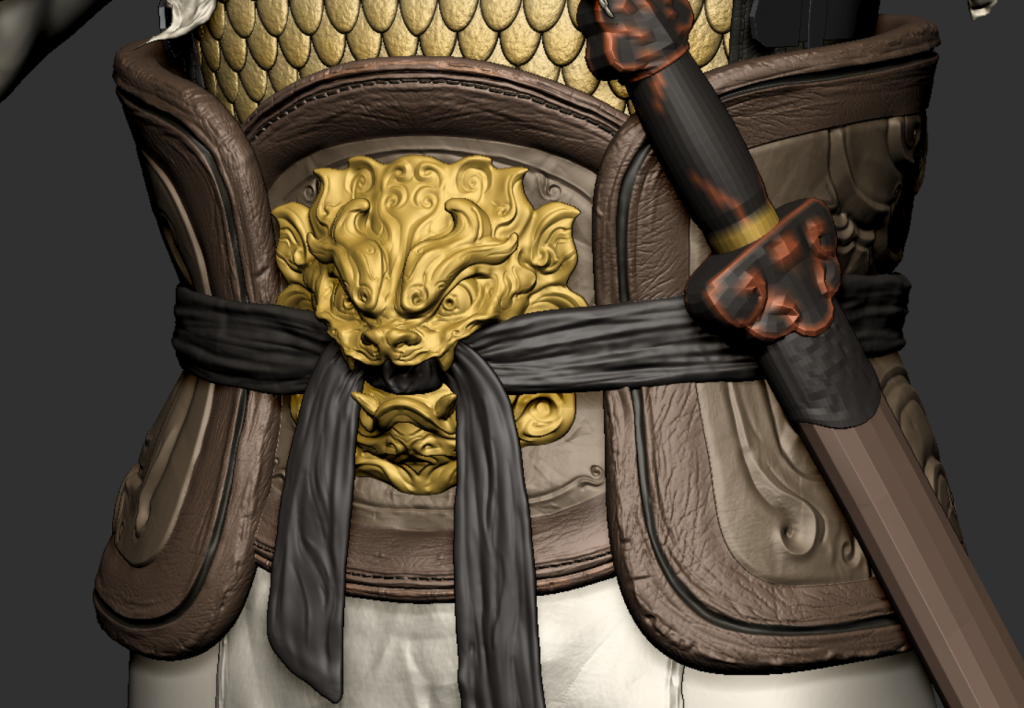
In the aftermath, I took a closer look at the difference between me and the reference, and I pondered why my character seemed oddly lethargic instead of having a dominant feel to it.
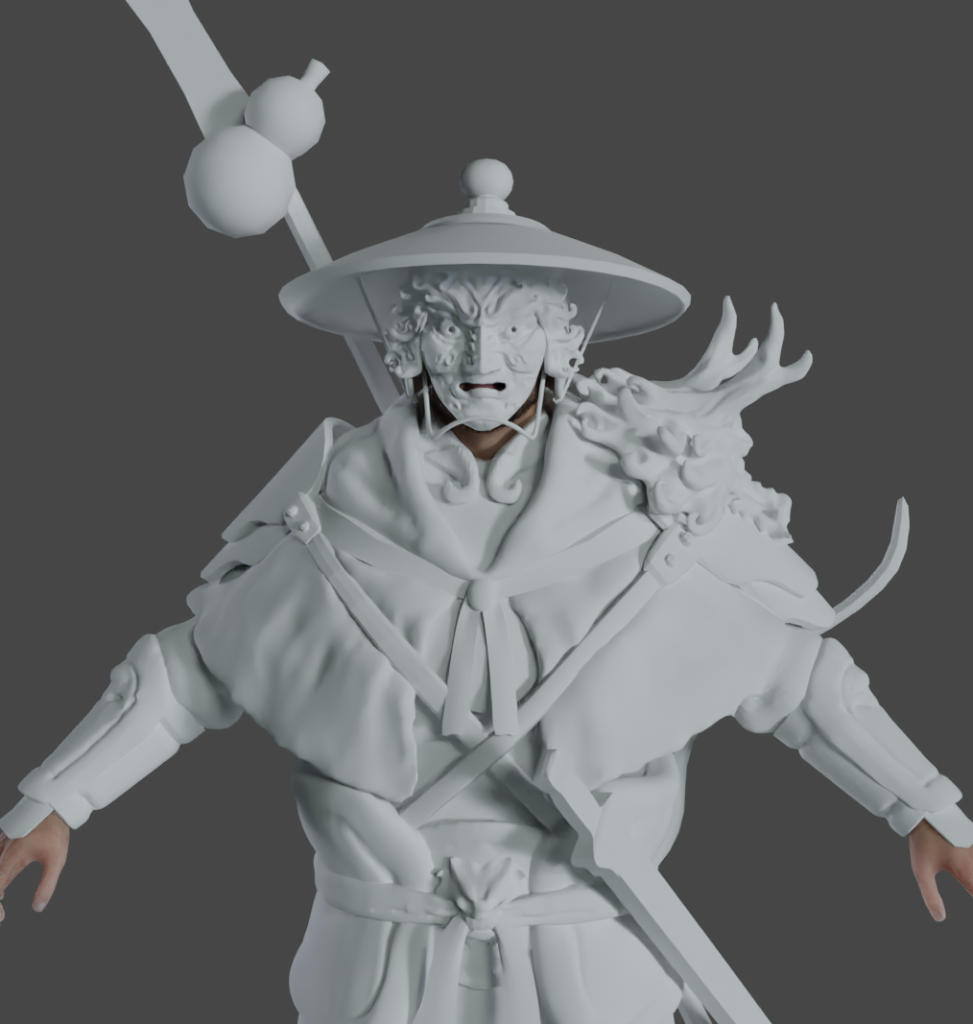
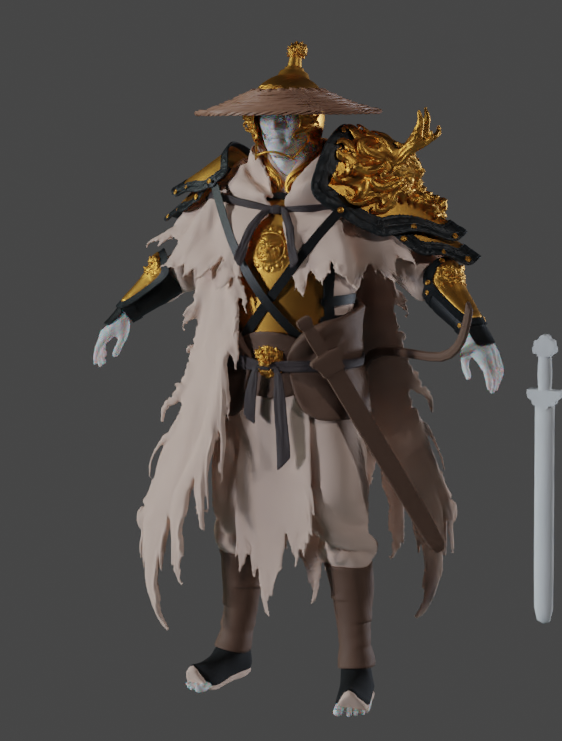
After further observation I realized that it was because of the problem of my belt being too low, which made people feel uninspired, so I raised his belt and enlarged his bucket hat to increase his sense of mystery.
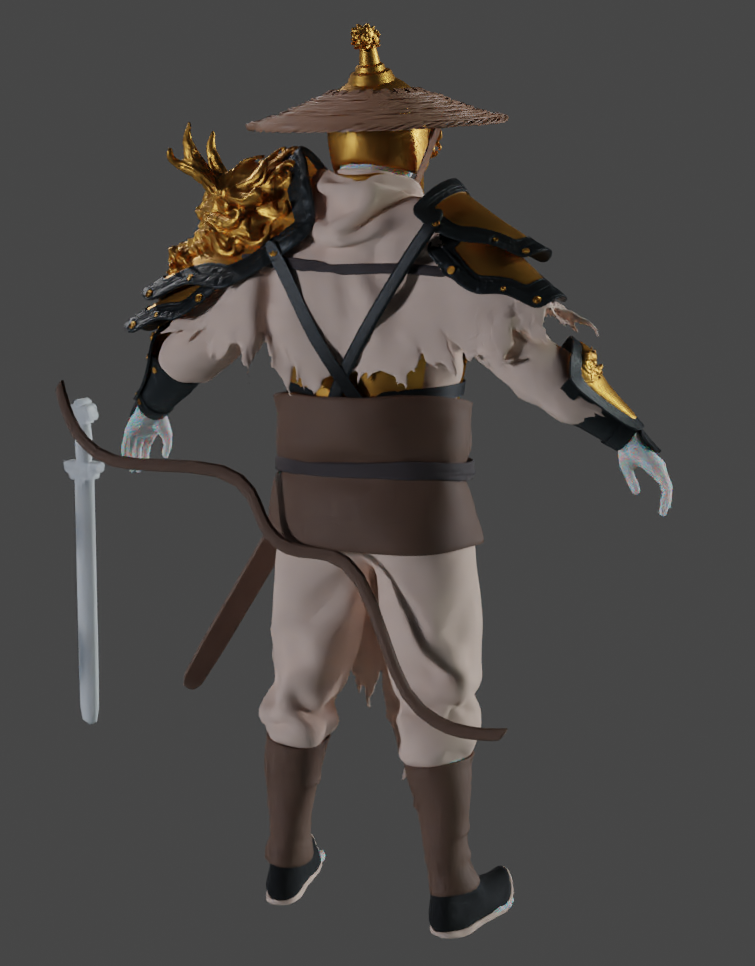
Now this gave me the right feeling, showing his ass from behind, but it also showed that the belt was tied around his waist.
I pulled the bra length under the belt in front and copied it to the back afterward, which made his silhouette even better.
Of course I didn’t decide to change it right away, I asked my peers and my girlfriend for advice and they both agreed that it was obviously much better and I was convinced that I had made the right decision.
HAPPY CHINESE NEW YEAR!!
12/2/24

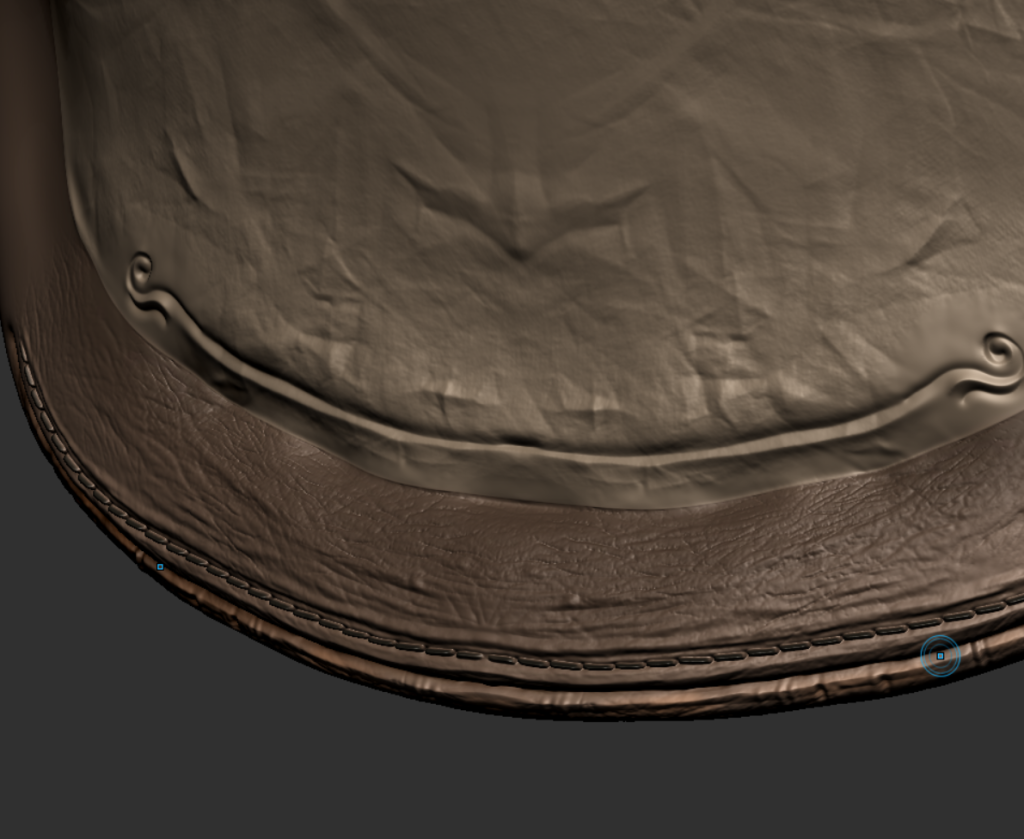
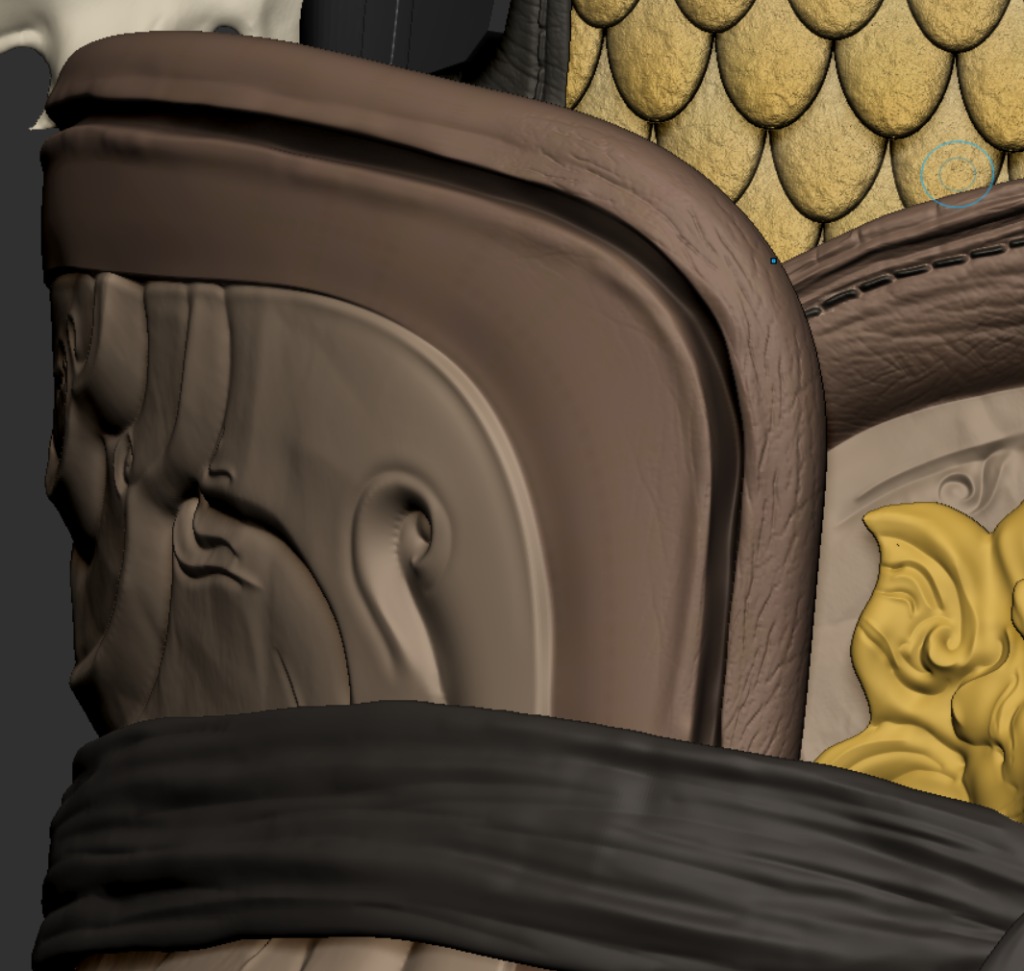
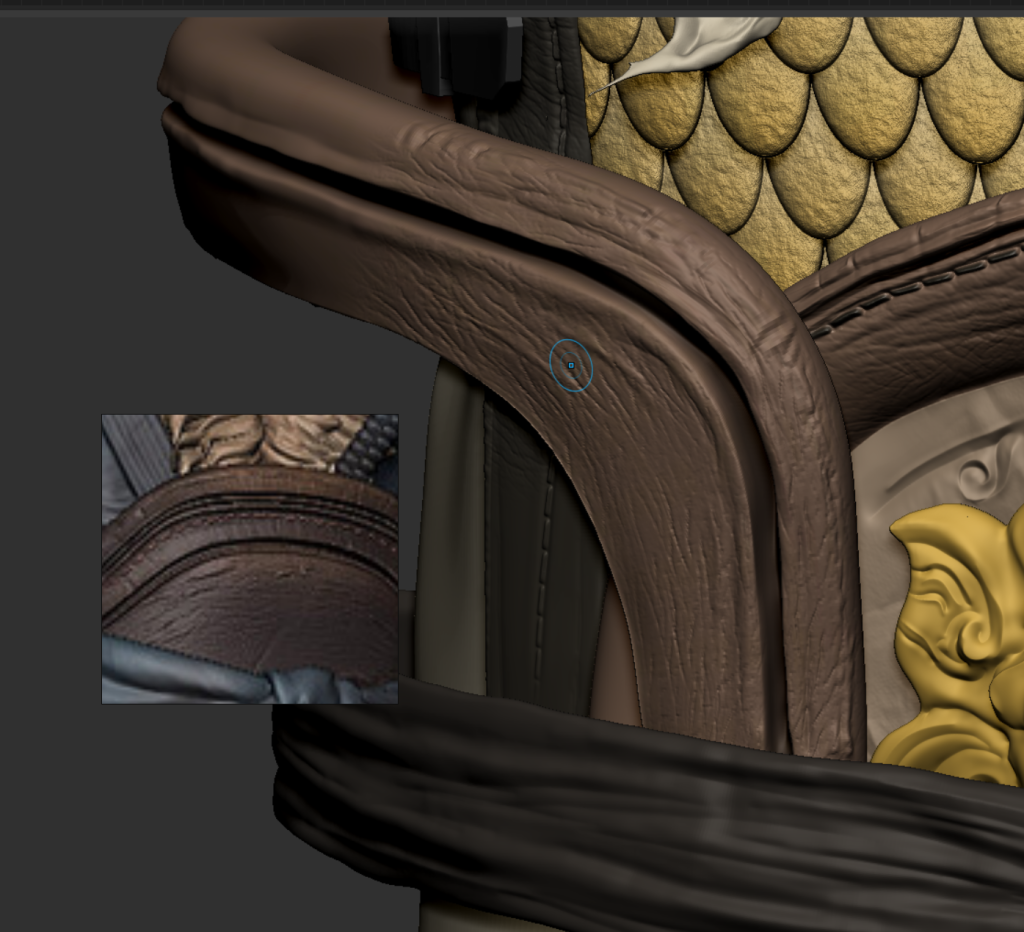
Today I started to create the leather on the outside of the breastplate, I first used the base brush to draw the bumpiness of the leather and then used the dam base brush to create the stitching on the sides
Then use skin alpha to create a leather texture
At this point I’m also thinking about stitching, I purchased zbrush’s seam brushes, but how to easily color them on sp will be an issue, so maybe I’ll make stitching with different colors on sp.
13/2/24
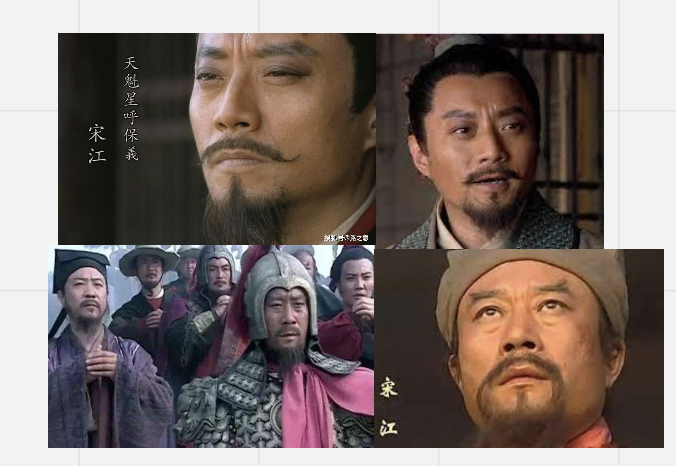
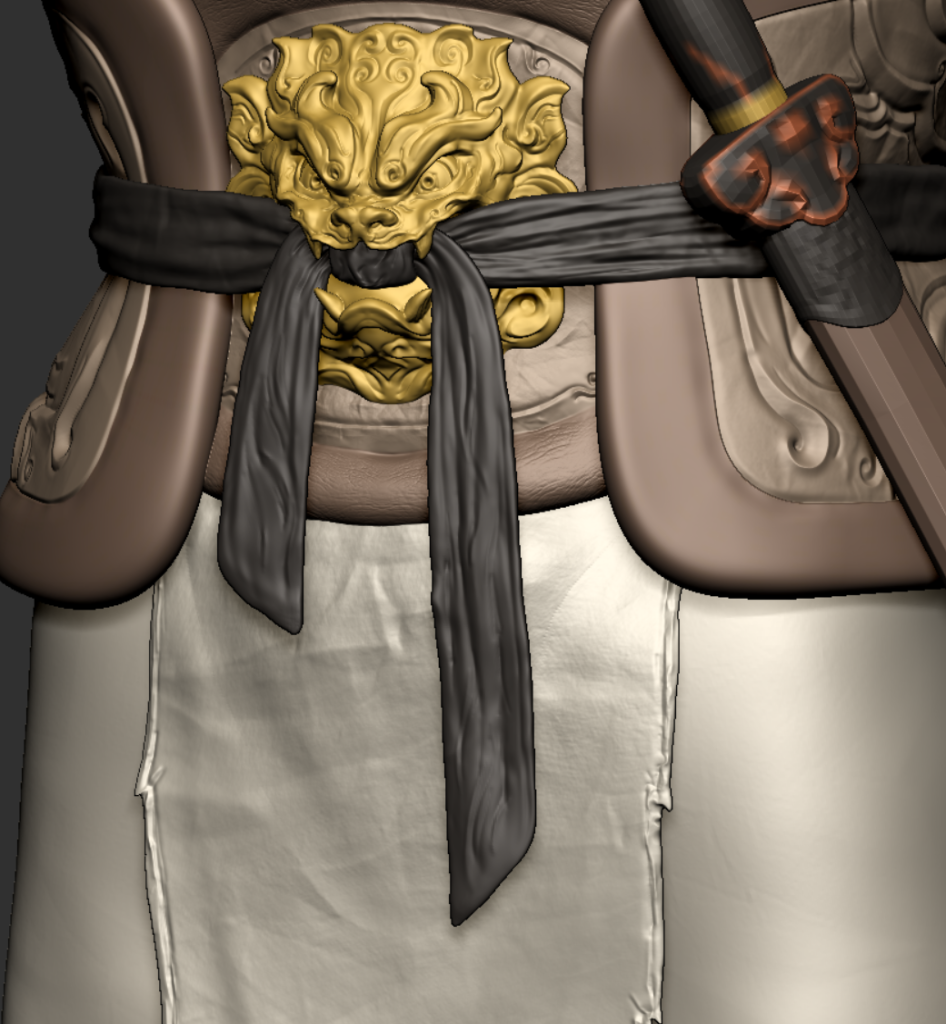
Today I saw a lot of new Chinese Song dynasty armor reference, for example, the belt in my design is also is the distinction between the inside and outside, and I do not know how to a brush stroke without jittery lines, I and Tiano to explore how to make related functions about zbrush, according to what we know about the function of the summary of the exploration of a way to first of all, we first distinguish between the outer side and the inner side of the mask function, which is convenient for us to modify the mask after the smoothness of the mask is not fixed down like the use of the Dam standard brushes.
Secondly, I told him that a lot of the details I’m making aren’t really necessary at all when scaled down, such as the waist swallow. He then suggested that I enlarge the size of the tiger at the waist, which I thought was a suggestion I’d never thought of because I’ve always followed my graphic design – I wanted to differentiate it from Kui Li’s waist swallow, and after hearing this suggestion, and based on my understanding of Chinese armor and aesthetics, I took a few stabs at it and backed up my files.

14/2/24
In the aftermath, I continued to draw improved concepts to give me direction for the future.
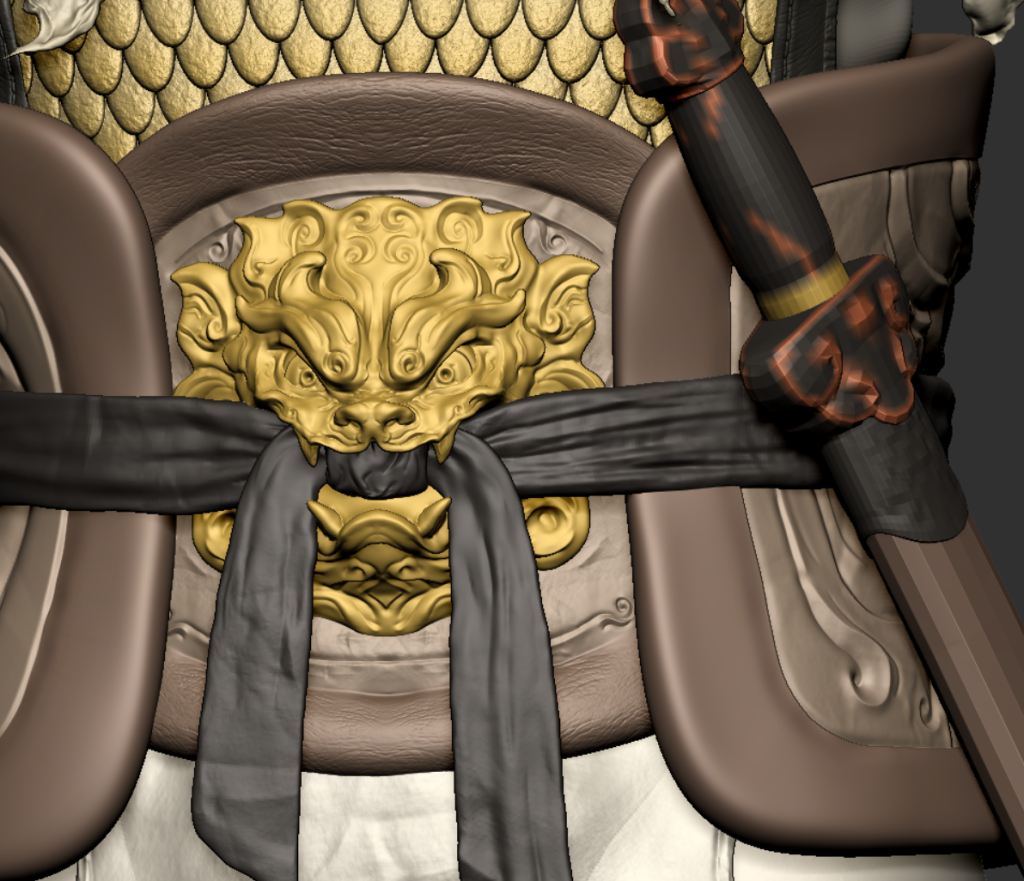
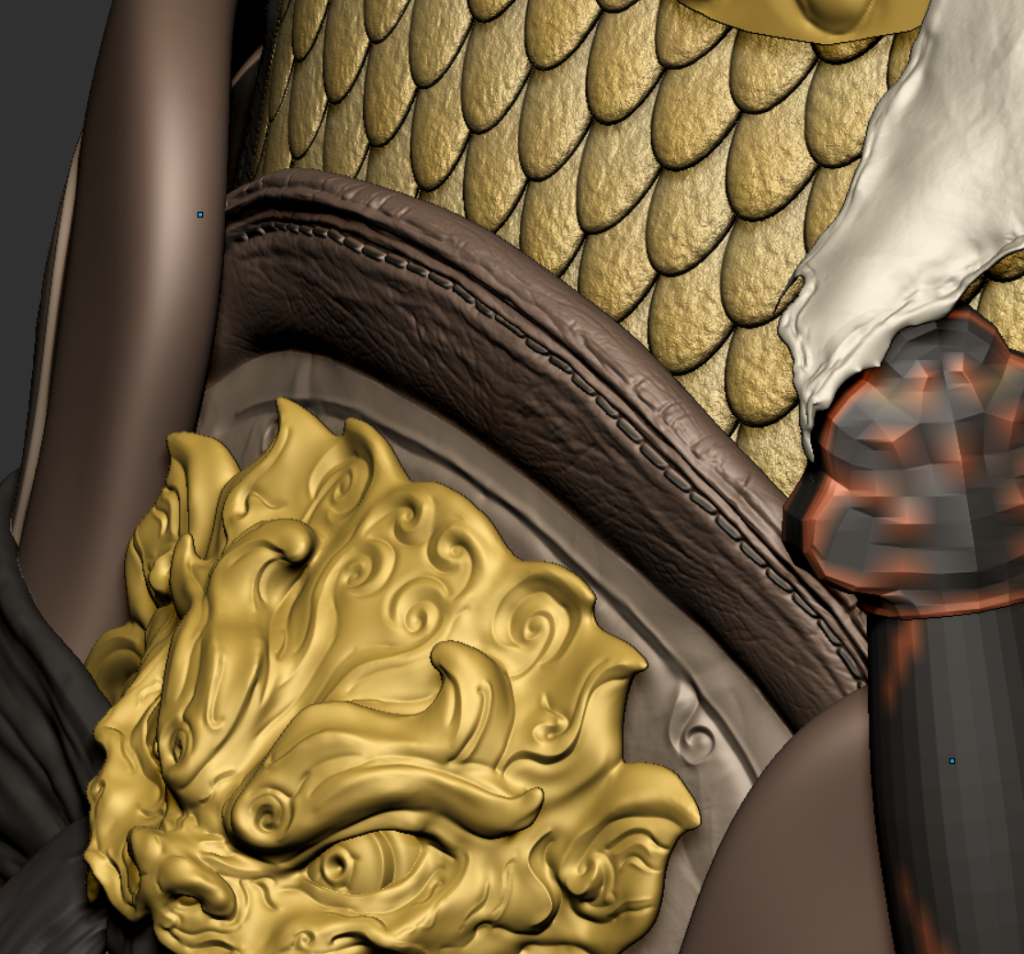
I first differentiated between the inside and outside face sets, then created indentations around the edges and added different colors to differentiate the materials so that the waist guards were made very nicely.
But just drawing out the parts I started designing I think the details seem very lacking, as scaling it down to look at the waist protector has a very large footprint, so I should have spent more time crafting it as well.
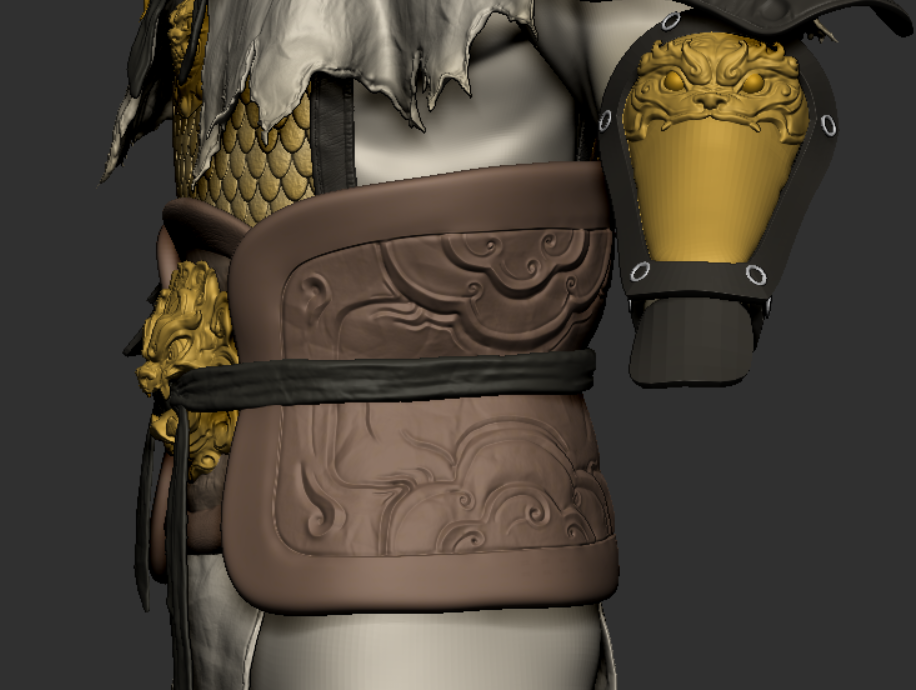
On the outside I tried to use leather alpha but it didn’t work very well, I researched and found that my reference may have been made using SP, so in terms of materials I chose to leave it to SP in continuing.
15/2/24 Thur
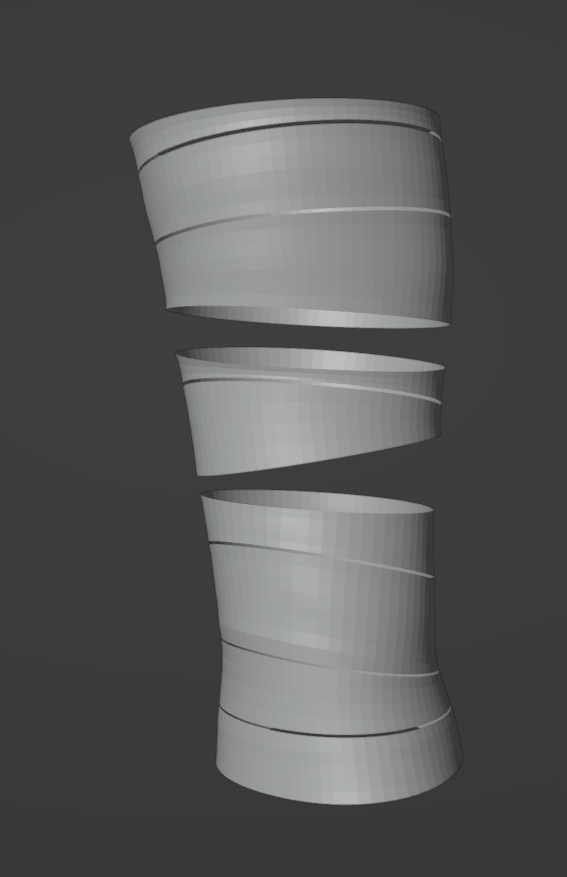
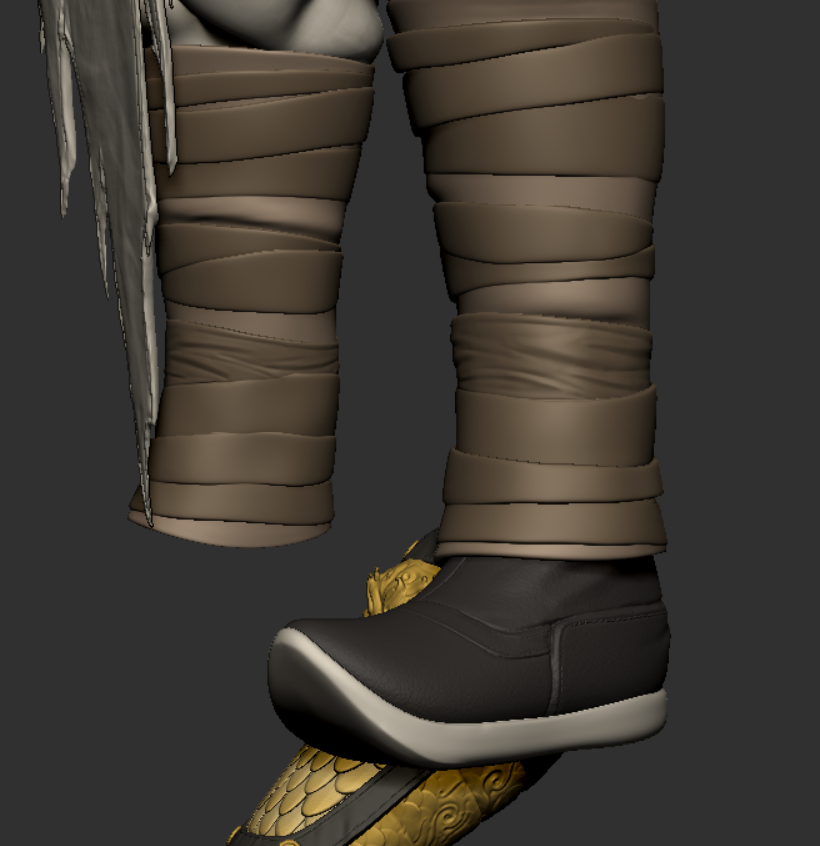
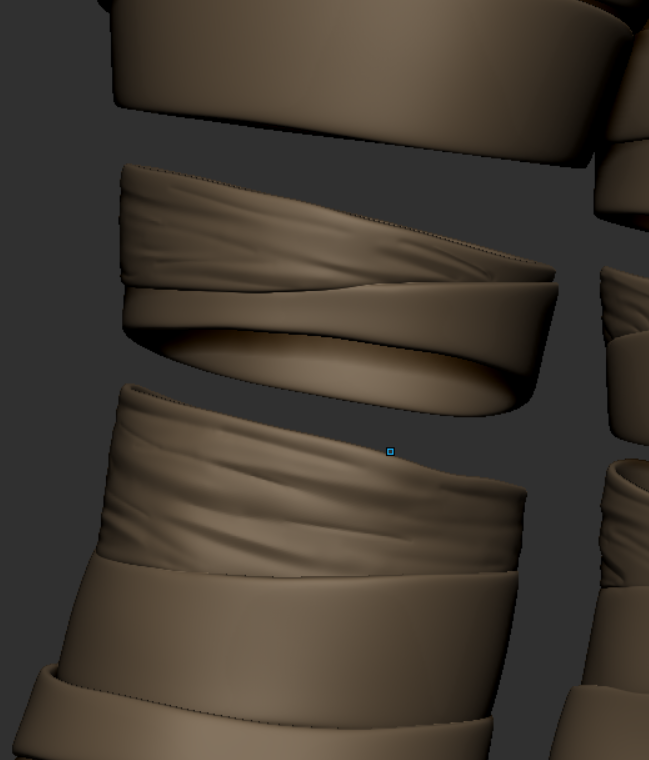
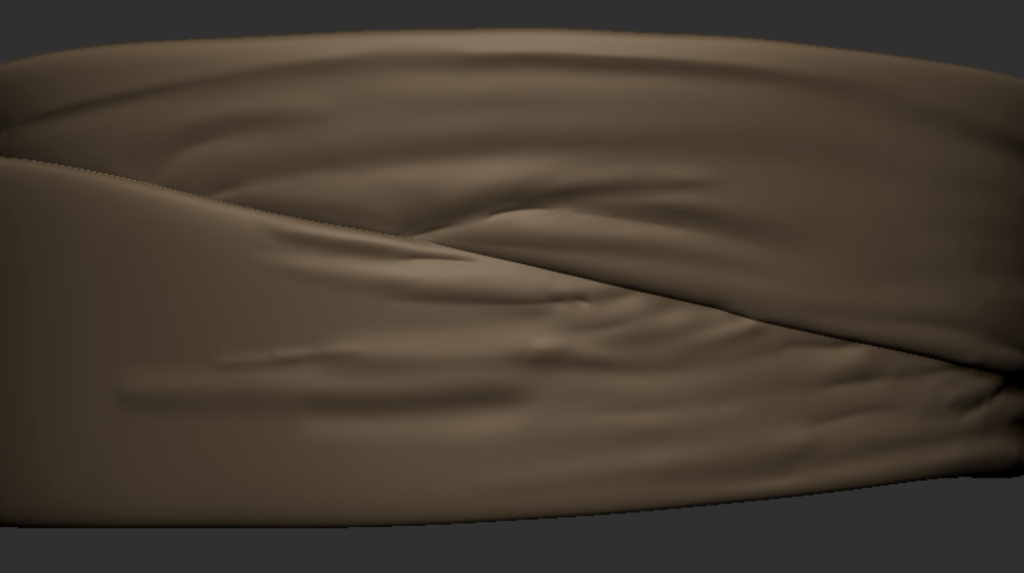
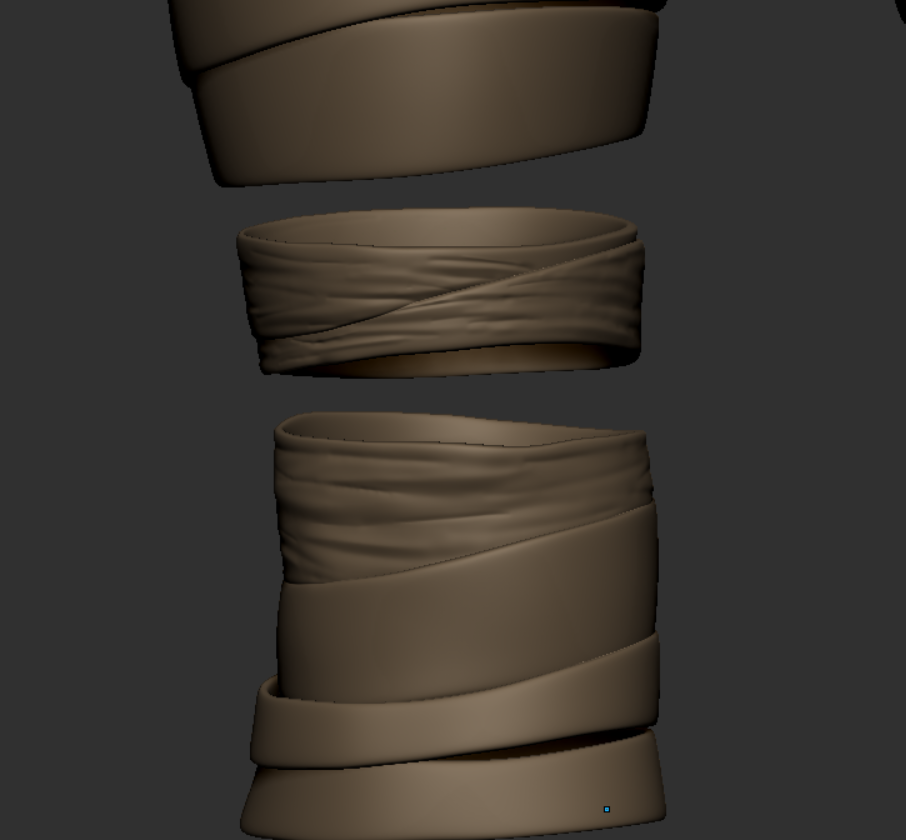
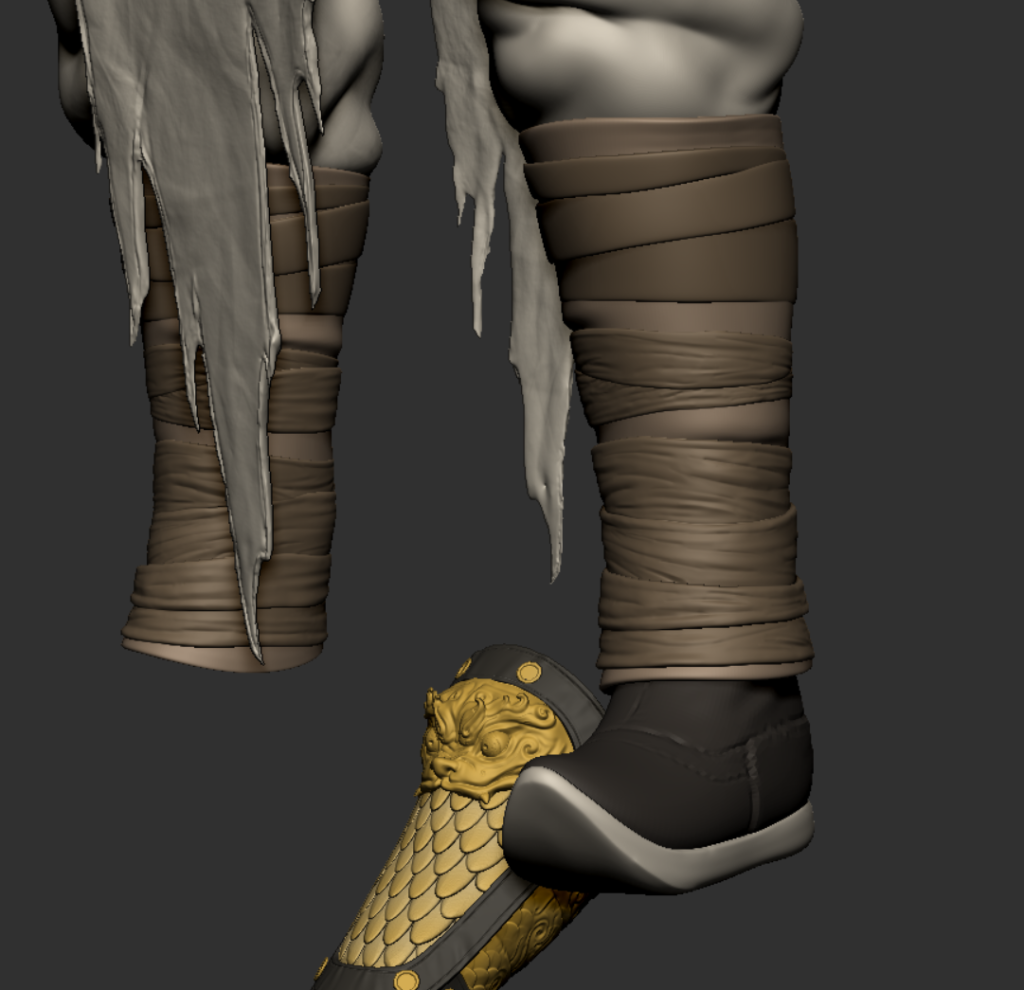
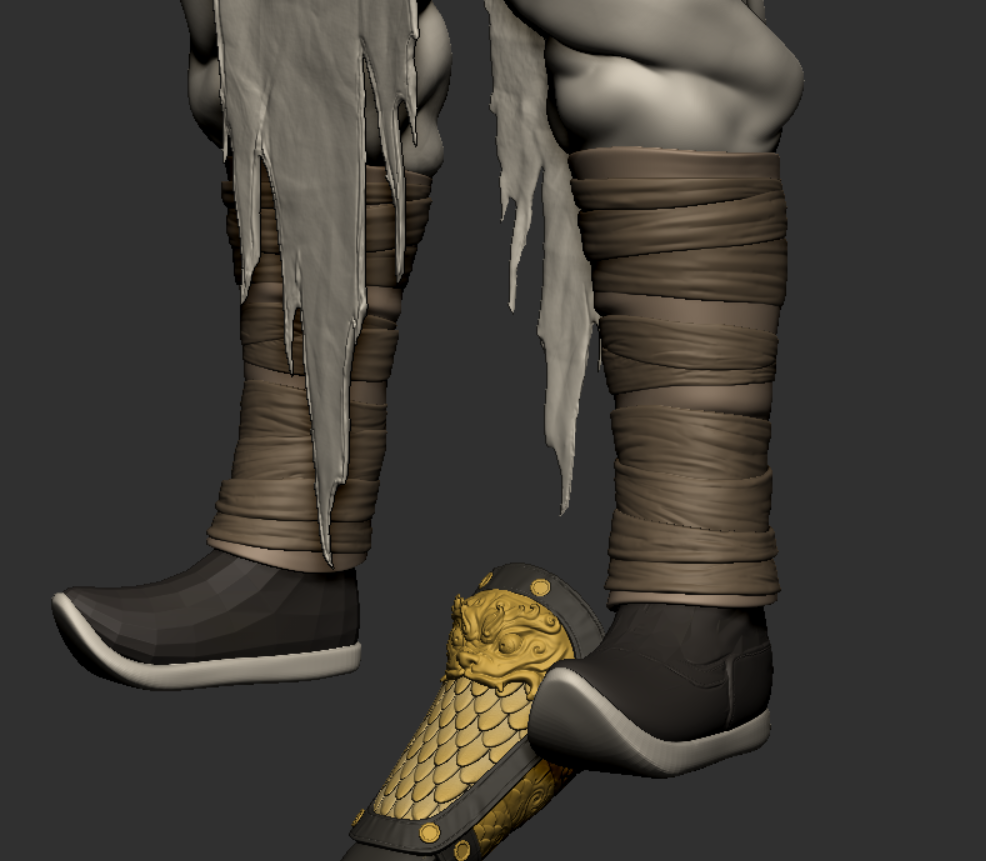
I’ve finally started making leg bandages!
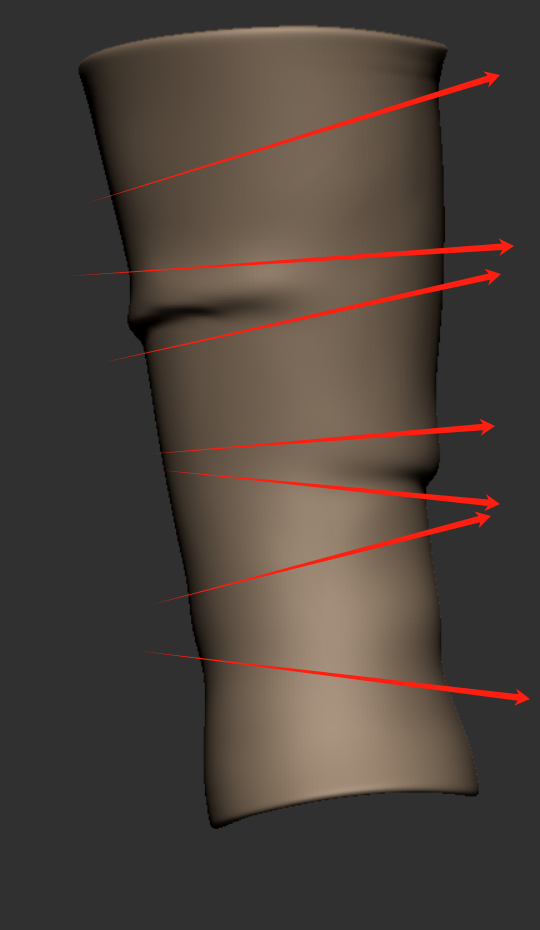
In the beginning I started by planning my groupings, in the two protrusions I wanted to give the effect of being squeezed out by the bandages.
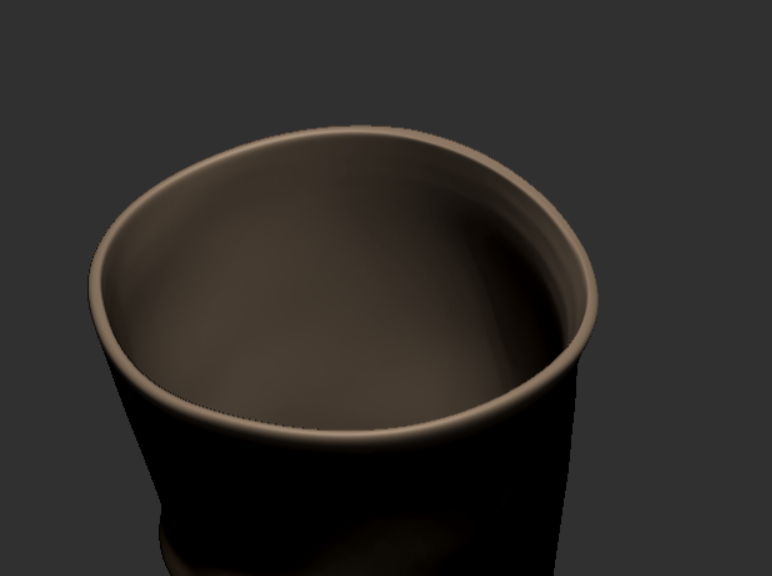
Also, the bindings were double layered causing problems with extrusion, so I moved to blender to remove the excess

Also, I found that Goz importing into blender and then back into Zbrush loses the face group information, so I chamfered directly into blender again and deleted the center faces so I could just extrude in Zbrush.
At the same time, I realized that there were a lot of bandages in the back that were only a short portion of the bandages, so I wanted to cover them by placing them
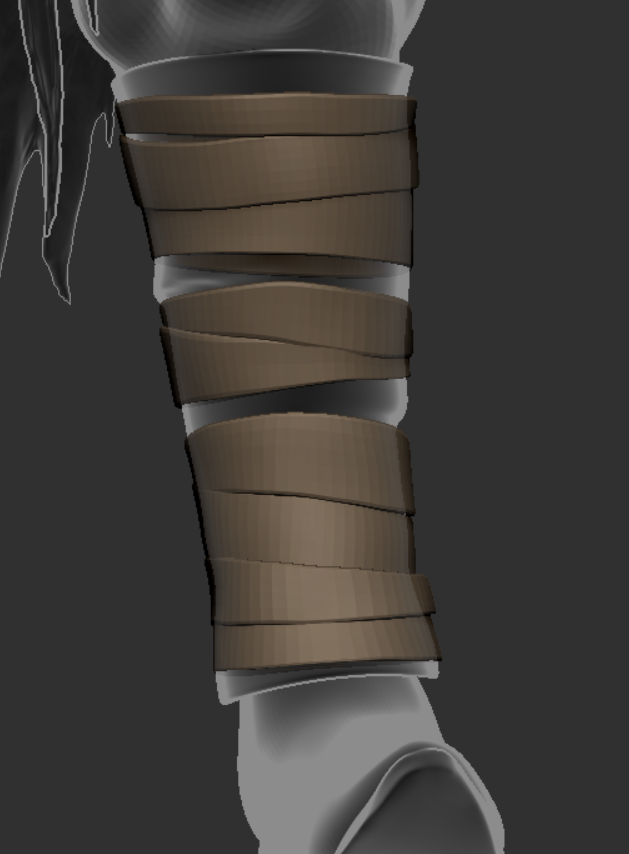
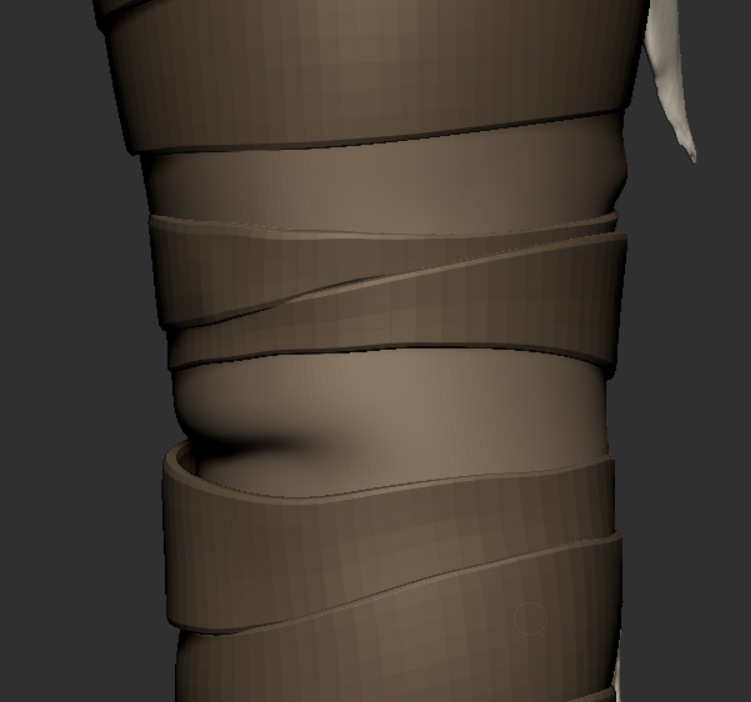
And at the same time the color I had some consideration, light on the outside and dark on the inside looks bloated, while on the contrary it still retains the previous feel while adding detail.

17/2/24
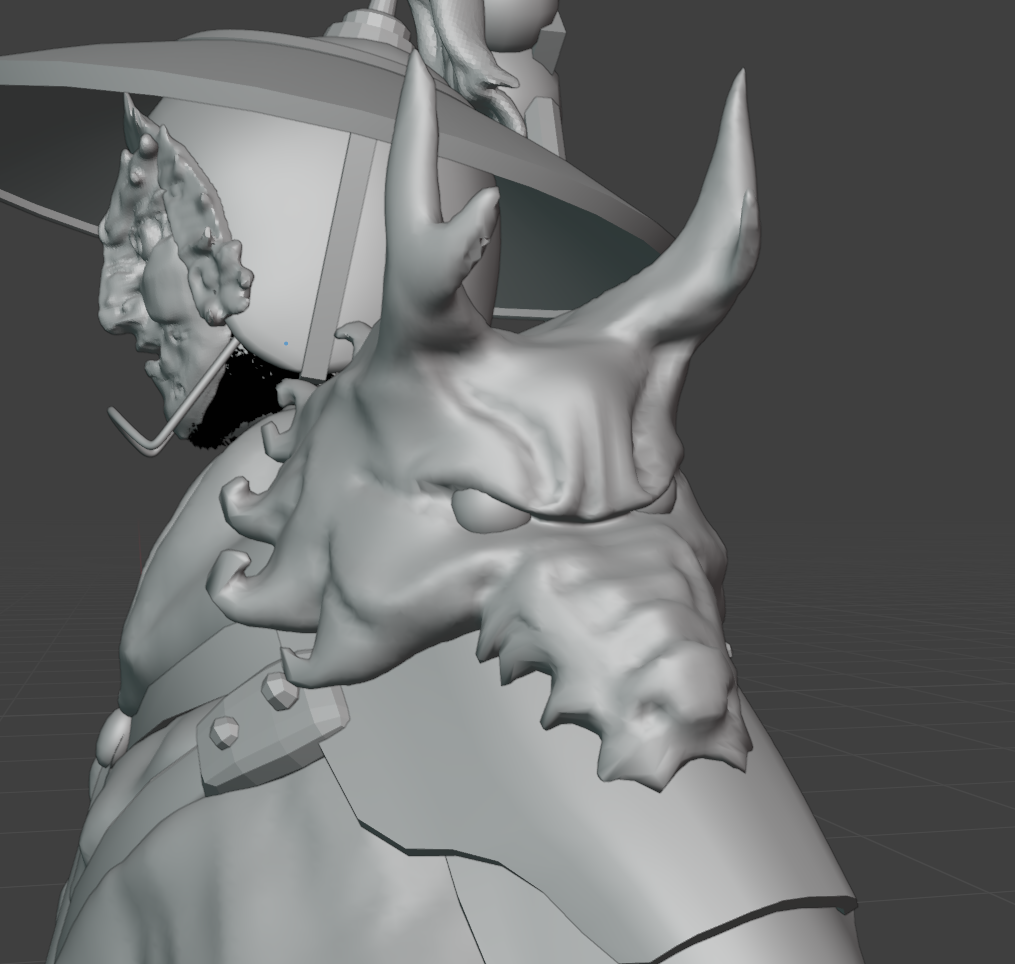
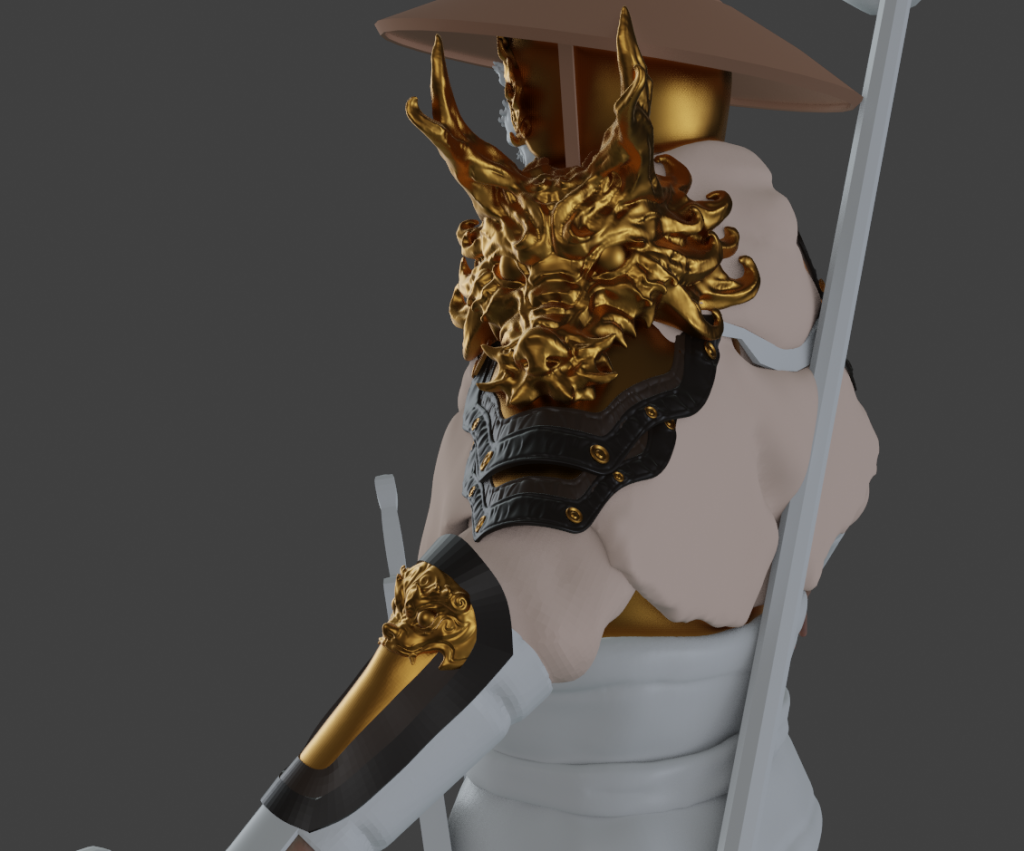
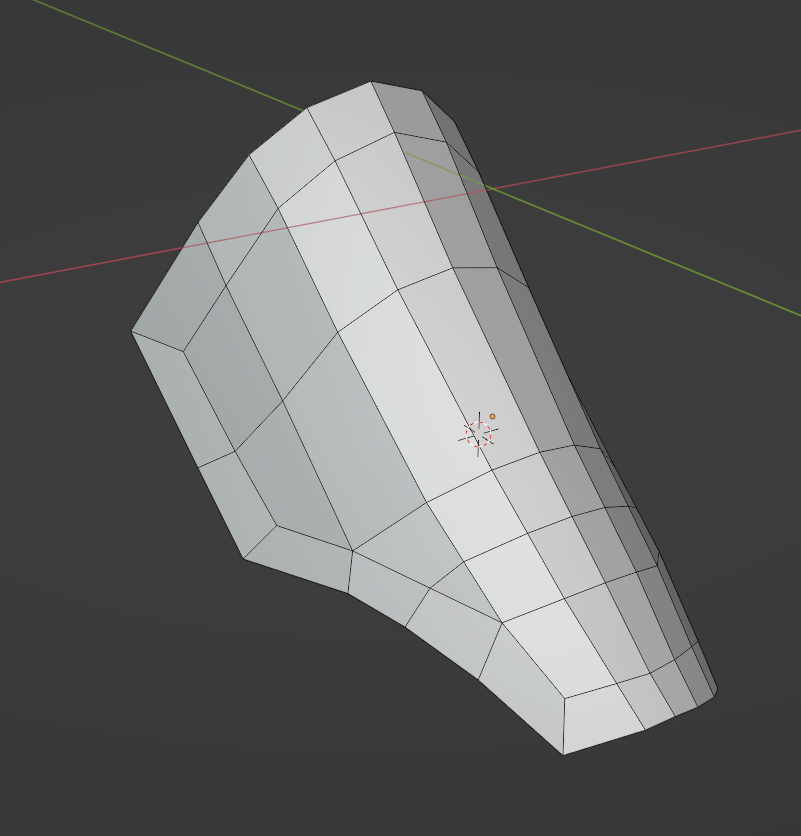
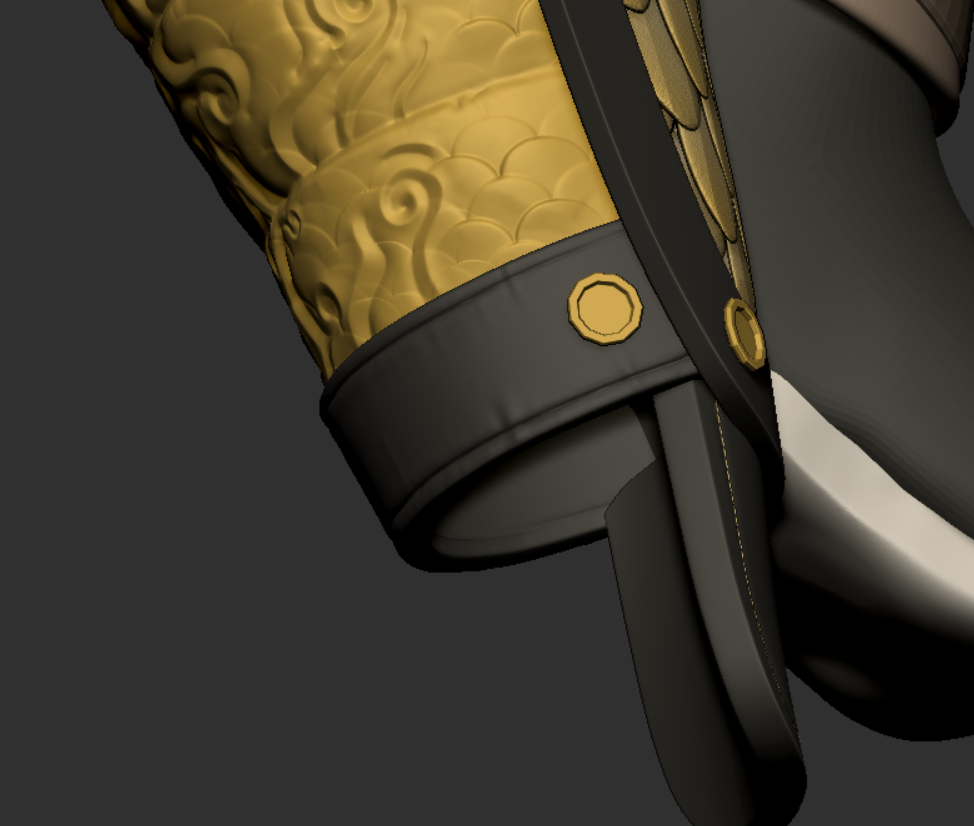
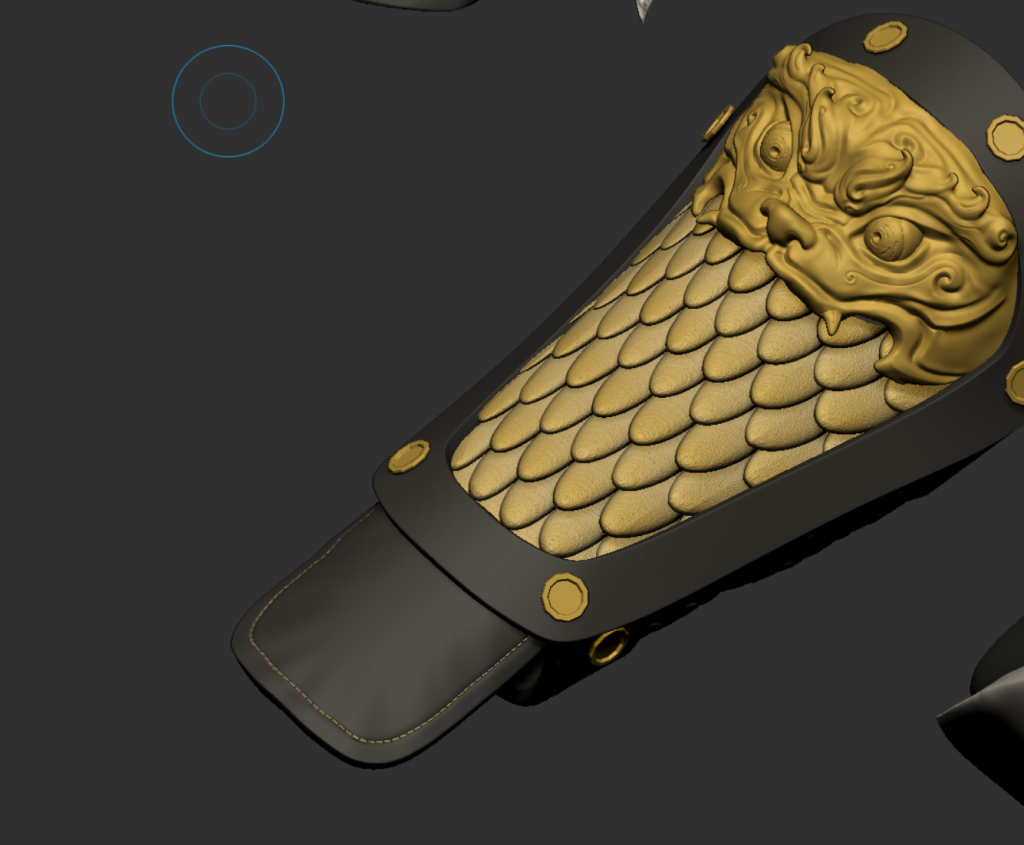
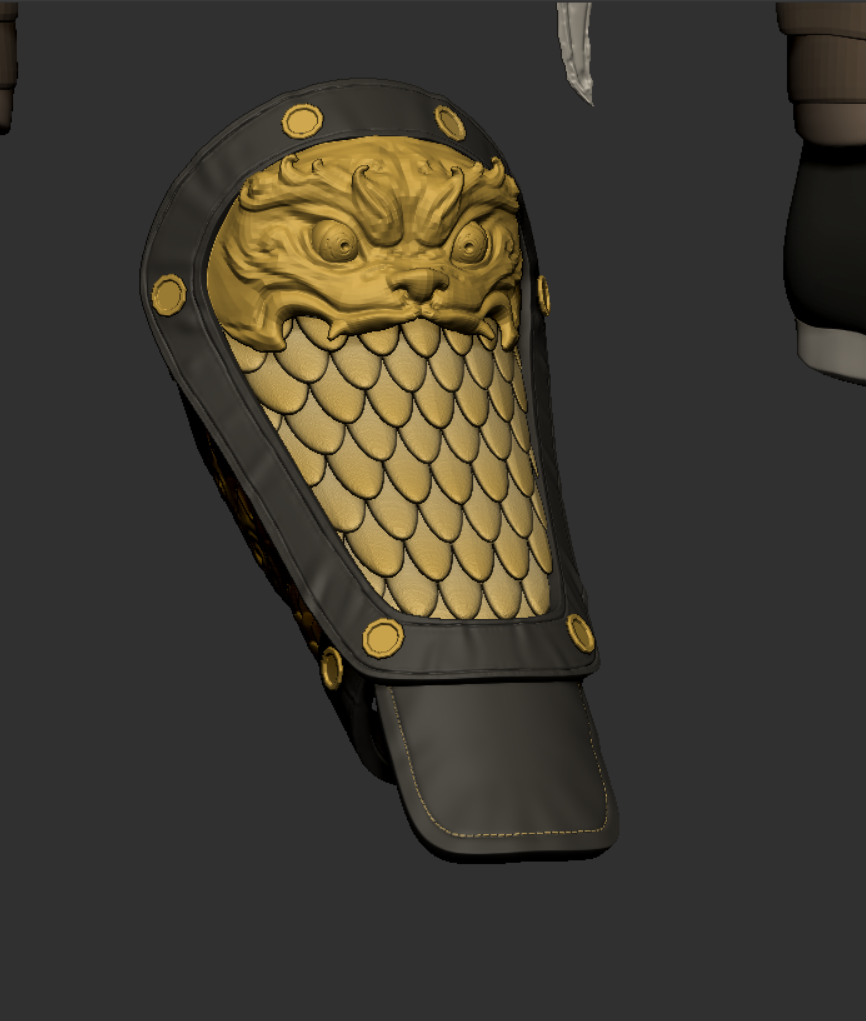
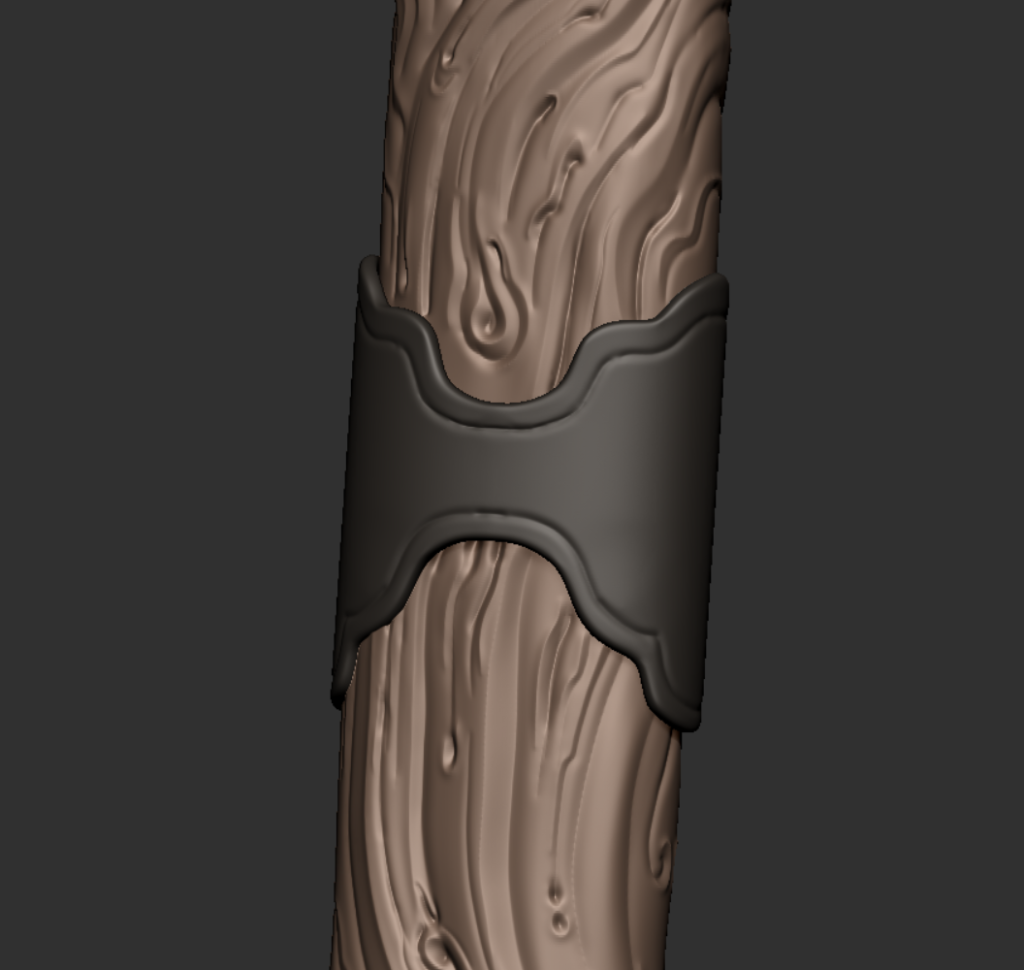
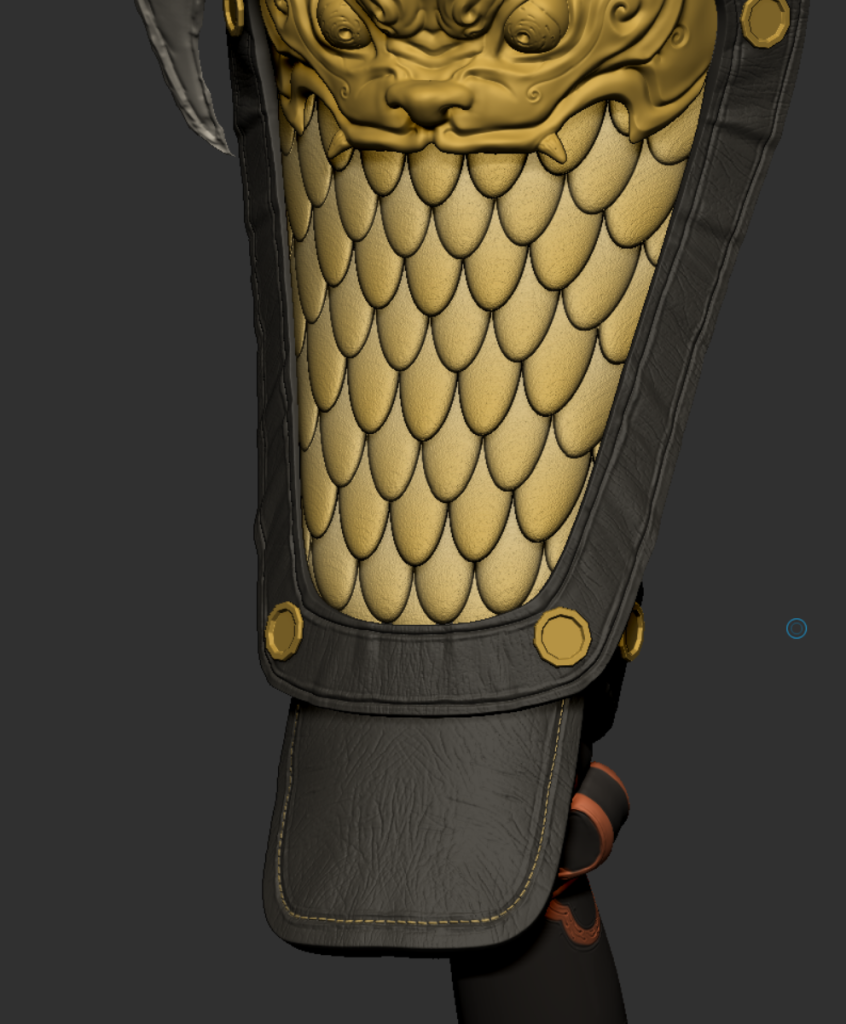
I started making the arm armor, first so I could mirror it, I put it in the center first.
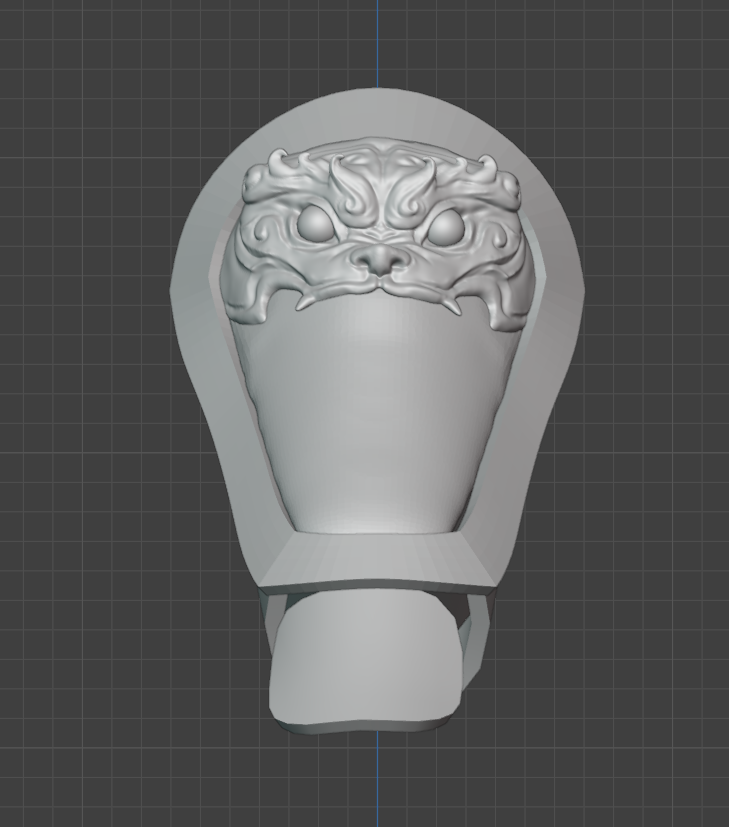
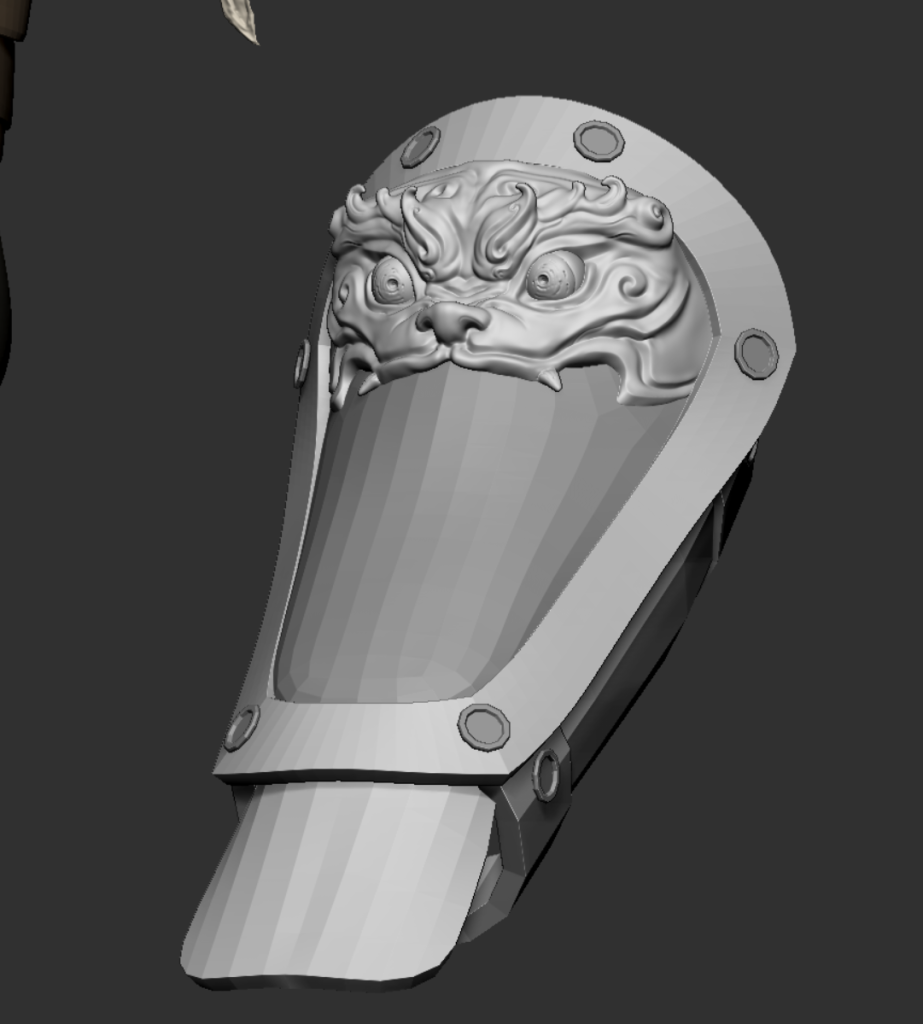
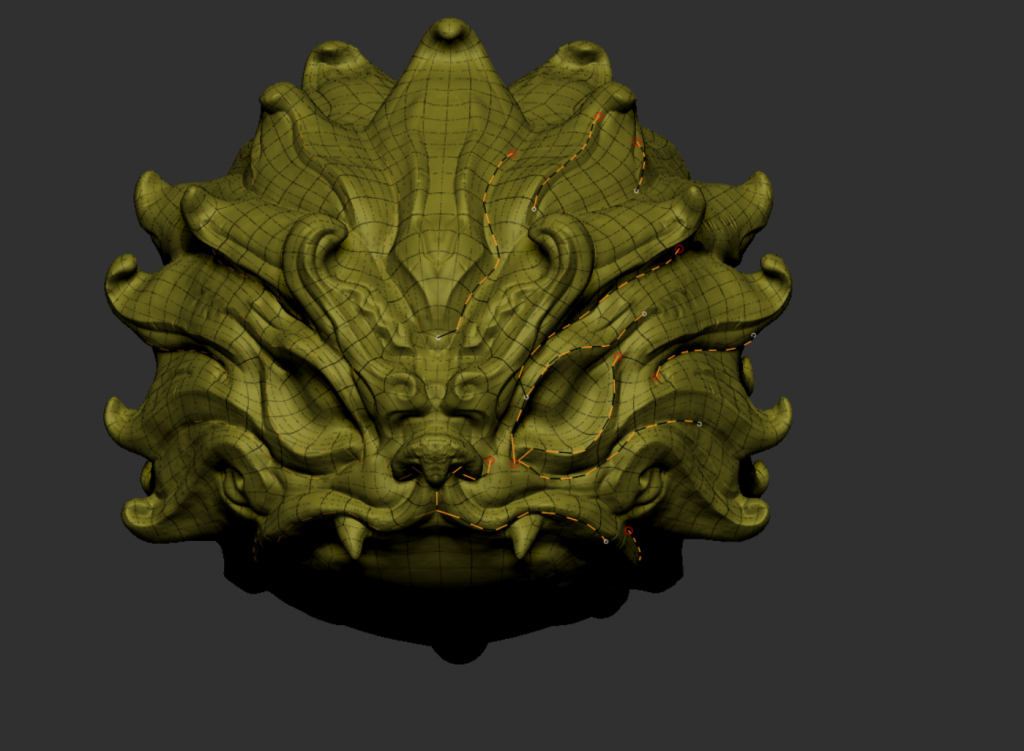
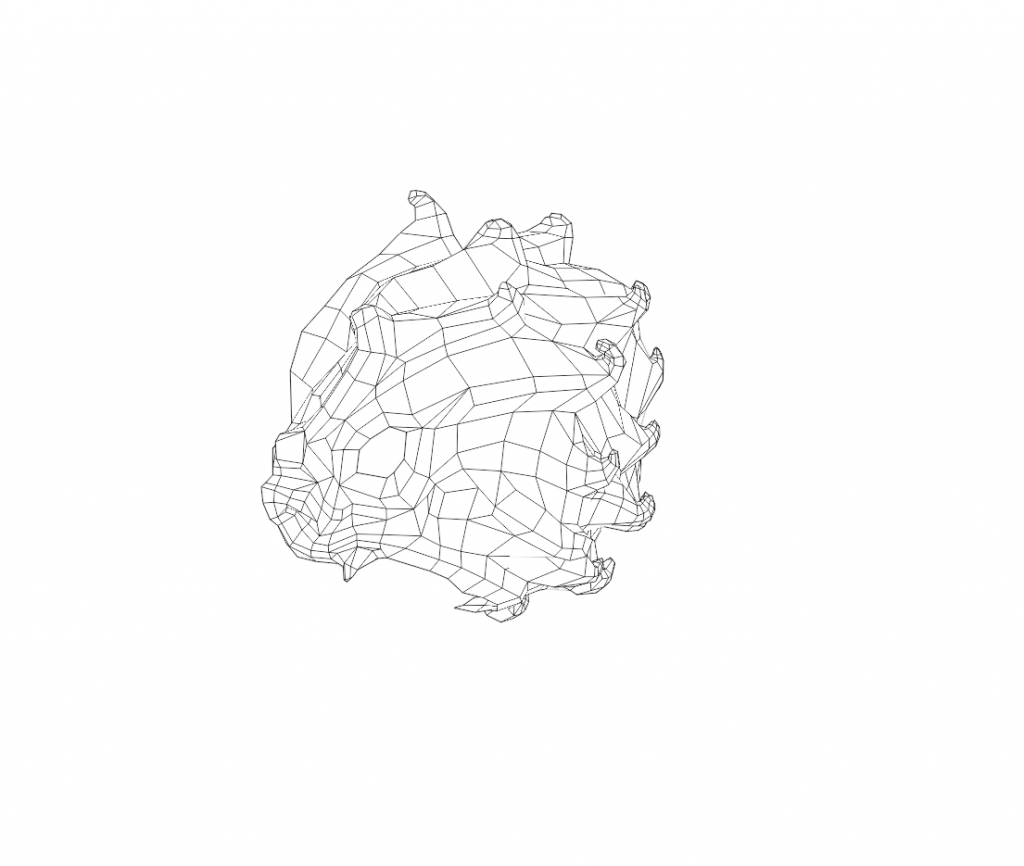
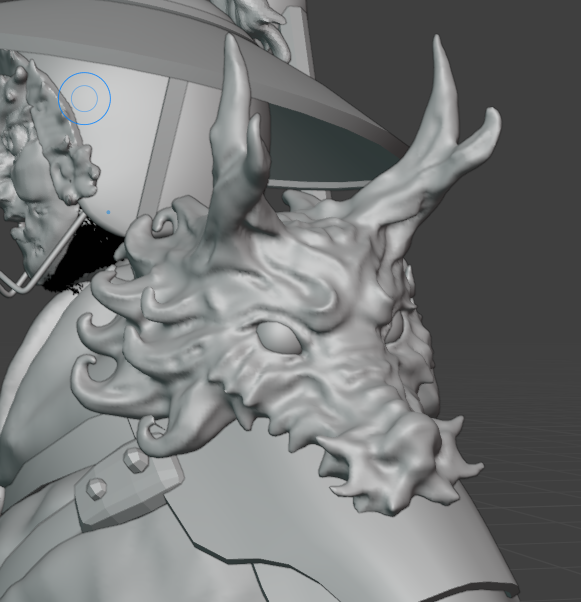
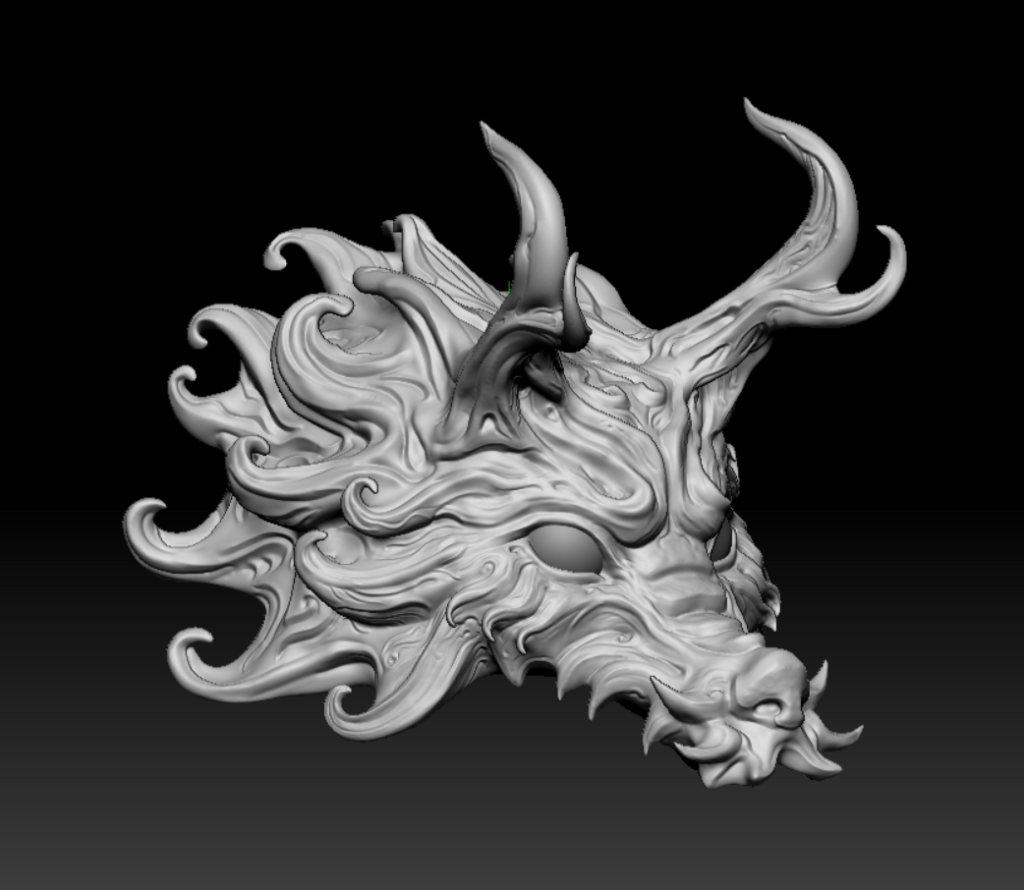
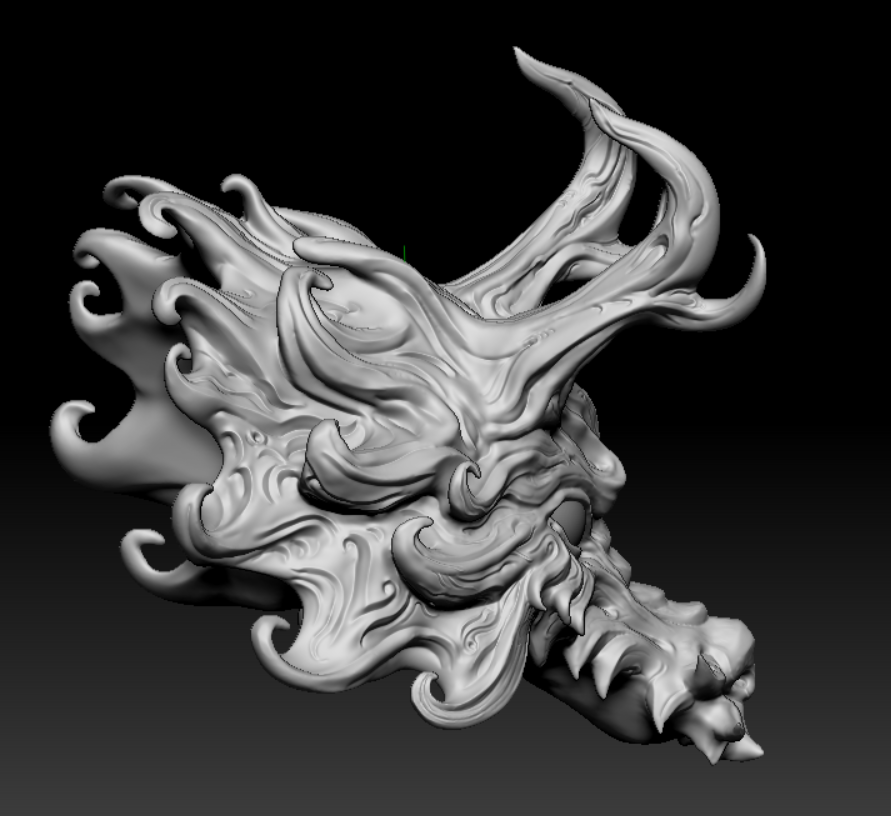
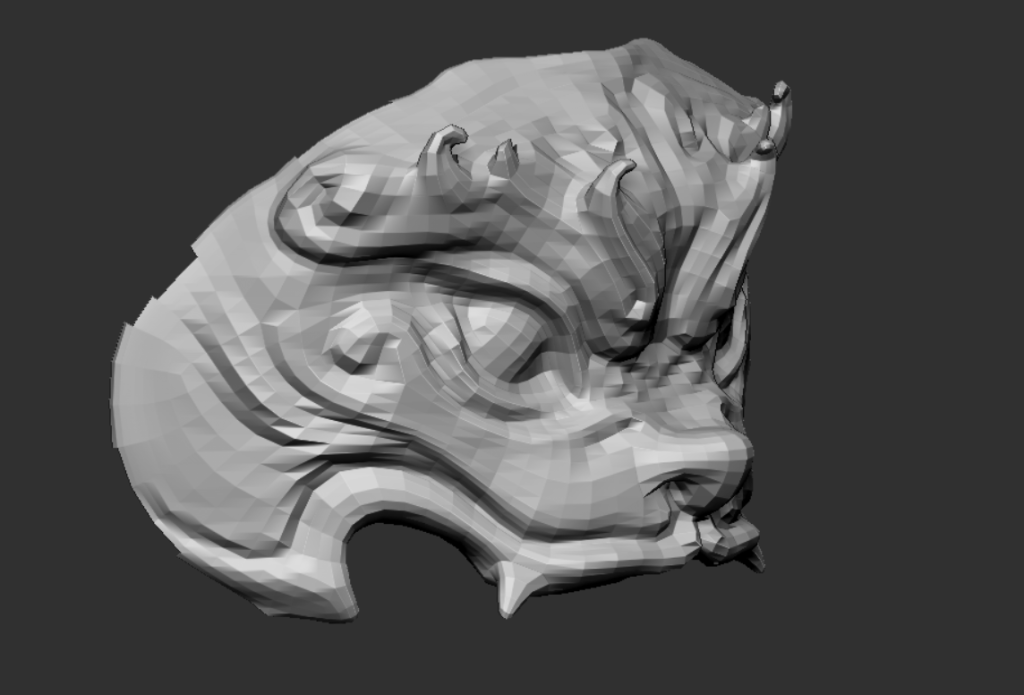
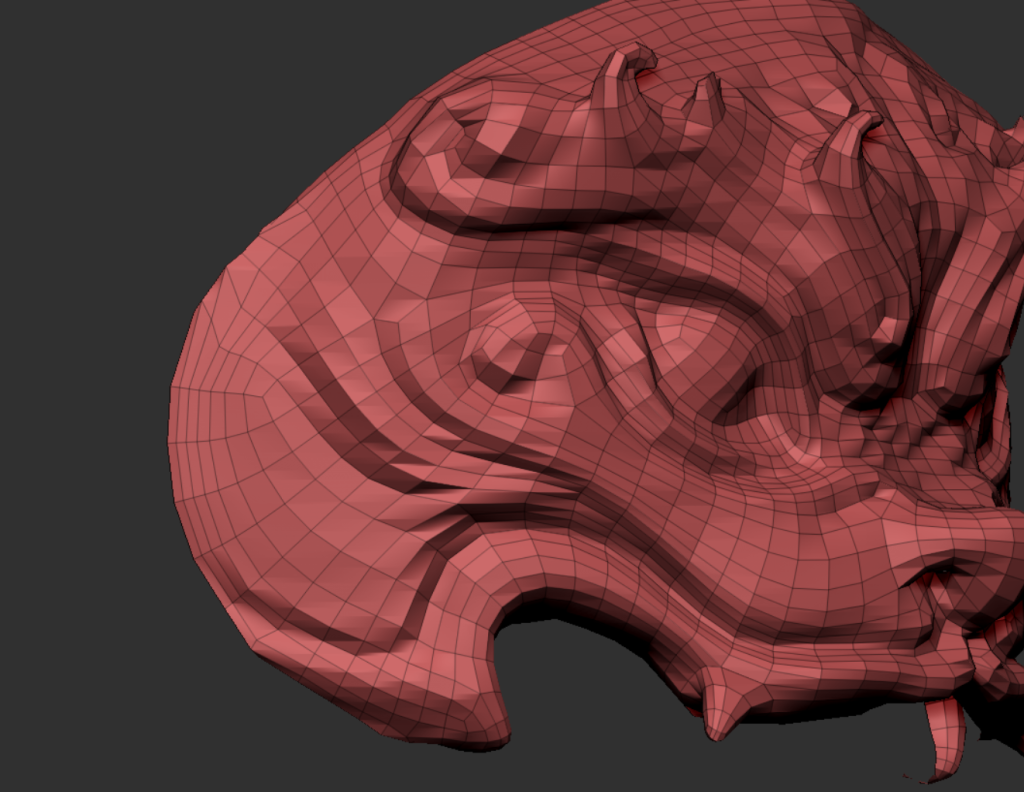
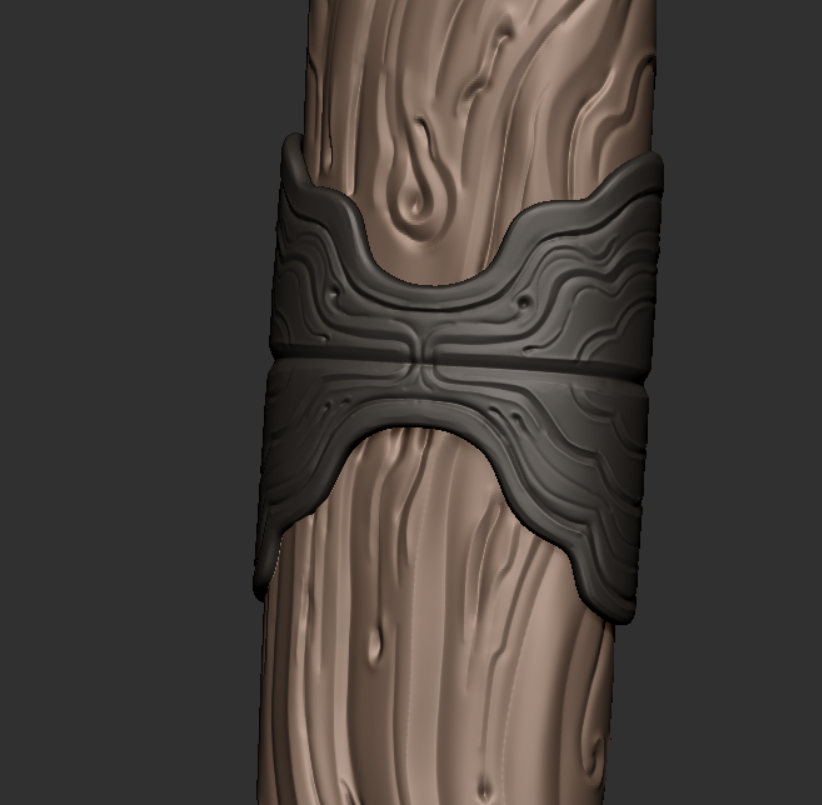
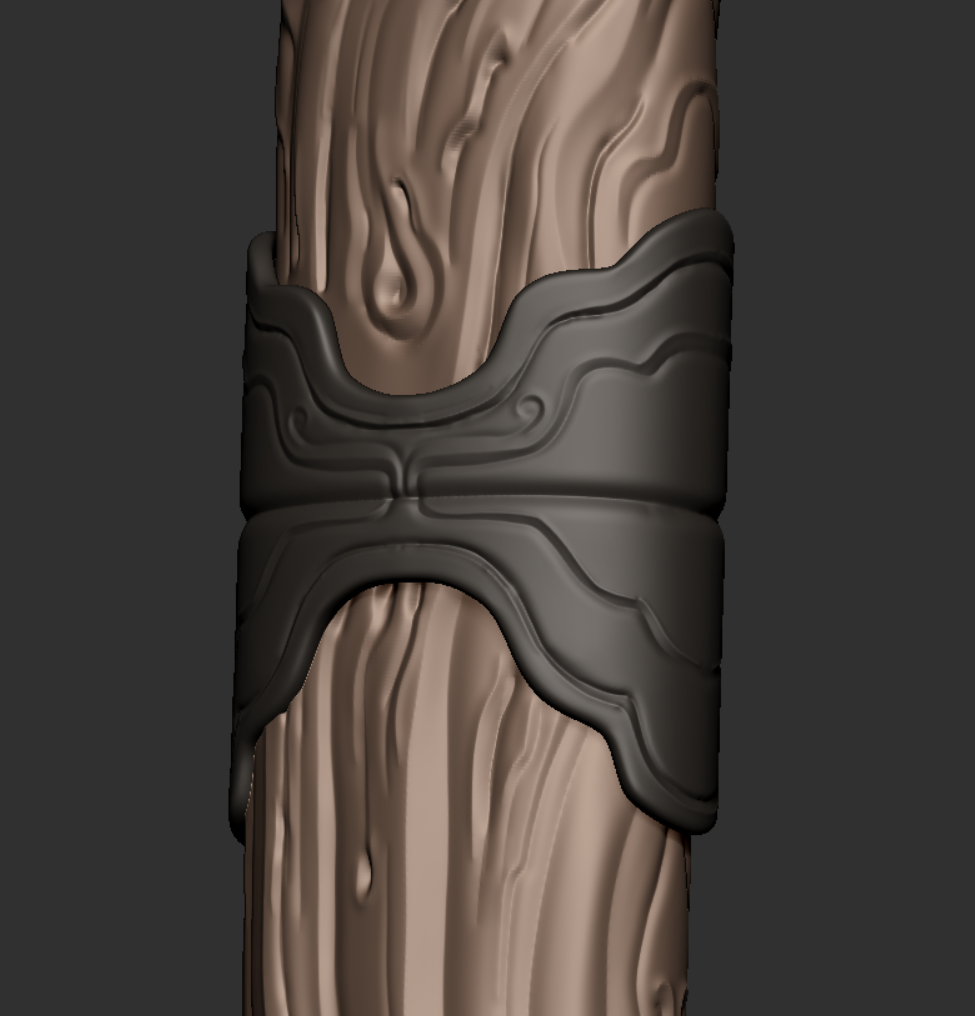
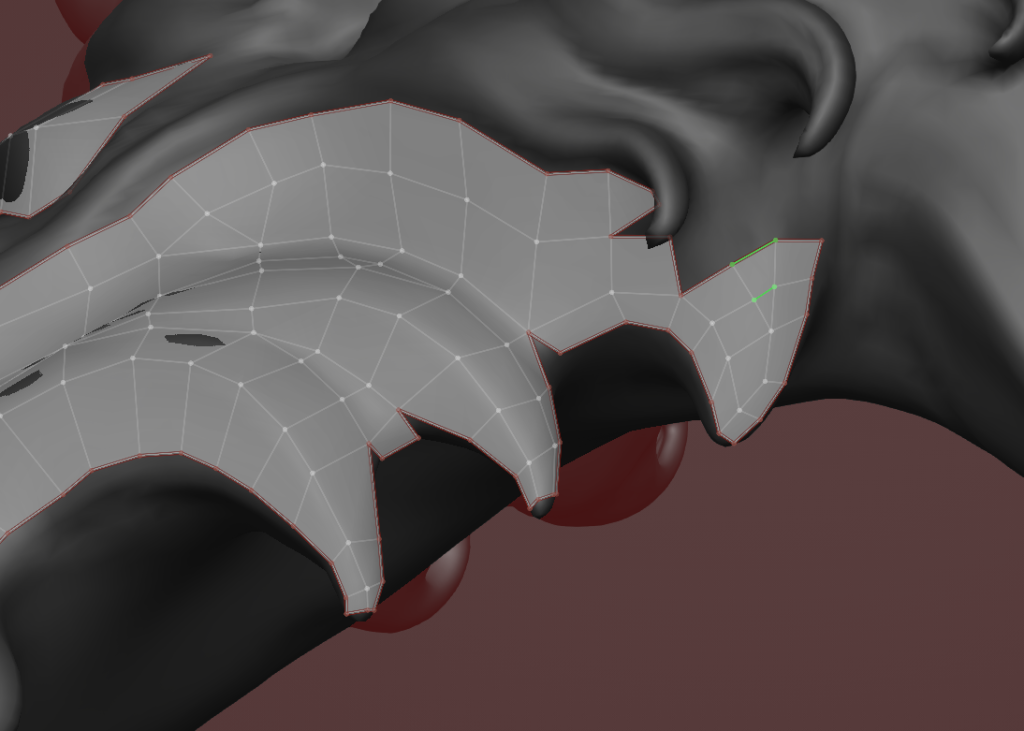
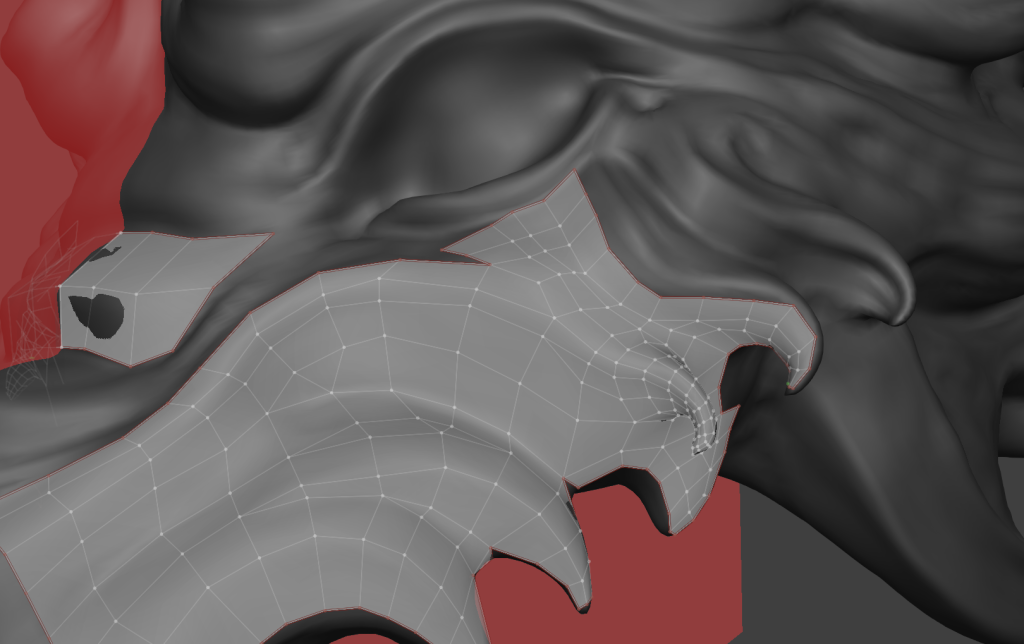
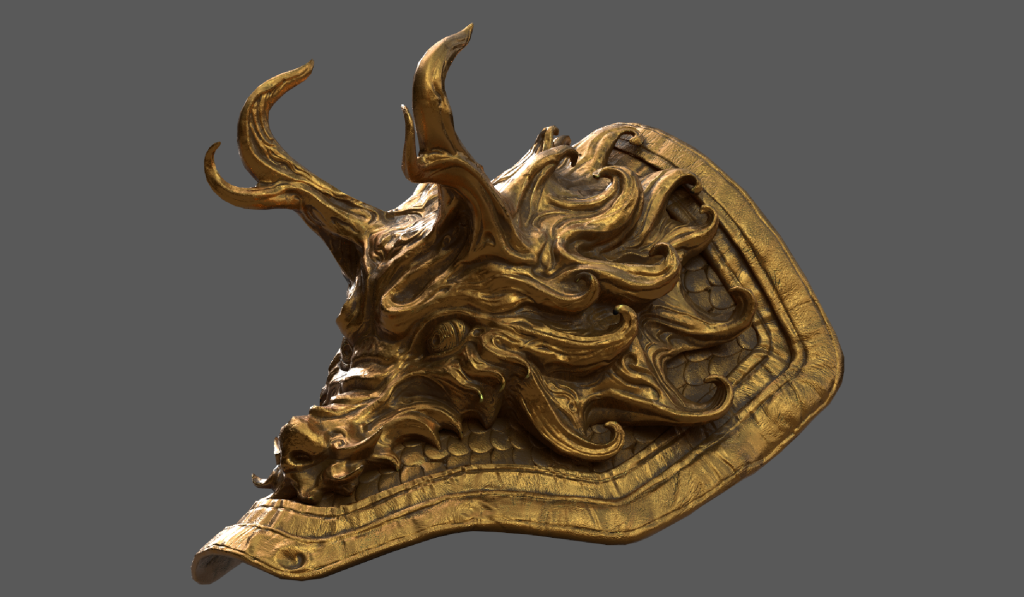
After that I mirrored it in zbrush, zremesher, adjusted it to look like this and sculpted the top beast head.
18/2/24


19/2/24
20/2/24
21/2/24
22/2/24
23/2/24

24/2/24


25/2/24
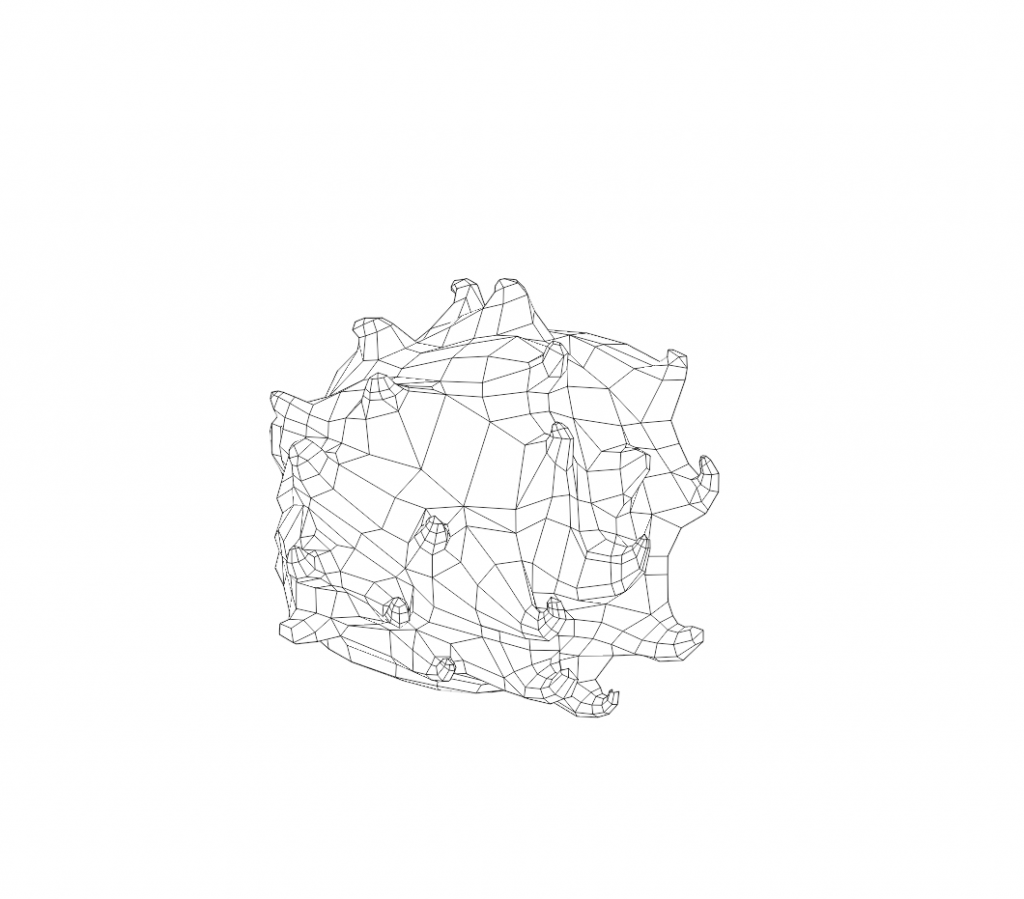
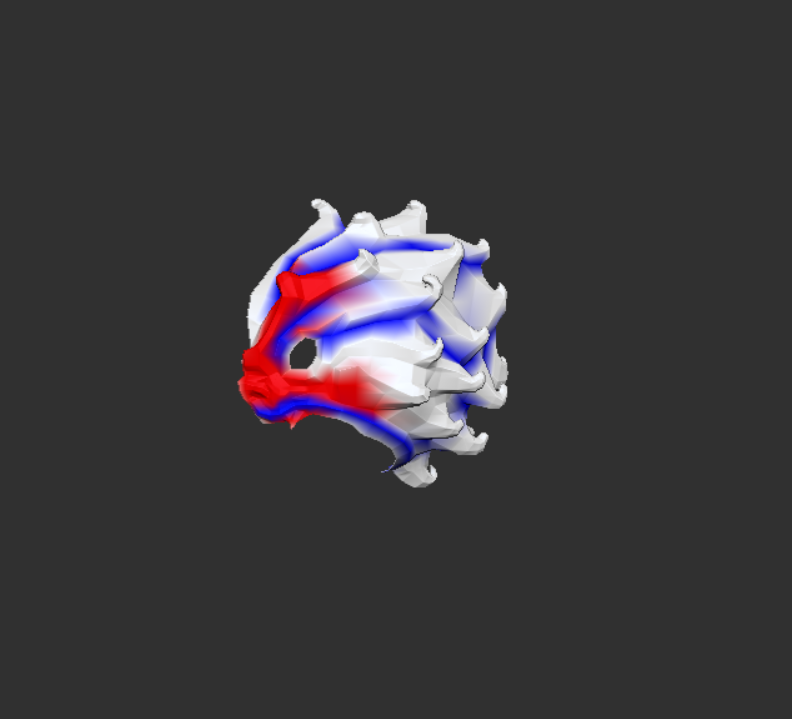
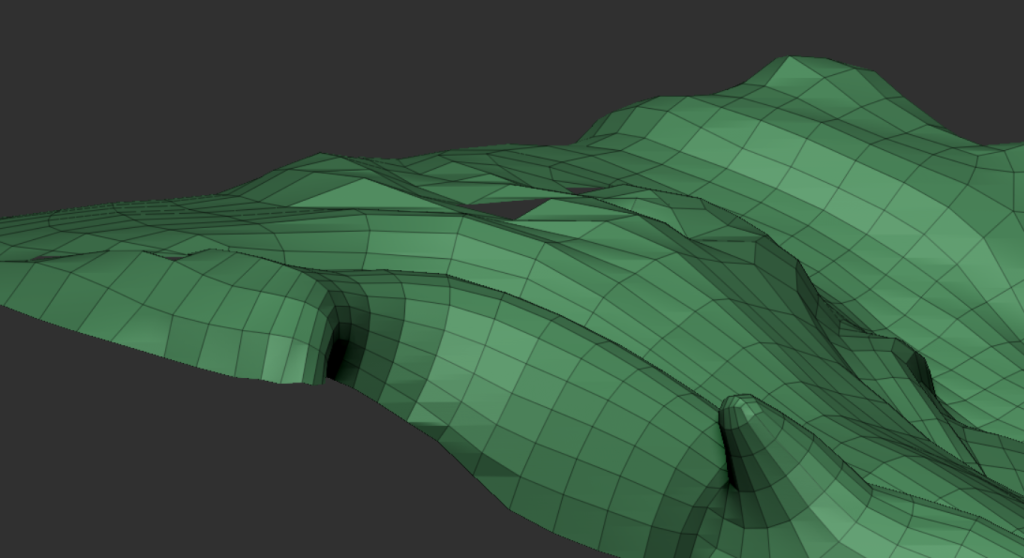
zremesher test
26/2/24


27/2/24
28/2/24
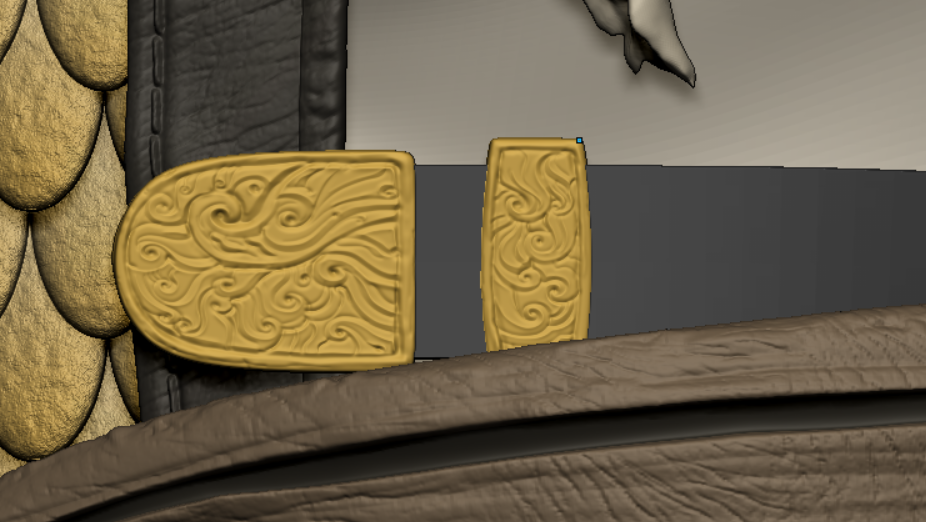
I made the belt brush handy for making multiple elements of the same type, but I realized that it didn’t work that well in the end, and that the one placed on the chest needed a lot of changes, but for now it’s more important to keep finishing the model.
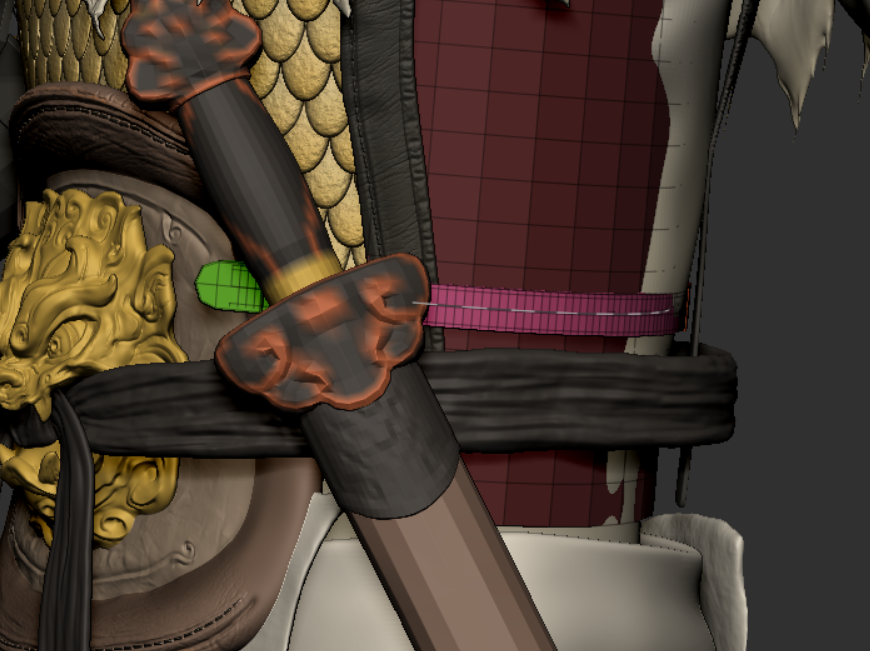
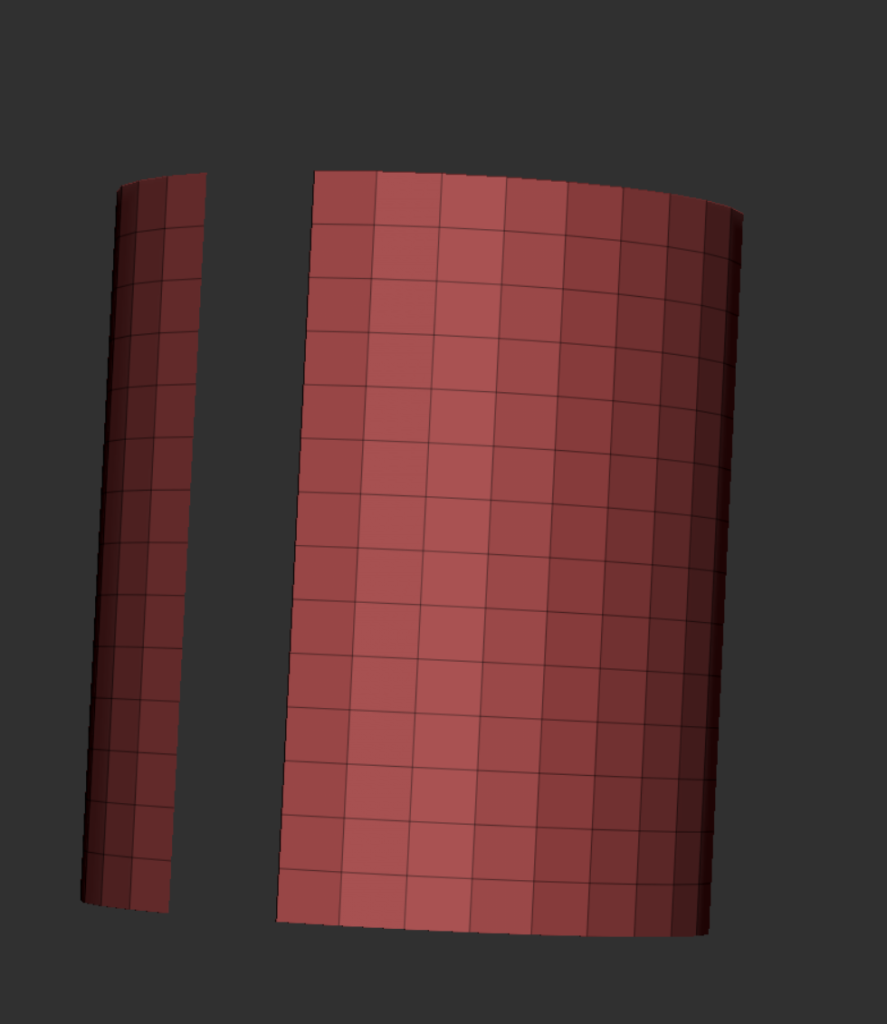
When I drew the belt directly, it didn’t get a good curve straight away, so I chose to first create a cylinder that fit my imagination and then extract his edge
Making the above pattern from reference, but when I wanted to differentiate the layers of detail, I realized that the existing colors didn’t work well, so I decided to use different levels of detail to differentiate the primary and secondary relationships.
And today I tweaked small places and rezremeshered parts that didn’t use multilevel subdivision as well as tweaked the
29/2/24
Putting making the belt back on the agenda, the first method I chose for making the outer leather stitching was to make it using a mask first so I could control it more easily as well as change it, and it could be uniformly reduced or smoothed. But if you draw it in one stroke it will be a crooked jiggly line.
Next I tried different blurs for the masks
After choosing the second one, I opted to thicken the edges and add leather alpha, and abrasion effects
When I was creating the details of the belt, after carving it I didn’t think it stood out enough and I used the standard brush again to add the bump.

1/3/24
3/3/24

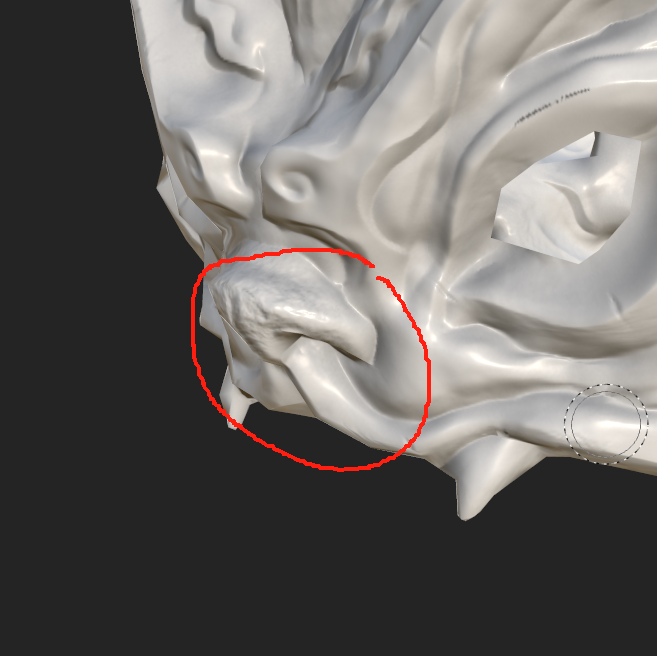
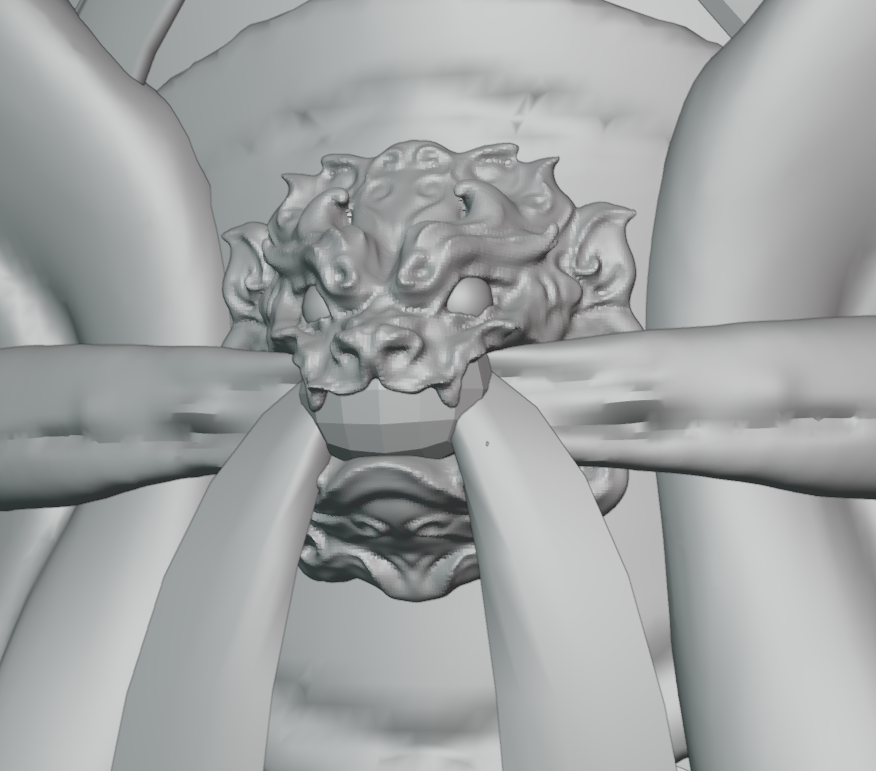
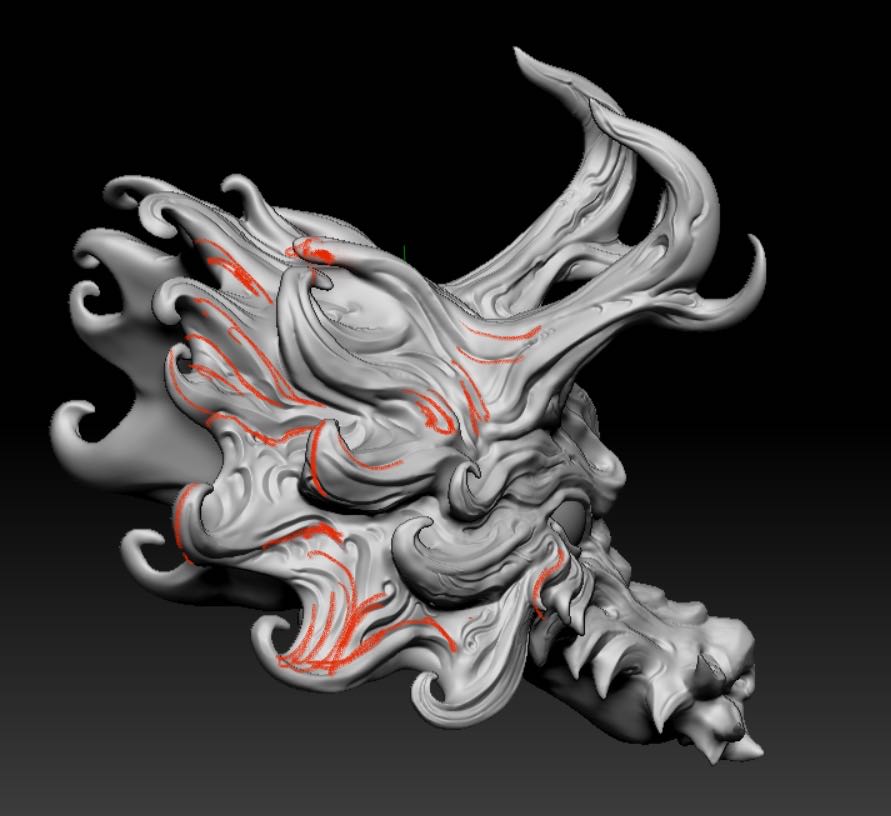
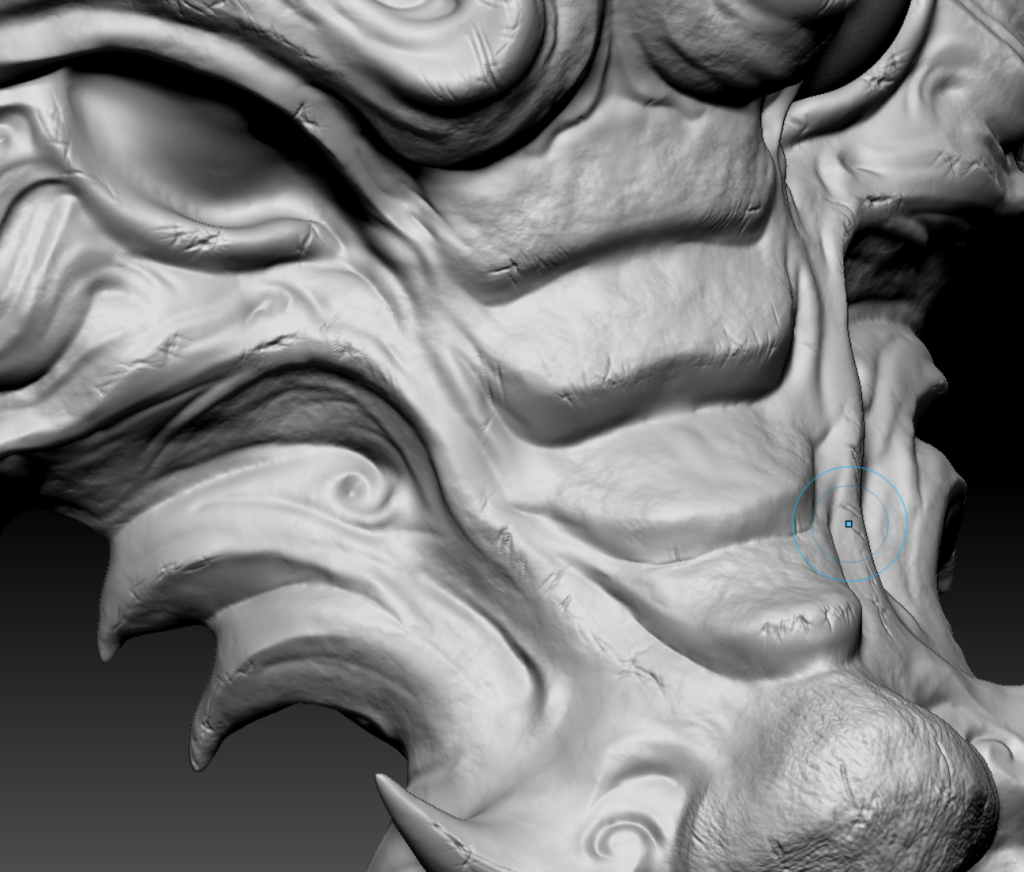
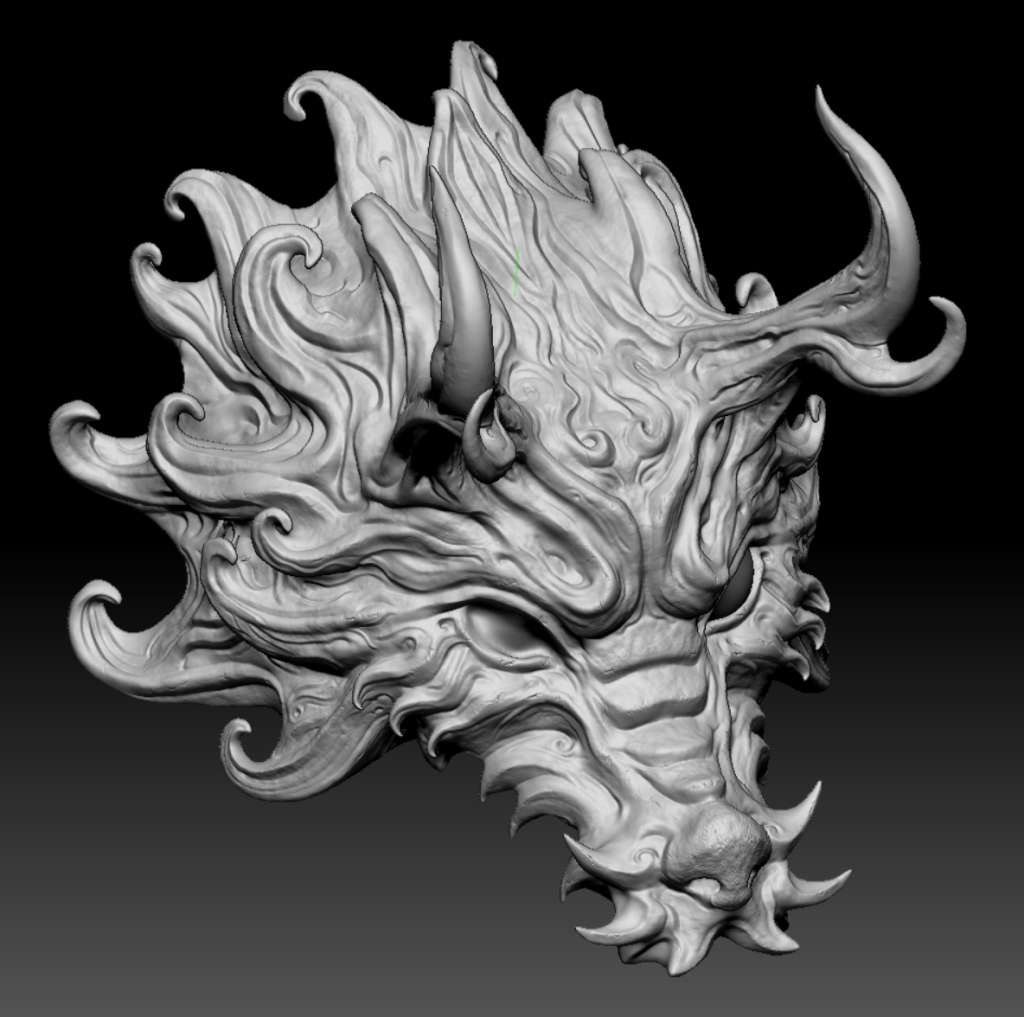
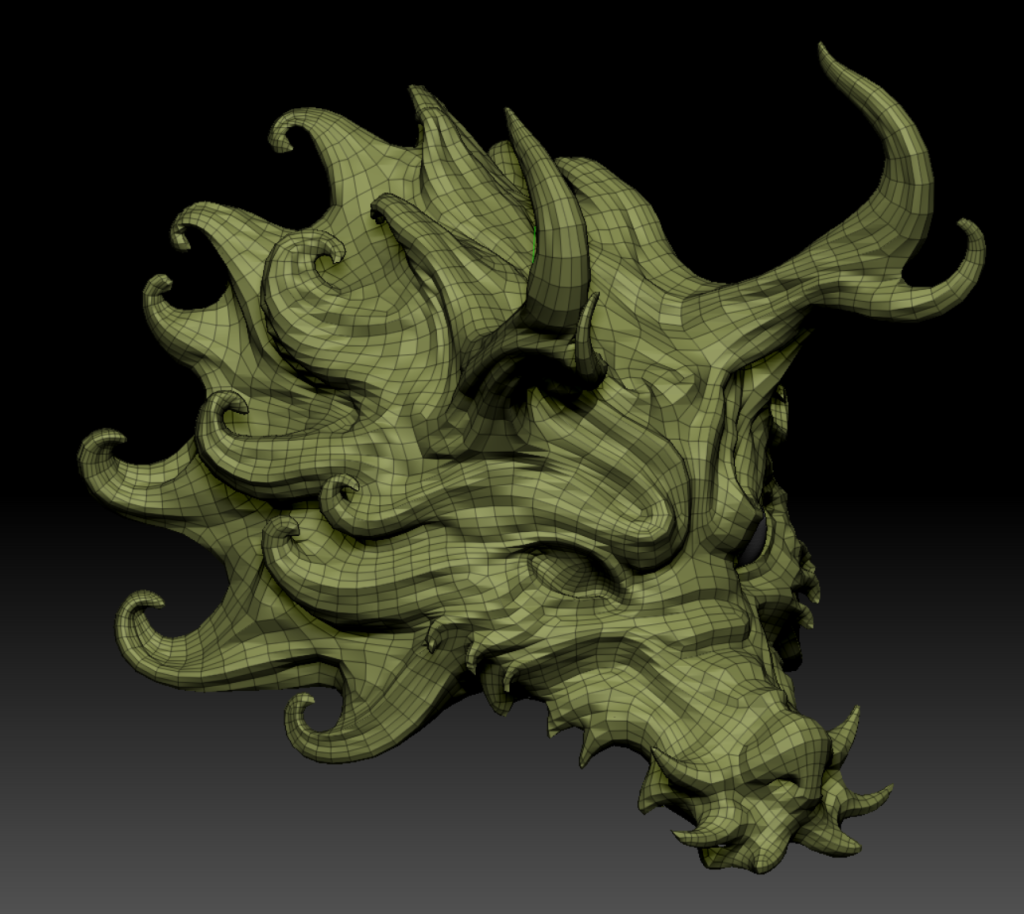
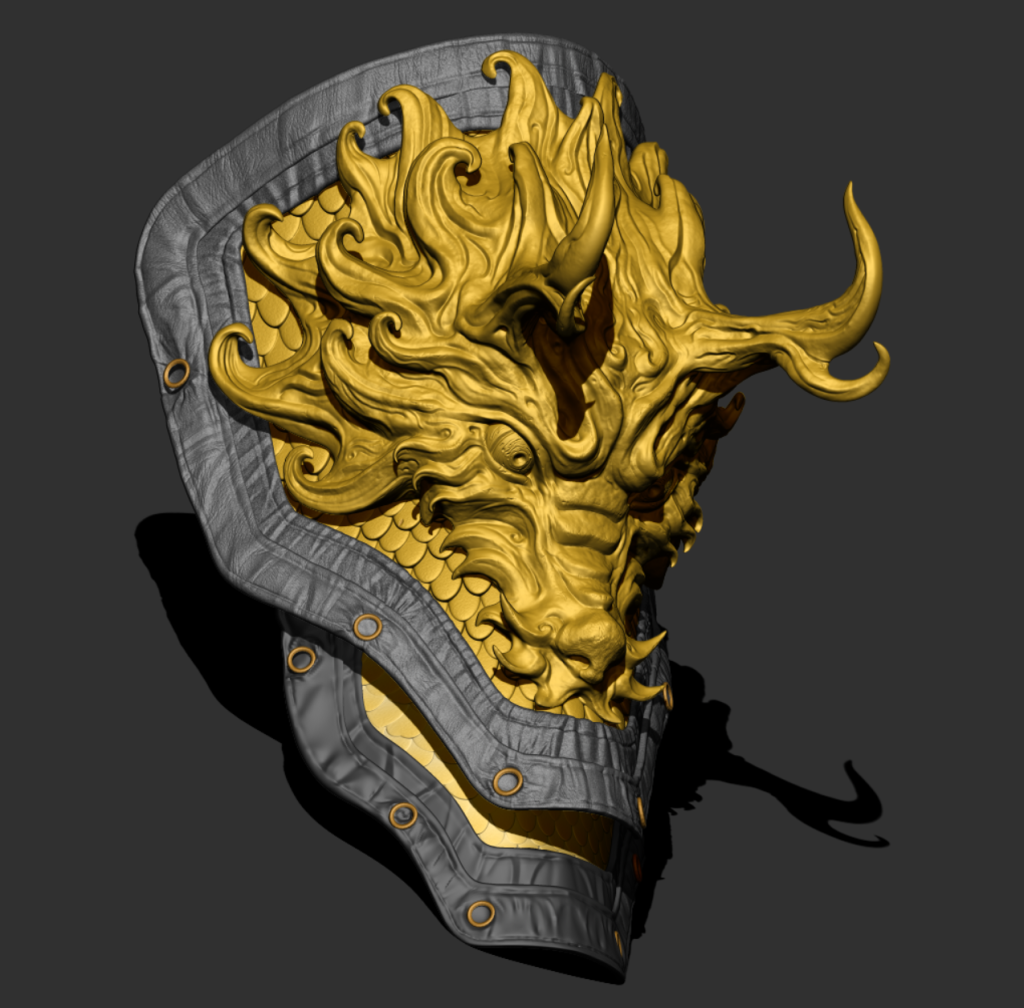
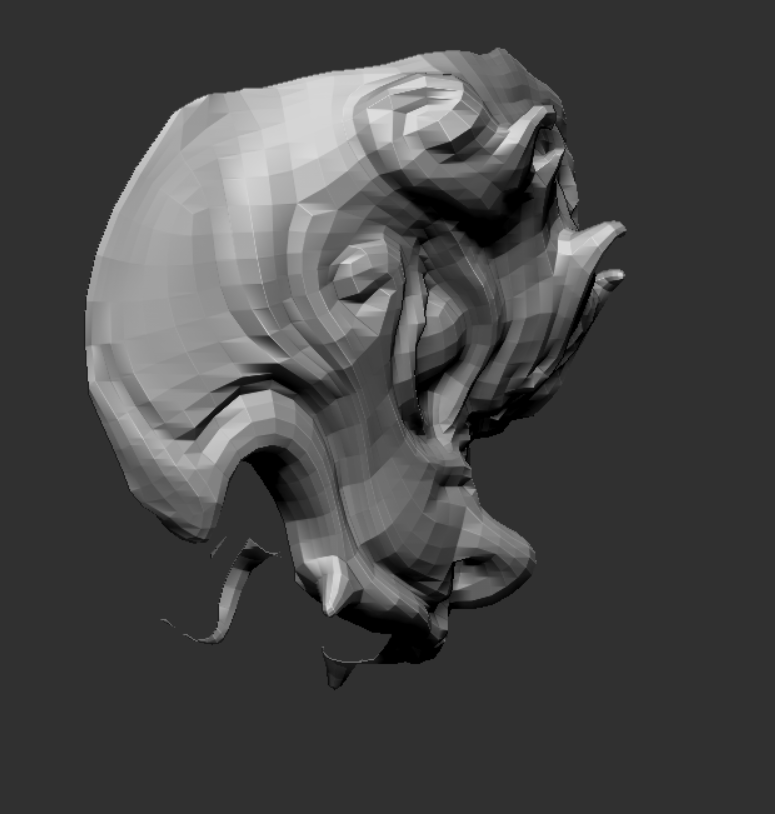
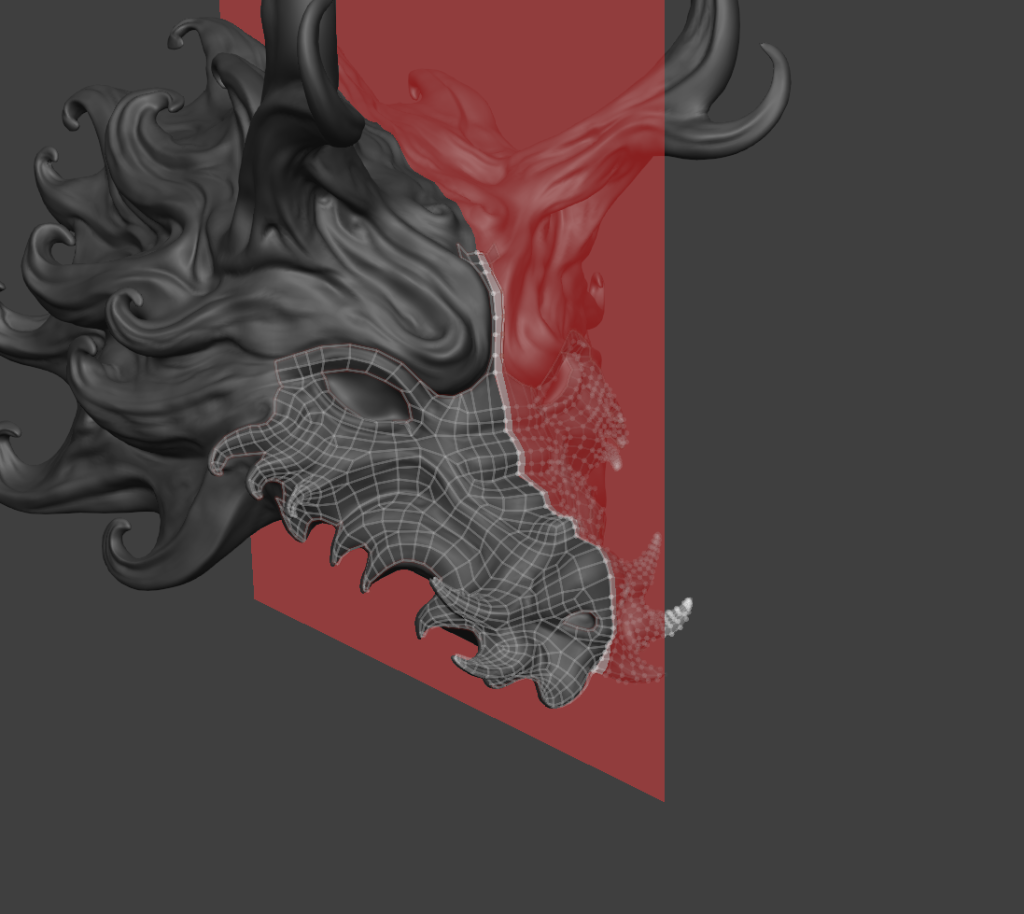
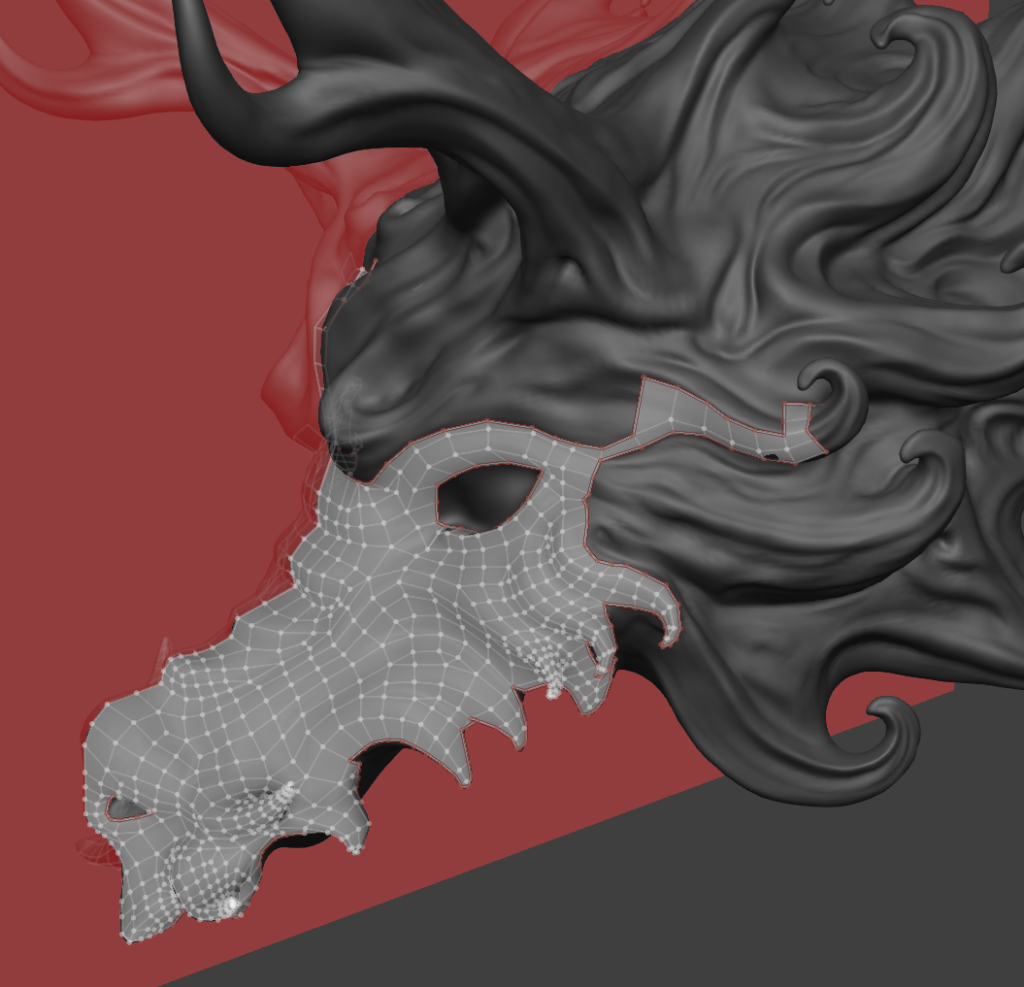
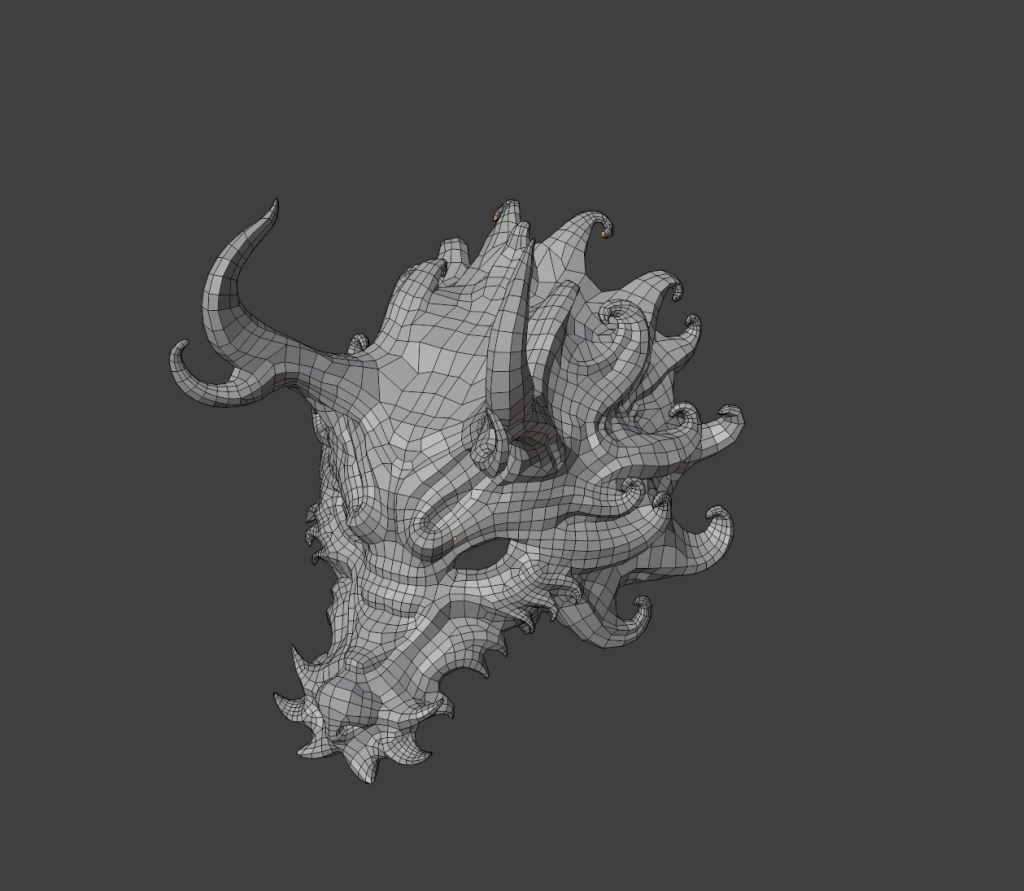
At this point I realised that the head looked a bit odd from the side because it was flat, so I added more topology, but this also gave the dragon head a total of 7000 faces
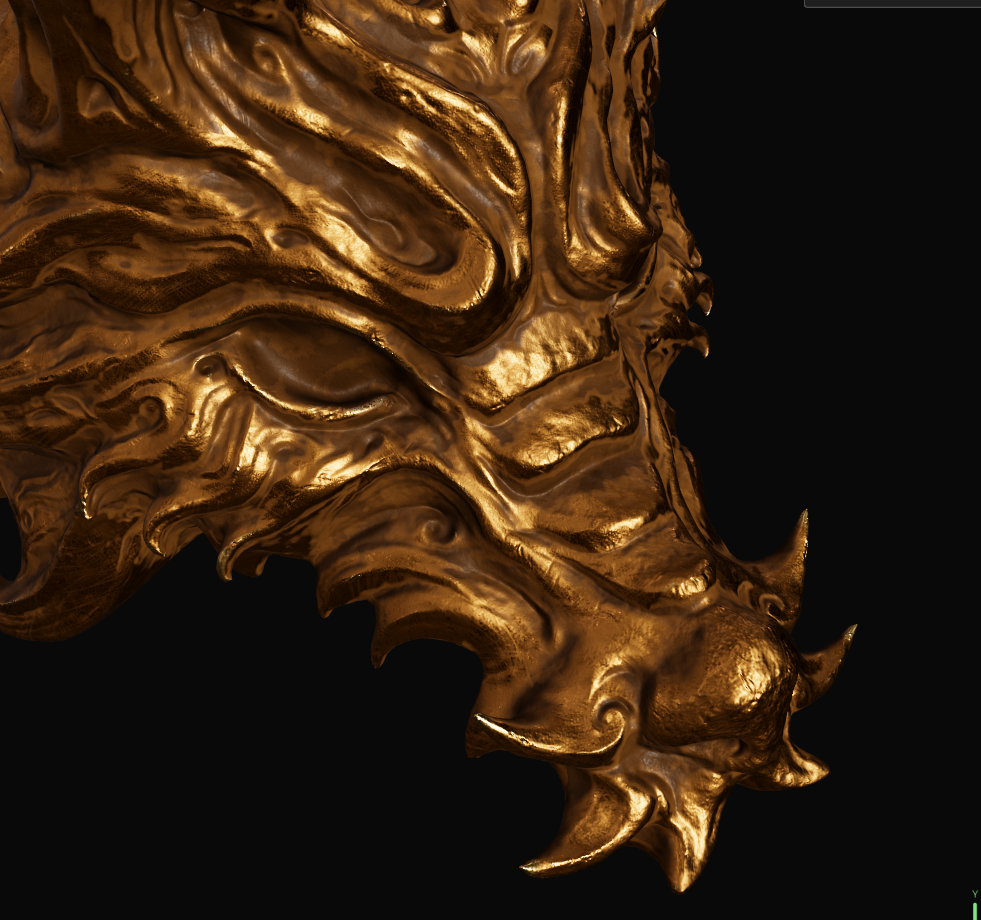
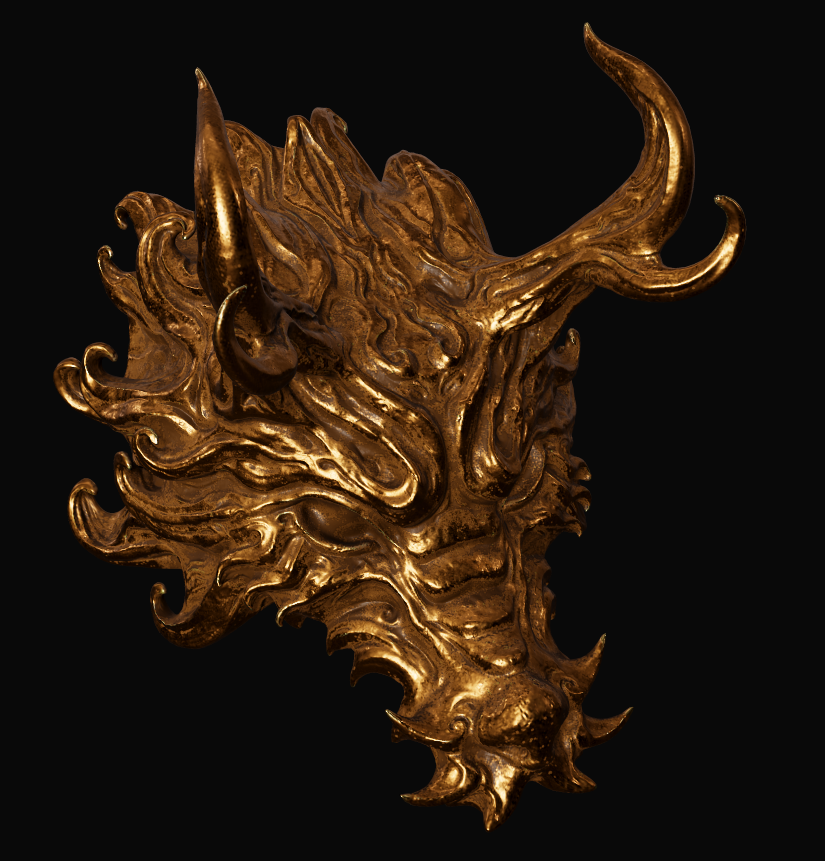
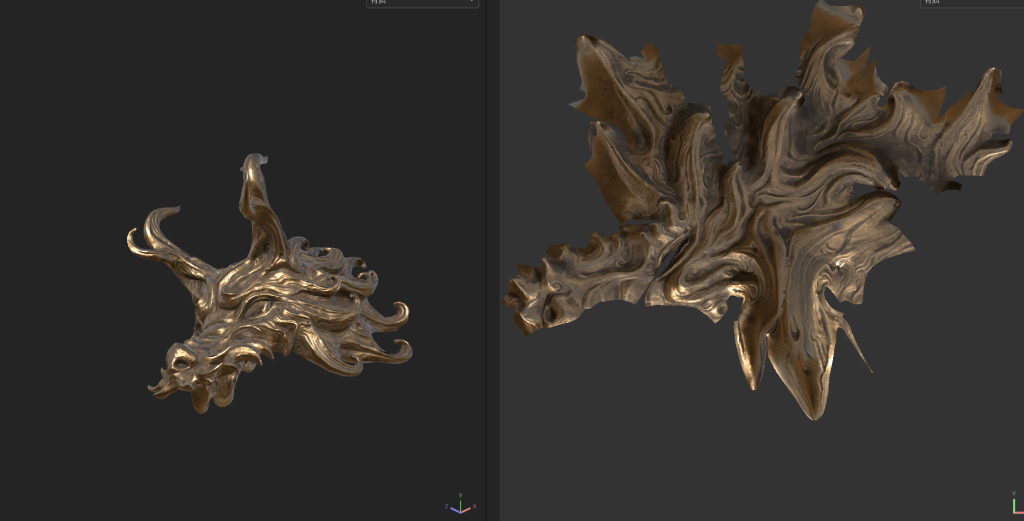
In addition to this I also tried to make the dragon scale effect in SP, I found that this resulted in no AO and curve etc. material, so it was easier to make it in zbrush
4/3
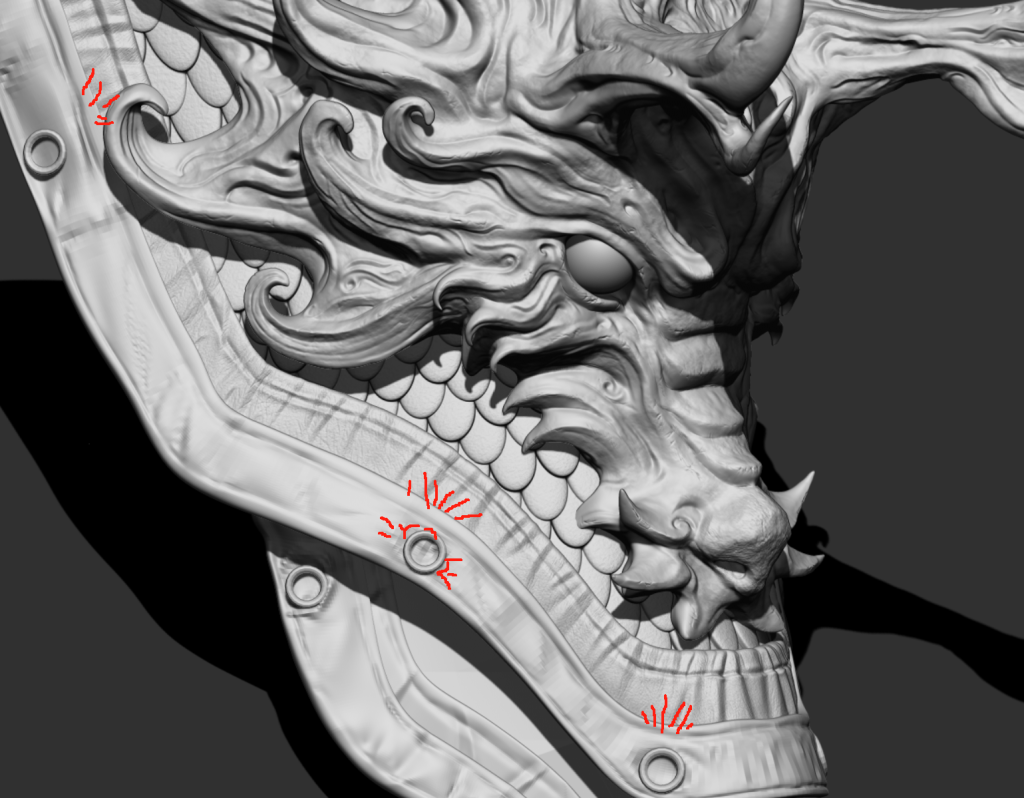
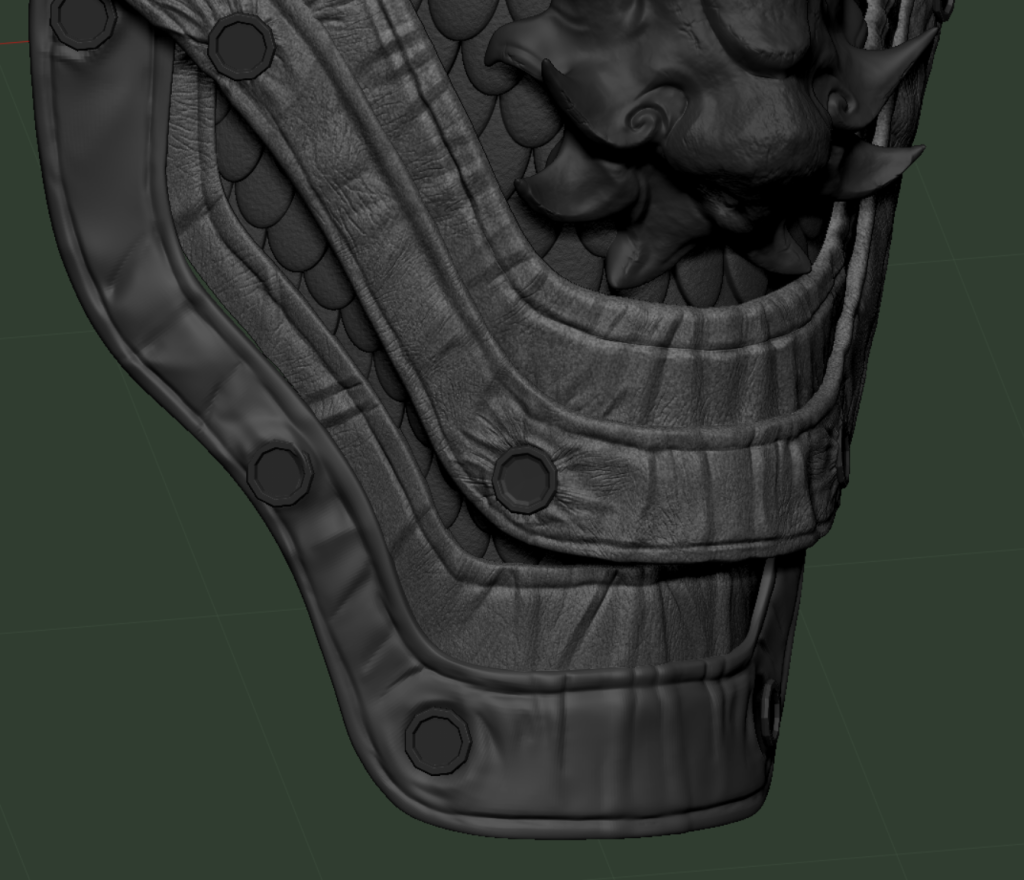
buttons
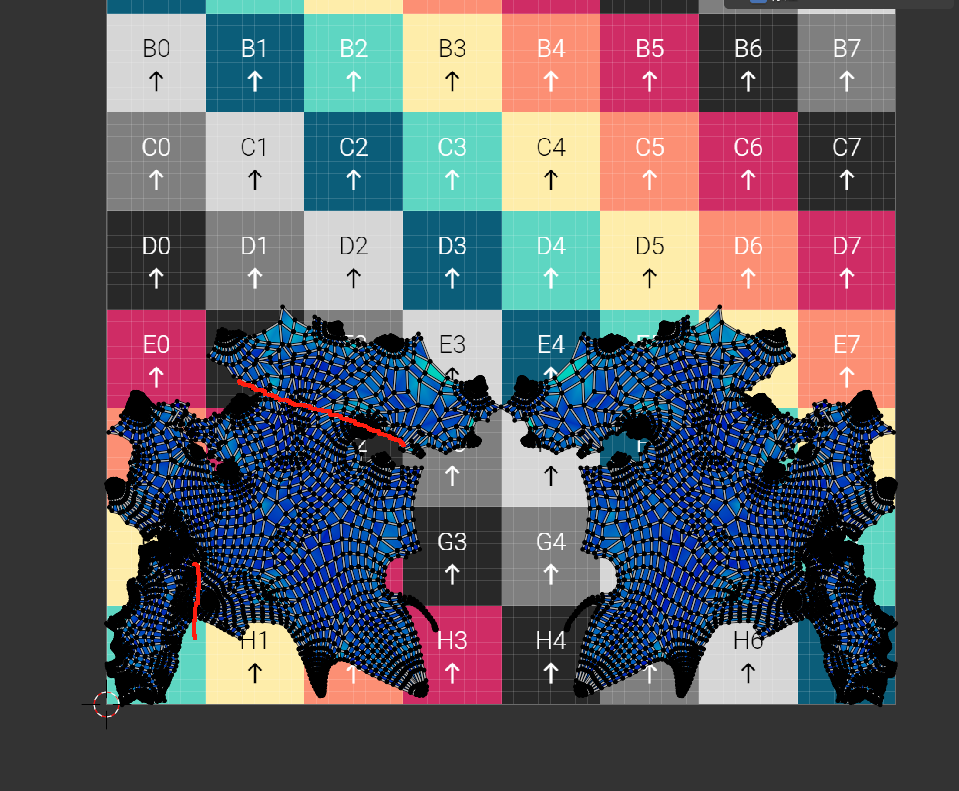
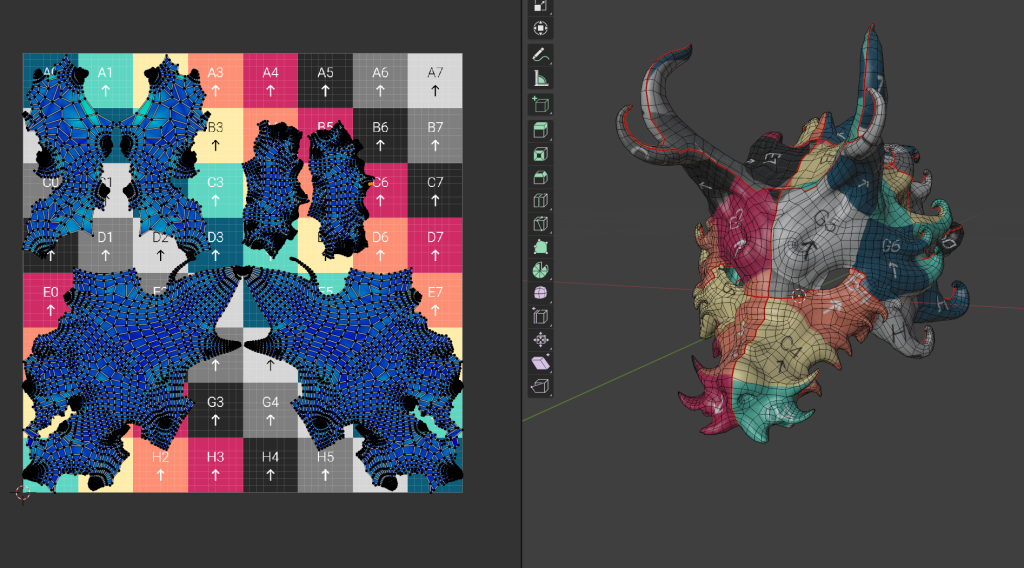
Disassembled the left shoulder UV
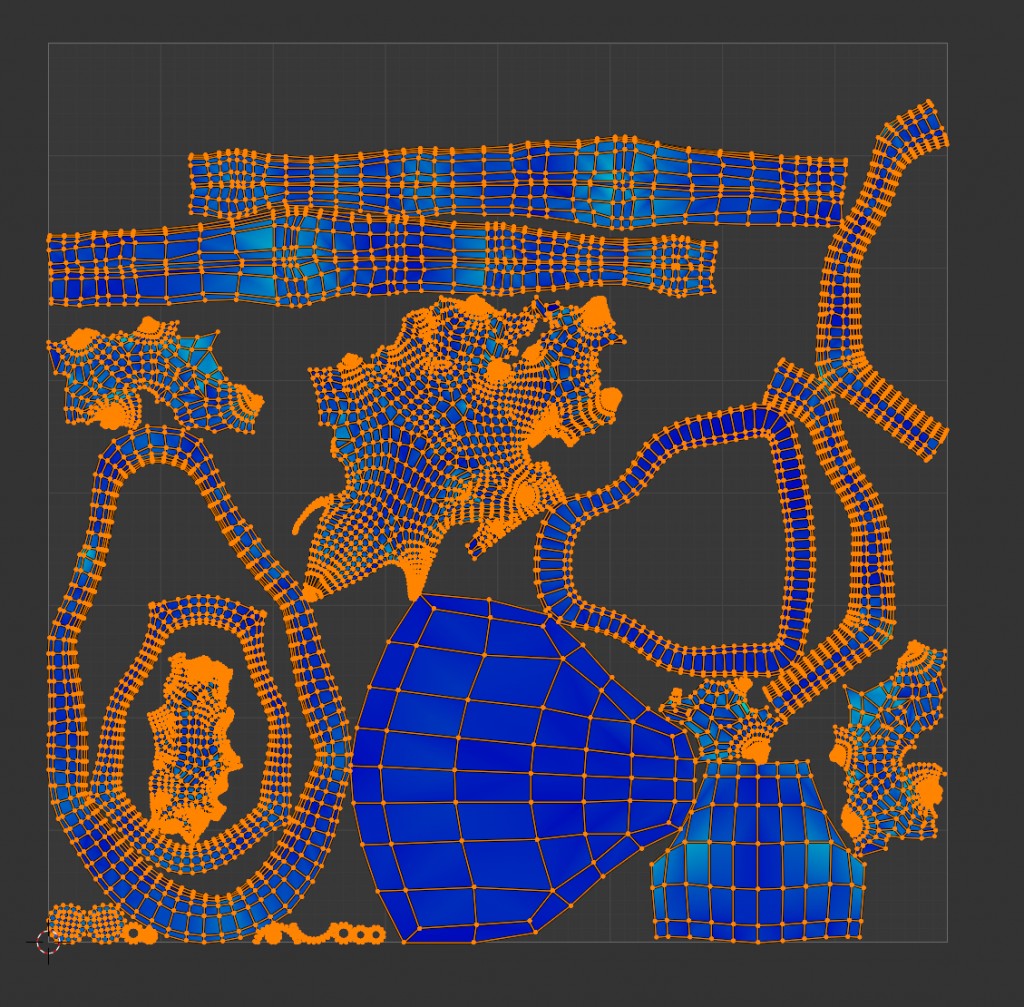
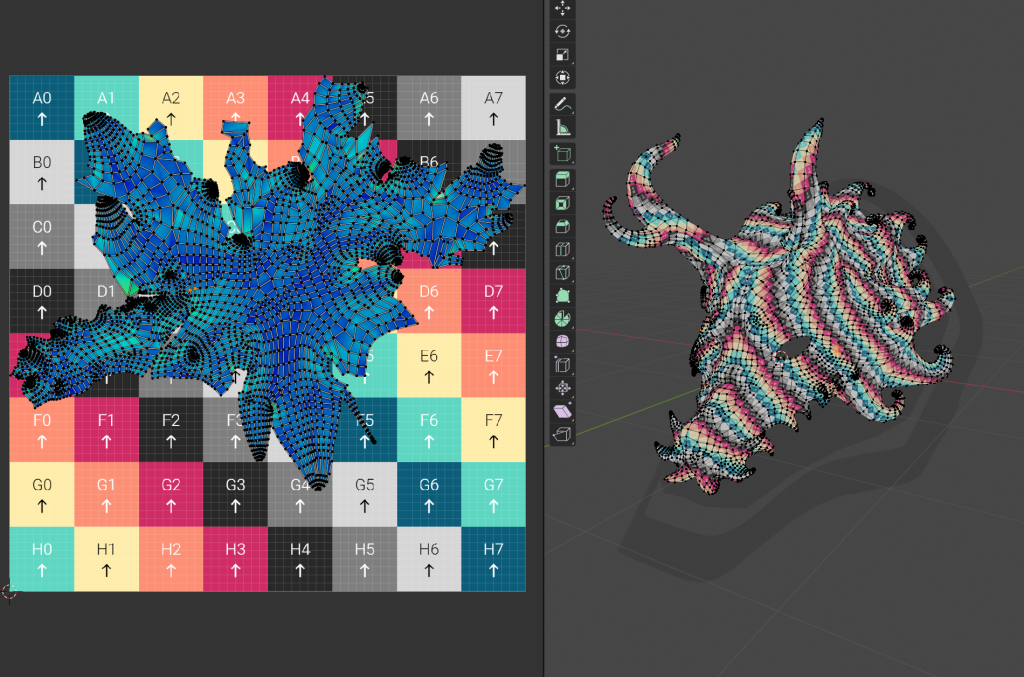
Zbrush Auto Unwrapping UV
Zbrush Zremesher
Bake issue

5/3