Week 1-Search & Thumbnails
Thumbnails
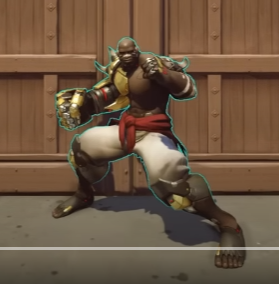
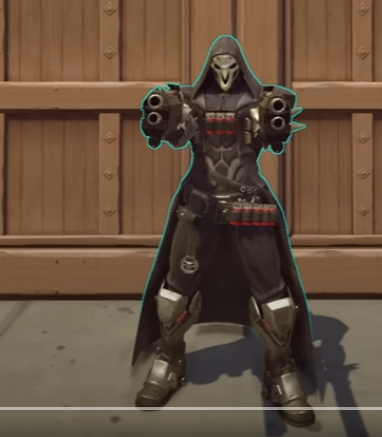
After researching, I became very motivated to draw thumbnails, and all sorts of animated figurines were created from my mind.
⭐ means I like it a lot
√ represents I think it’s relatively okay, can refine and look again


mood board


Week2 Thumbnails Development
25/2/23 ~ 28/2/23
I first chose the role I want to develop, and then a comprehensive consideration of the background, design, and my personal preferences to choose three, drawing further development.
While I was developing the three sketches, I re-watched the Watchtower character background and researched the character design. In fact, I actually disliked the game’s story background a little bit before, but I suddenly fell in love with the game after I learned more about it and became enthusiastic about making this style of character.
And after the second development, I learned a lot and connected my sketches to the Watchtower story, which made me feel that my characters were more alive, such as Red panda from HorizonLunar Colony, a tree man character archetype that fits Reinhardt’s backstory, and Ramattra’s rebellion that also made me think of The third role that I ironically had.


I was torn between choosing one of these three as the final product. I actually personally prefer to make small creatures, and at the beginning I always intended to make the first character. But after I asked people around me for their opinions and tried to refine them, I found it difficult to convey my feelings about Walker to others.
My second favorite character is Ford, because in my heart he is also a living being, and his story has a sense of drama, so after getting Robert’s feeling, I also decided which character I want to refine.
Concept art
27/2/23 ~ 1/3/23
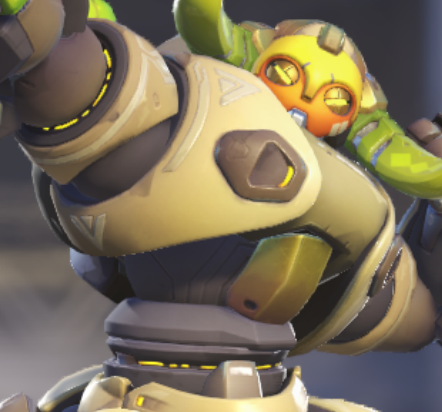
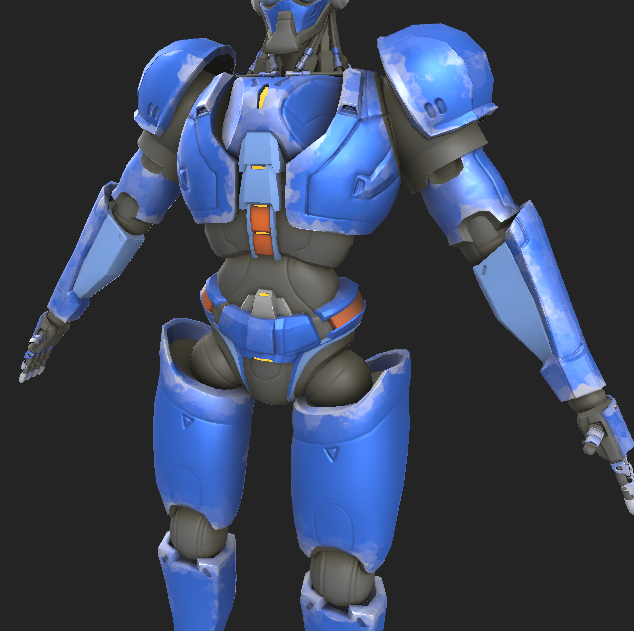
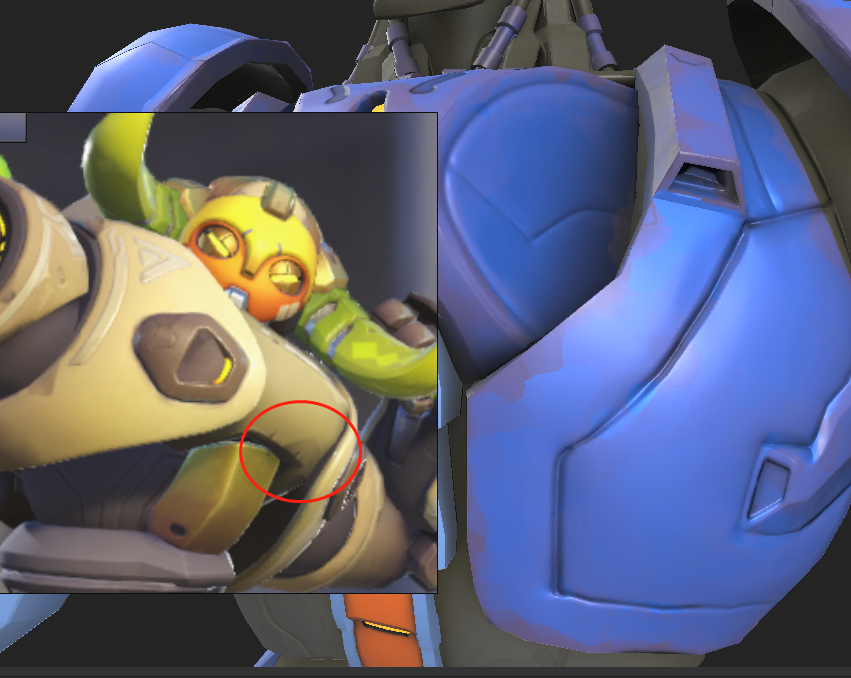
After reconfirming that, my mind actually started to conjure up a series of moves for Ford, who I imagined to be a super internet celebrity and to have a sports car-like shell, with structural references to Orisa, and I also did more research in Overwatch.

When I refined it further, I found that it was much easier for me to produce a creative sketch than to refine it, and I needed to put more attention as well as thought into it.

One of the main points is that I need to refine again at the same time to keep the feeling from a distance to keep consistent with my sketch, while taking into account the movable range of mechanical structures (I think I will continue to experiment with 3d afterwards), while I can think about the small ideas of various parts, such as the location of the link cloak, after which may be, for example, open large when projecting three-dimensional projection, appearing the whole character is very dazzling, and the design of the sword unfolded from the hand.
Week 3 Concept Art Finish&Block Out
2/3/23
When I got home from class today, I finished the sketches of the legs and shoes.
3/3/23
I did a lot of work today. In the morning, I made a scene from a collaborative project, drew the material and adjusted the lighting to build the scene.
Today I colored Ford and drew a draft of the back, but I’m not very clear about the structure of the small arms, I plan to do a simple 3d draft after.
And after the first two weeks of drawing, I became really good at drawing with Photoshop. I drew this character’s lines for three days before, but I believe it will take much less time back there.
And I also have a better understanding of perspective, although there are still some problems, but compared to Sketch, I have to Concept’s leg perspective has become much more comfortable.

I also did research on Watchtower’s Concept Art when drawing the concept, such as color rendering, line style, most obviously the background color, and even some small mechanical structures, which helped me a lot.

Block out
4/3/23
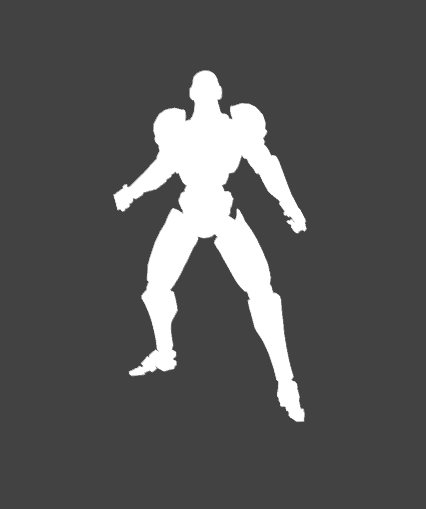
I used zbrush to make a simple shape


After refinement, I found that it was a bit out of shape, so I took yesterday’s as a reference to change the shape, and I should copy a few more layers and put them underneath as a reference, I think this is one of my weaknesses, I’m still a bit unsure about the perspective.
5/3/23
Today I focused mainly on finishing the back sketch and coloring, and tried my best to lean towards Blizzard’s Concept Art, and then also tried some different color combinations.

Color

I tried the classic color scheme of some different sports cars, and to be honest, I prefer black, but it doesn’t go well with the character background.
Next I’m going to model in 3d, I’m not going to draw detailed three views because for me I like to explore more in 3d, and I’m very clear about how I want the character to feel, and I’m not 100% accurate about perspective, instead of making inaccurate three views, I prefer to keep exploring in 3d.
6/3/23
https://www.artstation.com/artwork/Ponzg1

https://www.artstation.com/artwork/lVRvl5

I watched Blizzard designers, modelers workflow, and my very favorite artist zhelong xu, they are not drawing specific three views, but they are very skilled for sculpting, in my experience, is to capture the soul of the character, that is, the characteristics, and show it in the production, which is the most important.
And the importance of the three views is clear to me, that is, when the team works together, the concept design should clearly communicate their ideas to the modeler, but I think then the modeler is just doing repetitive, uninteresting, and not much creative work anymore.
Block out


Because zbrush is very well optimized for tall models (blender often flickers when sculpting tall models), I was going to try making them in zbrush, but I found I was more proficient with blender…
8/3/23


Week 4 – Medium Model & material experimentation
9/3/23
Because I thought the lighting would give me a fuller view of the character’s shape, I divided it into two collections so I could quickly switch between them, and I added keyframes to the lighting and camera so I could quickly switch between the front and back on the left side.


11/3/23
Modeled the hands, refined the face, legs, added the cloak


Overwatch Pioneer latest linkage for my performance Overwatch cloak on help a lot!

12/3/23
I wanted to use sculpting to draw out the shape first and then topology afterwards, but I found that many parts could be modeled directly, but I stuck with the unified process and next I plan to keep the topology correct throughout the model.


15/3/23
Different colors and materials were divided, cloak sculptures were made, the range of movable joints was thought about, and many things above the shape were adjusted, such as the thorax, the large structure of the pelvis, and the small arms were optimized.


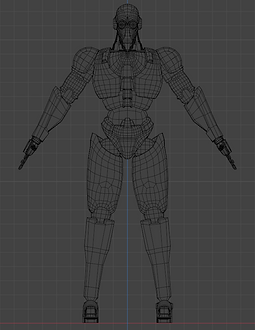
Week 5 – Retopology
16/3/23
Trying Retopology today, and having made several iterations of it in

But there are still some problems, which really bother me a lot

Luckily, I have Orisa’s model as a reference, which will at least ensure that my final wiring is not too far off
At the same time, I restored Orisa’s model, his head has a total of 800 faces, and then if you remove the triangulation, it should be more than 400 faces, I now have more than 200 faces, after adding the structure inside should be in a right category

Adding an extra looped edge on the head worked much better.

I tried to do the best I could:


But I found that his shape because I did not adsorption caused and my sculpture does not match at all, so I chose to give up the perfect curve, as far as possible to fit the original look, the other I want to continue to adjust more in the details of the sculpture after


Spring Break – Week 6
Retopology Finish
(use 3 week)
I used Mark sharp very frequently during this topology, which is crucial for hard surfaces, and to think about the edges that are laid out during the topology.
However, when I was working on it, I found that it was more of a design process because I didn’t have the final high-model version before I made the topography, and because of this I had to cross-reference it with the concept art and the sculpted drafts several times.
and use the sculpted Move brush to adjust the shape when adjusting


Week 7 – Unwrapping UV & Baking & Texture
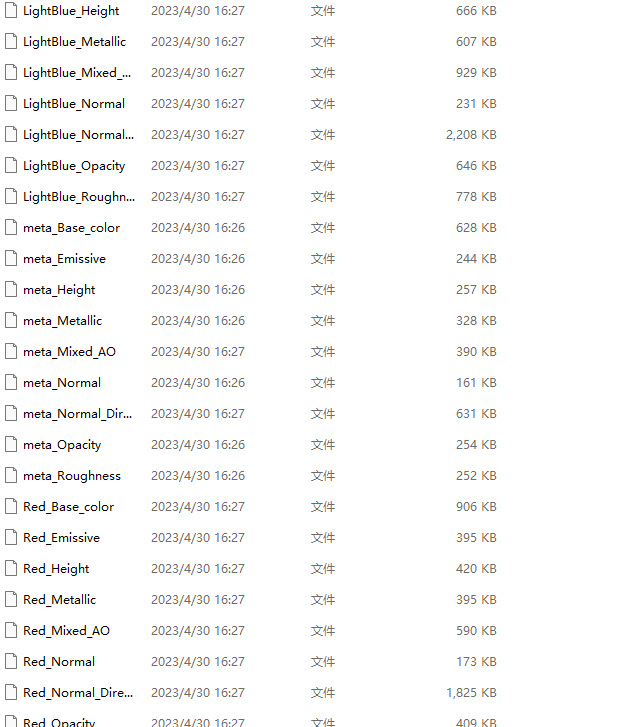
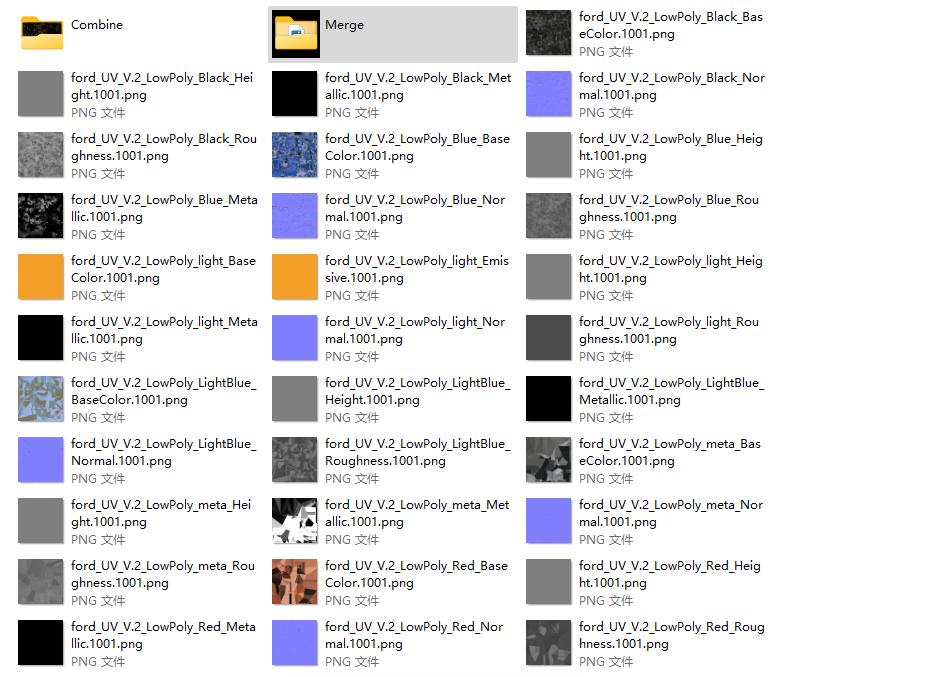
Ended Unwrapping UV and split the main blue material into two texture sets with the rest of the material.

Then bake in Substance painter

19/4/23


Modified: the wiring was adjusted, some uv’s were missing, and there was a problem with the sharp angle setting causing black spots.


To be honest, the smoothness of the planes is still problematic and there are unfixable jaggies where the meshes overlap, but they still need to be put together for procedural curves and AO
After debugging I found that a baking size of 2048 has no black dots, if it is 4096 it has…
Week 8 – High Poly & texture
20/4/23 – 21/4/23
Texture
After trying to paint the material in Substance painter, I found that the details that I was trying to bake just by the low die itself were not comparable to the models sculpted with the high die, for example the legs I wanted to make with sharp edges were actually a huge difference to sculpting with the high die, and sculpting the high die as opposed to painting in Substance painter was actually a much It is actually a more convenient option than drawing in Substance painter.
Anyway, after I had created the textures, I was devastated by the actual results and everything got worse rather than better.
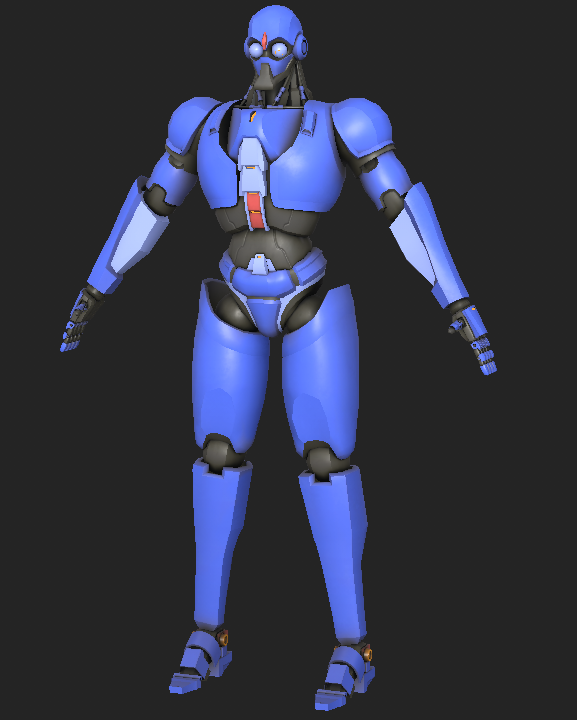
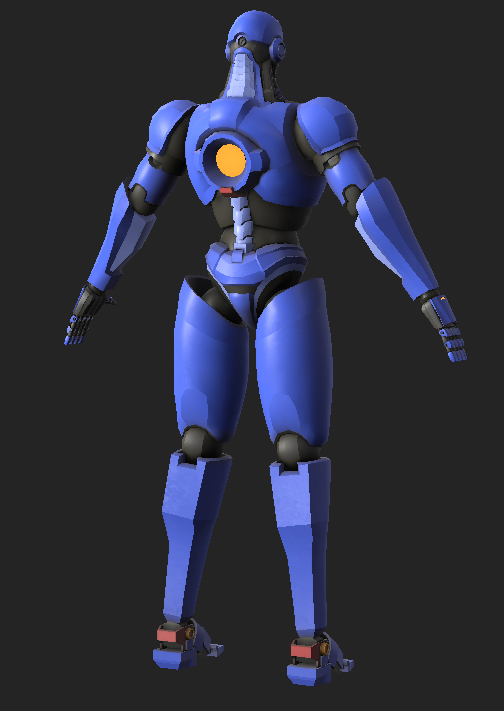
Model
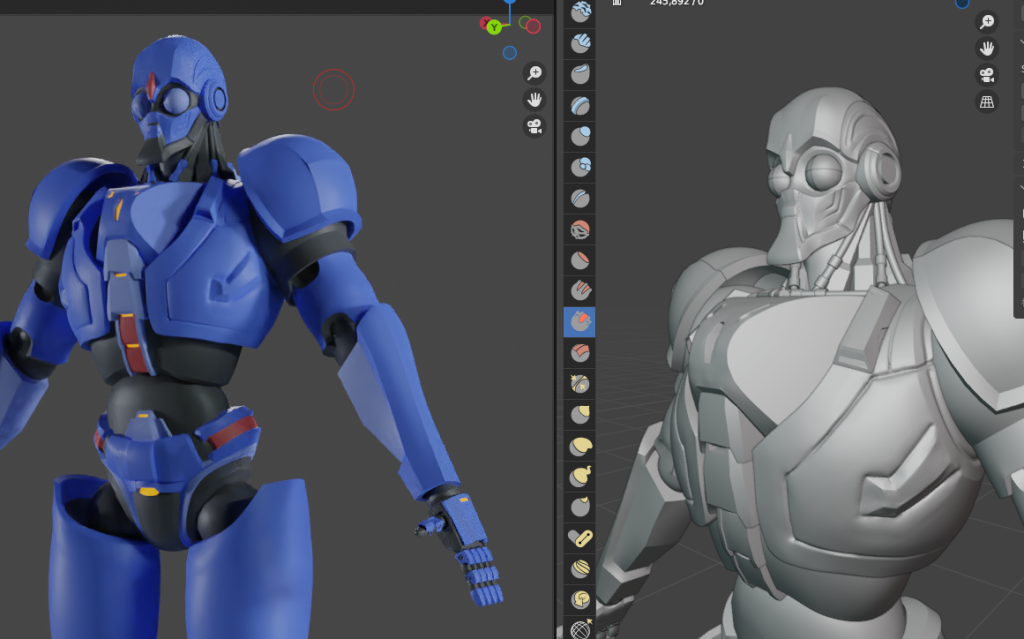
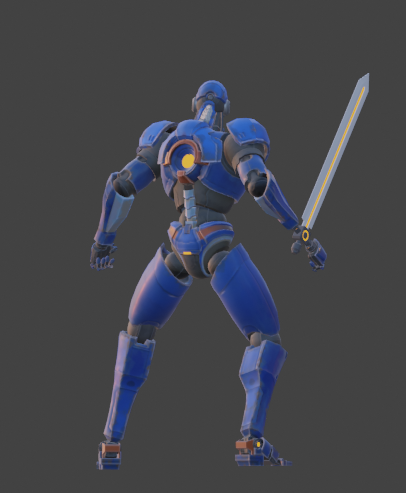
So I revisited my model, I was very unhappy with its structure, so I redesigned it. To be honest, I suddenly felt this week that I had focused a bit too much on getting the topology right and less on exploring the model itself, which I felt was very much putting the cart before the horse and I should have produced a great piece of work before thinking about performance
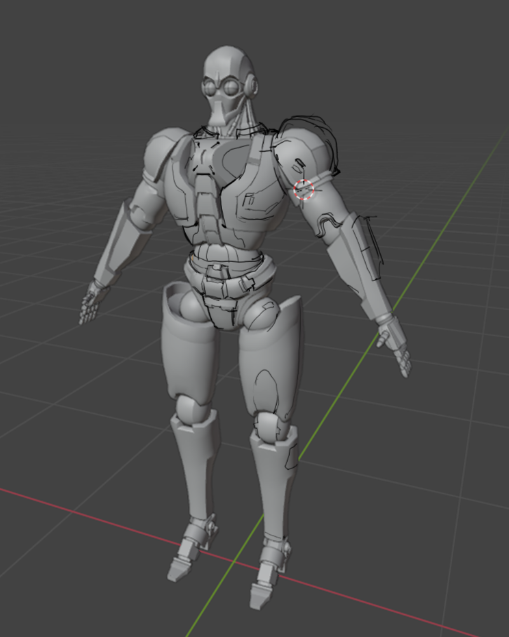
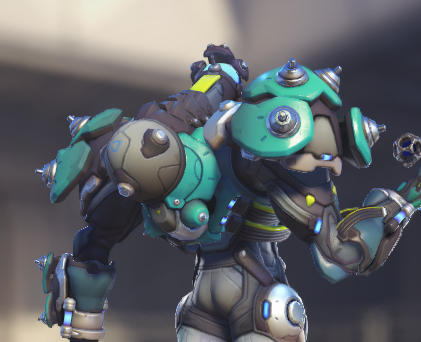
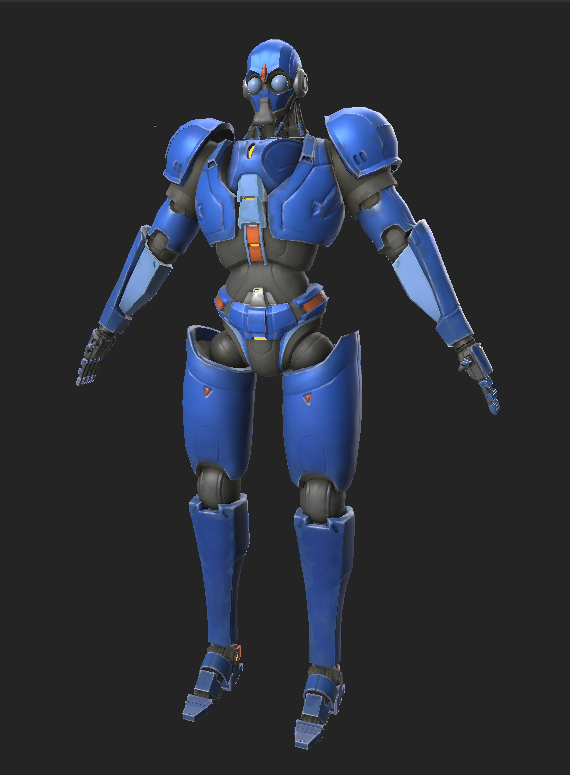
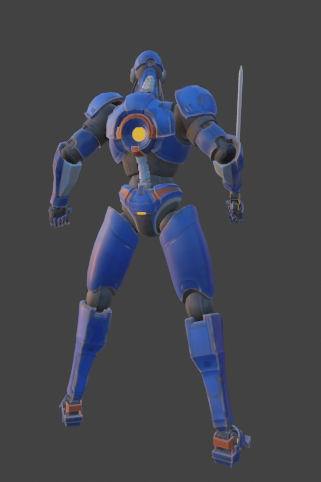
As well as I had been thinking about how to keep the shoulder armour from going through the mould when the arm joints were moving and my character didn’t look like a full Tank character, on re-researching I found that the structure of sigma’s shoulders, where the shoulder armour is fixed to the body, allows for arm rotation without moving the shoulder armour.
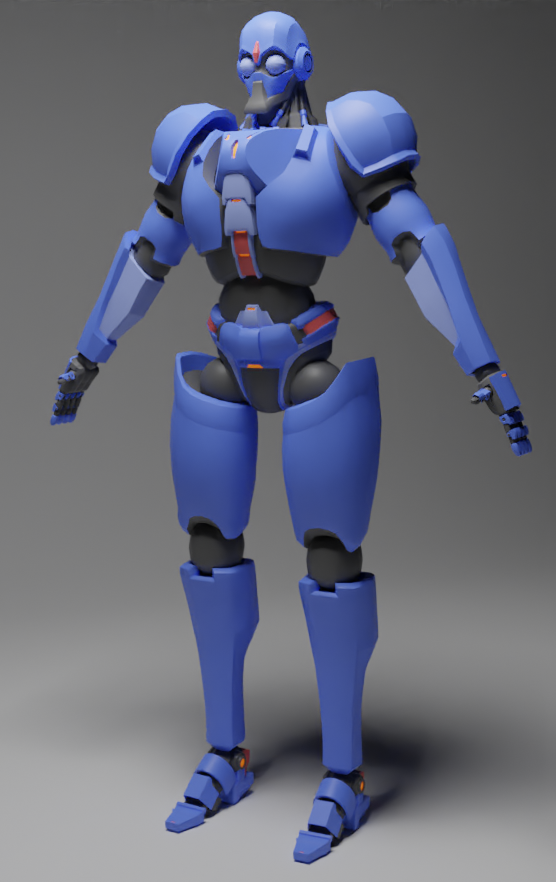
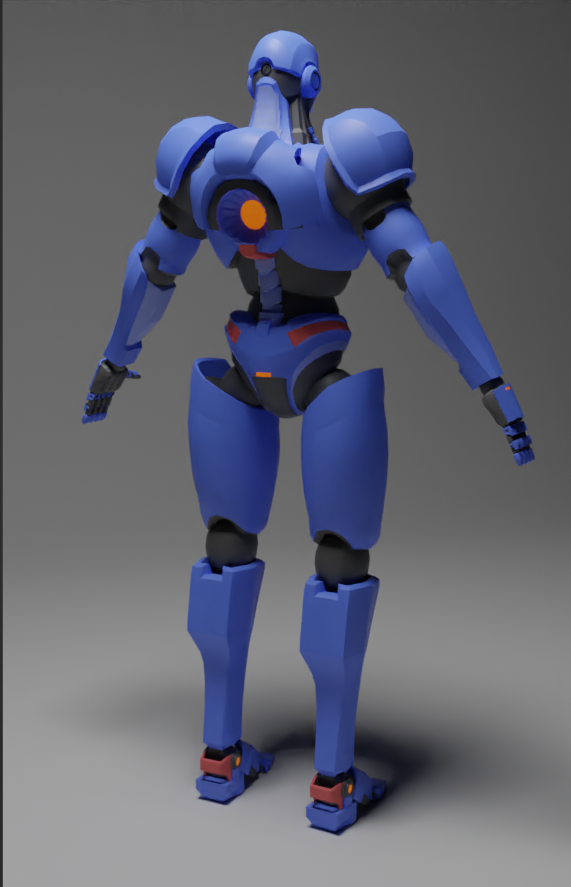
I spent a lot of time adjusting the proportions of my head and legs and hips, and I am now more than happy with the final result.
This video has been very helpful to me when sculpting high moulds, and the settings for the brushes have made it very easy to create incised lines.This video has been very helpful to me when sculpting high moulds, and the settings for the brushes have made it very easy to create incised lines.
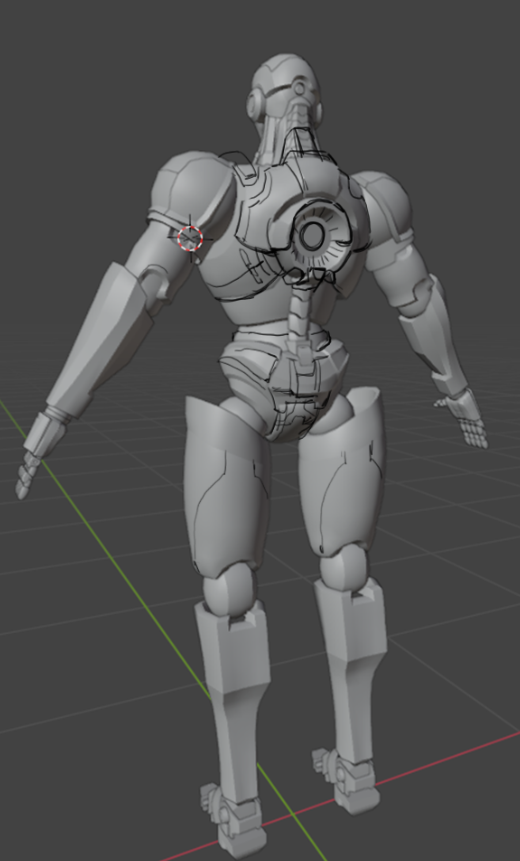
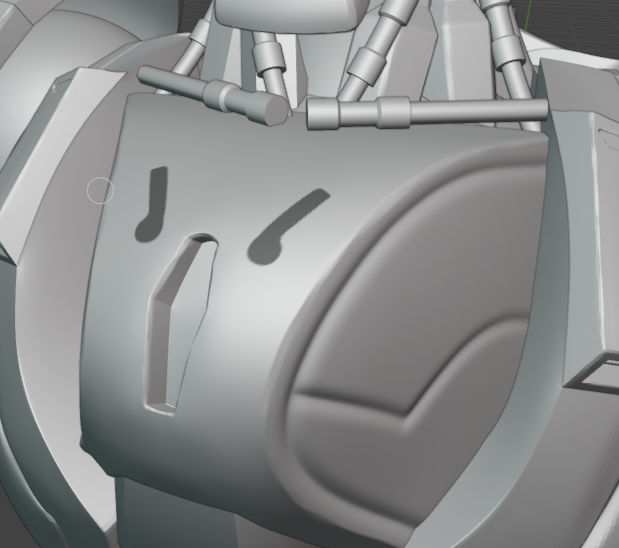
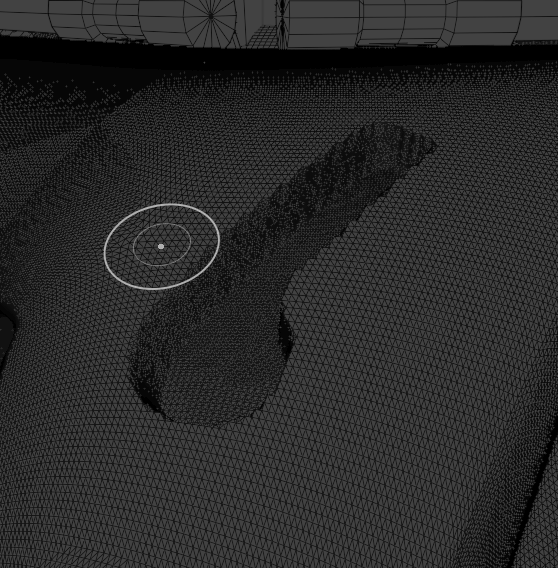
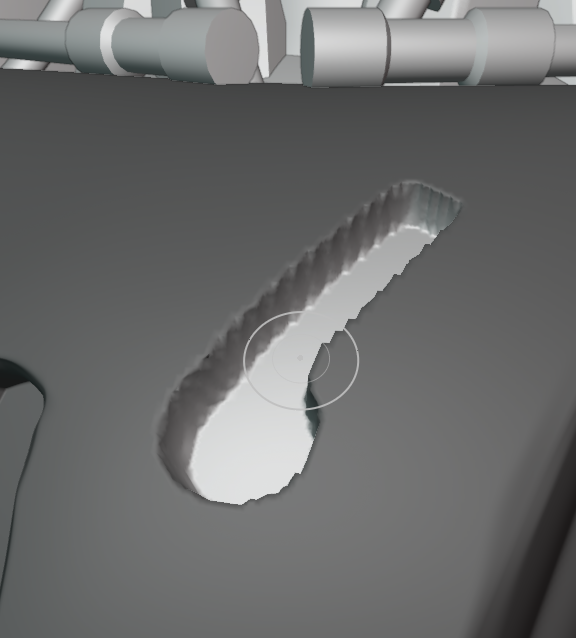
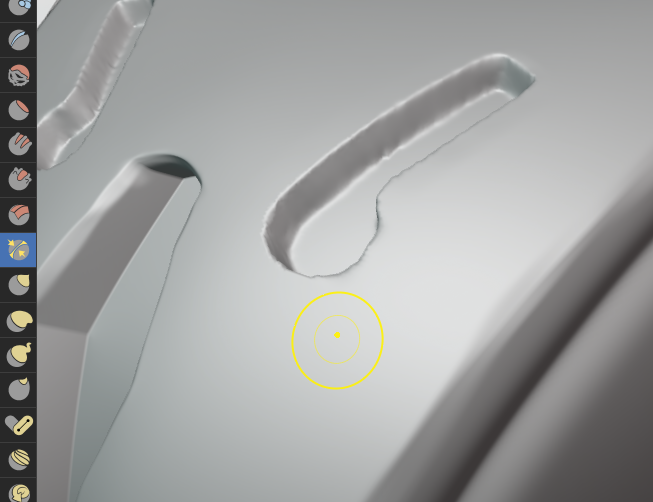
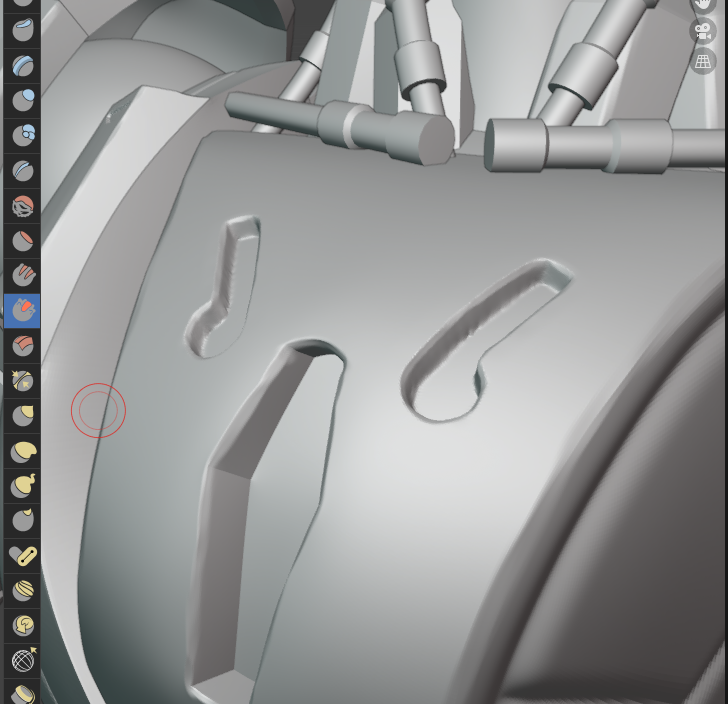
22/4/23
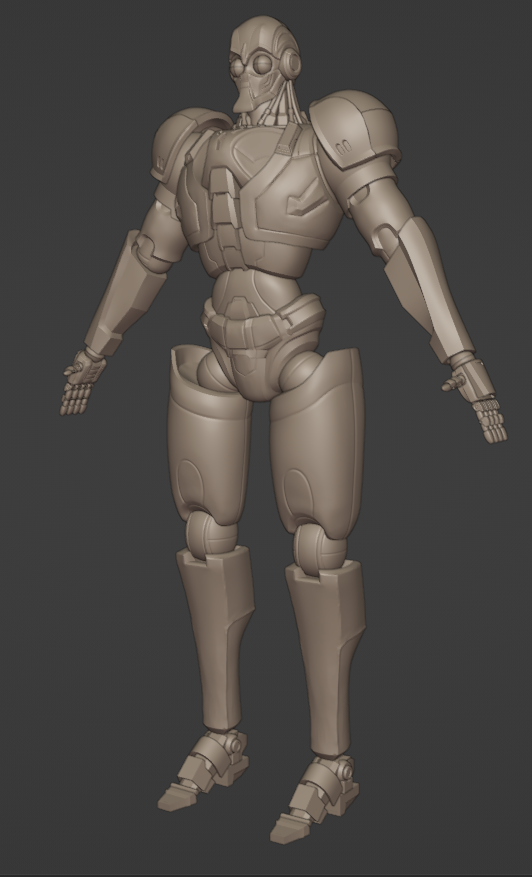
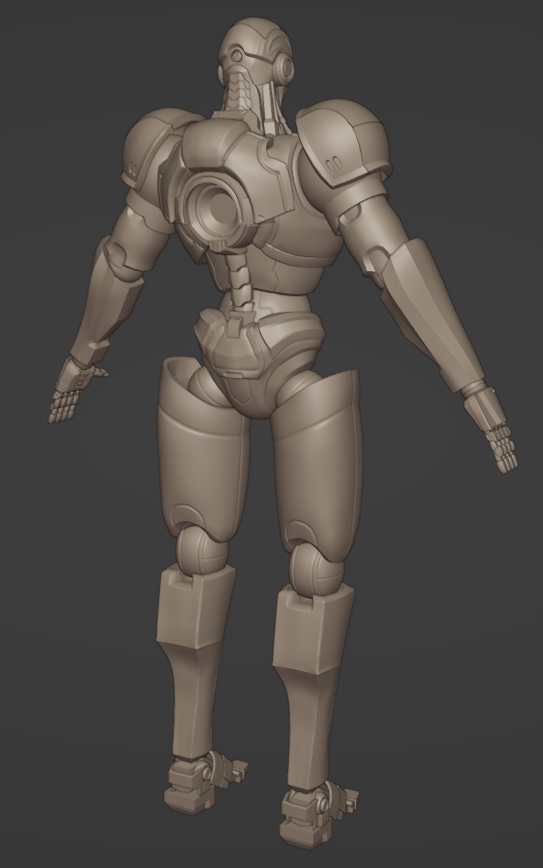
Today on the high model I have been working more on scoring, notching and Polishing the edges, scoring is using anti-shake and then drawing a less shaky line similar to traction strokes, notching is using a mask and then moving, as none of my models are closed I have used dynamic subdivision instead of Dynamesh and I am happy with the result of this process as it is much better than the The result is a model that I am happy with because it is so much better than the previous low moulds and it actually fits my design.
When I was working on the high model I found that I sometimes had to adjust the shape, so I either had to adjust the high model and then adjust the low model to make it consistent, or I had to go back to the low model and recreate the high model after I had finished adjusting the low model. The reason I don’t use multi-level subdivision is that my computer only has 16G of RAM and Blender is not that well optimised for it.
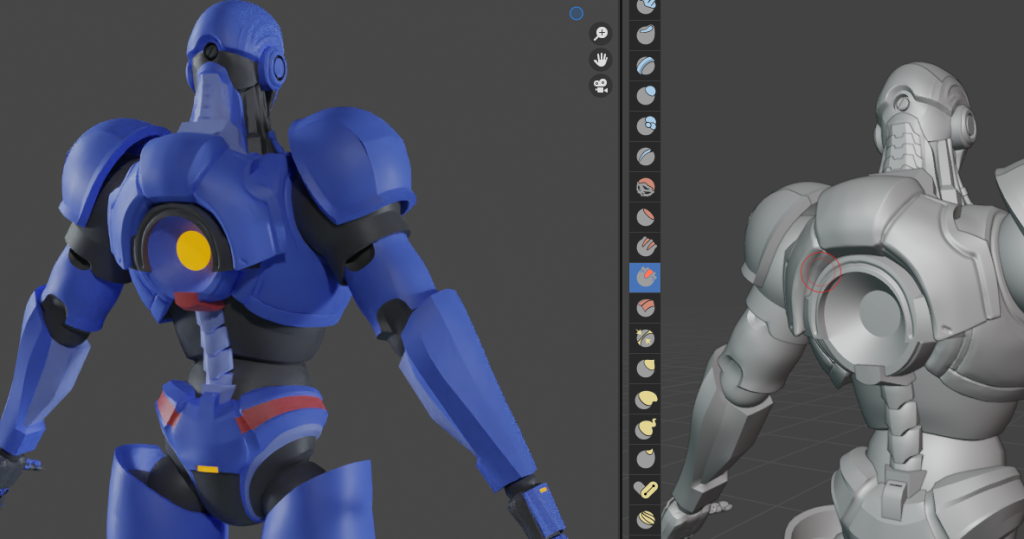
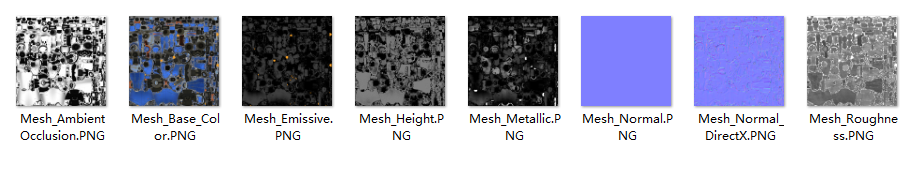
Texture_2
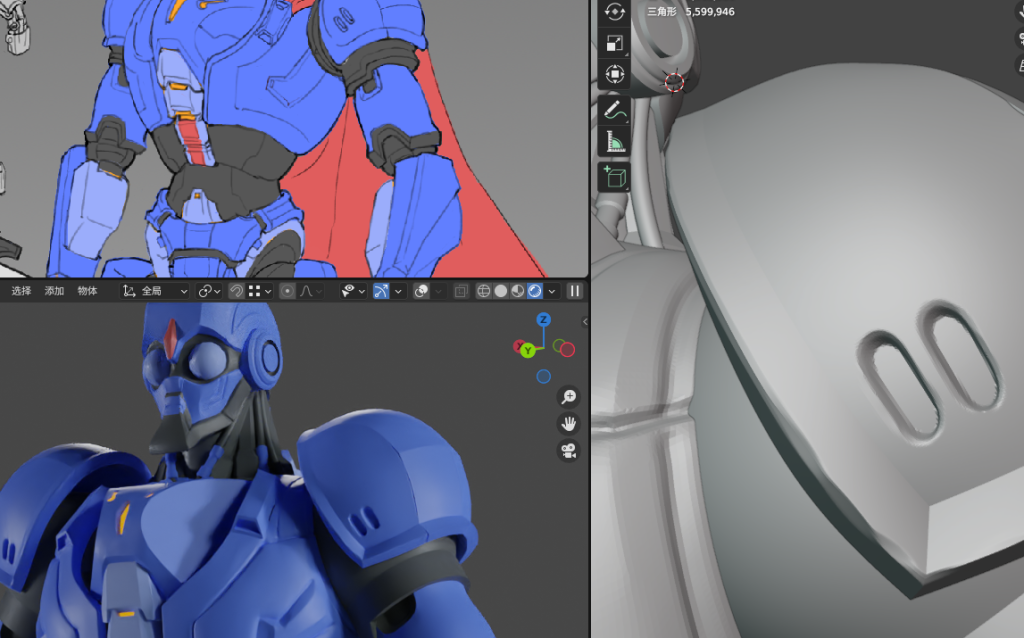
First of all, I am satisfied with the baking result, but there are still some problems: for example, my low mold did not eliminate the sharp edge, so after baking my carved chamfer will still have a hard edge. But other than that, it basically exceeded expectations.
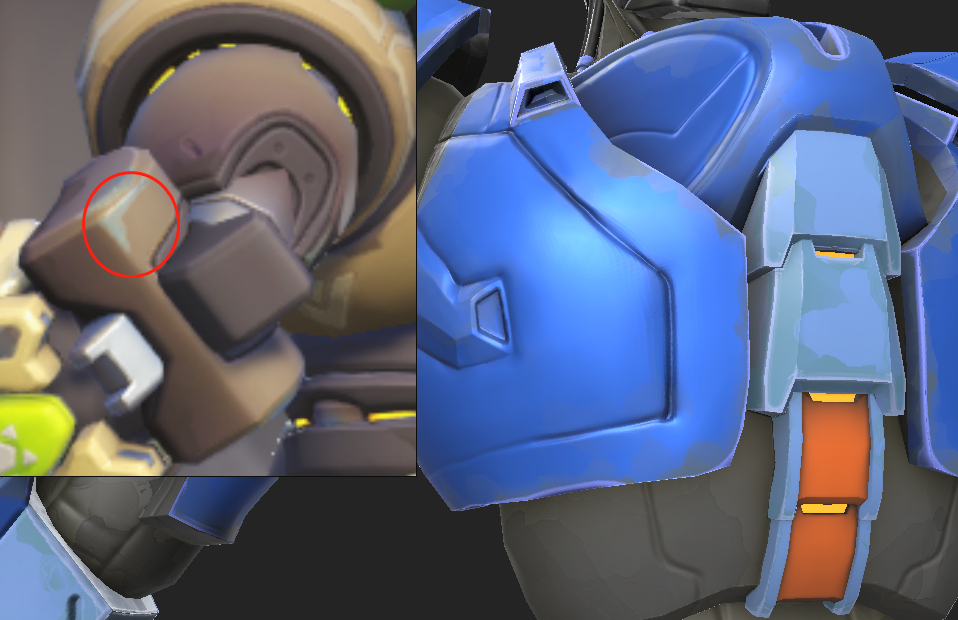
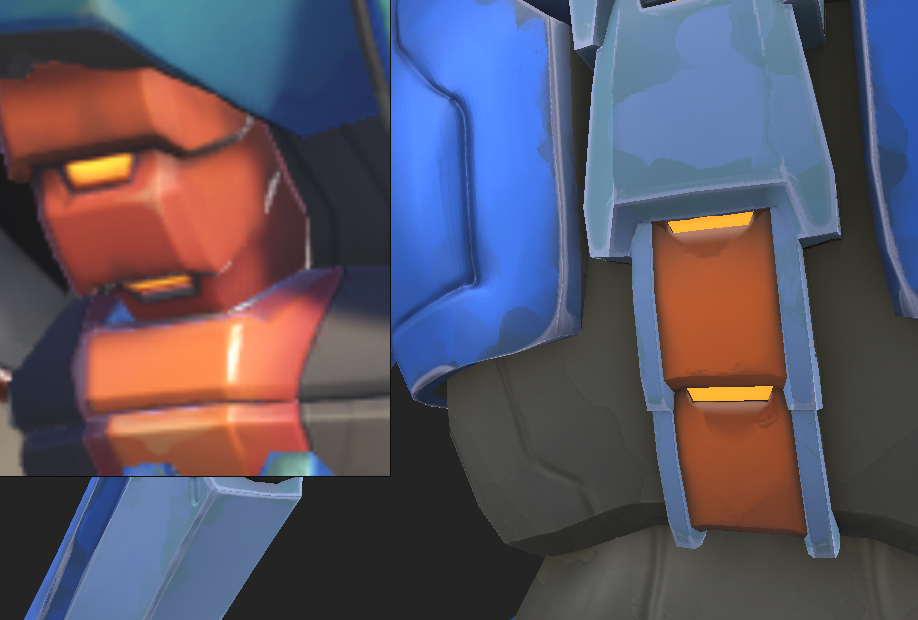
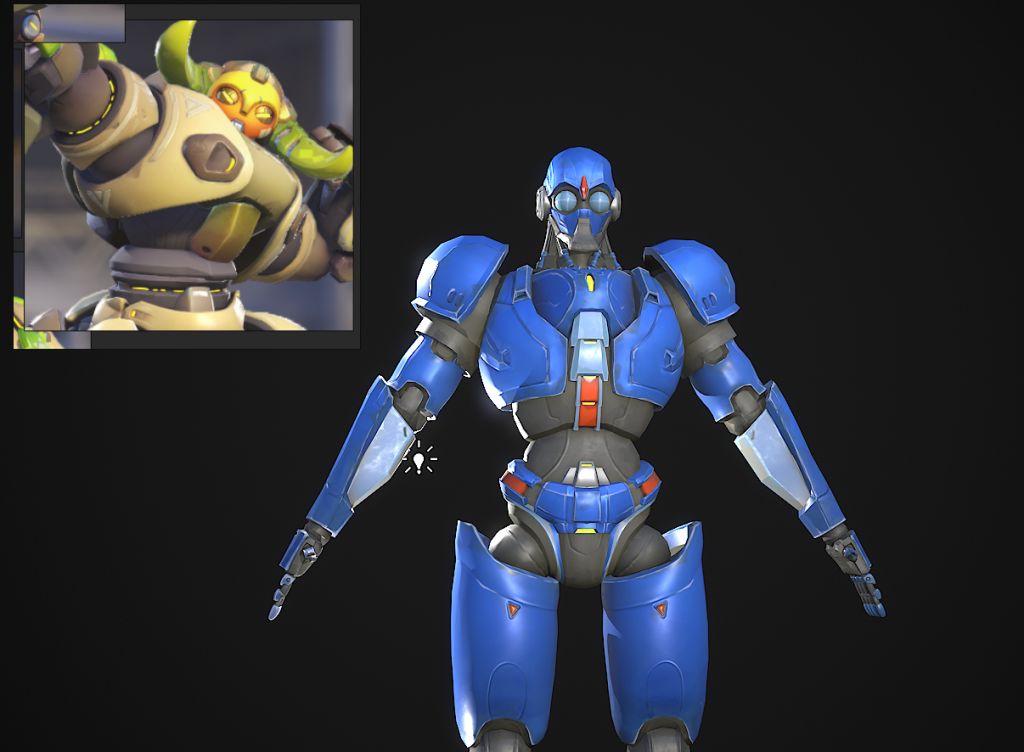
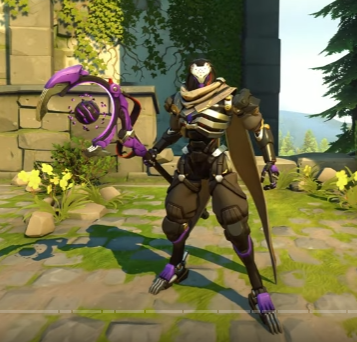
Before painting the character textures, I re-researched the Watchtower characters, especially my initial reference Orisa, which I found to be very stylized, unlike those real textures, and despite the tutorials I found earlier, I could only use them as a reference, and the most important thing was to look directly at the models in the game.
The most important thing is to look directly at the model in the game. While I was looking at orisa, I noticed that the brush strokes were very similar to a texture I had created before, and this effect could be achieved with a simple filter, and was mostly found at the edges.
In addition to this I added a gradient from the bottom up, as well as adding an earthy color to the AO, all of which I got by looking at the model.
Translated with www.DeepL.com/Translator (free version)
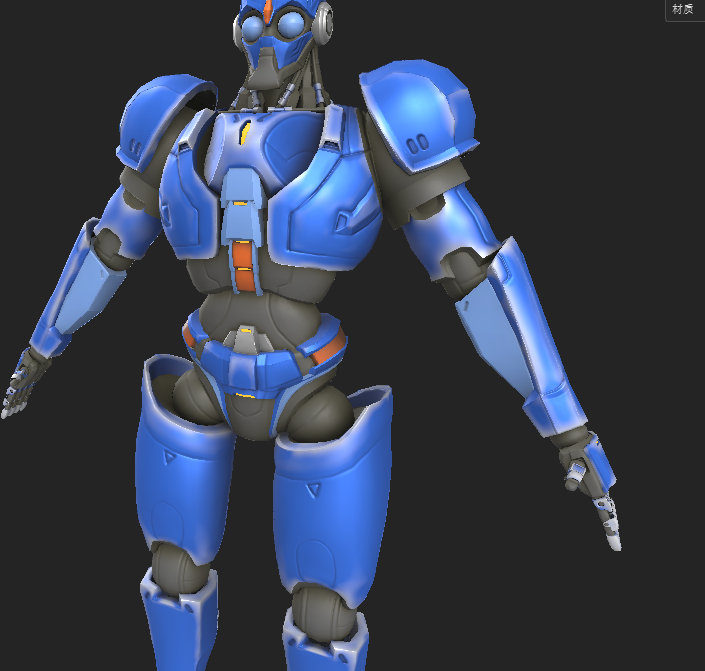

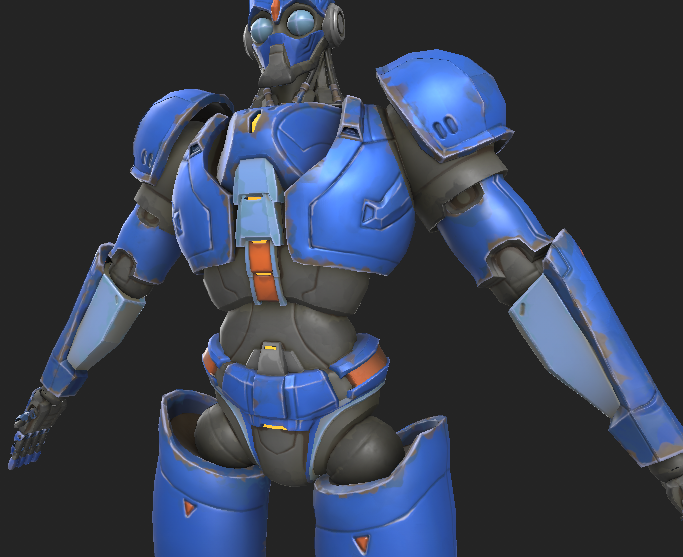
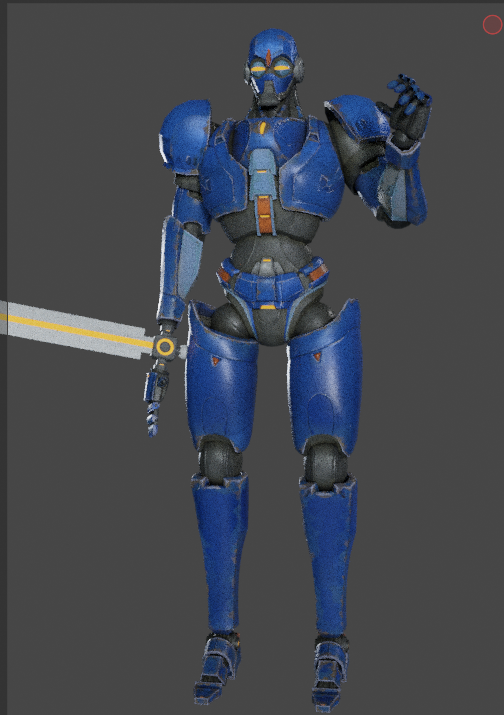
In fact, compared with the model at the beginning of the week, it was a quantum leap, and I have to say that in the original plan, the initial result was not a process in my mind but the final result, but because I saw other people’s work and the strict requirements of myself, I spent a lot of time and effort to recreate it in a short time, and got a result beyond expectation, which made me feel very happy and proud.

Week 9 – texture & rig
The conversation with robert reflected on my subsequent work process
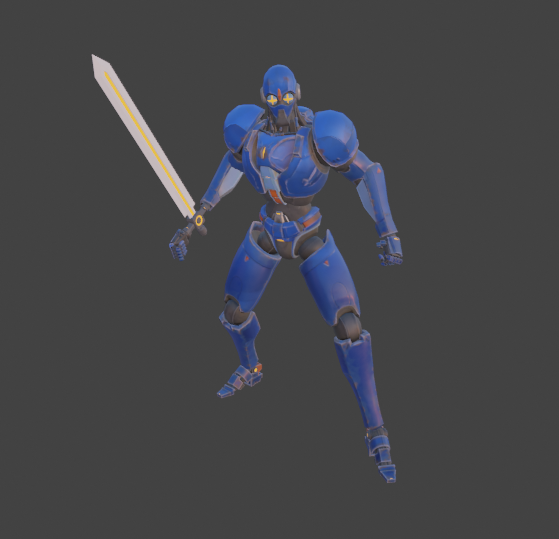
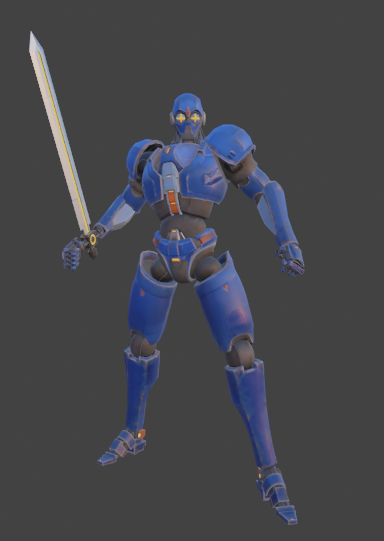
With regards to Ford, I first added some gradients to him which would give a richer overall feel and then I found it really cool if I added text or some warning prints and I was thinking if that could represent the feeling of a tattoo for a robot. But after researching overwatch’s character’s materials and thinking about my character’s backstory, like orisa he has that pattern on the clay pot and Genji doesn’t have any tattoo like pattern on him (although Hanzo does have a dragon tattoo), so I don’t think a company made robot would have that print in the overwatch setting, but I thought maybe it could Try alpha brushes to add detail, but for now I’d like to move on to the next step, and these details could probably be added during the final finishing, and changing the material wouldn’t interfere with subsequent work. (And he also has a weapon, as this is part of his body so I want to refine him as much as possible later)
Next I want to try binding bones in maya and rendering in Toolbag, which I’m not nearly as familiar with as blender and substance painter to be honest, so I’m going to get to know them and try to make them as soon as possible (but actually still slower than the schedule) to allow time for later!
28/4/23
Marmoset Toolbag
Rigging
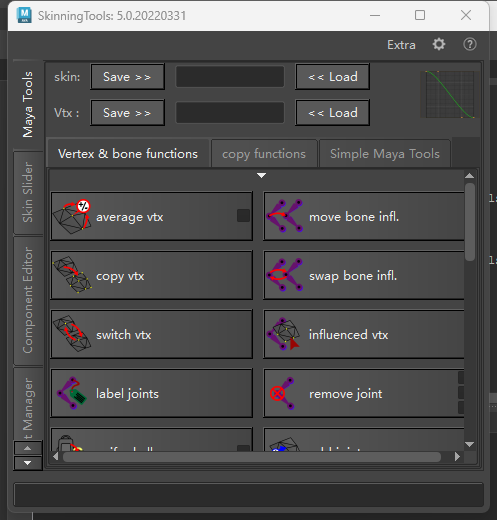
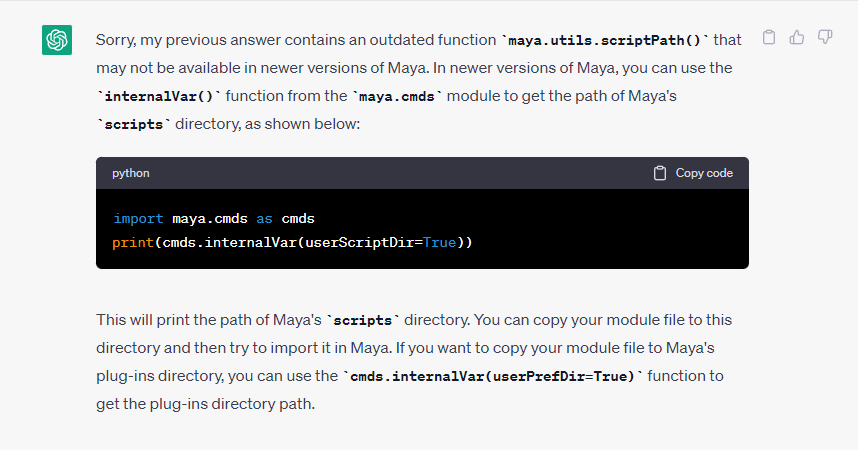
I tried using maya rigging, but not only could I not find a full tutorial no matter how hard I tried, it was a pain to use, not only was I already unfamiliar with the software, but more importantly my model was a hard surface model with a lot of unique structural design, so I couldn’t find any tutorials that fit, and there were a dizzying number of plugins, plus This, coupled with the fact that some of the tutorials are actually older and expensive to use, makes me agree with a comment made under the video “Why can’t maya be replaced”: maya is like a square wheel, it will take you to the end, but you need to use all your strength.
I have to say that blender does a great job with the community, I could easily find a very systematic tutorial – even if I had to pay for it – but I was able to learn the rigging thing from start to finish, especially with my favourite artist Ianhubert, and blender I’m very excited about 3D and I’m looking forward to when I’m done with the characters, but with Maya my mind is just tired and anxious.
First of all I was able to easily align the bones perfectly to the centre of the joint I started with using the cursor.
Then I ran into my first difficulty:
Because the character’s weapon is hidden in his wrist, his wrist is divided into two, and several problems arose
- the hand has to rotate according to the centre of the two semicircles
- even with the weapon unfolded, the wrist still has to rotate at the centre of the wrist at the start when it is separated
- the two semicircles of the wrist must always be parallel to each other
First I tried having the upper part of the wrist replicate the rotation of the palm bone, but this misaligned the wrist once it was moved, so I found that what was actually needed was not to replicate the rotation but to point to where the palm was, so I used Damped Track.

However, a new problem also arises in that there is no way to control the rotation of the outstretched palm, in which the palm bone runs correctly, but if it is moved, he performs a translation and the root no longer points towards the wrist.
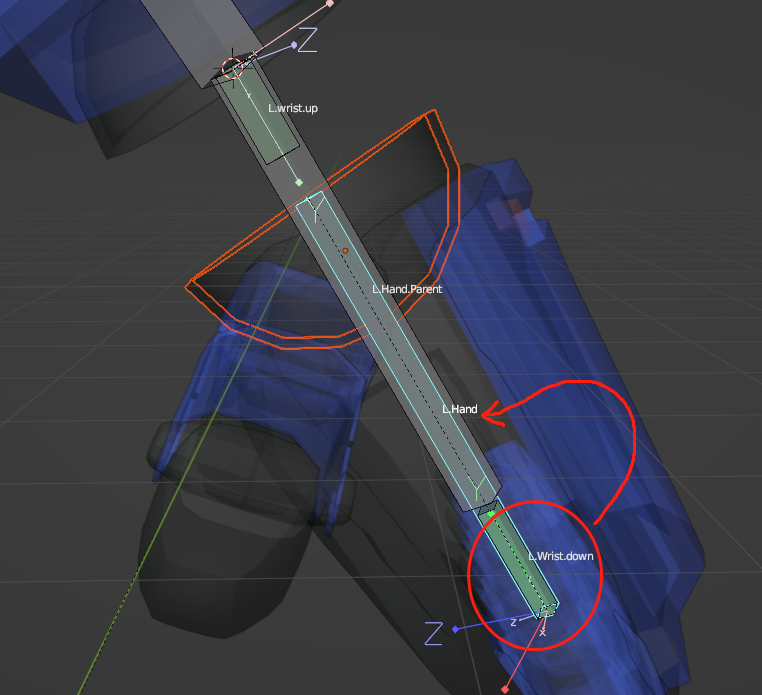
So I split this function into two bones, one for expansion and one for rotation
In the skeleton responsible for expansion I have locked it all except for the Y-axis movement.


30.4.23
reticle
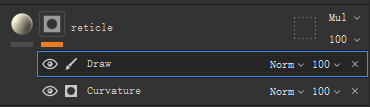
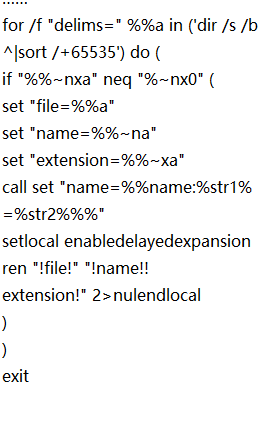
I re-exported the material and added some expansion so that I could eliminate the white edges where the UV was unwrapped.
1.5.23
Week 10
10/5/23 Finish Rigging
At the beginning of the rigging process, Robert recommended using a Maya plugin. However, after giving it a try, I found that the plugin didn’t suit my model well due to the presence of mechanical designs like a folding sword at the wrist. Therefore, I decided to stick with Blender, which I am more familiar with, for rigging.
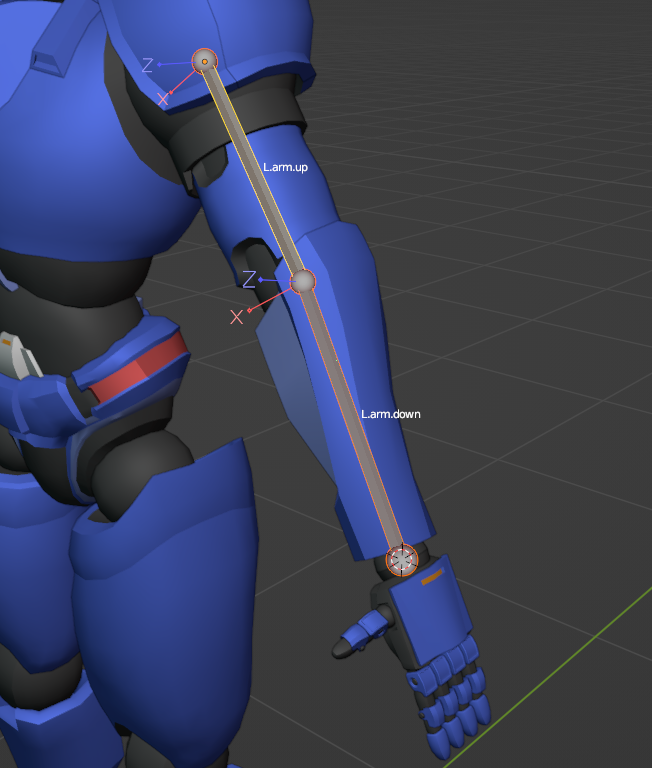
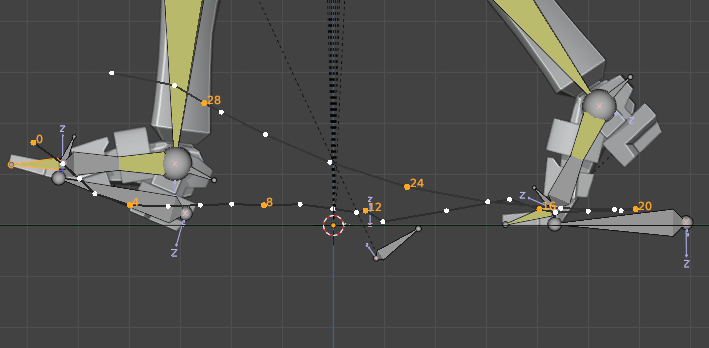
In this rigging project, I primarily used three types of bone constraints: IK, Copy Rotation, and Copy Location.
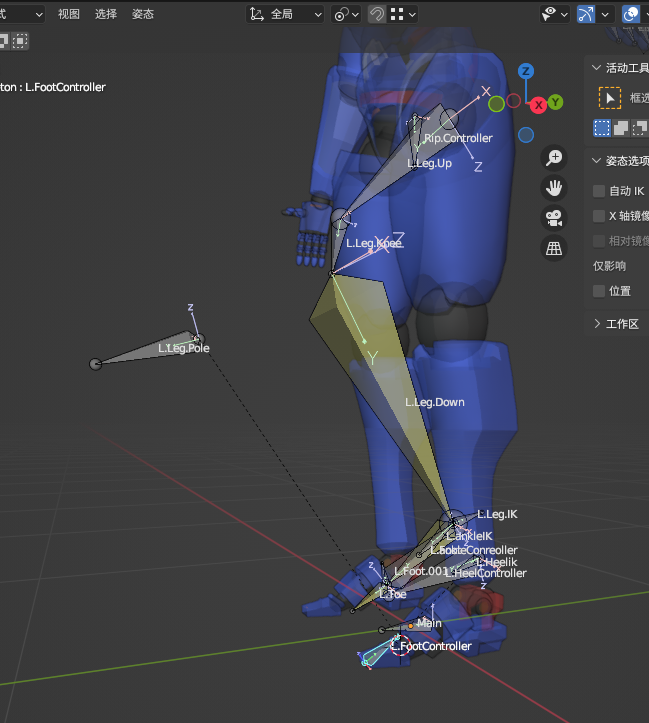
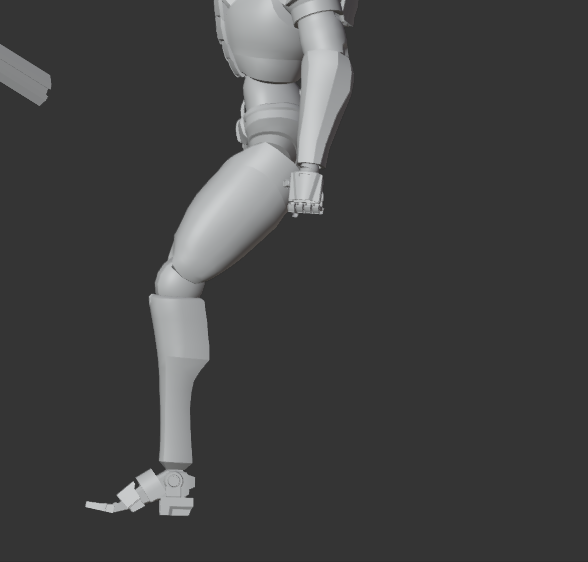
Firstly, the arm and leg rigging were relatively straightforward, requiring only IK and pole targets. However, since my knee joint was cylindrical (rotating it would look odd), I made adjustments by adding an extra bone to maintain the correct orientation. Additionally, I used IK constraints for the neck pipe and the spine on the back.
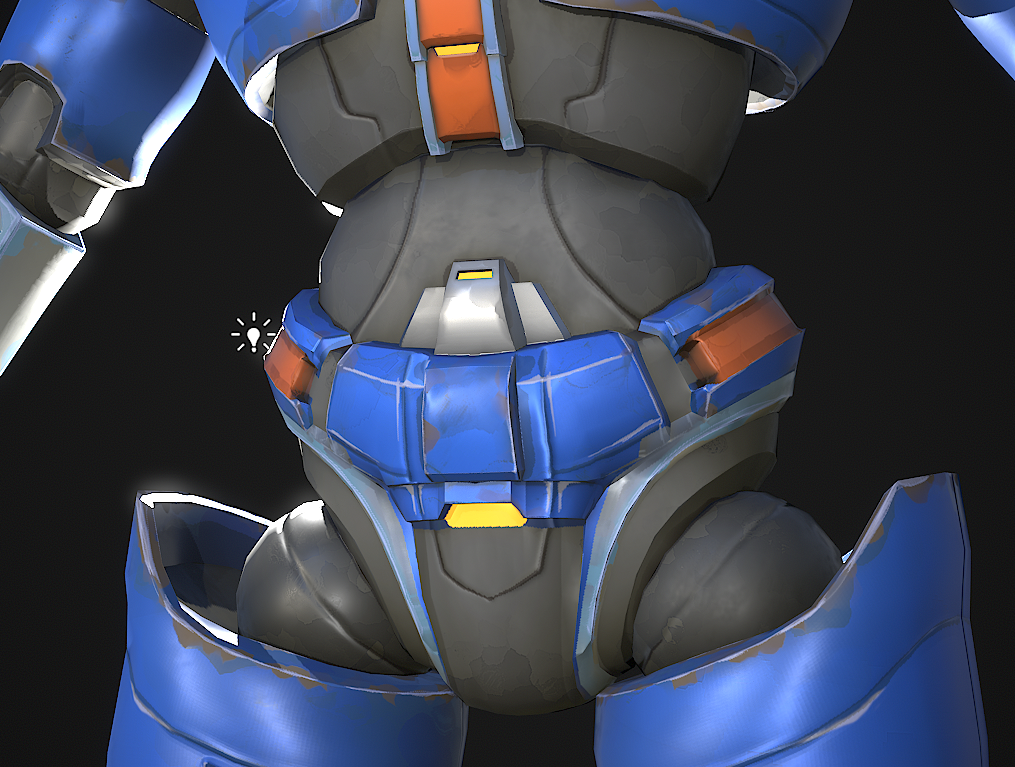
For the body rigging, I referred to a video tutorial. Firstly, based on my model, I divided it into three parts: the skeleton, chest cavity, and waist. I extruded an additional bone at the junction between the chest cavity and the waist (while removing their direct connection). Then, I made the chest cavity copy the position of the extruded bone and applied IK constraint to the waist, connecting it to the extruded bone. This completed the rigging for the body.
As for other movable mechanical parts like the front chest components, shoulder armor, head, and eyes, I used a simple hierarchy of parent-child bones. The eyes, however, required special attention to ensure that the root bones were positioned in the center, allowing rotation around the eyeballs.
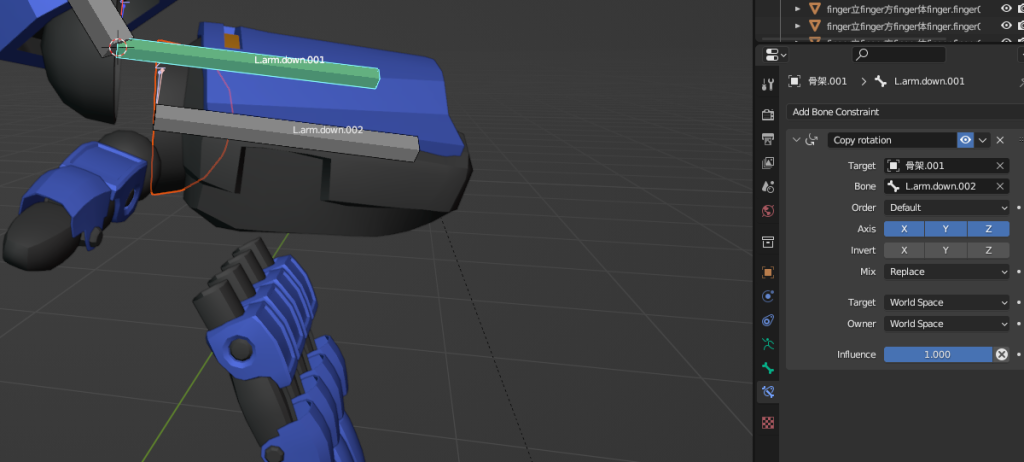
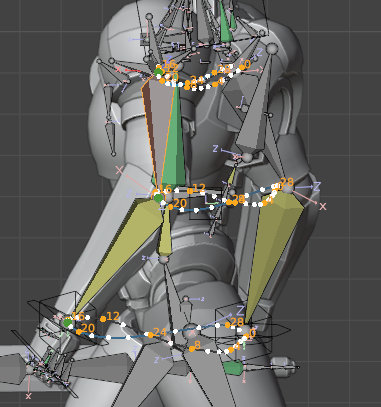
I found the wrist and fingers to be the most challenging part since I couldn’t find relevant tutorials. I had to figure out the rigging on my own. Firstly, since my wrist had two parts that needed to maintain the correct orientation, I used the Damped Track constraint to keep them parallel. When separating them, I needed the sword to stay in the middle, so I used the Copy Location constraint on the sword bone, with the influence set to 50%.
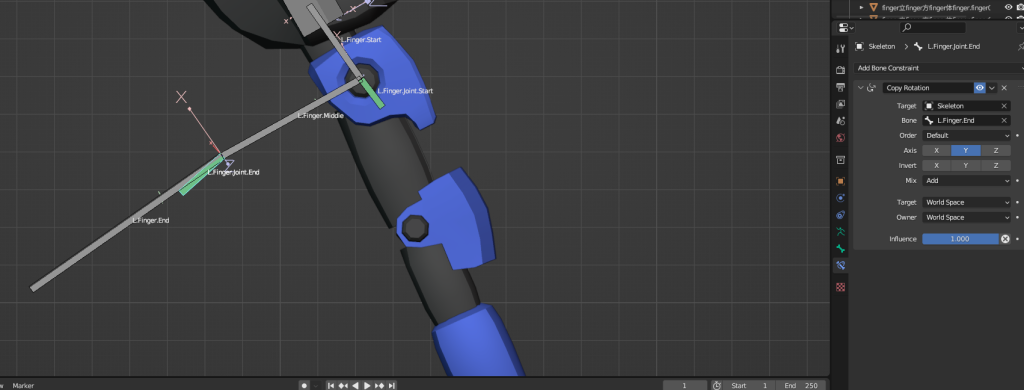
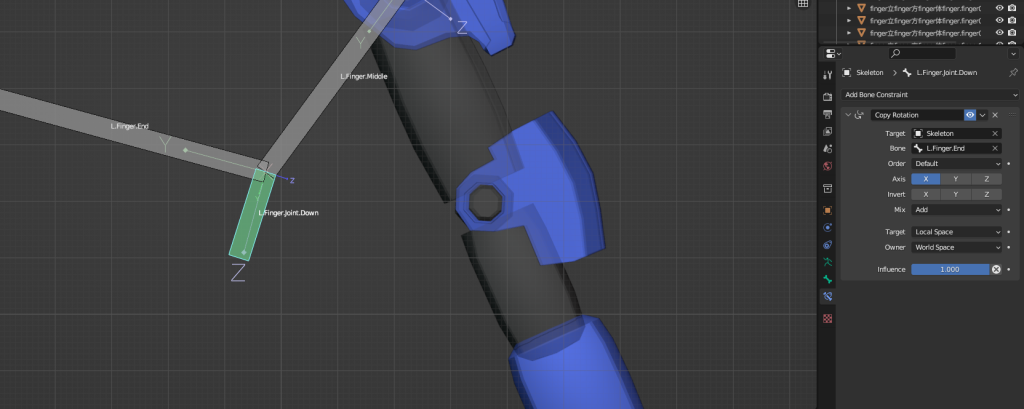
I spent a lot of time working on the joint armor for the fingers. I wanted the joint armor to rotate along with the bending of the fingers, so I used the Copy Rotation constraint with an influence of 50%. Additionally, in Blender, I had to set the owner to local space for this setup to work correctly.
Regarding the foot rigging, I watched a tutorial that was quite complex. Although I managed to follow along and recreate it, I didn’t fully grasp the underlying concepts. However, I did learn that organizing bones into different layers and grouping the controllable bones together greatly facilitated control over the rig.
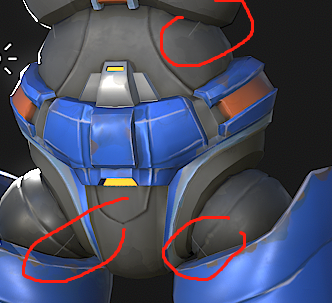
Regarding weight painting, even though my character was mechanical, I applied weights to ensure the cables connected to the legs, the waist connected to the chest cavity, and the back of the neck. However, I still encountered issues with the waist area, perhaps because I also needed to assign weights to the lower part of the chest cavity. Unfortunately, I didn’t resolve this problem before realizing its significant impact on the final rendering, which affected the overall visual appeal.

Week 11
18/5/23
idle
verson 1

verson 2
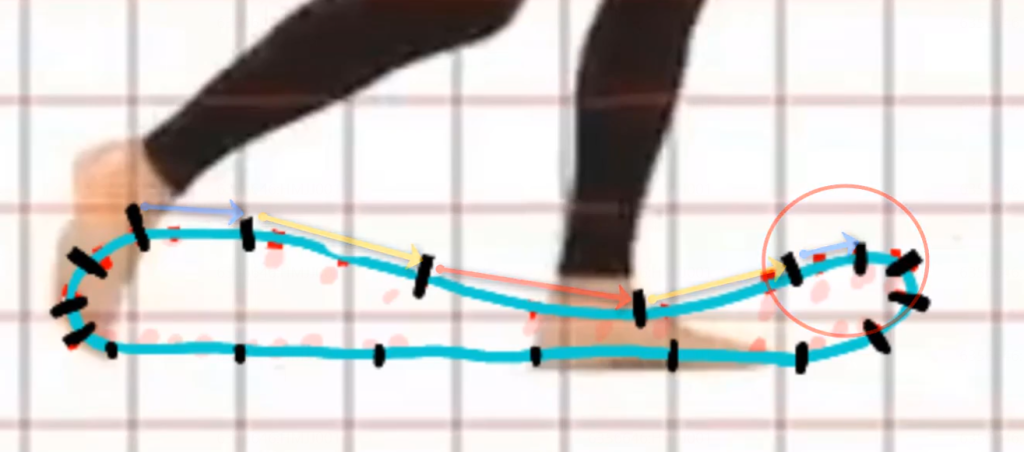
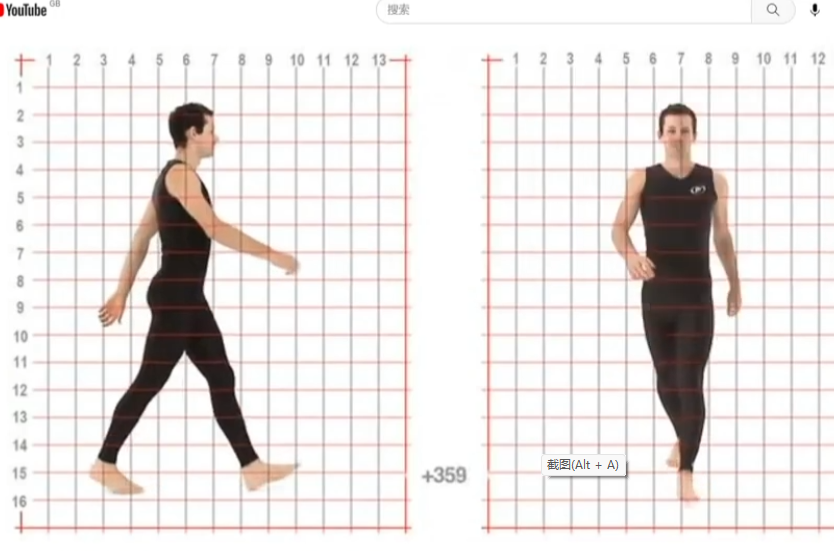
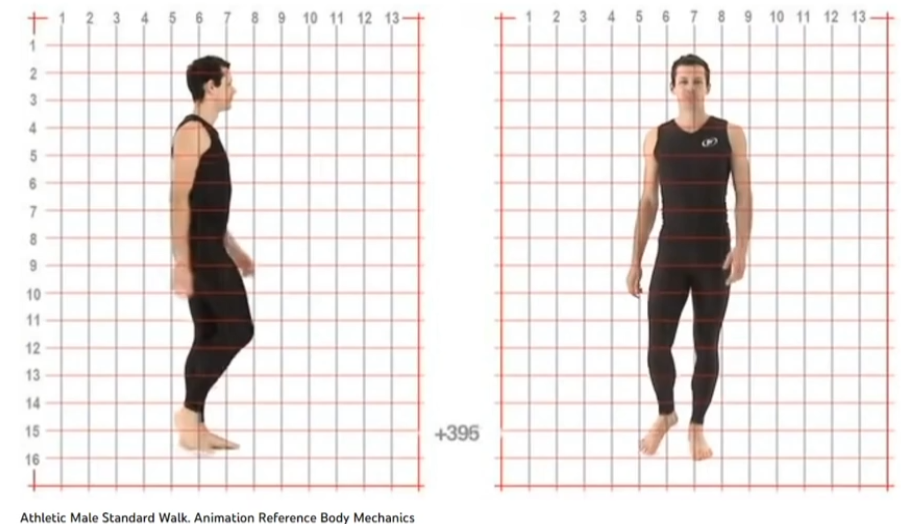
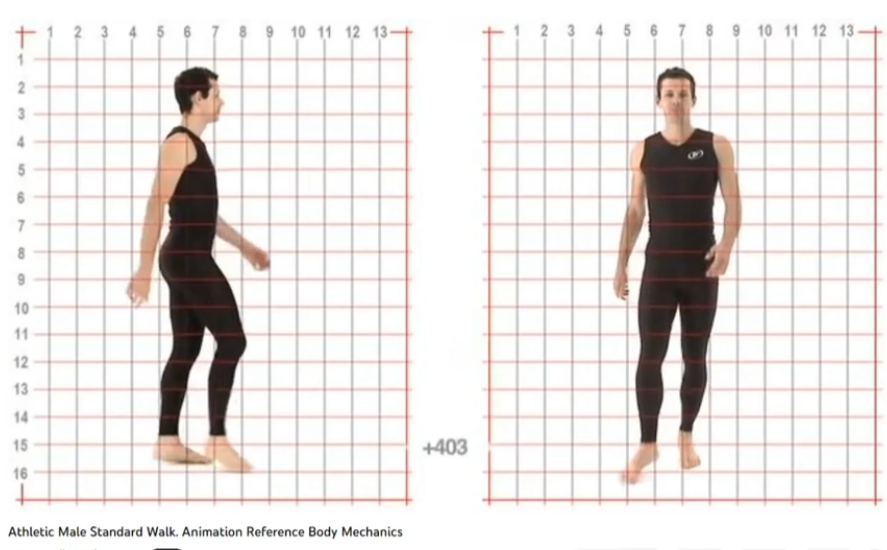
walk
ref

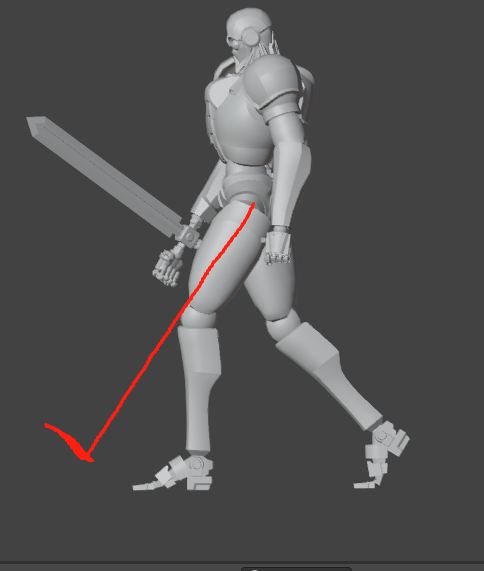
Week 12
28/5/23
Run/attack